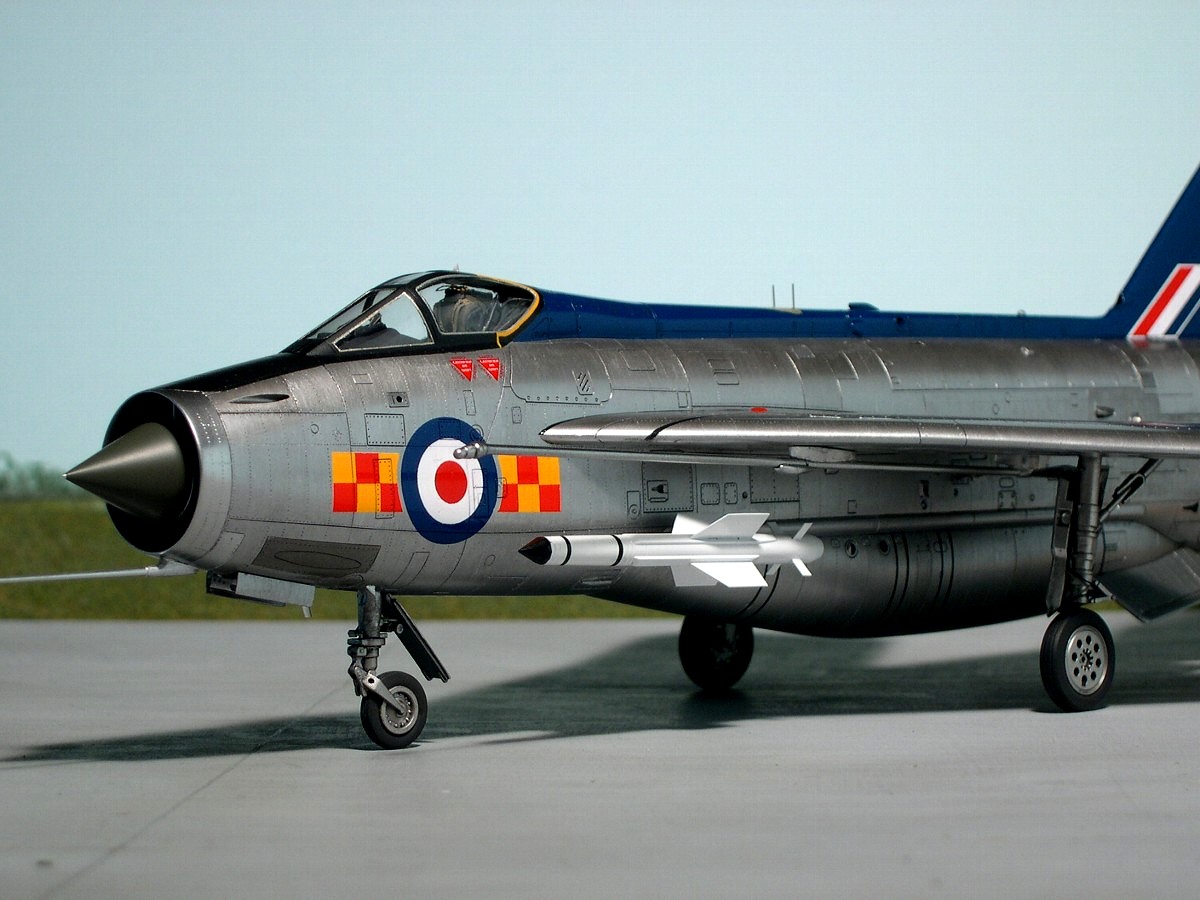
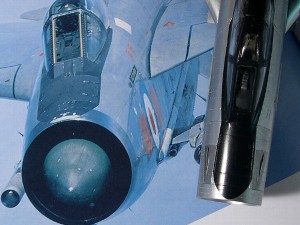
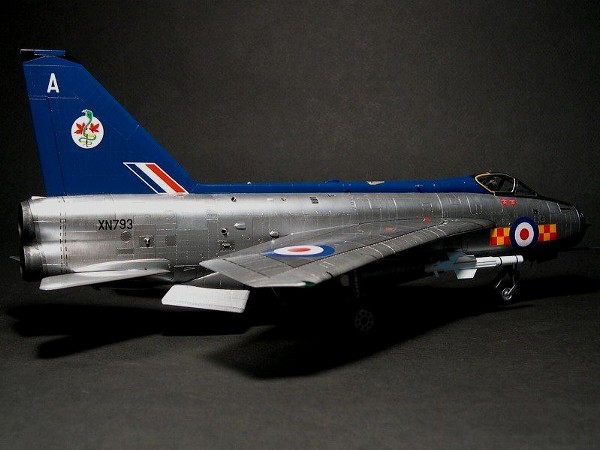
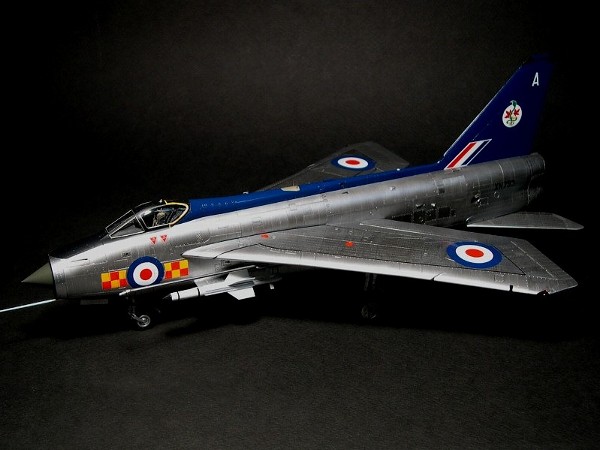
BAC Lightning F.2A (1/48 Airfix)
20.5.2005
|
|
|
|
**Introduction |
|
The mainstream of my homepage is propeller-driven airplanes of WWII. But I also love vintage jets. Then I chose Airfix's Lightning and Cutting Edge's decals from my stocks. And I started to construct the natural metal finished F2.A of the RAF 92 Sqn. Construction concepts are "almost straight from the box", "rivetting" and "hybrid painting for NMF". By the way, I think the design of Lightning has something in common with Spitfire in terms of the slender fuselage tightly covering R & R engine, advanced design of the wing and sacrifice of fuel capacity. Don't you think? |
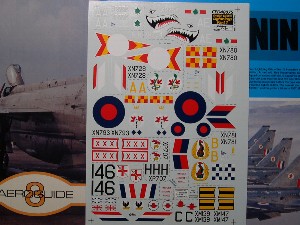 This is the Cutting Edge Decal CED48075 and references. |
|
Kit review There are two boxings, one for the F.2/F.3 and one for the F.2A/F.6. Each boxing is excellent. It's correct outline, crisp casting, crisp detail parts and fine fitting. Although there are a few very minor weak points, as I mention them afterward. |
**Construction |
|
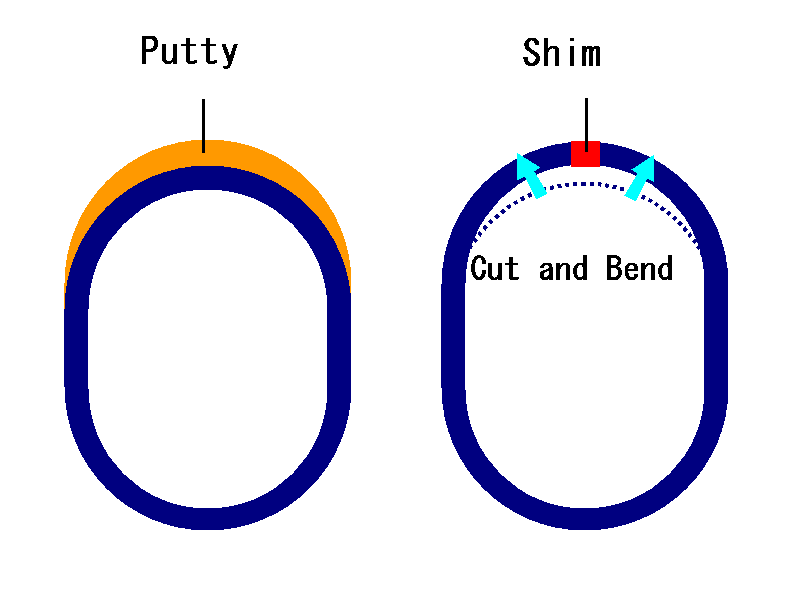
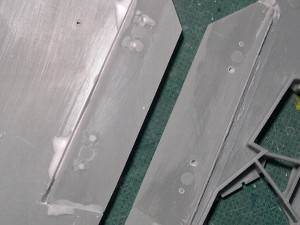
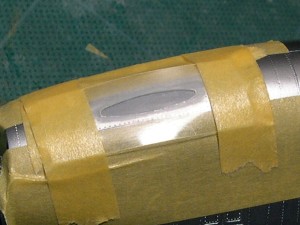
The nose The kit's outline from the intake lip to the wind shield is a little bended. So I'd correct it, but I don't like putty. Then I "cut" and "bended" and "widened" and "shimmed" the intake part (and also fuselage part). I call this method "Cut and Shim" method. |
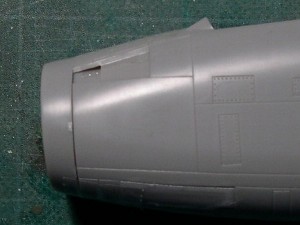 The original kit outline. |
 I cut the intake lip part at the top. |
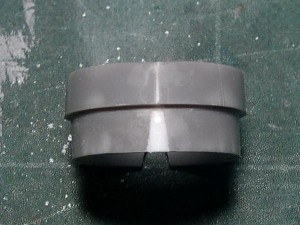 I bended, widened and shimmed it. |
 This is corrected outline. No difference ? |
|
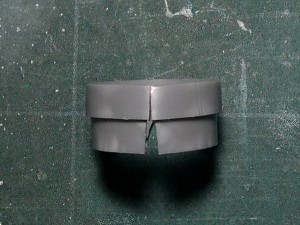
This is a conceptual figure of "cut & shim" method. These are cross sections of fuselage. The blue line is the kit part. And the left figure is usual method using putty and the right is "cut & shim". |
 |
|
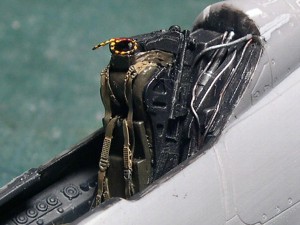
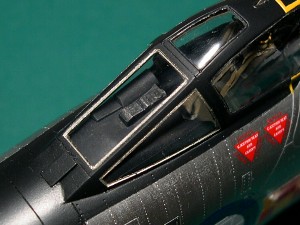
The cockpit |
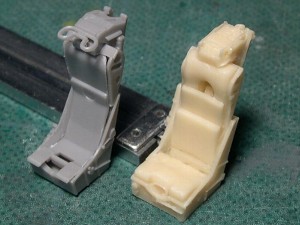 These are Airfix's seat and Aires's resin M.B.4 seat. |
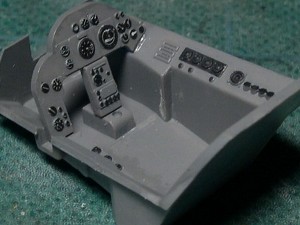 This is Airfix original. |
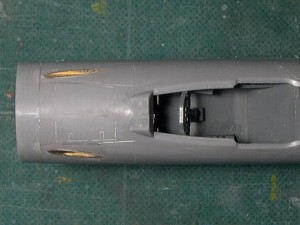
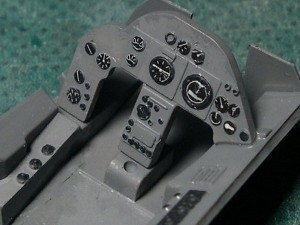 I didn't use resin cockpit set. It'd be hard to see from the closed canopy. |
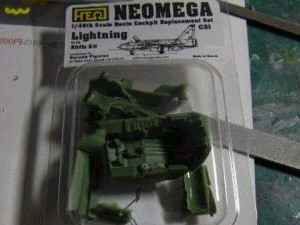 This is NEOMEGA's resin cockpit. It's not mine. My friend supplied the photo. |
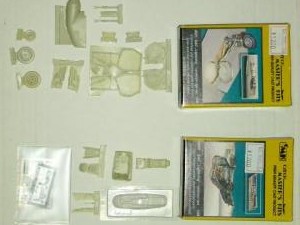 This is KMC's resin detail part. My friend gave me only photos. |
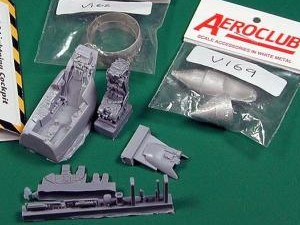 Cutting edge's detail set (front), Aeroclub's metal part. I enjoyed only photo. |
|
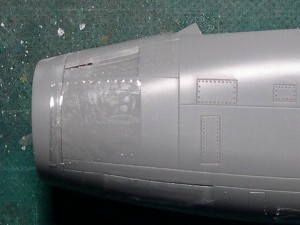
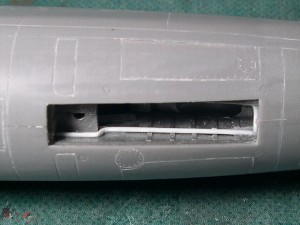
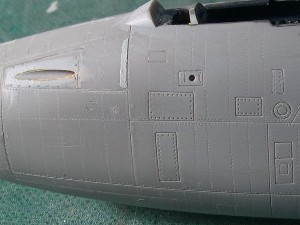
The fuselage The upper nose cannons are characteristics of the F.2A. I depicted the cannon holes with brass pipes. |
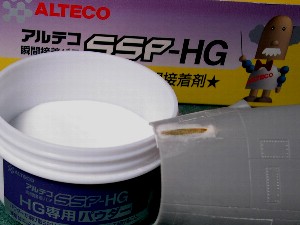 I set the pipe and applied CA glue and plastic powder which is attached with "ALTECO" CA glue putty. |
 After glued tightly, I sanded. |
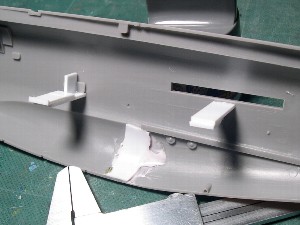 I put reinforcing beams of plastic sheet at the inside preparing for riveting work. |
 This is the upper view of the nose. |
|
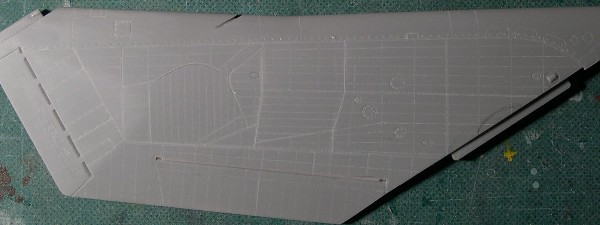
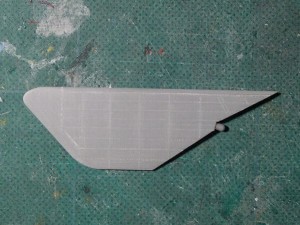
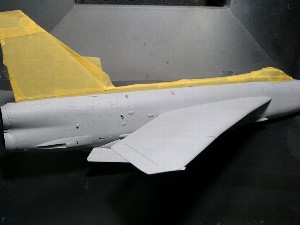
The wing The flap was constructed at upright position. Each flap part was glued on each wing part in advance, then upper and lower wing part was glued. There was a gap between the flap and wing part. So I used CA glue putty instead of glue. The leading edge of the wing wasn't sharp a little. I sanded and sharpened it like as Mach 2 jet fighter. |
 The flap was fixed by scotch tape, and CA glue putty was applied. |
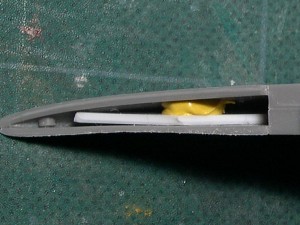 The reinforcing plastic sheet (white) was glued. When I glued the upper and lower wing part, I inserted some putty (yellow) between them. |
 Before sanding. |
 After sanding the leading edge. |
|
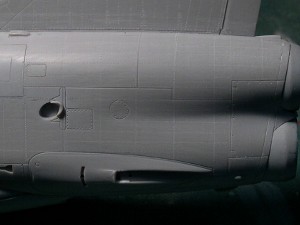
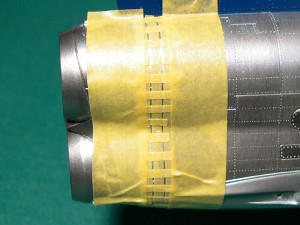
Panel lines I engraved the panel line of the intake lip (please see the photo). An etching saw was inserted in a magazine. Then the fuselage part was spinned along the saw on a table. But after engraving, I knew the width of the intake lip is not equal. So this method shouldn't be used. Mmmm. I'll forget it. |
 This is how to engrave the nose panel line. |
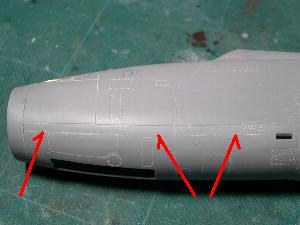 I deleted some panel line (red pointer). But as for the backward one, I deleted wrong line. (I mention afterward.) |
 This white plastic rod hided the gap. It wasn't correct detailing but fabrication. |
 This outlet was newly rebuilt with sprue and also the position was corrected. |
|
Rivetting Well, I had a problem. I didn't have enough data for understanding of rivet lines. At the beginning, I would trust the drawing of "Warpaint". But when I compared it with actual photos there were some differences. Then I gathered photos from books or Internet and nearly understood rivet lines of the fuselage. But as for the wings, I can't.Finally my friend sent me a photo of the framework of the wing in "SAM Publications No.7 BAE Lightning". It made clear rivet lines of the main wing. |
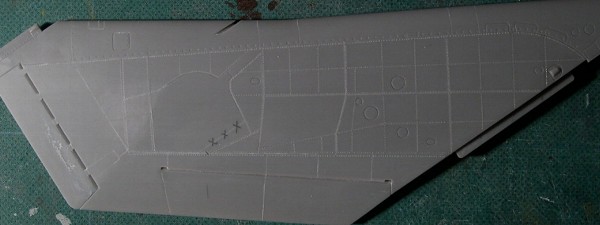 I depicted the framework from the photo of "SAM Publications". "XXX" marks is my mistake. |
 Next, I added rivets of small ribs. But there are some presumptions in this stage including panel lines. |
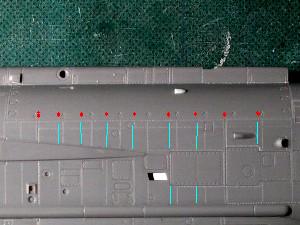 Red dots show correct positions of fasteners of the engine access panel. And blue lines show correct rivet lines. |
 I didn't understand rivet lines for the horizontal fin. Then I "trusted" Warpaint's drawing. |
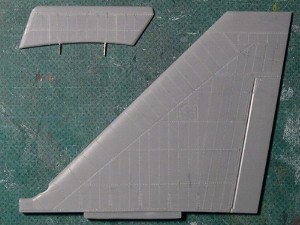 Rivet lines of the vertical fin and ventral fin are almost perfectly understood from photos. |
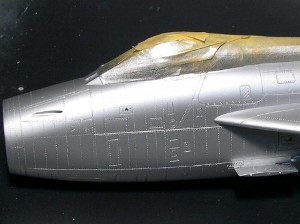
 Rivet lines of the nose are also understood. But they are inconsistent with some access panel. So if you build a perfect model, you should re-scribe panel lines. |
 The rear fuselage was the same. |
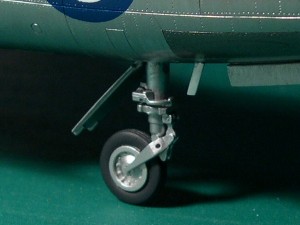
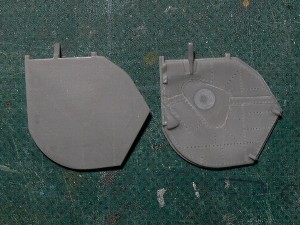 The main gear door. |
|
Improvement to the F.2A The Airfix kit is basically F.6. There are some minor differences and I scribed these panel lines. I deleted blue line formerly, but this was a mistake. I should delete red and leave blue. |
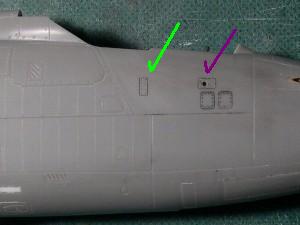
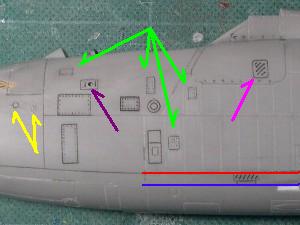 The exhaust of the cannon (Purple), slits (Pink), small access panels (Green, Yellow) were added. |
 The starboard was the same as the portside. |
|
|
|
Assembling Lightning has slight minus-dihedral (sorry, I don't know correct word). You can understand by a photo taken from the rear. So I carefully sanded the wing root. |
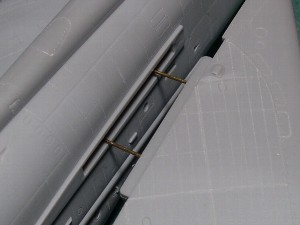 Brass sticks tied left and right wings. |
 These brass sticks are reinforcements. |
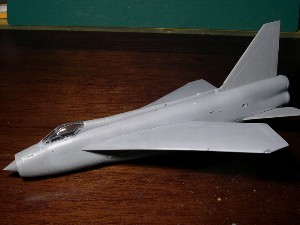 The whole shape appeared. |
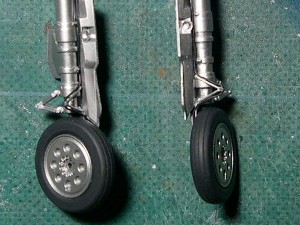
 The main gear fork of the kit is slender and it can't stand the load. So I reinforced by brass stick. |
|
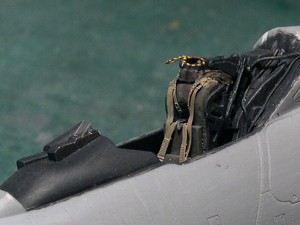
The ejection seat The seat belts of Aires's Mk.4 are photo etching and I didn't understand correct position. Then I referred the "The Ejection Site". |
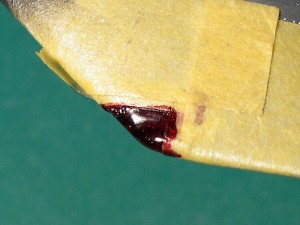
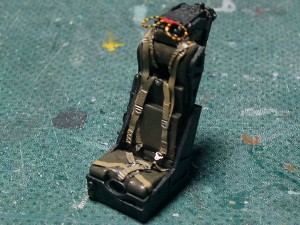 It was hard to paint black and yellow stripes because my sight deteriorates with age. Should I buy glasses or a loupe? |
 Piping backward of the seat were fabrication detail-up. |
|
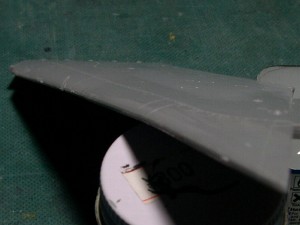
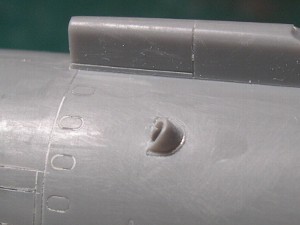
The wing tip I noticed kit's wing tip was thick. The small blister for navigation light was an obstacle, so I deleted and depicted after. |
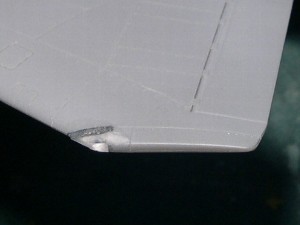 Before. |
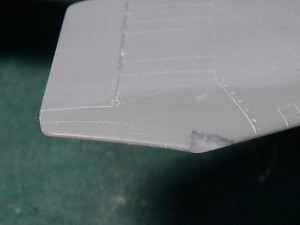 After. |
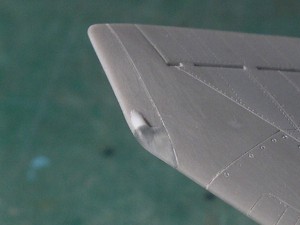 Next, I depicted the blister. |
|
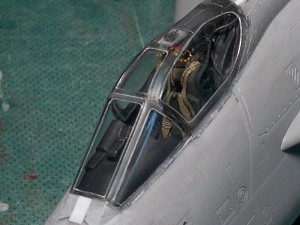
The canopy First of all, I glued two canopy parts and polished the inside of the canopy by #2000 sand paper and compound. |
 The gunsight and the anti-glare panel are kit part. The anti-glare panel of the kit is for the F.6 and differs from the F.2A. But I don't know exactly. |
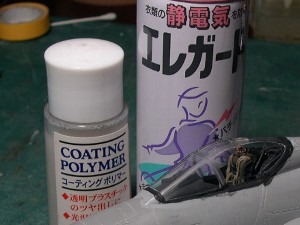 Hasegawa coating polymer and anti static electricity spray were applied inside of the clear part. They prevent impurity of the canopy. |
 I painted the frames in black and then applied putty. |
 I scribed borders between glasses and frames and sanded dull frames to be sharp. |
|
Details |
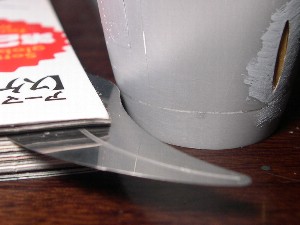
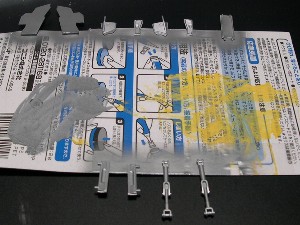
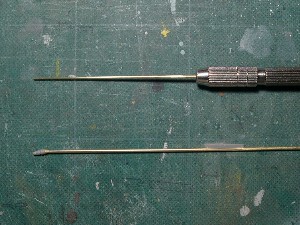 The pitot tube and the fuel probe were made of brass stick. |
 Fins of the Firestreek were replaced with 0.2mm plastic sheet. |
 Brass sticks were solder on the base of the pitot tube. |
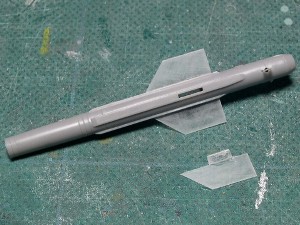
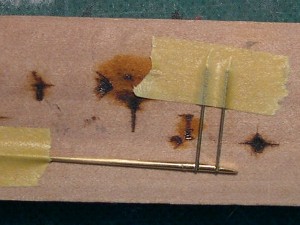
 I checked the proper position in dry fitting. |
|
|
**Paint & Markings |
|
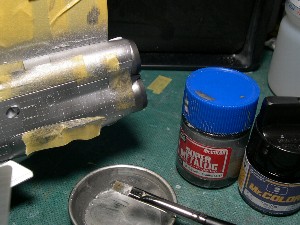
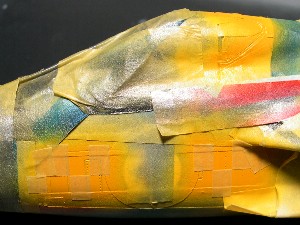
NMF Natural Metal Finish was expressed by "hybrid painting method". This method is a hybrid of "airbrush" and "drybrush". |
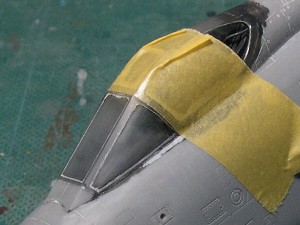
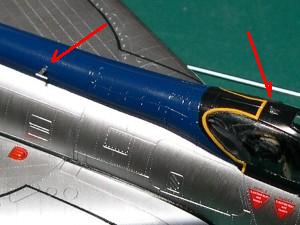
 The canopy was polished by compound. The small rectangle made of plastic sheet was added ahead of the wind shield. |
 I thinly sprayed Mr. Surfacer #1200 and polished by #2000 sand paper. Then I masked the fin and spine for painting silver. |
|
|
 Mr.silver(#8) + Mr.clear(#46) was sprayed. |
 Small parts were stuck and sprayed like this photo. |
 Mr.Super Chrome Silver(SCS) + Clear + Black(a small quantity) was sprayed and polished by #2000 paper. |
 SCS+Black was drybrushed on sprayed silver surface. Clear was not mixed. Each panel was masked and brushed. |
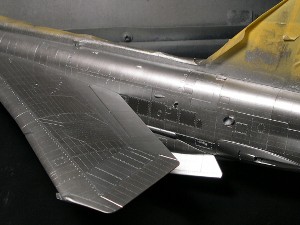 The leading edge of the main wing, the aileron, flap and some other panel were drybrushed by SCS without Black. Some other panel were sprayed darker silver. |
|
Details |
 The lower cannon muzzle was patched. So I scribed with original template. |
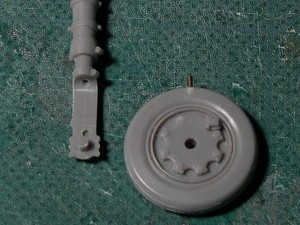
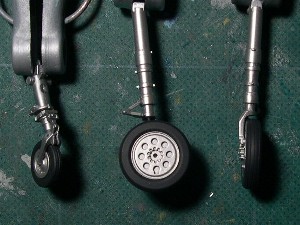 I scribed tire tread by an etching saw. It was the same method as the intake lip. |
|
|
|
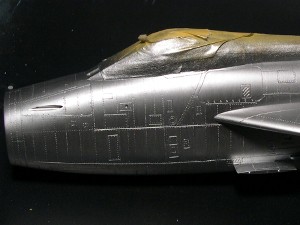
Anti-glare painting The demarcation line for anti-glare painting is the upper edge of the panel for the ADEN cannon muzzle. And I trusted kit's panel line and painted black. But this was a mistake. I should re-scribe the panel line. |
 I made a mistake for the shape of the anti-glare paint. Because I trusted kit's panel line. |
|
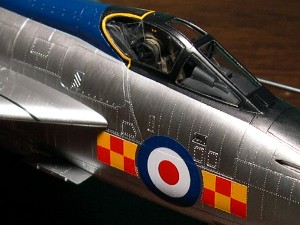
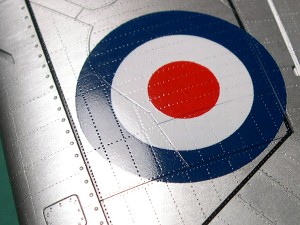
Markings The vertical fin and the dorsal spine of the 92 squadron were painted Roundel Blue. This is a tradition of "Blue Diamonds" the RAF official acrobatic team. I used Mr.color #322 for this blue. This color is used for the acrobatic team "Blue Impulse" of JASDF. The "finisher's Bright Red" is used for Red of the roundel and fin flash. |
 |
|
All roundels were painted. I used same blue as the vertical fin. Well, the name of this color is "Roundel Blue". |
 This is masking for Blue. I masked white portion. |
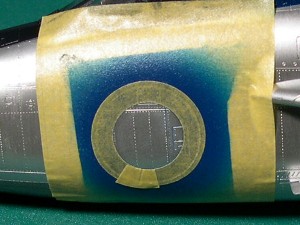 After spraying blue, I masked for white. |
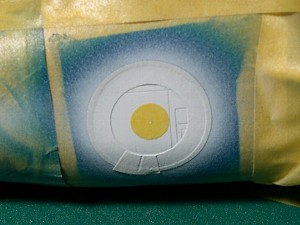 To determine the position of red masking, I put round masking tape. Afterwards, I masked red portion and removed this round tape. |
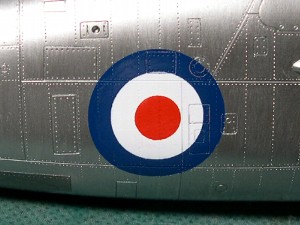 Finished. The surface was polished by #1500 sand paper. |
|
The fin flash was also masked and painted. Because I wanted to use the same red for the roundel and fin flash. |
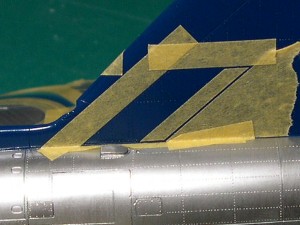 This masking is for white. |
 Finished. |
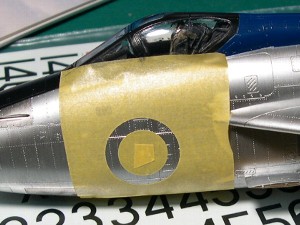
 The size of the fuselage and lower wing roundel is 12:24:36 inches and upper wing is 18:36:54 inches. |
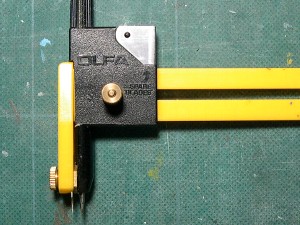 I use this circle cutter. |
|
Please be careful that the nose checker is parallel to the panel line which is just over the checker. The walkway lines were painted. |
 After spraying yellow, I masked for red checker. |
 The double dotted lines were masked and painted like this photo. |
|
The correction of nose Finally, I decided to re-scribe the panel line and to repaint the anti-glare. |
 I applied CA glue for the wrong panel lines. |
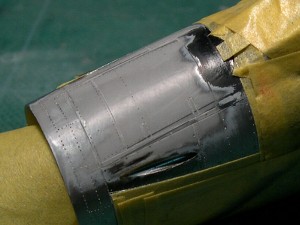 Next, I re-scribed by etching saw. |
 The correction work was finished. Please compare this photo with the former one. |
 The checker and the yellow edge had been done. |
|
Details |
 The brake line and the landing light were added. The light is the part for 1/43 car model. |
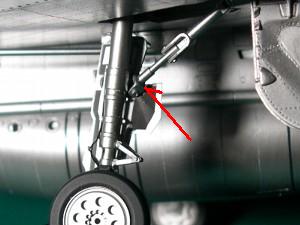 The linkage was cut at red pointer, twisted 45 degrees and re-glued. |
 Brass sticks were soldered to "L" shape. The triangle shape antenna was made of brass stick. |
 The blade antenna was also made of brass. |
|
Decals and dry transfers I used decals from Cutting Edge CED48075 sheet for the squadron emblem, the letter "A" and the serial on the lower wing. Before applying decals, I lightly sprayed #46 clear on the whole model. Clear paint slightly lowers the brightness of the silver paint surface. But it still shines enough. Then after applying decals, I sprayed again clear a little thick. |
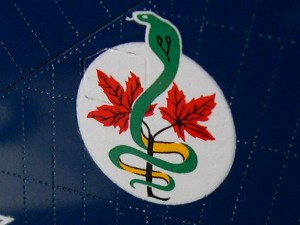 The size of the squadron emblem is a little small but a permissible range. |
 Red caution triangles are from a certain decal sheet of USAF markings. So they aren't exactly correct. |
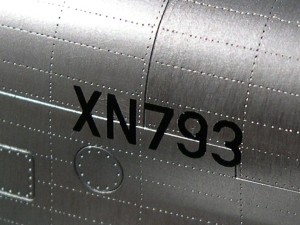 The serial number on the fuselage side is an original dry transfer. |
 After spraying clear, I polished by #2000 sand paper |
|
Detail painting |
 I think masking and airbrushing are the best way to depict the window edge. |
 The color is Silver + Yellow. |
 The navigation light looks rather dark. So I painted it with clear red + black. |
 I carelessly hit the pitot tube and it was broken. Damn it! |
|
|
**Completion |
|
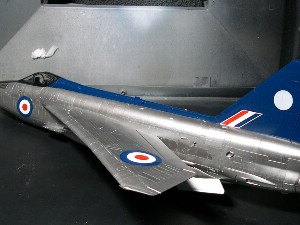
Finally, I completed the construction. The Airfix kit is very fine so I could pleasantly finish the work. I'm convinced that the "hybrid painting method" is the best way for NMF at the present time. I recommend you to try this method. And this model was also published in Japanese model magazine "Scale Aviation (October 2005)". |
 |
 |
|
References |
| 1 | The famous aircraft of the world | Bunrindo |
| 2 | WARPAINT SERIES No.14 BAC LIGHTNING | Hall Park Books |
| 3 | AEROGUIDE 8 BAC Lightning F Mk 3/Mk 6 | Linewrights |
| 4 | Scale Aviation Magazine Vol.2 | Dainippon-kaiga |
| 5 | No.7 BAE Lightning | SAM Publications |
| 6 | LIGHTNING STRIKES | Airlife |
| 7 | THE LAST OF LIGHTNINGS | Sutton |
|
|