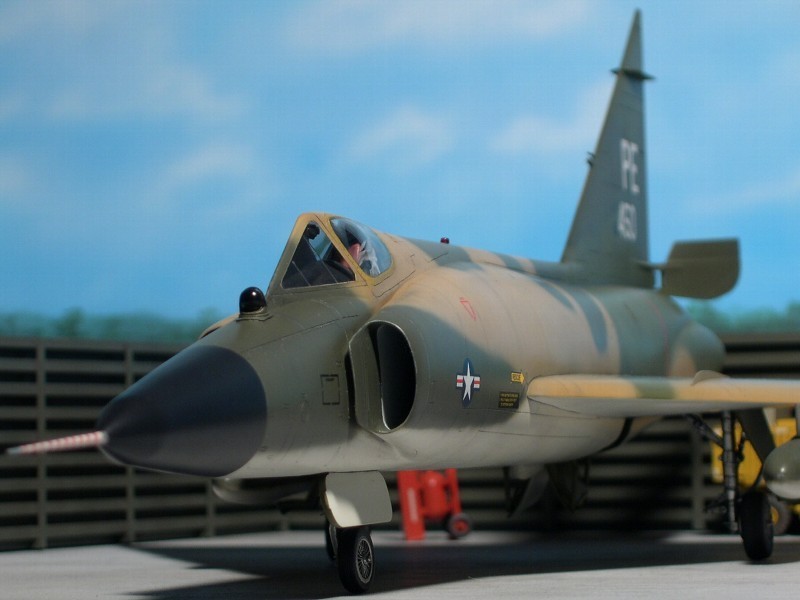
F-102 Delta Dagger (1/48 Monogram)
19/4/2004-26/8/2004
|
|
|
Å@ |
**Introduction |
|
Monocon I was considering entry for Mr. Dads & Tori's "Monogram Contest" since it was announced. Finally, I decided to enter with "Duce" which has beautiful symmetry of the main wing and tail fin.Kit review The outline is very good. But there is a mistake. The nose radome of actual A/C is conic shape. So the silhouette is consisted of straight lines. But the kit's redome is curved. Unfortunately, the main wing of my kit was curved like a "SURUME" which is a dried squid. |
 Monogram Models 1990. |
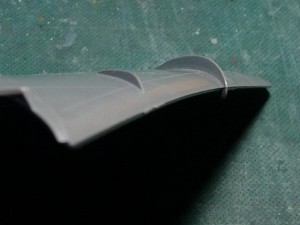 This is a SURUME. |
|
Cosmic kaleidoscope When I opened the box I was surprised, because there was a strange plate in front of a pilot's head. This plate was called splitter and it prevented windshields from a kaleidoscope effect. The trial product didn't equip the splitter, so the pilot might have seen a wonderful sight of a cosmic kaleidoscope!!Case XX wings There are two type of wing tips for F-102A. Early productions equipped case X wings and case XX wings were applied after s/n 56-1317. Revel-Monogram have released both types. So you can choose both of them. A Hasegawa-Monogram version which I bought is case XX wings.There are some minor variations on F-102 as follows, the IR seeker, blade antenna, navigation light and front wheel. Structure mechanics Before fixing the curved wing, I'll explain structure mechanics.Figure-1 shows a plate which is bended by a force from outside. The upper side is stretched and stretching stress is working. The lower side is compressed and compression stress is working. |
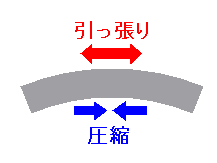 Figure-1 A bended plate. |
|
Next, two plates were adhered like figure-2. Then stretching stress and compression stress are canceled each other at the adhesive surfaces. So two plates are fixed this situation. |
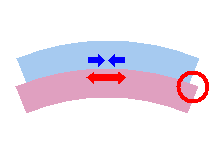 figure-2 Adhered plates. |
|
If you replace "plate" with "wing part", this article changes "How to correct the wing". Å@ |
**Construction |
|
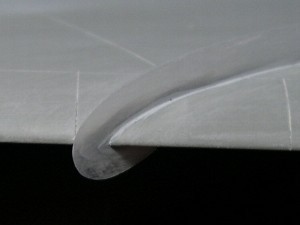
Wings First of all, I fixed curved wings. Of course, such extreme curving can not be fixed by above-mentioned method only. So I used hot water altogether. I dipped the part into hot water filled in a frying pan for several seconds. Then I bended it. Please be careful that boiling water is too much hot. |
 Plastic plates were glued for reinforcement. |
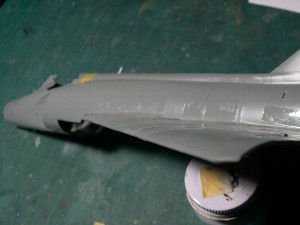 Small roughness was still remaining. |
 Then I was sanding, sanding, sanding. |
 White small dots are 2mm plastic sticks glued for reinforcement. |
|
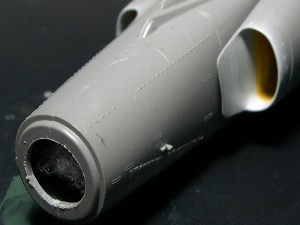
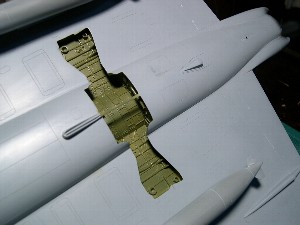
Air intakes |
 The splitter vanes were sanded thinly. |
 Yellow putty was filled and sanded. |
|
The fuselage The lower fuselage line is straight from the nose to the main gears as for the actual A/C. So the fuselage height after the cockpit was risen up by inserting a stick of sprue, and the weapon bay doors were sanded. |
 This plastic wrap was filled to keep windows clean. It cut off dust or paint mist from outside. |
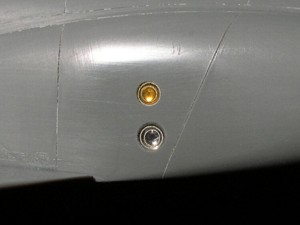 The navigation lights are made of color sprues and 1/43 car lights. |
 A stick of sprue was inserted after the cockpit. |
 The fitting of the wing parts was not so bad. |
|
Detailes |
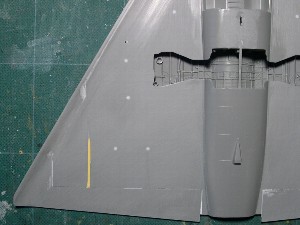
 Small panels were re-scribed using original templates. |
 All of panel lines were re-scribed. Surfacer was thinly sprayed for confirmation of engraved lines. |
 The fences were changed for plastic plates. |
 Once the brass ring was grued at the cone. After putty ( CA glue putty ) was filled up and sanded, the brass ring was removed. |
 The pitot tube was made of a brass stick. The base was a metal pipe. The pitot tube was detachable. |
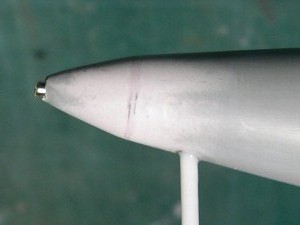 The plastic stick was the stopper for the metal pipe. |
|
Cockpit |
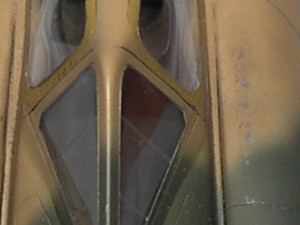
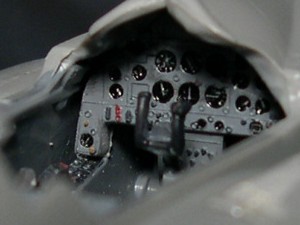 The cockpit is from the box. Tamiya Gloss Black was painted over Mr.Medium Sea Gray on each instruments. Then I scruched gentlly. Details appeared. |
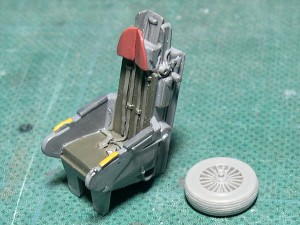 The ejection seat was from the box except for the seat belt made of a lead sheet. I engraved tread petterns of the nose tire using a etching saw. |
 The canopy frames were engraved using a needle and etching saw. Rivets were engraved using beading tools. |
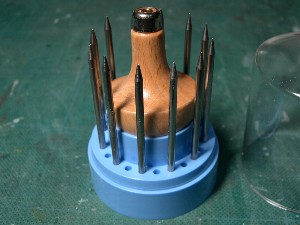 These are beading tools. |
|
Final assemble |
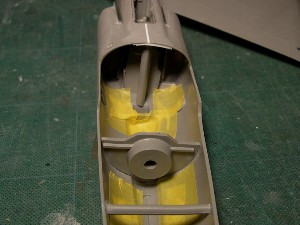
 The wheel bay was pre-painted. |
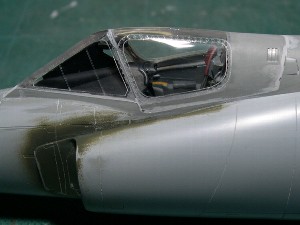 Fitting of the canopy was not good. It required some putty and careful sanding and re-scribing. |
|
Å@ |
**Painting |
|
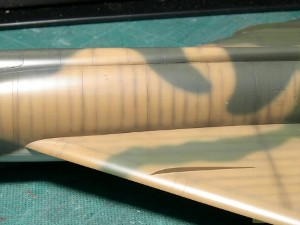
SEA camouflage F-102 of the 509FIS painted light gray first appered South Viet Nam on March 1962. After a several years, SEA camouflage was introduced. At that time, only small letters of serial number werewritten on the tail fin. Tail code was introduced on 1968, and was only applied for the 509FIS (PK), 82FIS (NV) and 64FIS (PE). Before the war ended, all of F-102s were evacuated until 1970.The 509FIS used case X wing A/Cs only. So the tail codes for the case XX wing were limited for "PE" or "NV". Painting I used Mr. paints. Two colors of Green and gray (for under surface) were straight from the bottles. And I prepared two variety of Tan. One was straight and another was faded color mixed 20% of white. |
 SEA camouflage was sprayed by free hand. |
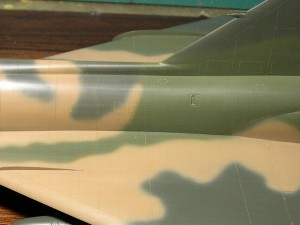 After spraying, I polished by #1500 sand paper. |
|
Weathering I intended to express characteristic rough surface of F-102 by painting. Well, I know this is only "metaphysical" modeling. |
 This is pre-shadowing using dark gray paint. |
 Then base color was sprayed along dark gray. |
 Basic painting was finished. |
 The landing gears and wheels were painted Mr. Super Fine Silver. |
|
Details again |
 The main gear covers couldn't be set the right position. So I cut off the upper portion of covers. The landing lights were added by 1/43 car model. |
 And the wheel bays were widen in order to set the gears. Details up was not necessary. |
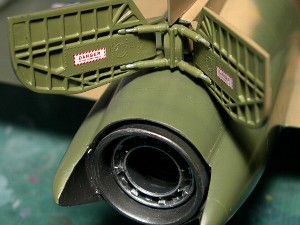 The speed brake and jet nozzle were from the box, too. |
 The arresting hook was made of a brass stick. |
|
Decals |
 I selected F-102A-80-CO (s/n56-1450) of the 64th FIS. "PE" was from AMD letter set. |
 The caution data were AMD sheet from the box. The red triangle was cut from a red decal. |
|
Finishing |
 Chipping was done on the air intake. |
 The canopy frames were Yellow + Silver. |
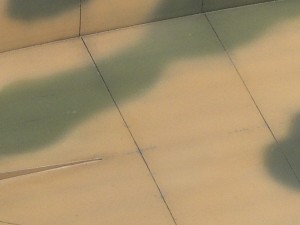 Faded tan was sprayed on the wings. |
 The landing light was replaced. |
|
Å@ |
**Completion |
|
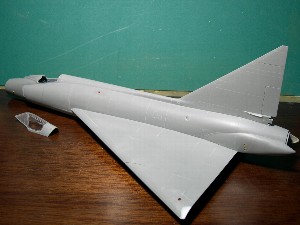
Monogram's Duce is excellent as for the proportion of outline. Especially, the line from the back to waist is beautiful and sexy. Looking at my model, I remember the days of Viet Nam. Almost 10 years ago, I'd been Viet Nam over and over. When I stepped out on the Ho Chi Minh City International Airport, a tropical smell reminded me former trips. Migs alerting beside the runway taught me who was the winner. I found that the crew of F-102 had been alerting at the same airfield . Once I flew on A-320 of VN (Vietnamese airlines) from HCMC to Hanoi. I asked a flight attendant of my visiting the cockpit and was courteously welcomed. The pilot was middle-aged American and the copilot was young Vietnamese. I wonder the pilot had flown at the war, but I couldn't ask him. I remember the deep blue sea of DaNang. Å@ |
**References |
|
References |
| 1 | The famous aircraft of the world (old edition) F-102 & F-106 | BUNRINDO |
| 2 | The famous aircraft of the world (new edition) F-102 Delta Dagger | BUNRINDO |
| 3 | KOKU-Fun Illustrated No.21 "Air War over Viet Nam" | BUNRINDO |
| 4 | KOKU-Fun Illustrated No.101 "Century Series" | BUNRINDO |
| 5 | KOKU-Fun Air Combat No.15 | BUNRINDO |