Grumman F8F-2 Bearcat Monogram 1/72
|
|
|
Next, see the comparison with F4F and F6F. Positional relations between the engine cowl and cockpit are the same as each three aircraft. Cockpits are located in a high position to inprove visibility of carrier landing.
|
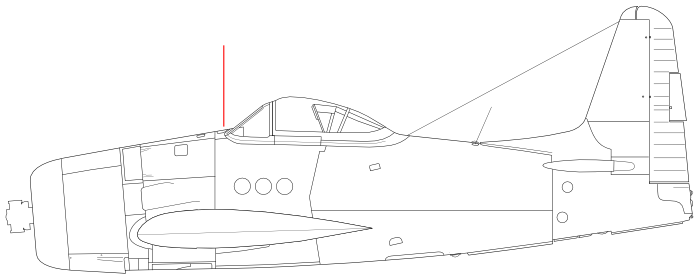
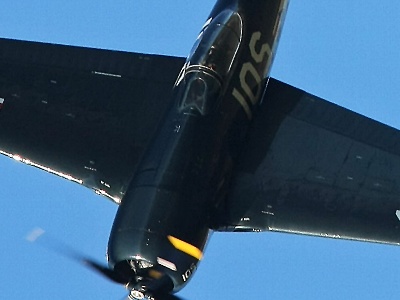
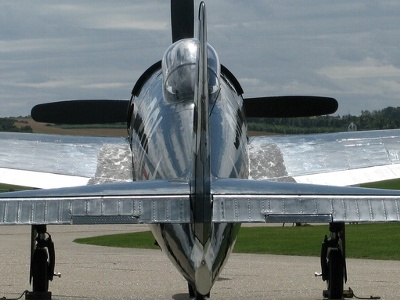
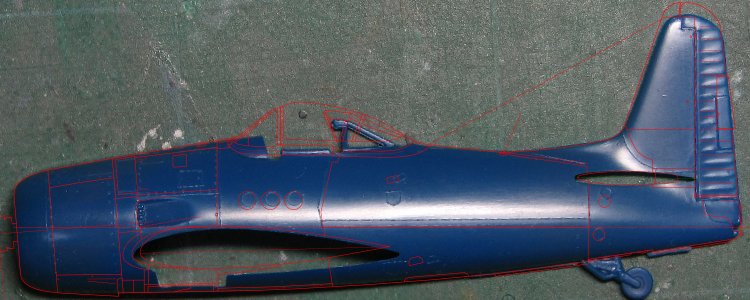
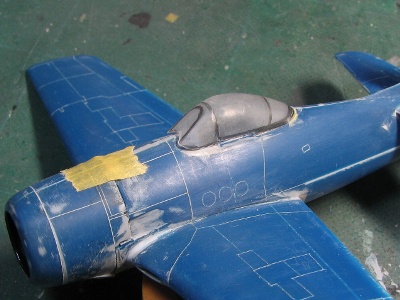
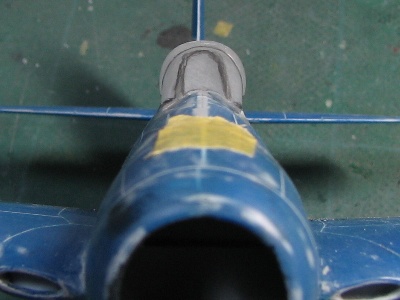
 There is a flat area at the top of cowl. The nose ridge is sharp at the front of the windscreen. |
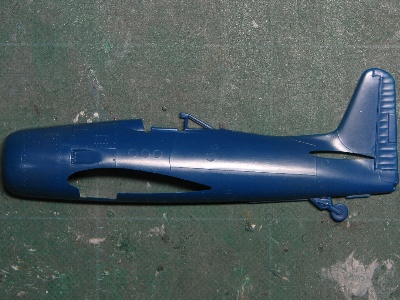
 Seeing from this angle, the cowl side is not straight but rather curved. |
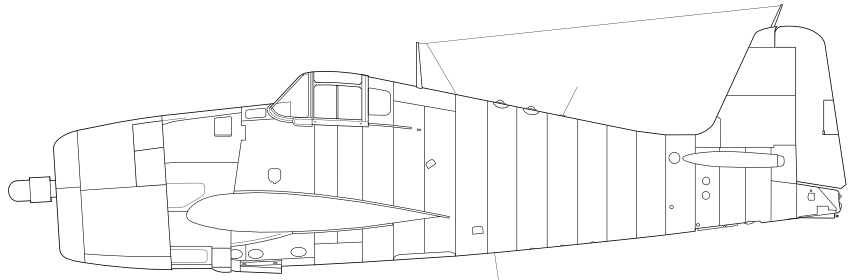
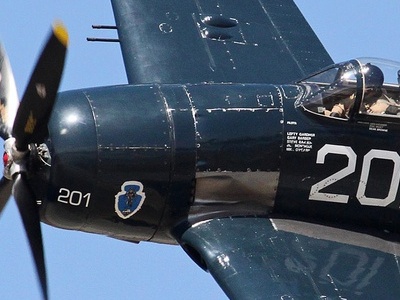 The cowl side looks curved in this angle. That is the same image as F6F Hellcat. |
 The highlight line shows complicated outline. |
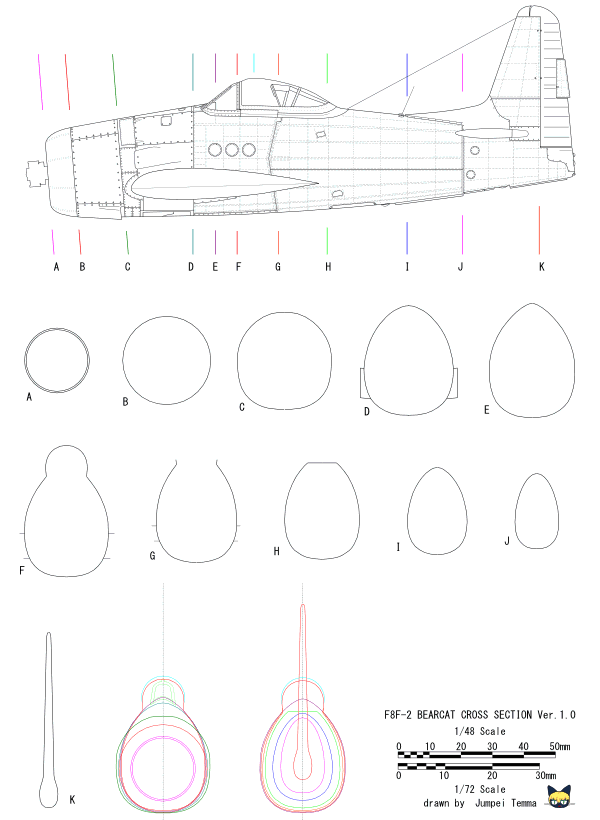
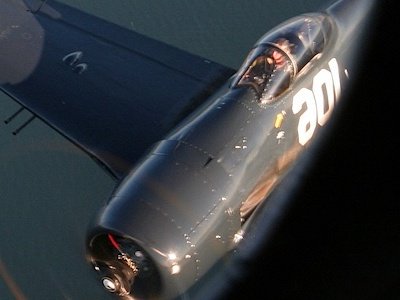
 See the transition of the cross section shape. See the width and the bubble shape of the canopy. |
 On the other hand, the nose line is straight from the right side view. |
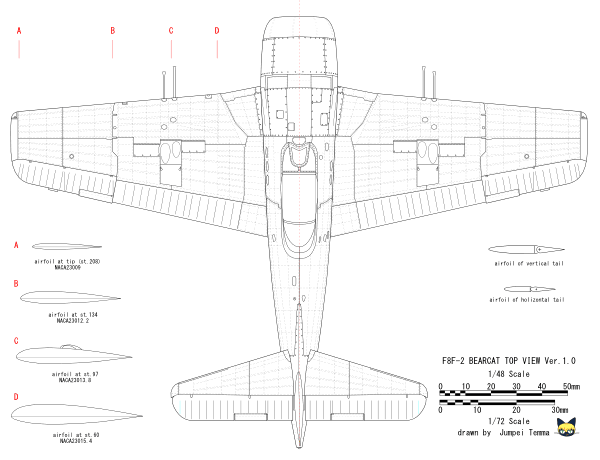
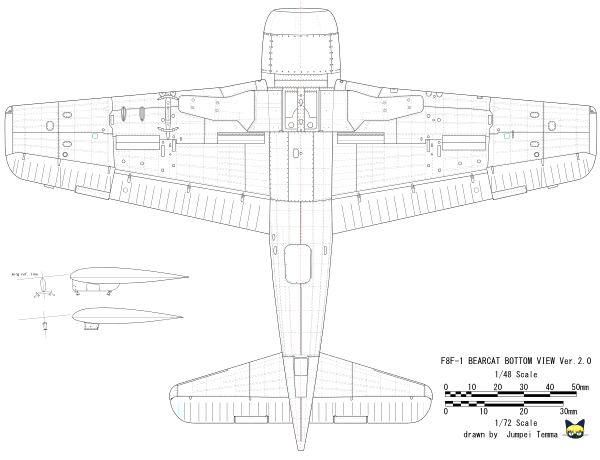
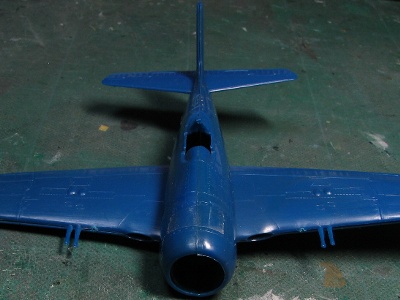
 The fuselage is slim and tight in the top view. |
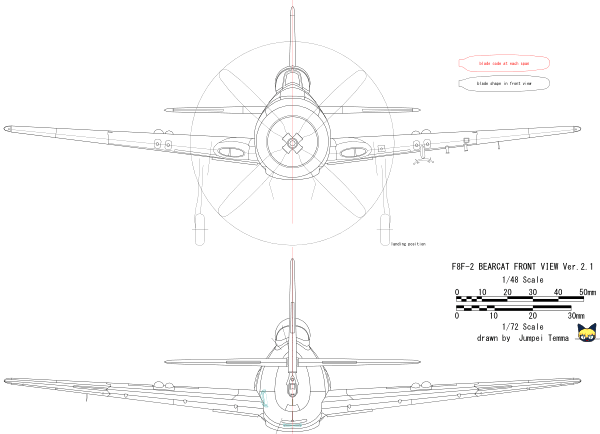
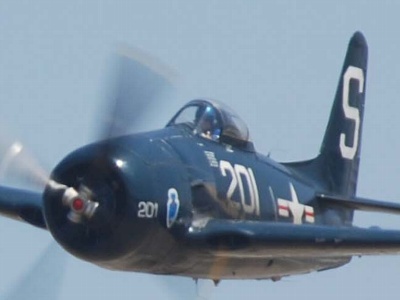
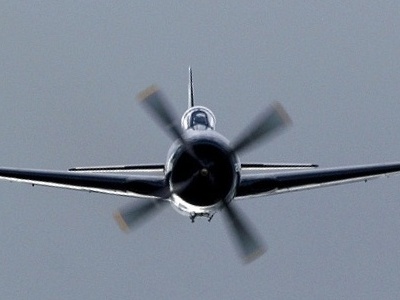 The cross section of the cowl rear end is expanded at 2, 10 o'clock and 4, 8 o'clock. |
 The nose is massive and the rear fuselage is slim. |
 The outer panel seems to be bent at the firewall. Also, the width of tail fin can be checked. |
|
I think the purpose of this nose ridge (= cutting of both sides) is for the visibility in the deck landing.
|
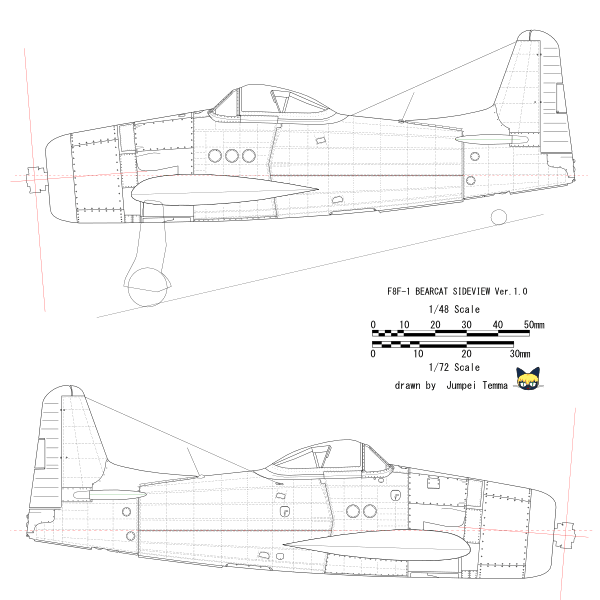
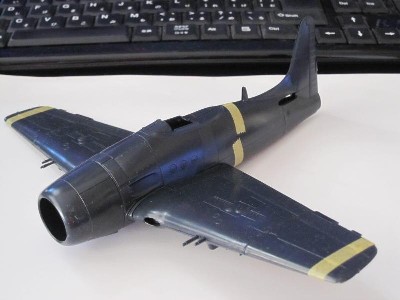
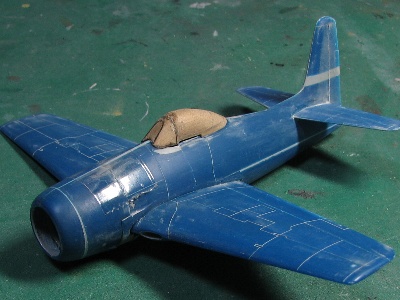
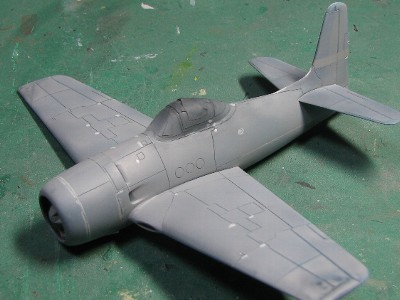
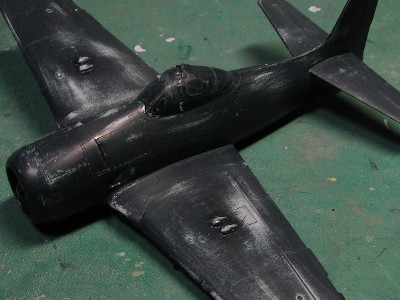
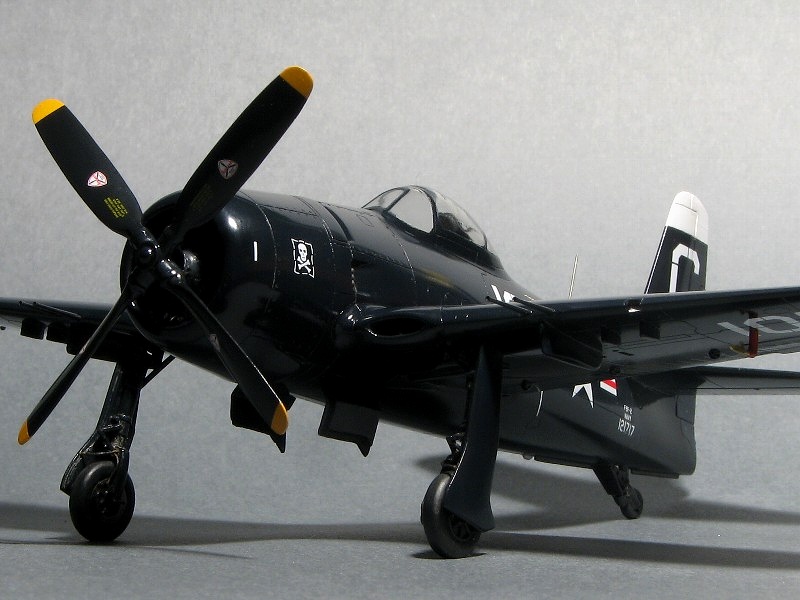
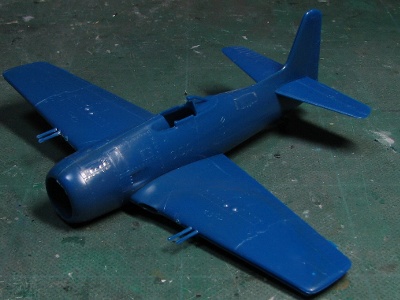 The Monogram kit well represents the Grumman DNA. The total length and width are correct. |
 The composition is very simple. The main wing consists of only two parts. The horizontal fin is only one piece. |
 The fuselage width is correct. The plan shapes of the wing, horizontal fin and fuselage are good. |
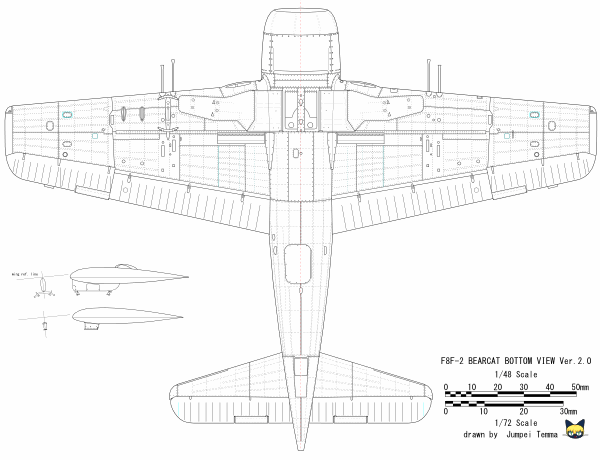
 The wing is assembled through the hole. |
|
However, there are some minor faults. The kit is unclear whether -1 of -2. The height of the tail fin is the middle of -1 and -2. The step-less lower side of the cowl is -1. The exhaust looks like -2. The cross section of the canopy is not bubble shape. The fuselage side view is slightly slim (the position of the canopy is a little low). And so on. Other points are to be commented later. |
 |
|
|
 |
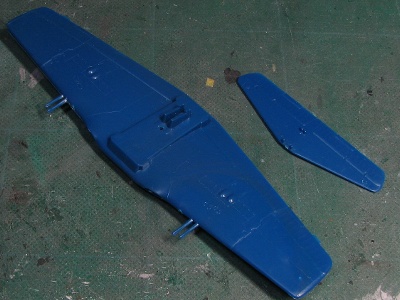
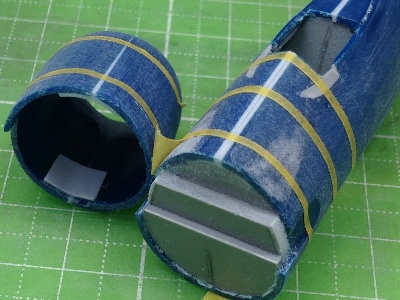
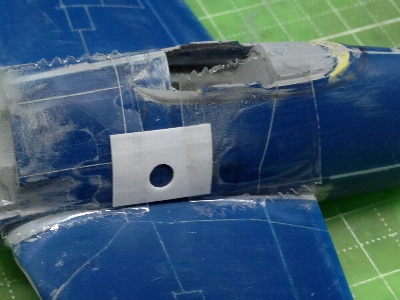
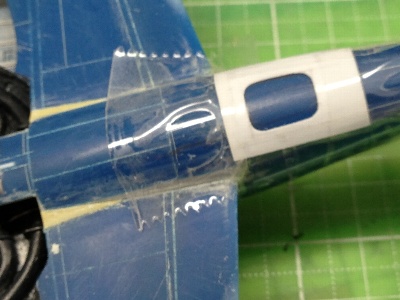
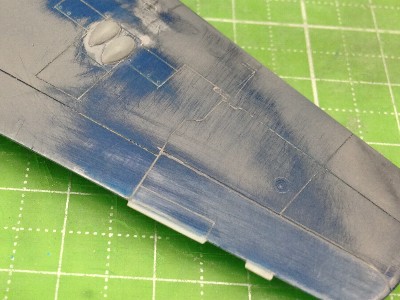
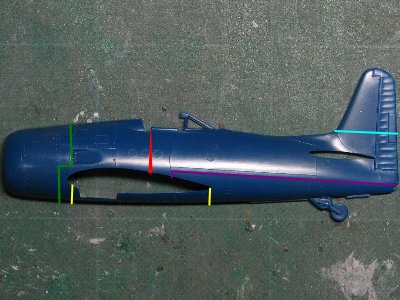 The fuselage was cut at each line. |
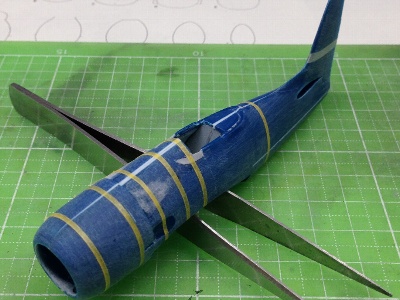 The shim of white styrene sheet was inserted at the top of the front fuselage. Then the both sides of the nose ridge were sanded. |
 Compare each cross section shape with drawings. |
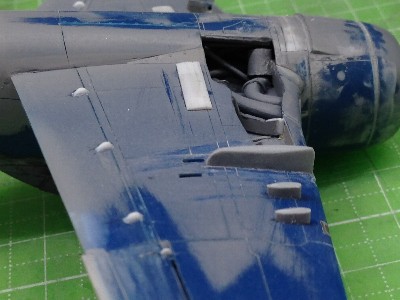
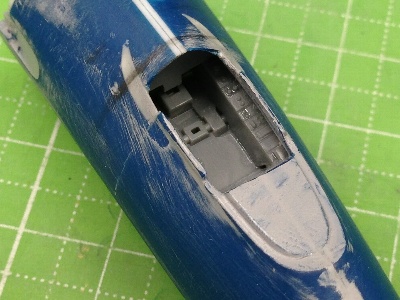 The cockpit floor is from Tamiya F-84G. |
|
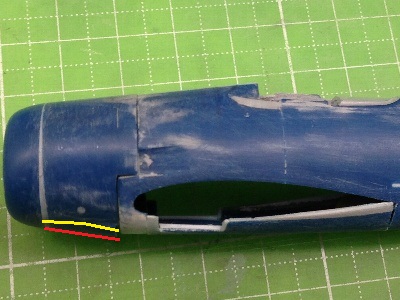
The front edge of the cowl was cat at the access panel line and re-assembled with the shim. The shape of the lower cowl air outlet is not simple. The line is straight at the center, (red). On the other hand, it is bent at the side(yellow). |
 |
|
|
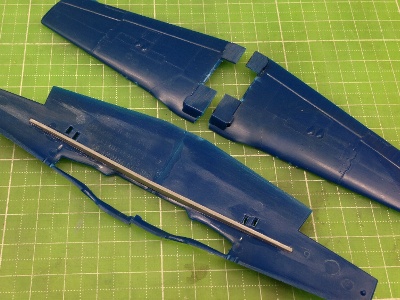 The main spar of styrene sheet was glued to ensure the dihedral. I didn't notice the difference of the sweepback at this time. |
 Then the sweepback was corrected. |
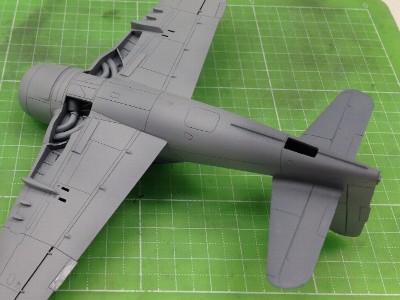
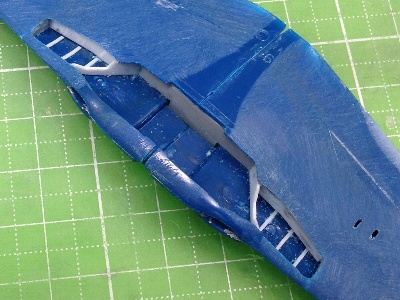 Ribs were glued on the gear bay. |
 More details were added. |
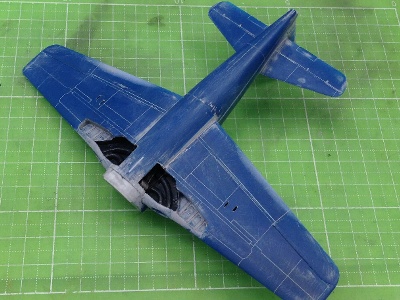
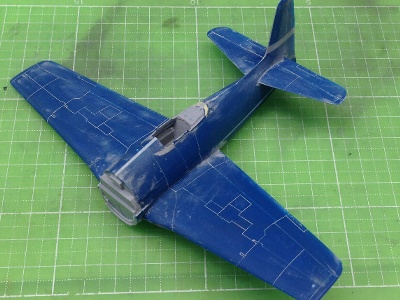 The fuselage and wing were assembled. Then panel lines were engraved. |
 |
|
|
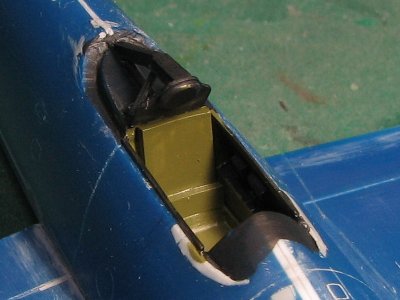 The coloring of the seat and bullet proof plate is unclear. |
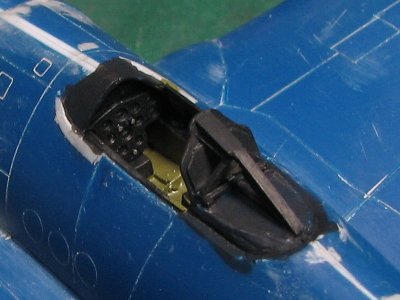 The roll bar was made of styrene sheet. |
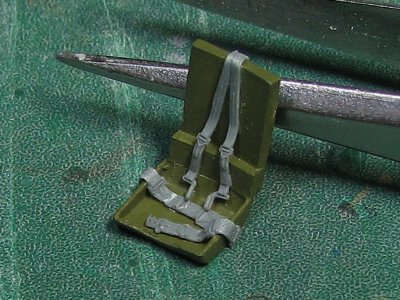 The seat was referred to Naval Fighter No 80. The seat belt is from Finemold. |
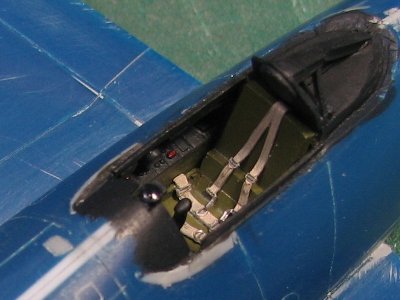 The gunsight is unclear. F8F-1 might equip the Mk-8. It is un-visible from outside. F8F-2 might equip the gyro gunsight Mk-18. But F8F-2P or -2N doesn't equip it. |
|
|
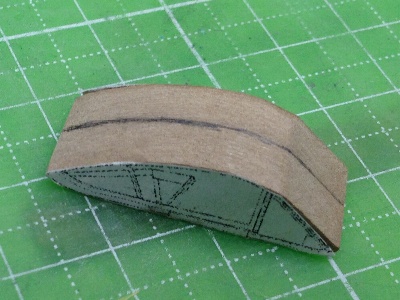 The wooden master was sanded to the just size of drawings. |
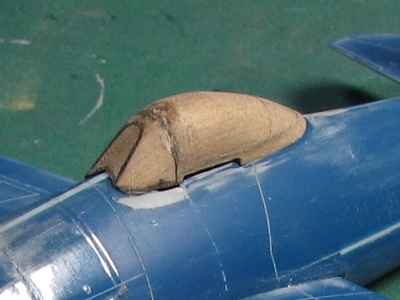 |
 The size and image were checked on the model fuselage. |
 |
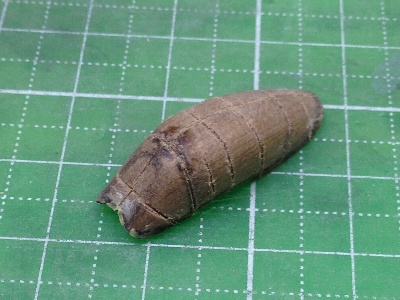 Then the surface was peeled off by the thickness of acrylic sheet. |
 The side window consists of a quadric surface (see green lines). |
 The heat formed acrylic sheet was sanded with #800 to #1500 grit sand paper. Then it was polished with rubbing compound. |
 |
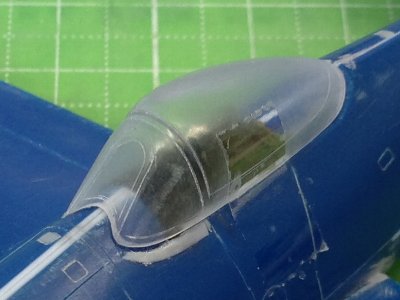 Frames were engraved with etching saw. |
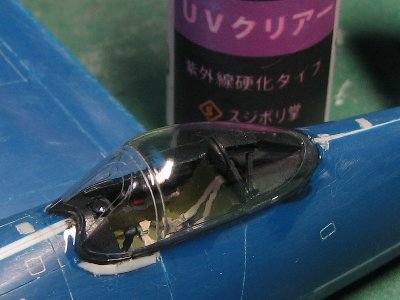 Acrylic canopy was glued with UV Clear glue. |
|
|
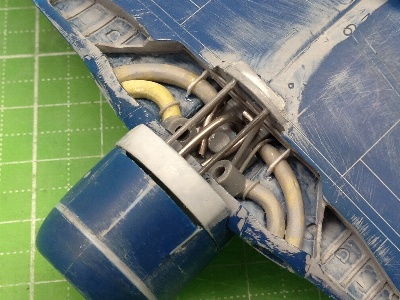
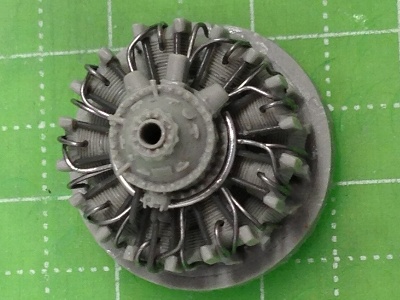 The P&W R-2800 C-series engine was from Quick Boost. |
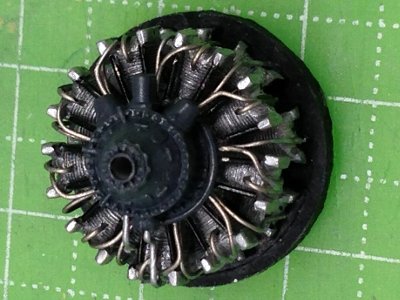 Details were added. See the wiring of ignition harnesses. |
|
|
 Access panels were engraved with the handmade template. |
 |
 Blisters and tabs were added. |
 The pylon, aileron hinge, flap hinge, dive recovery flap were added as well. |
|
|
 Mr. Color Surfacer was sprayed and the surface was polished. |
 |
 Gross Sea Blue was painted. |
 Again, the surface was polished. Then, Gross Sea Blue was thinly painted again. |
|
|
 Rib tapes were depicted with custom made dry decals. After that, Sea Blue was over painted on them. |
|
|
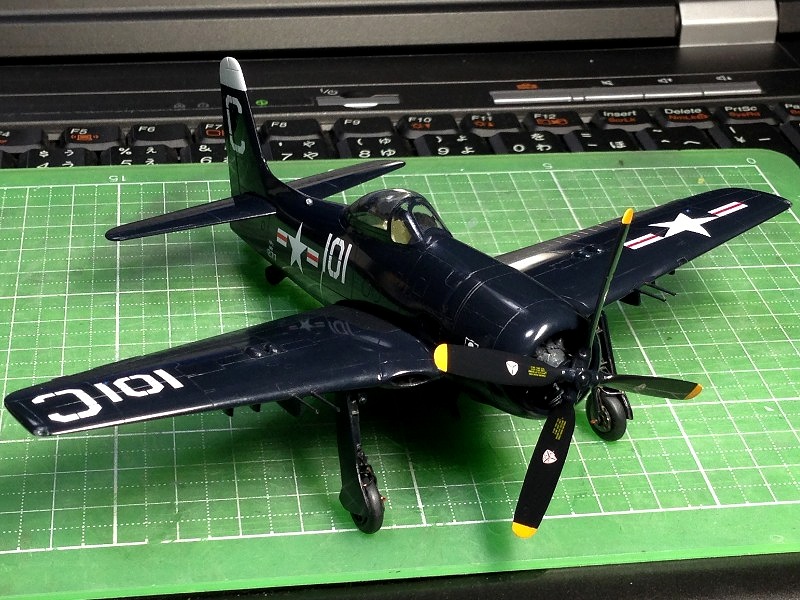
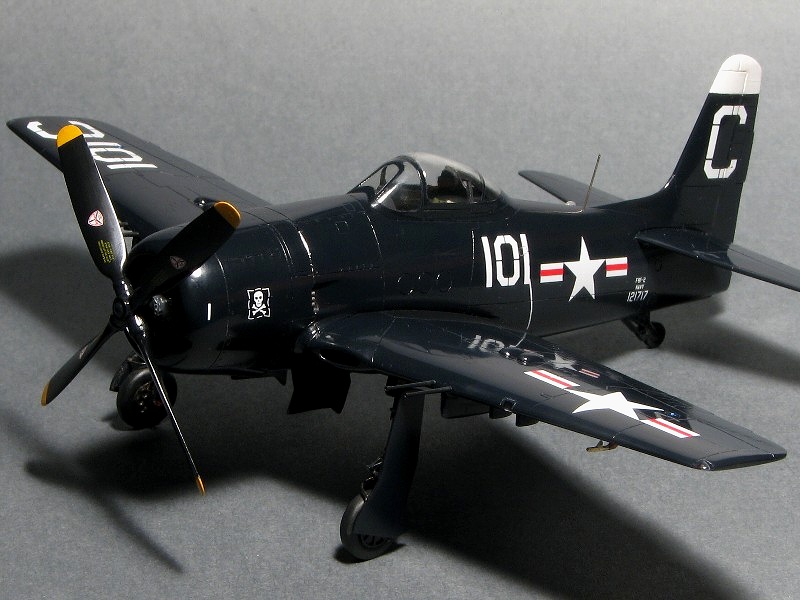
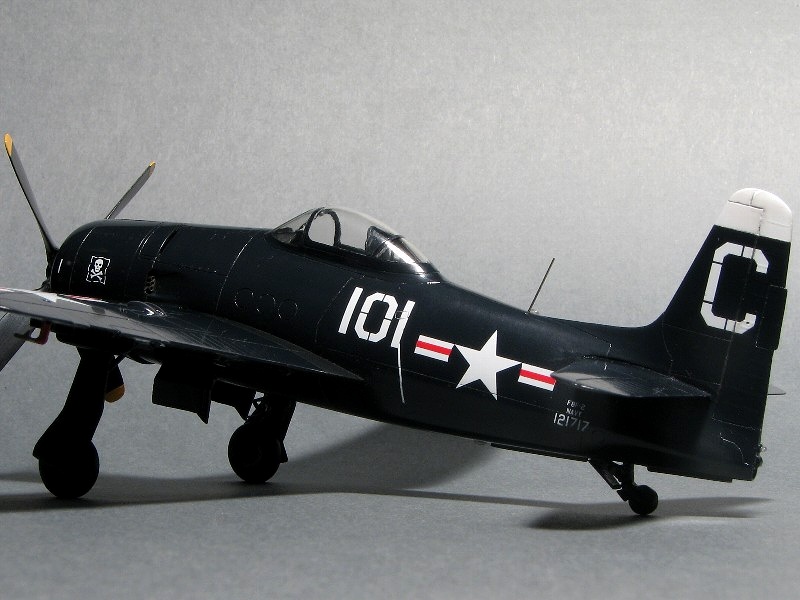
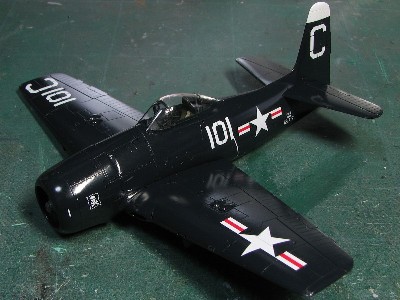 Most of markings except for the white tail fin tip were custom made dry decals. |
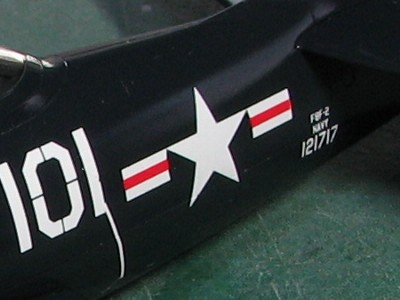 I found the font of BuNo was mistaken. But it was too late. I already ordered dry decals. |
|
|
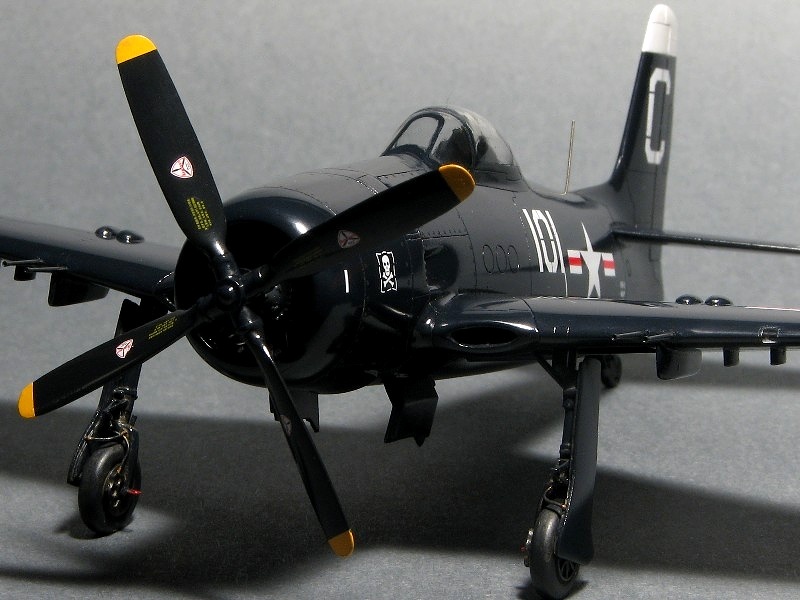
 The kit Aeroproducts propeller was basically good. I corrected the blade shape a little. |
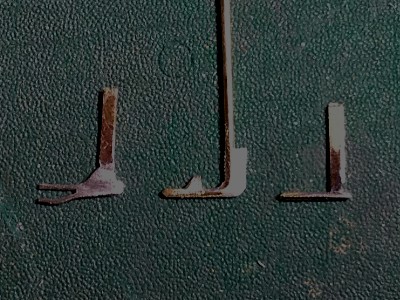
 These are original kit parts. Kit gear leg was longer by 2mm (0.08"). |
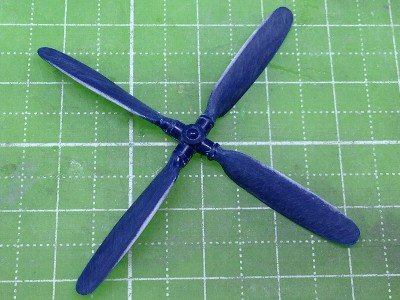 The propeller blade is corrected. |
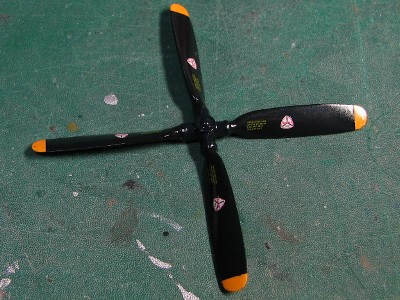 The logo of Aeroproducts is from Revell kit decal. |
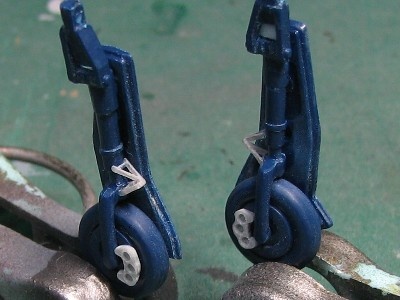 The torque link, brake pad were scrutched. |
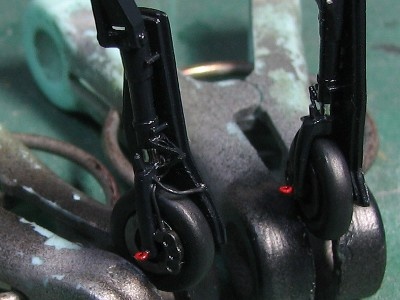 The brake line and some more details were added. |
 The exhaust is made of brass pipe. |
 The pitot tube was made of brass rod. |
|
|
 |
|
|
|
|
 |
 |
 |
|
|
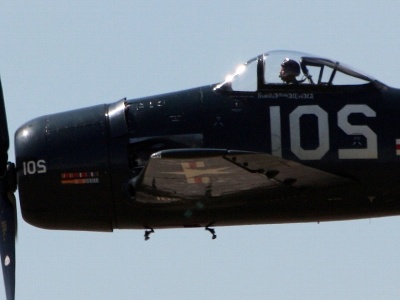
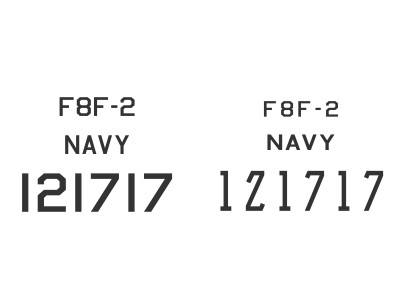 The left font is the standard Navy style. The right font is mostly seen on the factory finish aircraft. My model should be applied the right font. |
|
|
 |
|
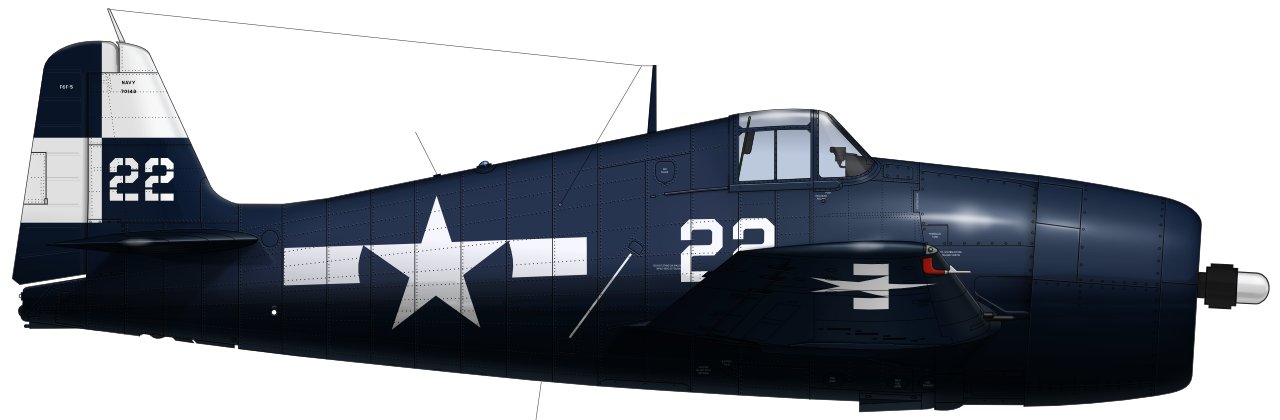
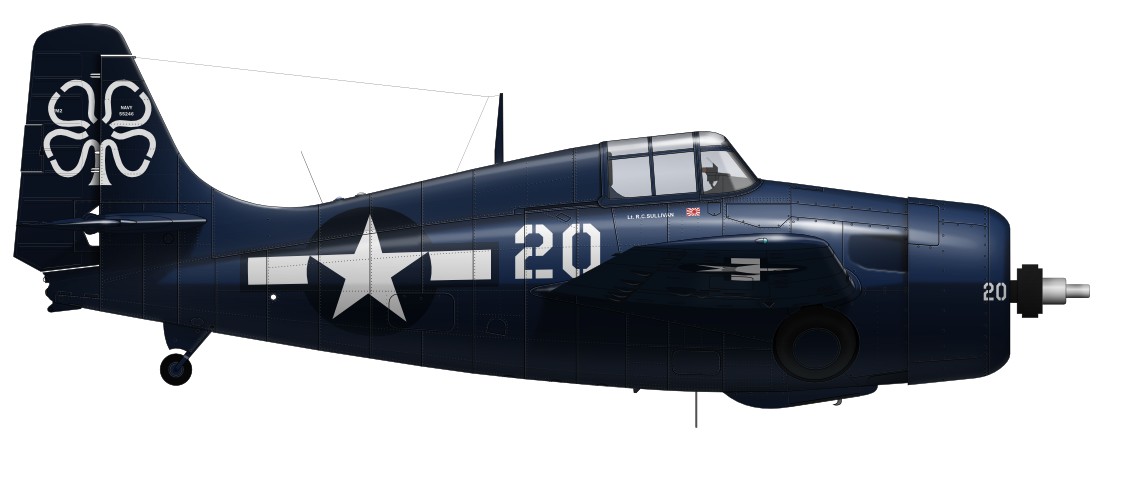
The next profiles are F6F-5 of USS Hornet VF-17 "Jolly Rogers" USS Hornet and FM-2 of VC-93 USS Petrof Bay. These profiles are illustrated in the same scales (incidentally, other color profiles such as P-51, Spitfire, Seafire are the same as well). What a big F6F is! |
 |
 |
|
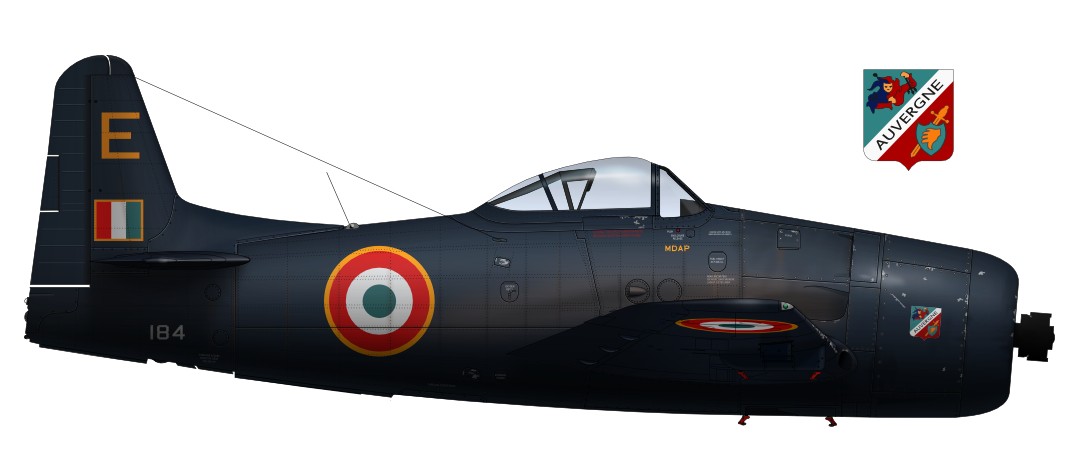
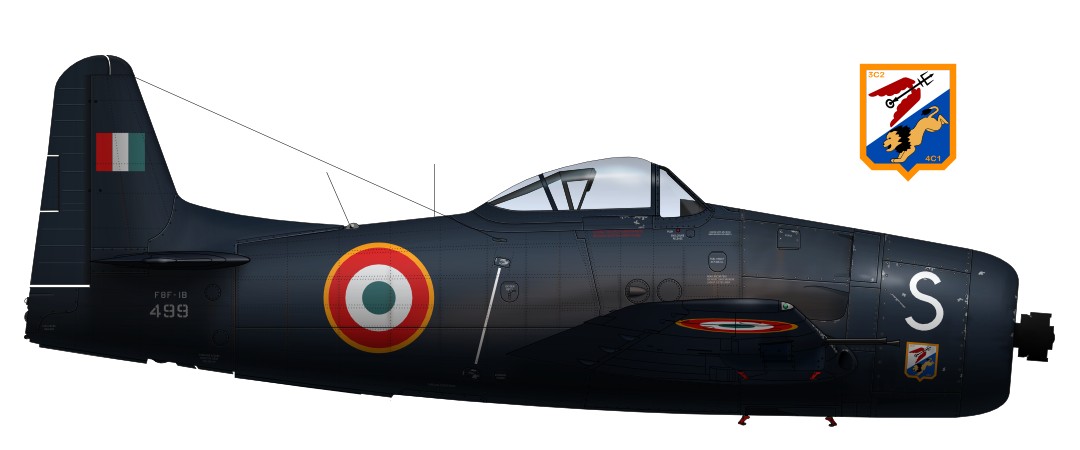
Following figures are F8F-1s of Armee de l'Air in Indochina. The first one is GC II/9 Auvergne. Most of Indochina F8F retrofit air outlets on both fuselage sides. The next is F8F-1B of GC I/22 Saintonge. The serial number is uncertain and referred to a certain web site. The third one is uncertain unit (it may be GC II/9). Armee de l'Air's F8Fs can be seen in frenchwings.net. |
 |
 |
 |
|
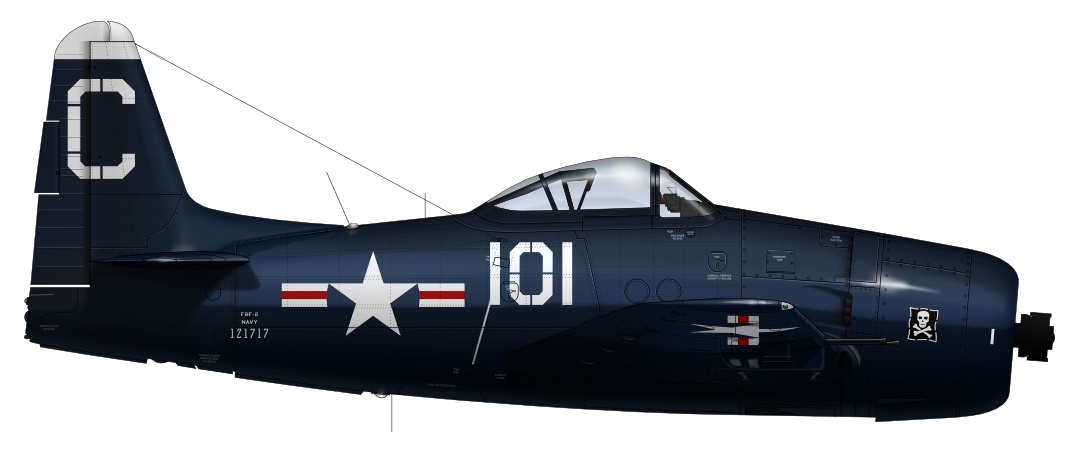
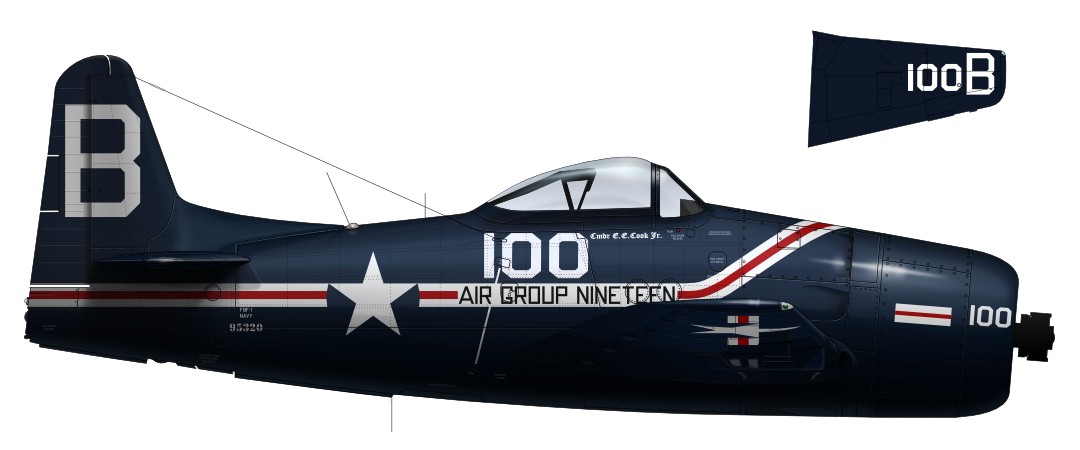
This may be the most colorful Bearcat in the front line units. F8F-1 BuNo 95320 of VF-19A Commander E.E.Cook Jr. The color of "AIR GROUP NINETEEN" is darker than red and it may be black or blue. The letter 100 on the wing is about 26", and the letter B on the wing is about 40". This BuNo is the third font. |
 |
|
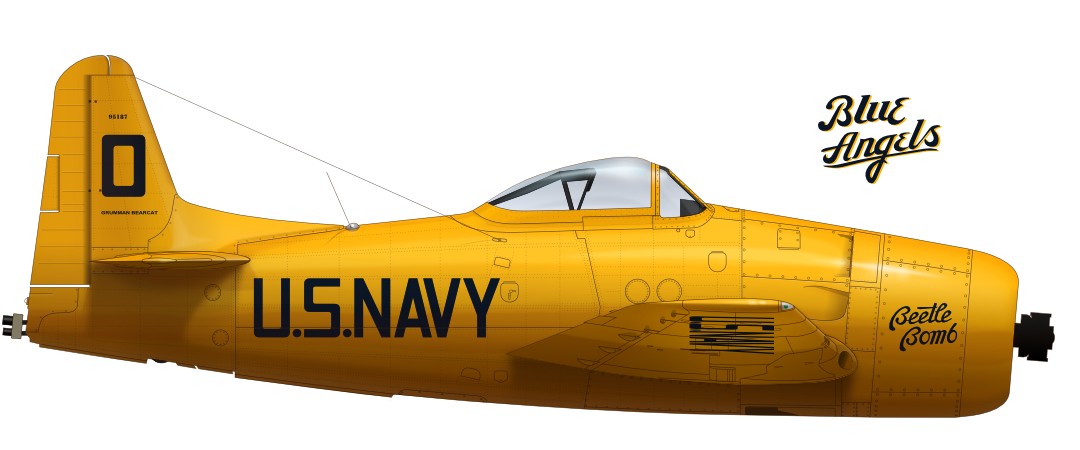
The special F8F-1 "Beetle Bomb" of Blue Angels BuNo 95187. Gross Yellow was a difficult color for computer illustrating for me. The usual black shadow made the color tone dull. So, it was changed to a brown shadow. The Black walkway was painted on the upper wing root. The letter of BLUE ANGELS was painted on both sides of the lower wing and not painted on the upper wing. The smoke generator was attached on the tail. |
 |
|
|
| 1 | The famous airplane of the world (new edition) No.94 Grumman F7F/F8F ISBN 4-89319-094-6 | Bunrindo |
| 2 | The famous airplane of the world (new edition) No.35 Grumman F4F,F6F,F8F | Bunrindo |
| 3 | The famous airplane of the world (old edition) No.78 Oct.1976 Grumman F8F Bearcat | Bunrindo |
| 4 | F8F Bearcat In Action Aircraft No.99 ISBN 0-89747-243-8 | Squadron/Signal Publications |
| 5 | VNAF : The South Vietnamese Air Force 1945-1975 ISBN 0-89747-193-8 | Squadron/Signal Publications |
| 6 | Blue Angels : U.S. Navy Flight Demonstation Teams 1928-1981 ISBN 0-89747-117-2 | Squadron/Signal Publications |
| 7 | Raceplane Tech 02 Bearcats & Corsairs ISBN 1-58007-035-3 | Specialty Press |
| 8 | Naval Fighter 80 Grumman F8F Bearcat ISBN 0-942612-80-9 | Ginter Books |

|