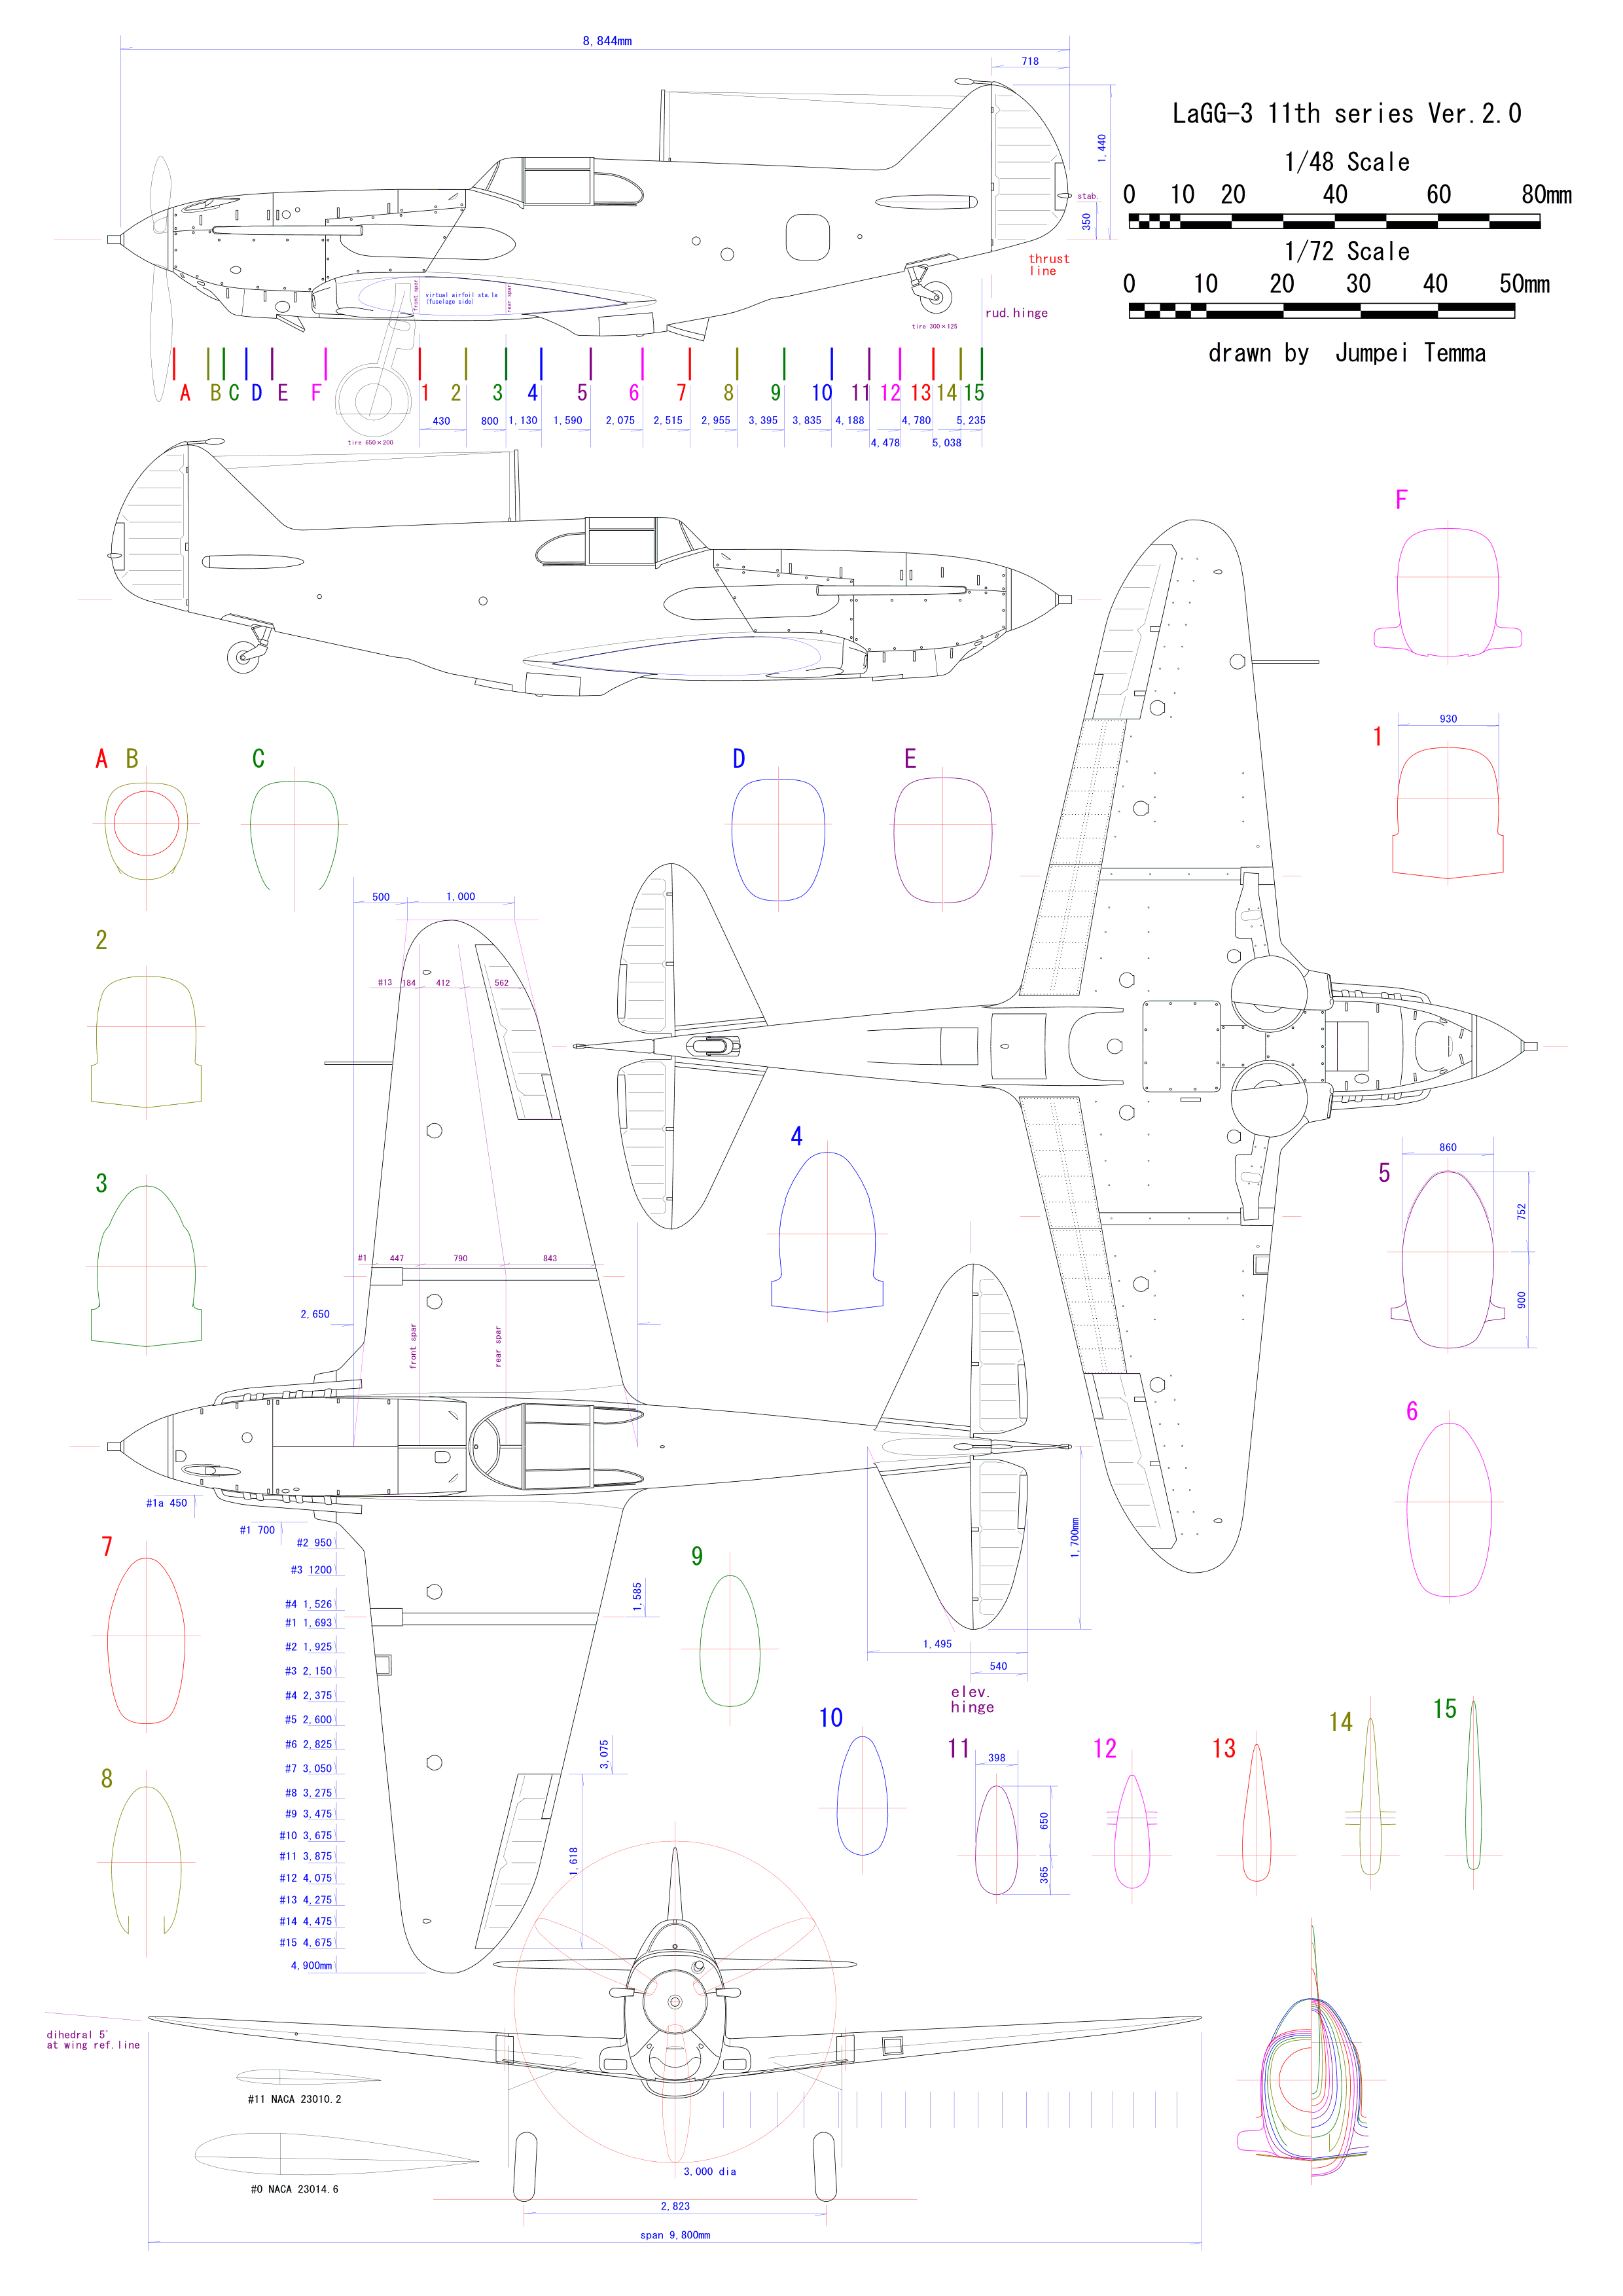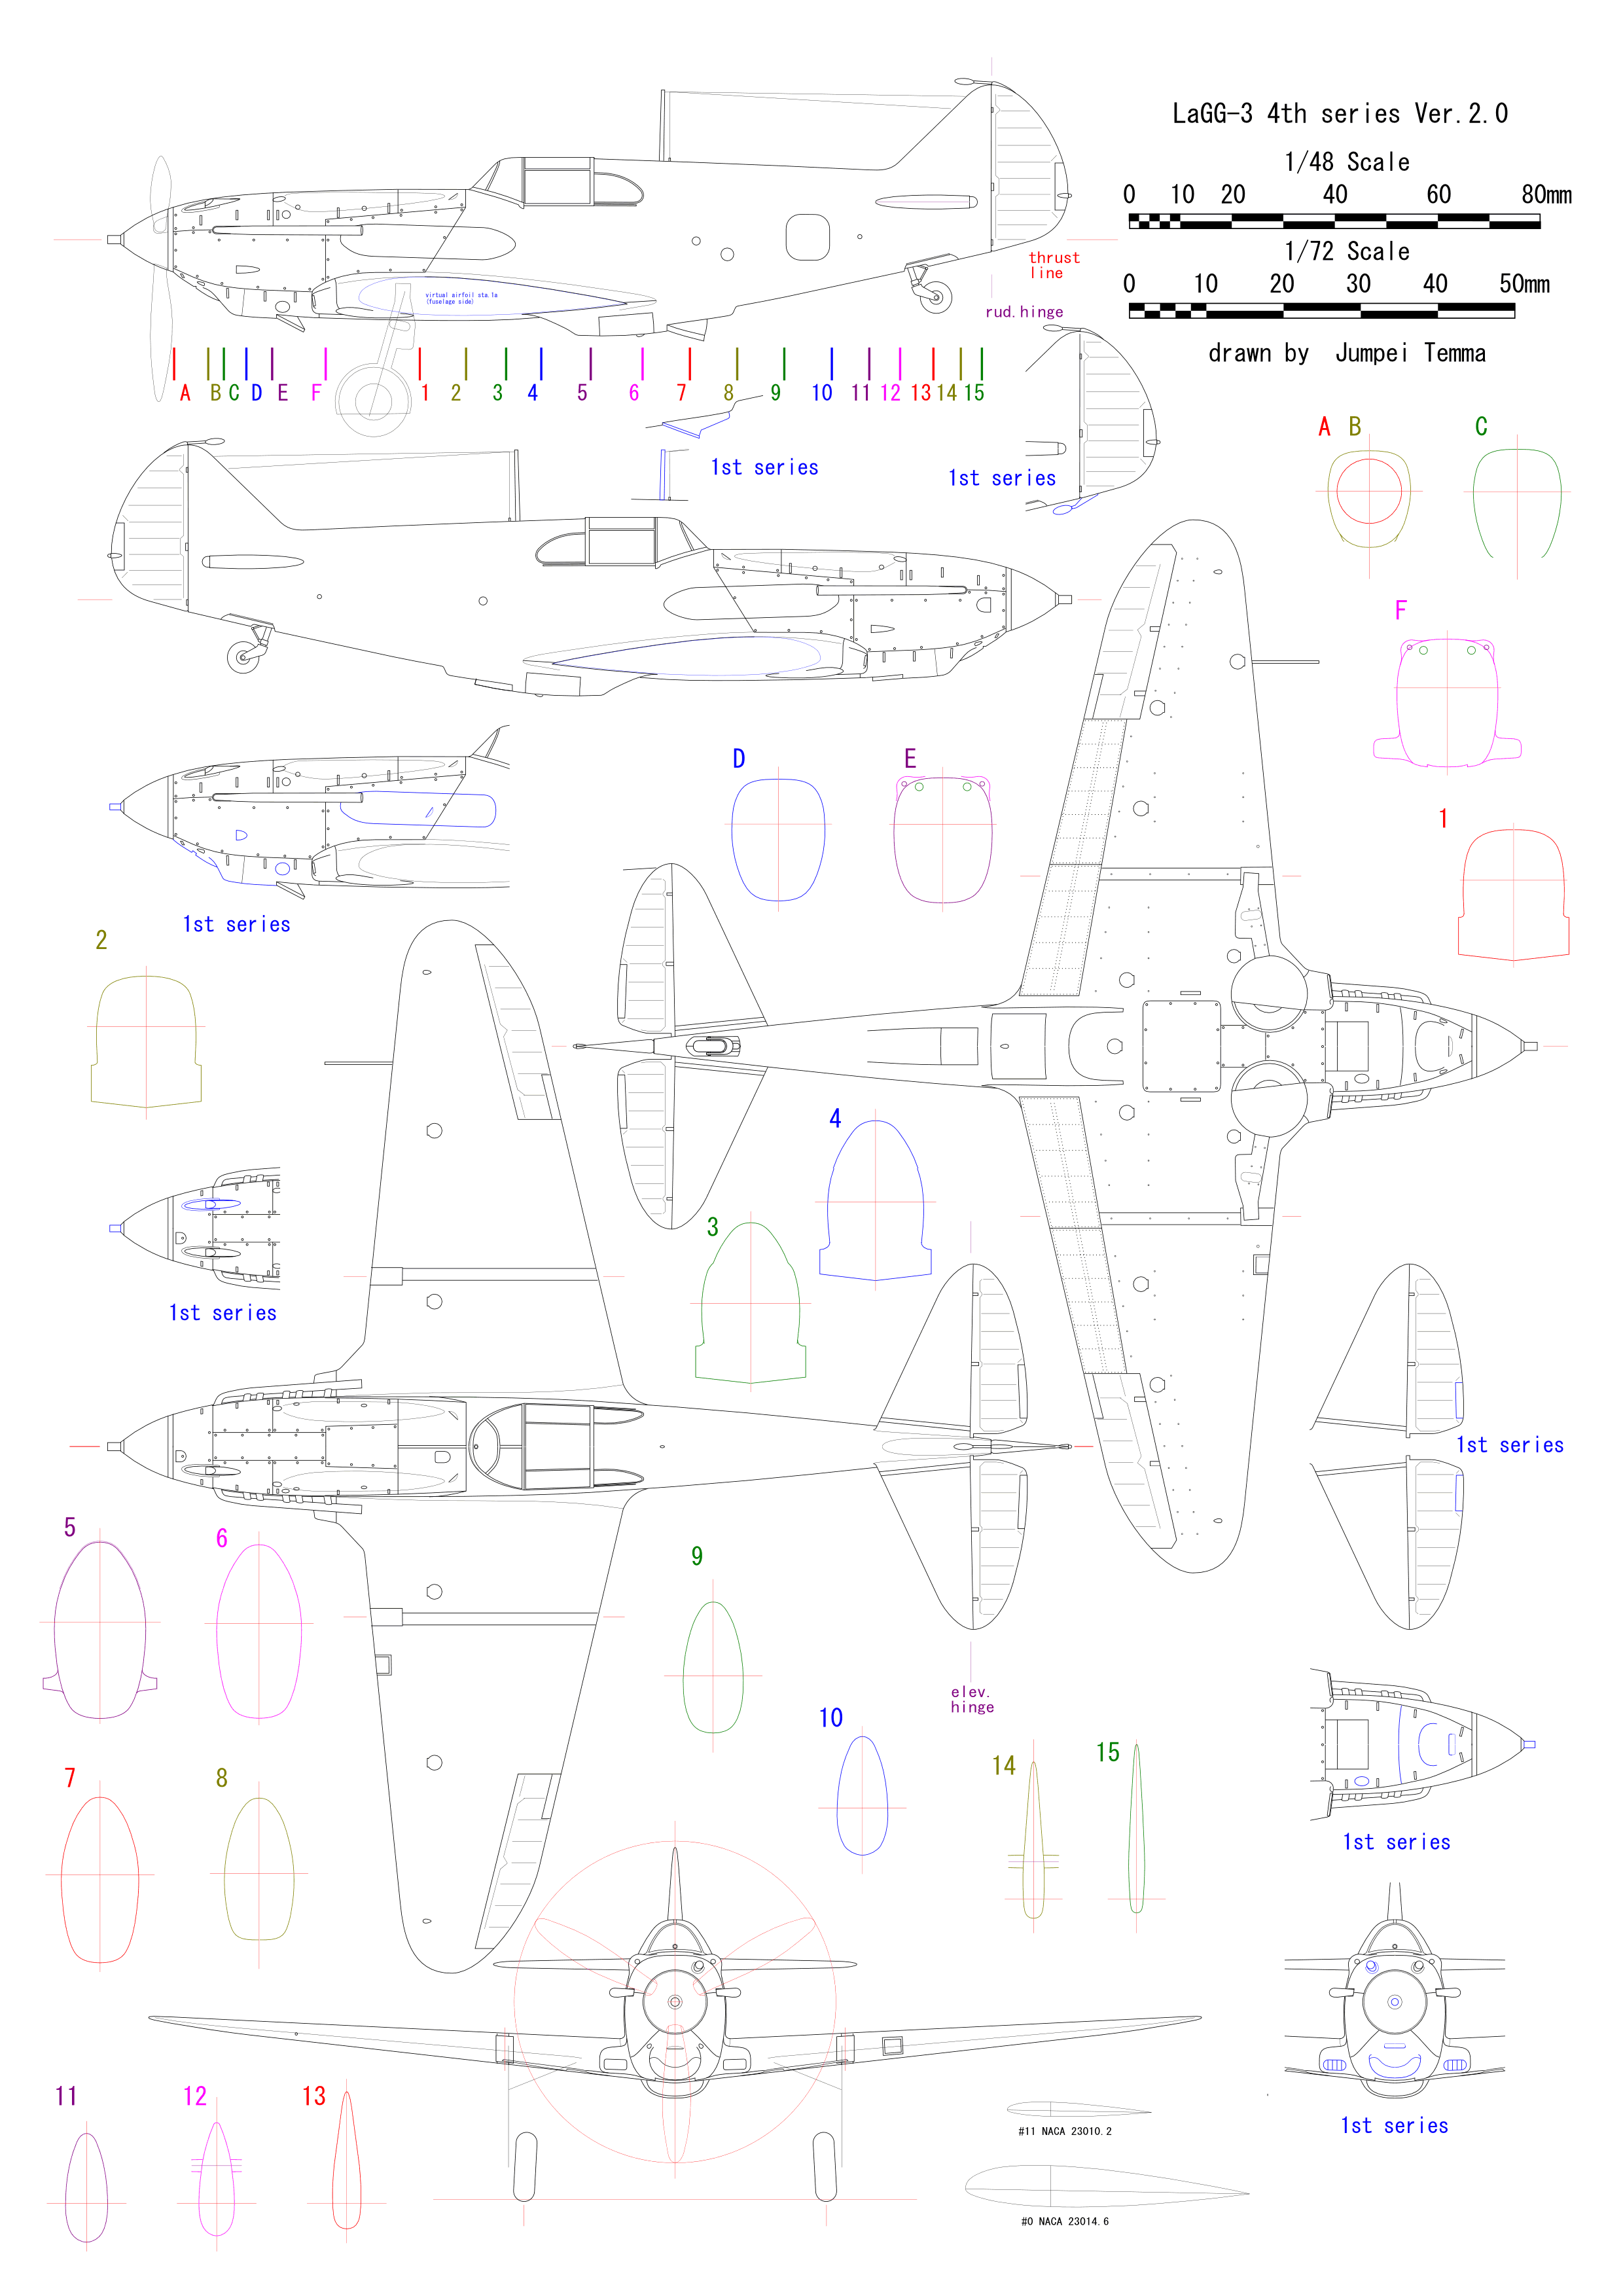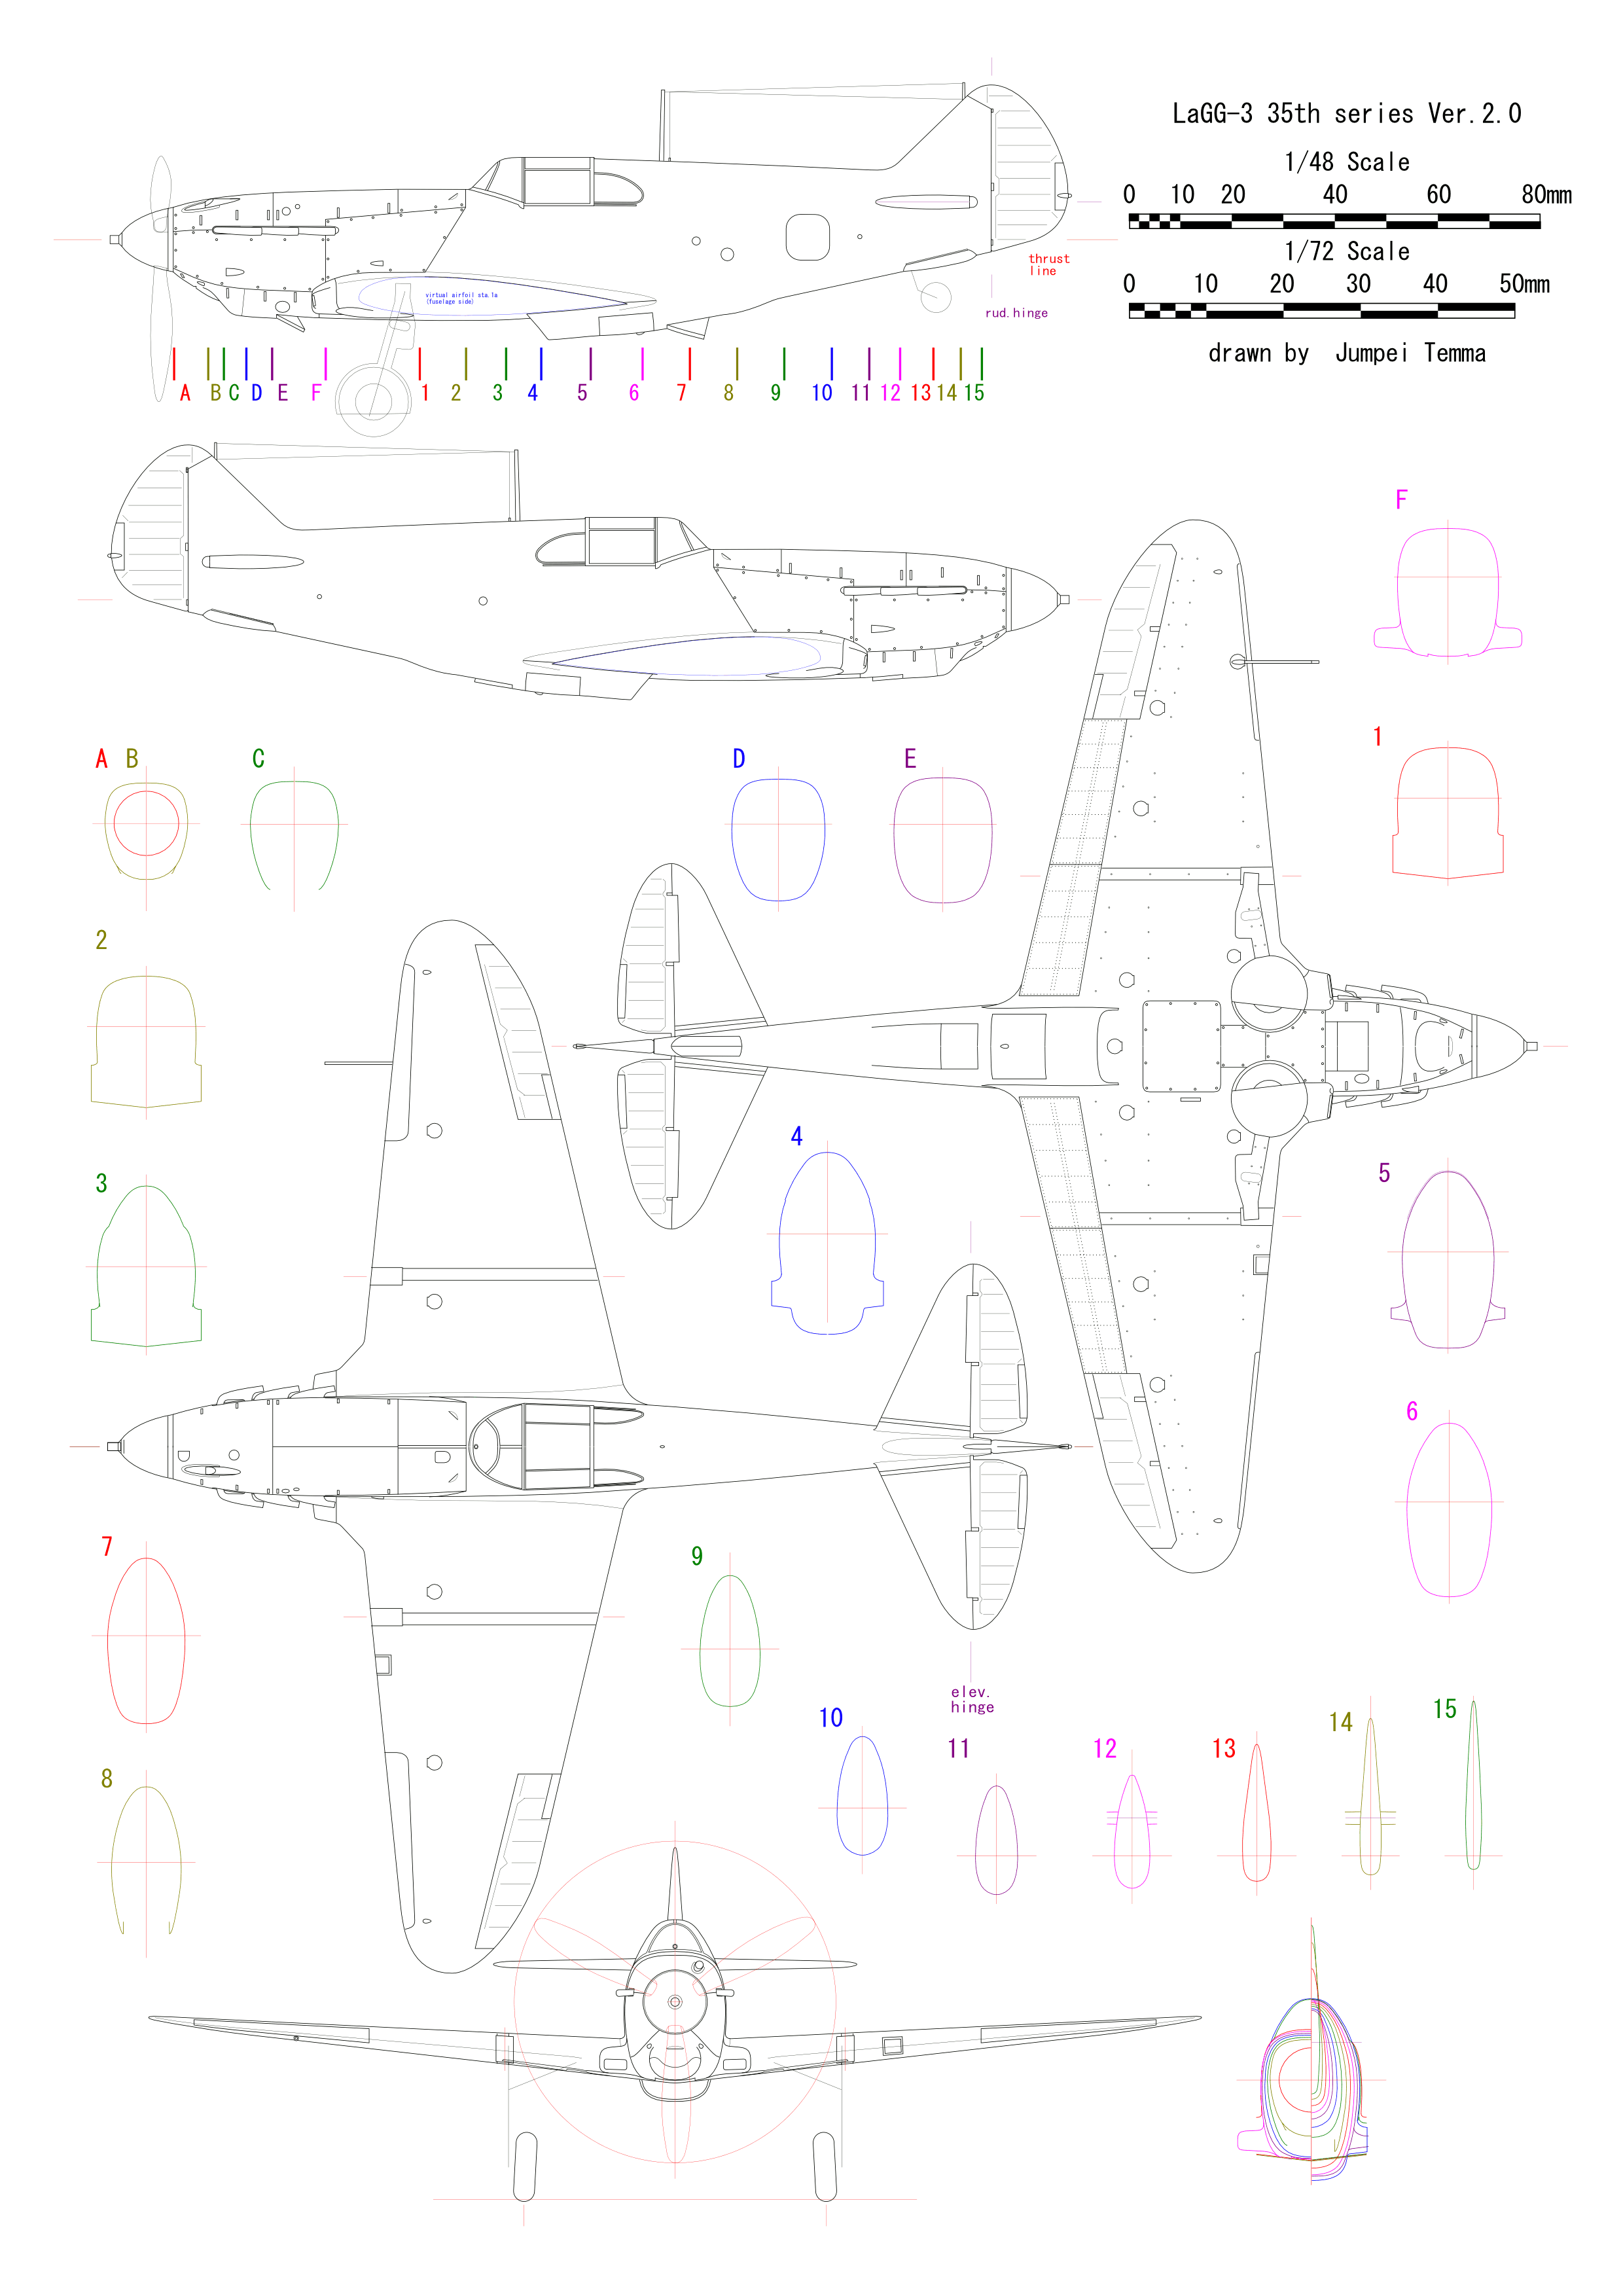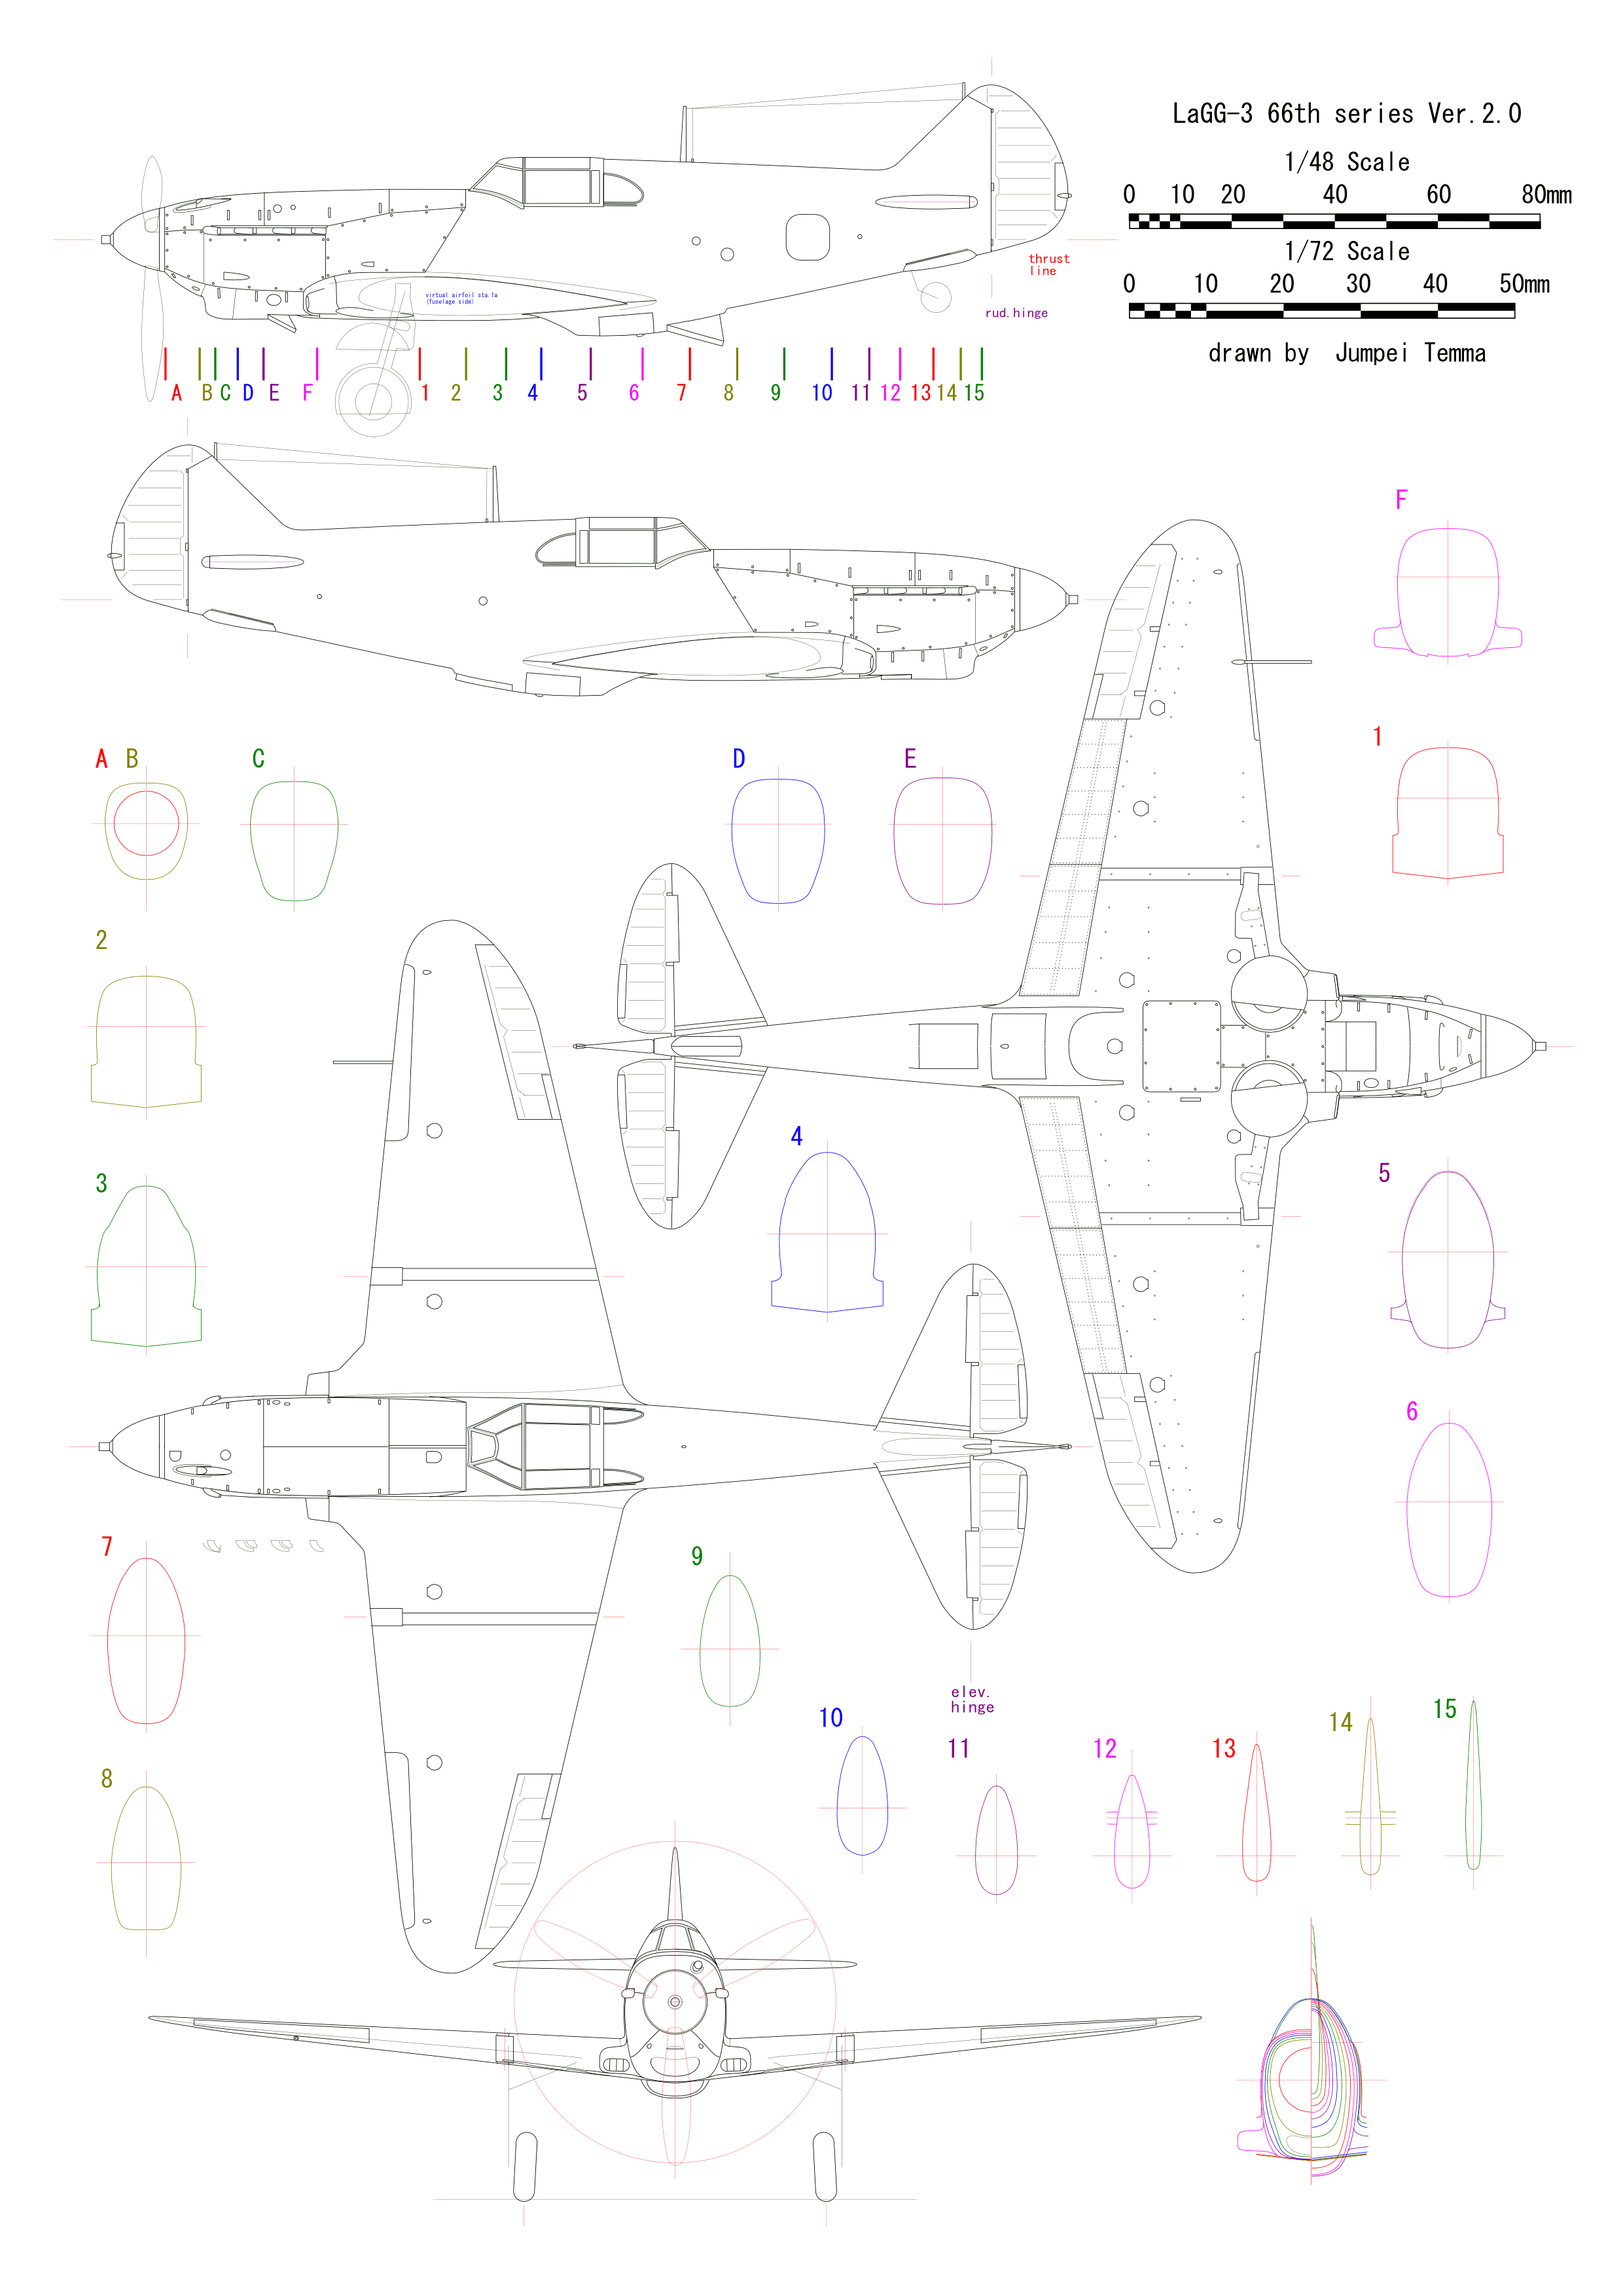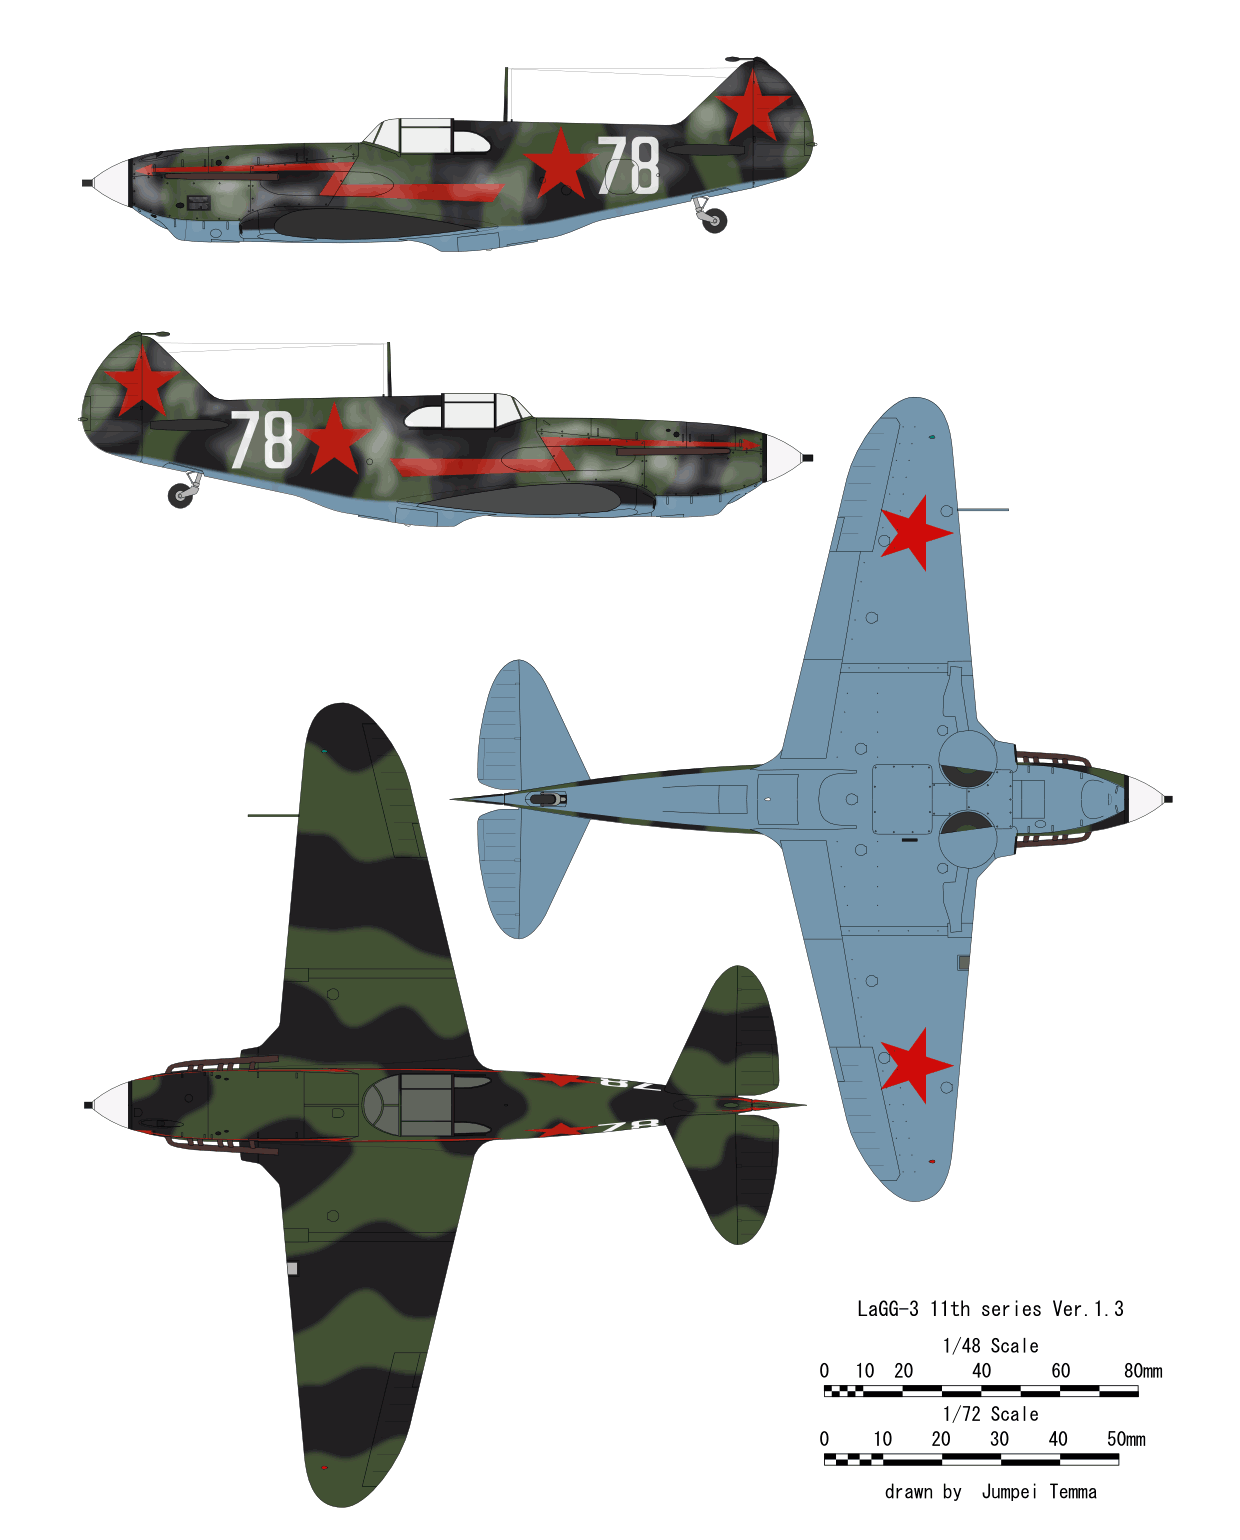
LaGG-3 11th series TOKO (Roden) 1/72
last update 8/27/2016
|
|
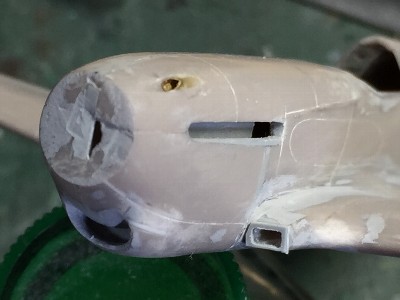
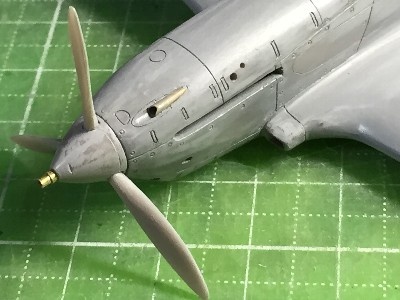
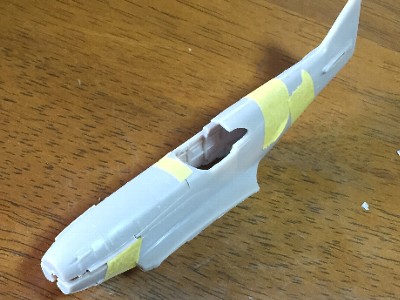 This is the kit original upper cowl. The nose is too narrow to include a Klimov M-105 engine. |
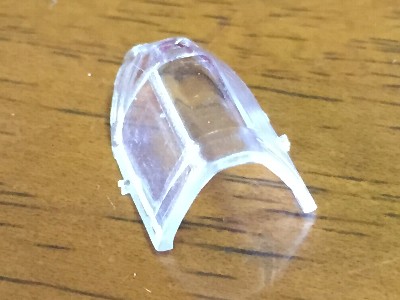 This is the kit original canopy. The cross section of the kit is angular. Actual aircraft is a roundish egg shape. |
 The rear quater window was replaced with kit canopy parts. The width of the fuselage was narrowed. |
 There is a large step (red arrow). |
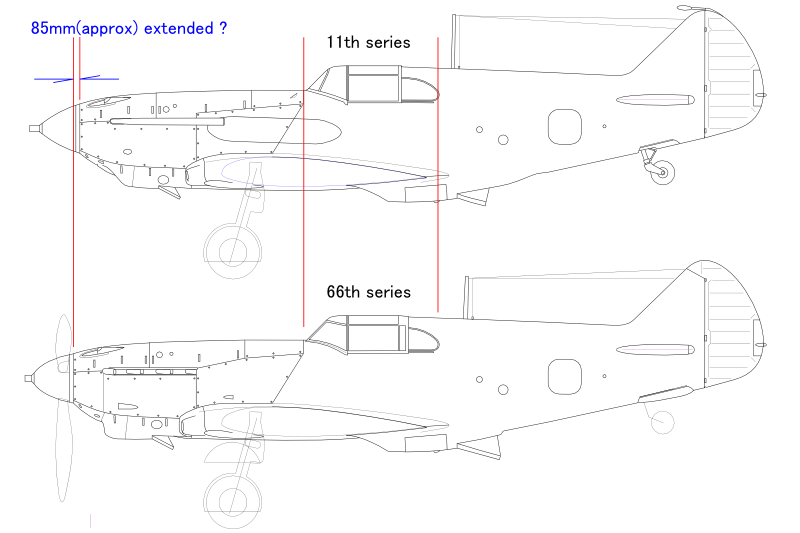
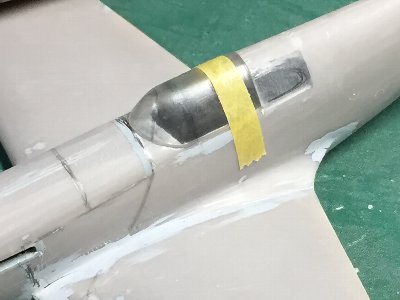
 The kit demarcation lines were adjusted and rejoined. The kit nose was a little shorter than my drawings. So, 1mm(0.04") plastic sheet was inserted. |
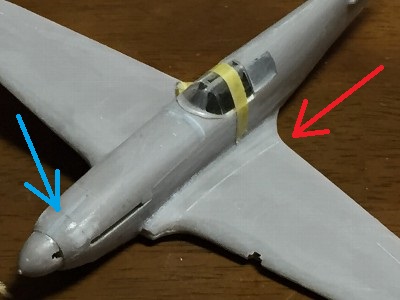 The center of the kit upper cowl was cut and a shim was inserted (blue arrow). The kit demarcation line of fillet and upper wing was not correct. Therefore, the wing upper surface bends at the incorrect straight line (red arrow). |
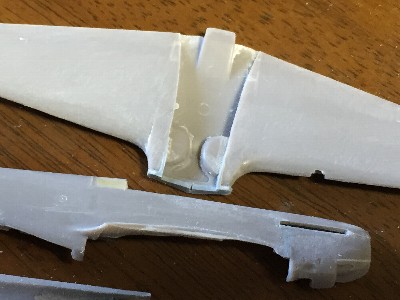 The kit fillet was cut at the correct line and glued to the wing. Then the wing surface was sanded straight. |
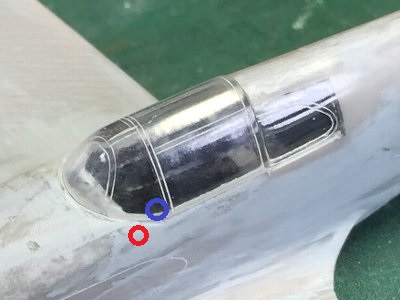
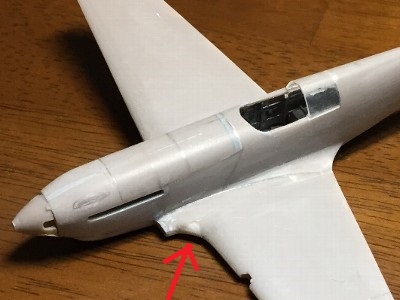 The wing and fuselage were joined. The plan shape of the leading edge corner was corrected (red arrow). |
|
I scratch-built the canopy with 0.4mm(0.016") transparent styrene sheet (Tamiya Plaban 0.4mm). The mold was made of chemical wood. Details of this method are described in my SB2C Helldiver article. Styrene sheet was heat formed to be 1mm (0.04") thick. For, tranparent styrene sheet shrink and grow thick when it is heated. Then both outside and inside surface was sanded to be 0.5mm(0.02") thick and adjusted its outline shape. |
 The scratch-built canopy (berow) and chemical wood mold (upper). |
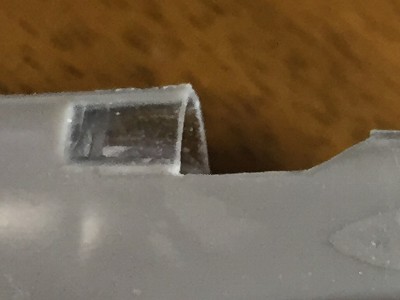
 Fitting of the fuselage was adjusted. |
 Canopy frames were engraved with 0.3mm(0.01") double needle. Then the surface was polished. |
 The rear quater window and some other panel lines were engraved with machine cut template. These cutting data are from my drawings. |
|
|
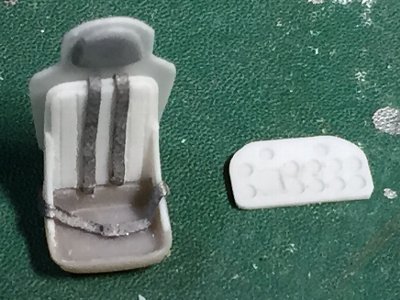 The pilot seat, bullet proof board and instrument panel were scratch-built. |
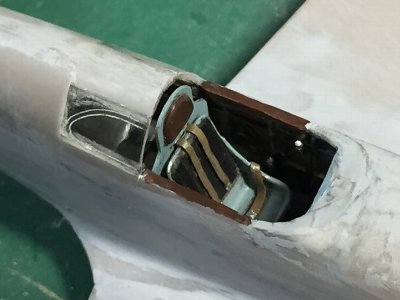 The seat were tentatively set in the cockpit. |
 The far-right is the kit seat back and bullet proof board. |
 Side walls might be painted silver. The seat and instrument panel were painted light gray. Upper edges of the cockpit were covered with leather. |
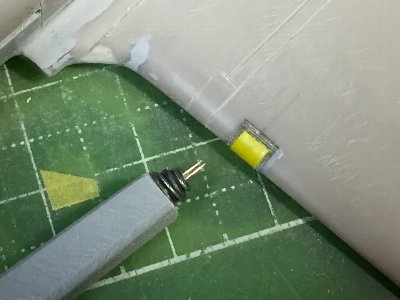 The landing light was heat formed transparent styrene sheet. The method was the same as the canopy. Panel lines were engraved with a double needle. |
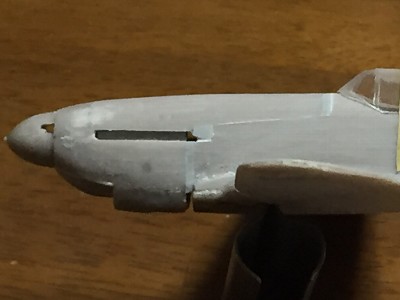
 The lip of the engine air-intake was replaced with plastic sheet. |
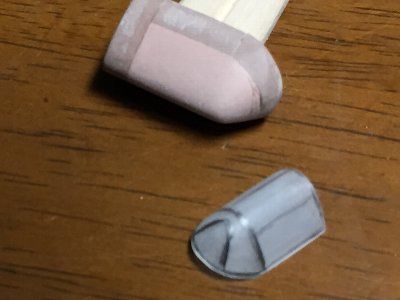
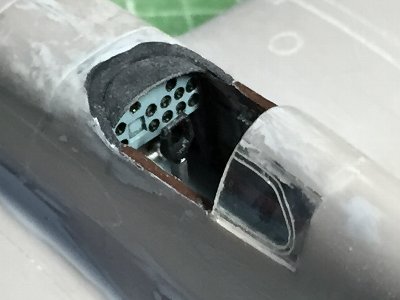
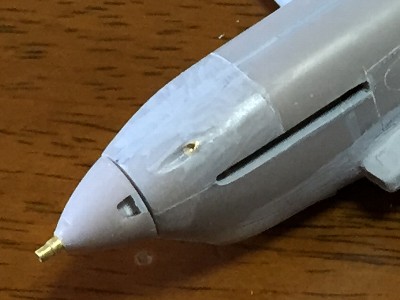 The kit spinner was good in its shape. The cannon muzzle was made of 0.9mm(0.035") and 1.1mm(0.043") brass pipes. |
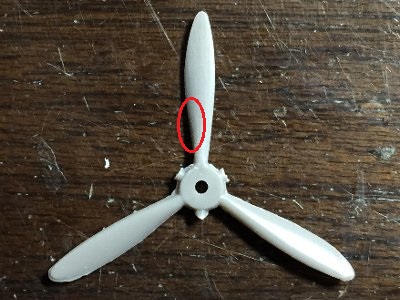 The upper blade was corrected its shape. The lower two blades were kit original. |
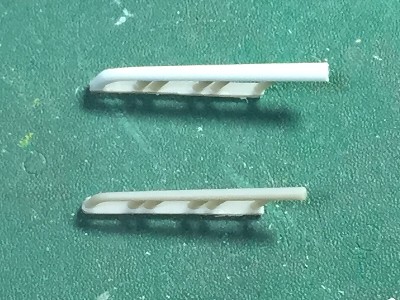
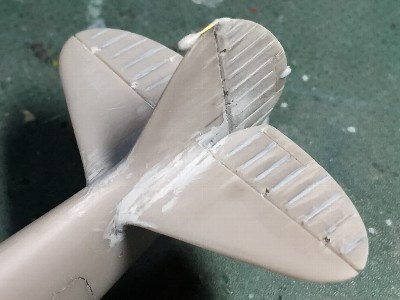 Ribs of control surfaces were depicted with surfacer. |
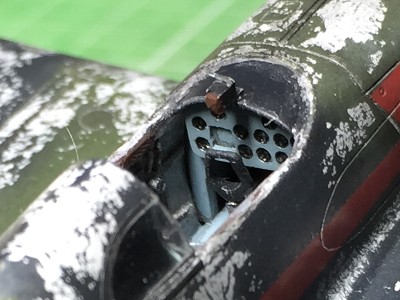
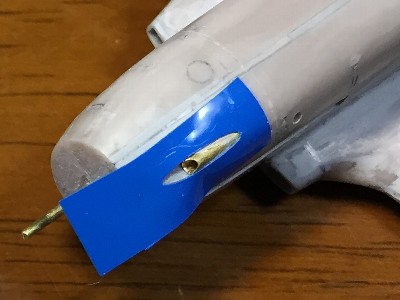 The 12.7mm gun muzzle were brass pipe. The edge was engraved with template. |
 The propeller, gun and cannon muzzle were finished. |
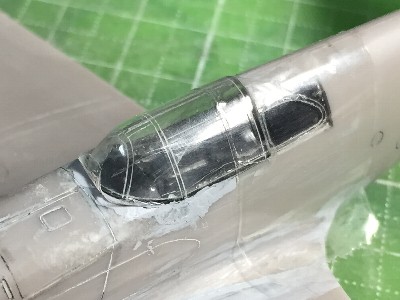 The gap between the canopy and fuselage was filled with surfacer. But the canopy was not glued on the fuselage in this stage. Scotch tape was attached on the canopy. |
|
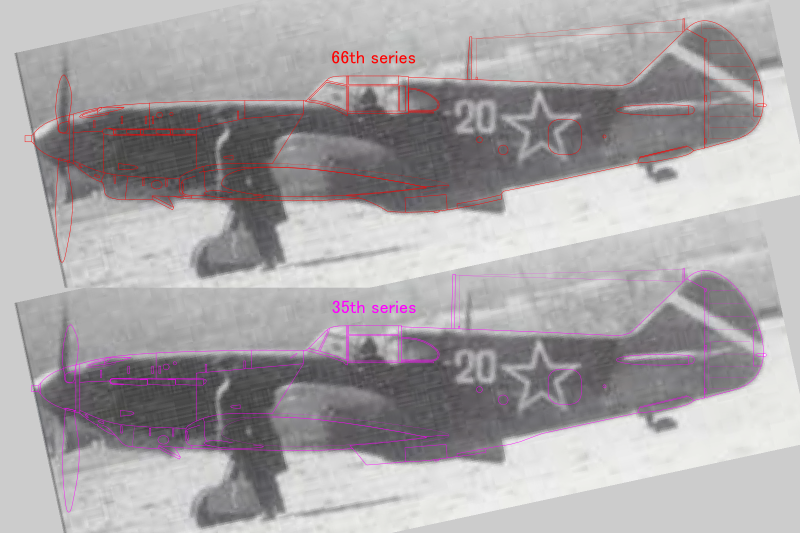
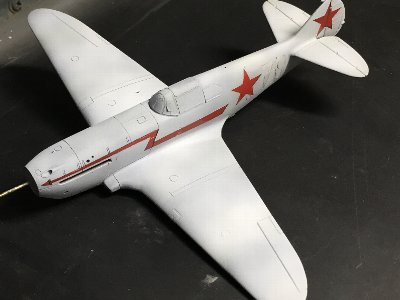
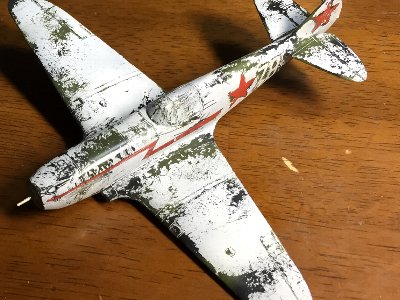
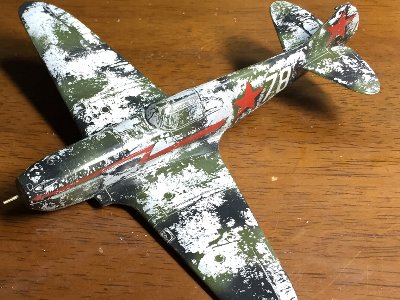
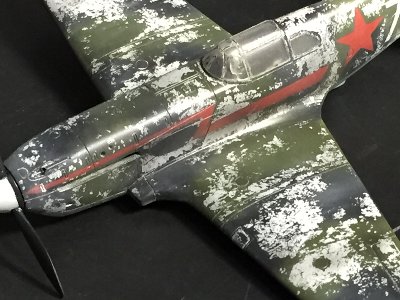
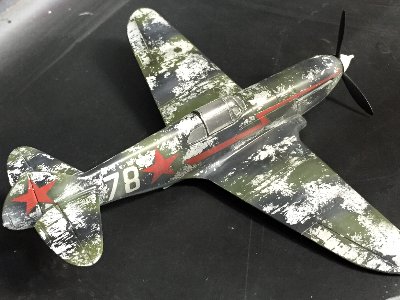
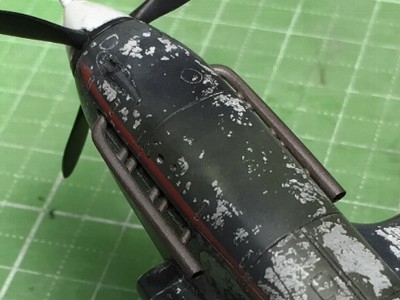
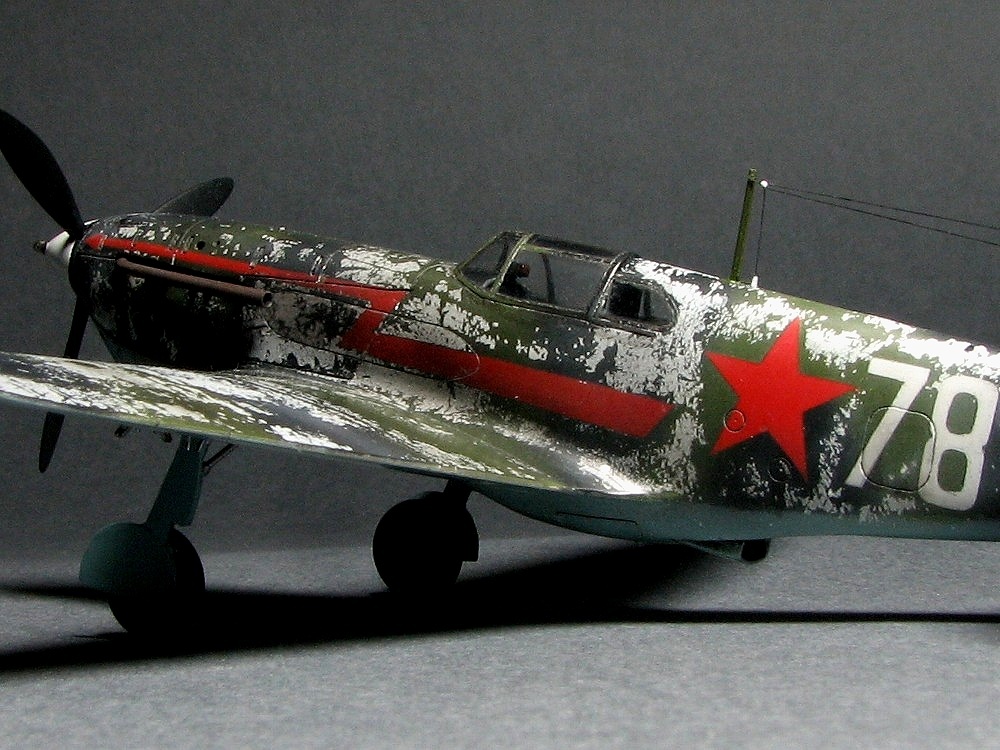
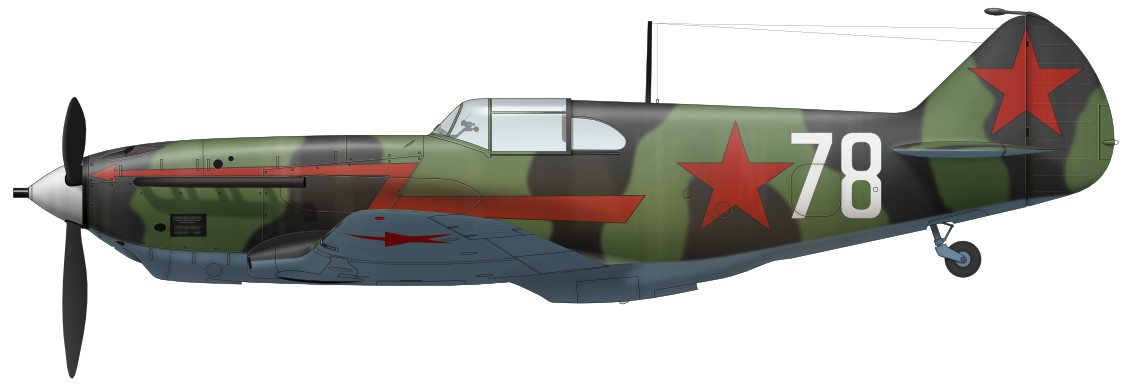
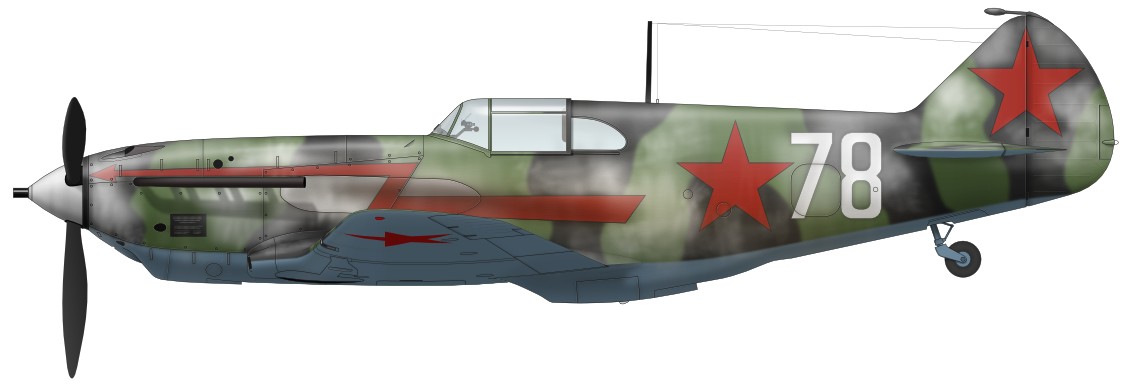
I chose Capt. Mironov's aircraft of the 609th IAP in early 1942. I refered the sovietwarplanes.com. The upper surface was washed-out winter camoufulage on the original scheme of AMT-6 Black and AMT-4 Camoufulage Green. The lower surface was AMT-7 Grayish Blue. The pattern of Black/Green scheme is unclear. So I presumed as common pattern of early LaGG-3s. Only starboard nose seemed to be repainted. The color of individual markings were followed to above web site.
|
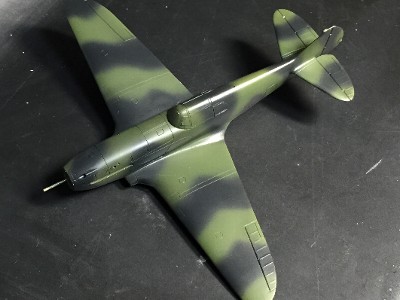 Dark Gray was 7:3 of black and white. Dark Green was #303 FS34102. |
 The demarcation line was Bru-tack. |
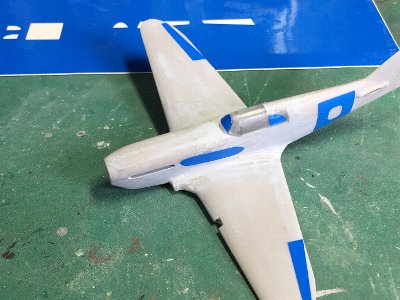
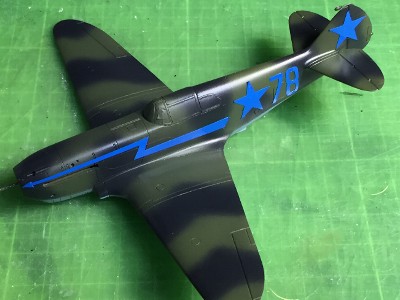 Red stars, fuselage arrows and aircraft numbers were painted with machine cut masking sheet. This picture shows its positioning. |
 Markings were finished. |
|
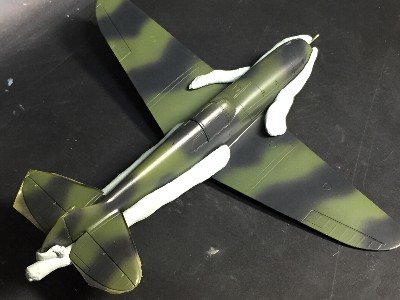
Silicone barrier is a mold release agent applied on a silicone casting mold for resin casting. Before applying silicone barrie, gross clear paint was sprayed on the semi-flat model surface. The gloss surface makes peeling works easy. Then Mr. Silicone Barrier of GSI Creos was sprayed with an airbrush. Delution was not needed. The thickness of silicone barrier layer relates easiness of peeling, so I recommend you to test before real part. Next, X2 Flat White of Tamiya Aclyric Paint was sprayed unevenly. Thick paint isn't so good. After drying, White paint was peeled with a tooth brudh and water. Fine brushes of oil painting and cotton swabs were used as well. A metal spatula and tweezers were used for pinpoint peeling such as panel line edges. After peeling, semi-flat clear was over sprayed for coating. |
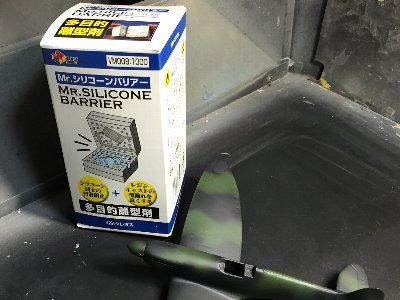 These are Mr. Silicone Barrier and the testbed. The starboard side was clear coated and port side was flat. |
 Tamiya Aclyric Paint was deluted with its dedicated thinner and sprayed. The port side was thinly and the starboard side was thickly sprayed. |
 White paint was peeled with tooth brush and water. Note that the results of port and starboard were different. |
 As a test, paint was peeled moreover with cotton swabs and alcohol. |
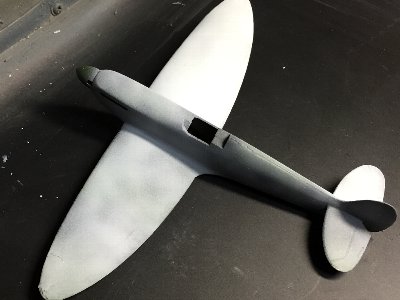
 Clear paint was sprayed and markings were masked. Then Silicone Barrier was sprayed. |
 X2 Flat White was randomly over sprayed. |
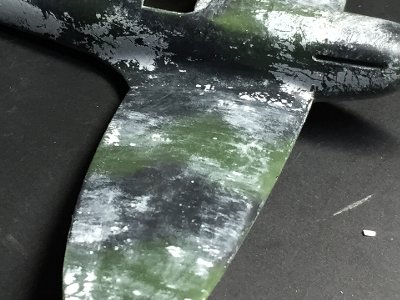
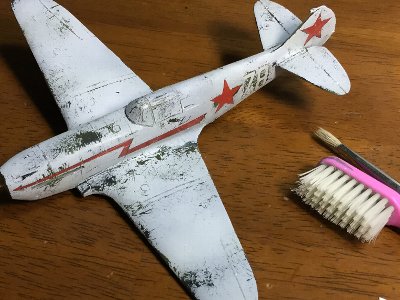 First, white paint was peeled a little with a tooth brush and fine oilpaint brush. This state is not bad as normal condition of winter camoufulage, is it? |
 Moreover. |
 Moreover. You can quit anytime you like. |
 I quitted peeling at this state. |
 Very thin white was partially sprayed to reduce the contrast. |
 |
|
|
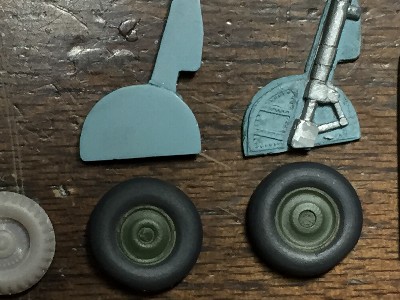
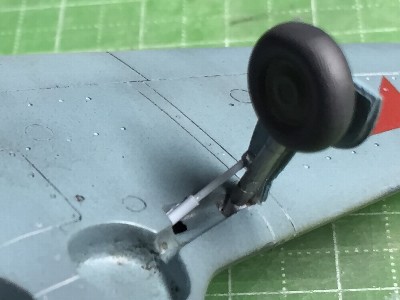
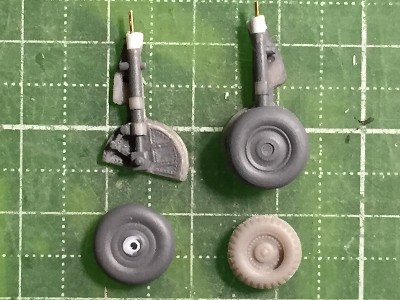 The gear leg and cover were kit parts. Tires were from Airfix's Defiant. They were too small for Defiant to use. The lower right is the kit tire. It is rather small. |
 I didn't have solid evidence of colors for the landing gear. Some early Lagg-3s might have the smooth tread tire. But I don't know as for Capt. Mironov's aircraft. |
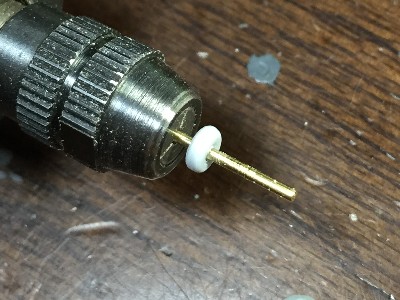 I lost the kit tail gear. So it was scrach-built with sprue. |
 Finished. |
 The kit gear bay was narrow, it was extended by 2mm(0.08") outward. The actuator was made of sprue. |
 After gear parts were glued, I noticed that the angle of the lower hem of the lert and right wheel cover were different. Well, I ignored them. |
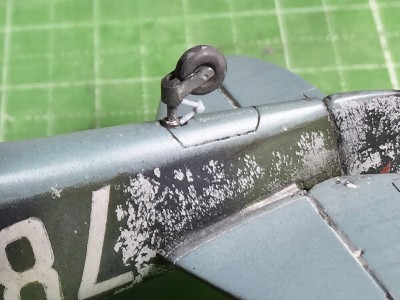
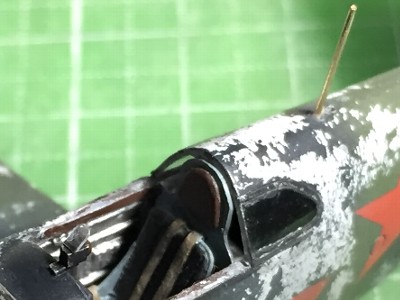 The antenna mast and gun sight were added. |
 The gunsight was scratch-built. |
 The exhaust pipe was made of 1.5mm(0.06") styrene rod. The lower is the kit part. |
 Small pipes and base were from the kit. |
|
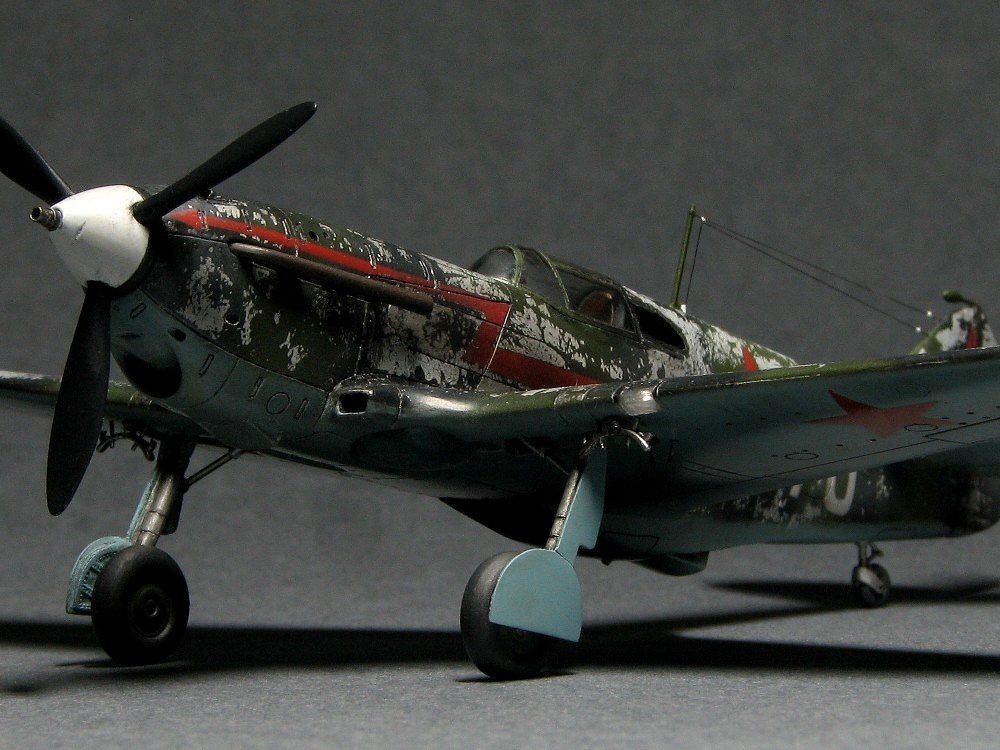
The last contsruction work was the drop tank racks from Tamiya Il-2 parts. I was satisfied with the corrected engine cowl and canopy. The silicone barrier weathering method was satisfiable as well. I think its impact is dramatic and eye-catching. Meanfhile the work is unexpectedly easy. And this method may be widely applicable for example flaking camouflage paint of Japanese late ww2 aircraft. |
|
LaGG-3 (11th Series) flown by Capt. V.P.Mironov of 609th Fighter Aviation Regiment, in early 1942, Kandalaksha ,Murmanskaya Oblast, USSR. |
 |
 |
 |
|
|
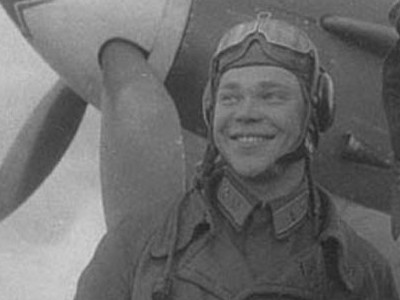 Capt. Mironov's portrait from "sovietwarplanes.com" |
|
|
|
The next one is the same situation as my model in early 1942. |
|
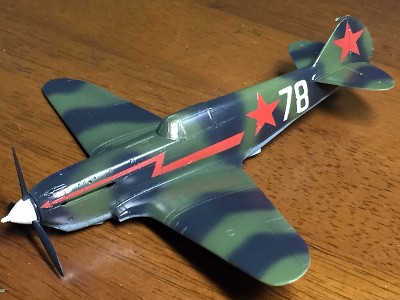
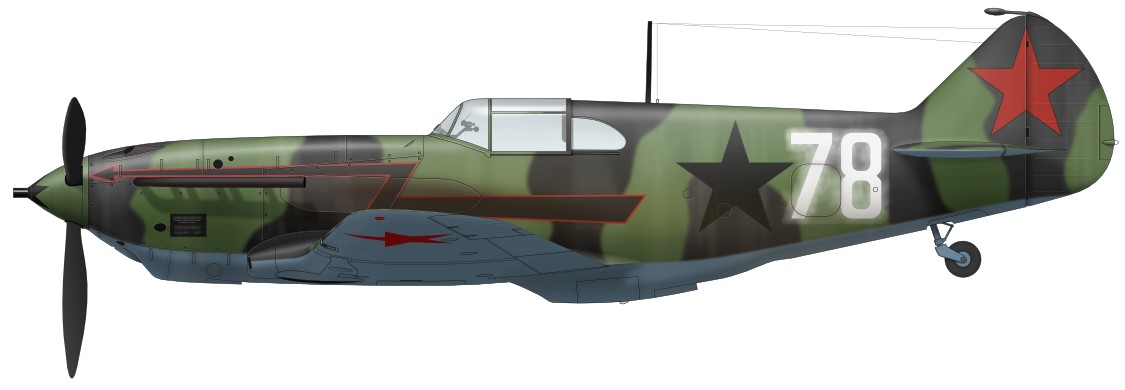
The third one is after spring of 1942. According to the "sovietwarplanes.com", I painted the fuselage star and arrow in black. |
|