P-40L (Hasegawa 1/48)
since 19/sep/2005
|
|
|
|
**Introduction |
|
I constructed "Merlin Powered Warhawk" P-40L flown by Lt Col Gordon H Austin CO of the 325th FG the "Checker Tails" from two boxes of brand-new Hasegawa P-40E and P-40N. Kit review First of all, I'd review the kits. When I check a kit, I don't trust drawings someone drew but use photos of the actual aircraft. The most reliable "drawing" is here. |
 This is Hasegawa E's fuselage + Hasegawa N's tail fin. |
 This is Mouve P-40M. |
|
I was surprised when I compared the fuselage of Hasegawa N with Mouve M. The positions of the cockpit of both kits are different with each other about 3mm. So I checked the photos of the above-mentioned Airliners.net. And I found the correct answer was the middle of both. (But I didn't correct it.) |
 Please compare the position of each cockpit. |
|
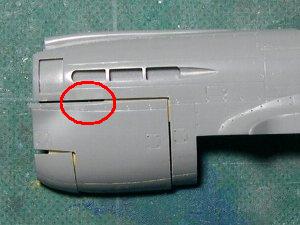
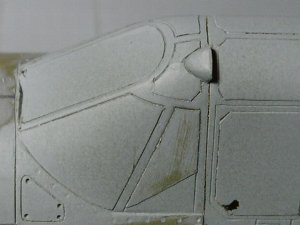
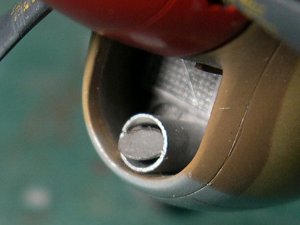
The jaw of Hasegawa kit is almost perfect. Only one minor weak point is the gully behind the intake (the red circle) is exaggerated a little. You'd better fill putty or something. On the other hand, the gully of Mouve is appropriate. As for the jaw, I think that Mouve is excellent as the entire impression. |
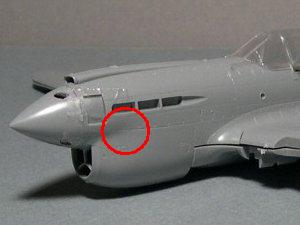 Hasegawa. |
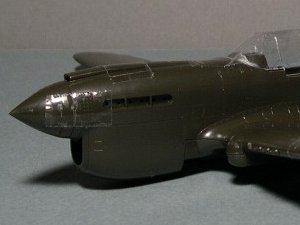 I think the jaw of Mouve kit is better than Hasegawa. |
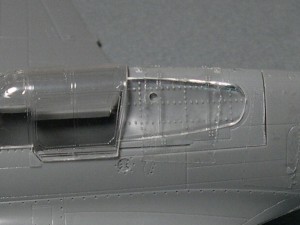 The division line of the rear window part is not good. It's very hard to glue neatly. |
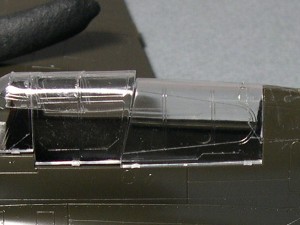 The Mouve is good. But the shape of the rear window is not good. |
 The plane shape of the extended tail is correct. |
 Mouve made a mistake. |
|
The wing sections of P-40 are NACA2115(root) and NACA2209(end). Then the wing thickness ratio is 15% to 9%. As compared with this data, Hasegawa kit is correct and Mouve kit is a little thick. |
**Construction |
|
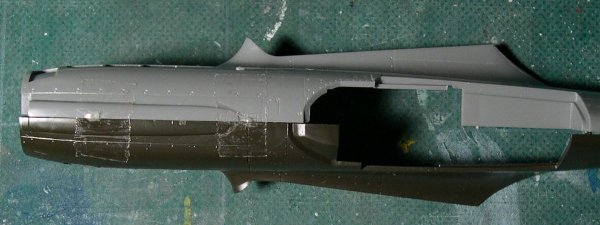
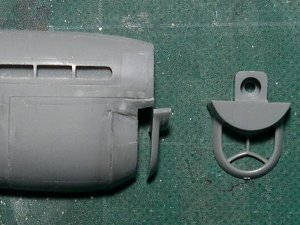
The nose The nose was combined with two fuselage parts. I cut out the jaw from one fuselage and glued another fuselage. This method is easier and more beautiful finish than using putty. Fitting of two parts were adjusted on the photocopy of the photograph |
 These parts were cut from two kit by etching saw. The portion of the red circle was stretched outside. |
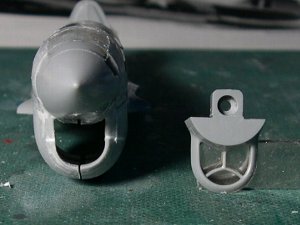
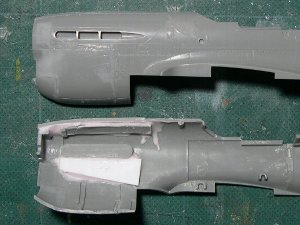 Each part was glued together. The upper intake was removed. The white plastic plates are for reinforcements. |
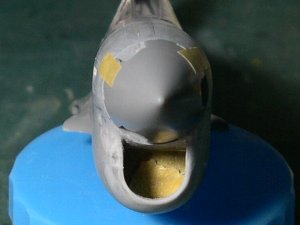
 At this time, the intake was too wide. |
 So I cut the tip of the intake, adjusted the width and glued again. |
 The lip was from kit part. But it was necessary to adjust the width and height. |
 The width and height of the Merlin powered type intake are different from the Allison type. |
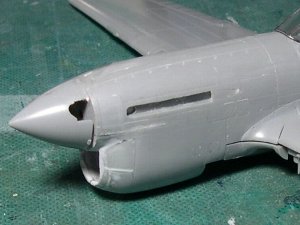 The position of the exhaust slit was moved forward. The distance from the spinner end to the exhaust was 7mm. |
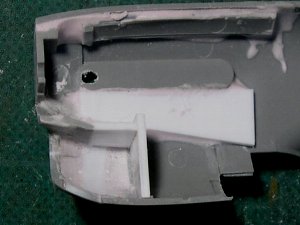 The inside of the jaw was glued to each fuselage part. |
|
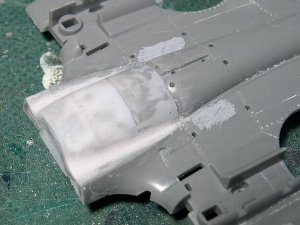
The rear window I replaced the rear window with Mouve's clear part. The width of Mouve's part was narrower than Hasegawa's fuselage. So I cut the clear part at the top and inserted plastic plate. |
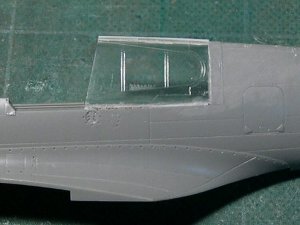 The rear window was from the Mouve's kit. I reinforced with plastic plate from the inside. |
 The window shape of Mouve is not correct. So I sanded and deleted the engraved line. |
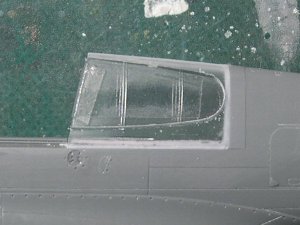 I engraved the window. I used the part of Hasegawa's window as the template. |
 And I also engraved other panel lines and polished. |
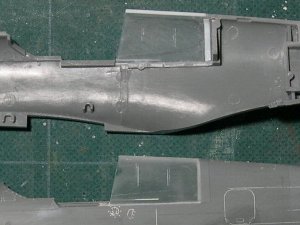
 The inside parts of the window were from Hasegawa E. These parts were temporary fixed to the fuselage and were glued together. |
 After glued together, the part was sanded and adjusted fitting. |
|
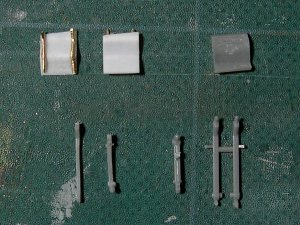
The cockpit I constructed the type F cockpit. There are photos of F's cockpit in D&S. The instrument panel of the type F is almost same as the type E. The left side-wall is same too. But the right side is a little different. So I depicted it using some parts from Tamiya P-47. Lt Col Austin's A/C didn't have the head pad on the bulletproof plate. So I buried the hole. |
 These are the Hasegawa original parts. |
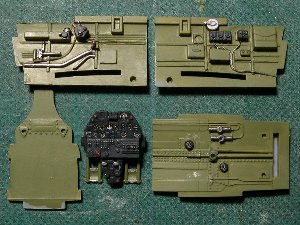 These are corrected cockpit of type F/L. |
 The throttle was cut out from another side wall part. |
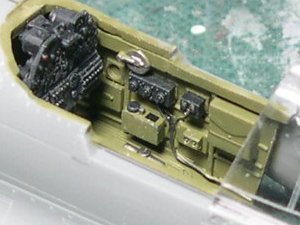 Black boxes on the right side were from Tamiya P-47. |
|
Ultracast Fine resin parts arrived from Ultracast. It is highly appreciate that parts are sent by airmail and arrive in a short term. |
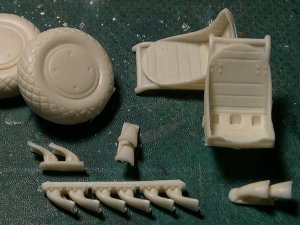 Especially, the seat and exhaust pipes are very fine. I recommend. |
|
The radiator and oil-cooler The radiator and oil-cooler of the Merlin type and the Allison type were completely different. Then I scratch-built them. |
 The flame of the oil cooler was made of 0.2mm plastic sheet. |
 The radiator was made from junk parts and the oil-cooler were from Hasegawa kit. |
|
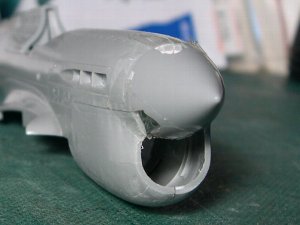
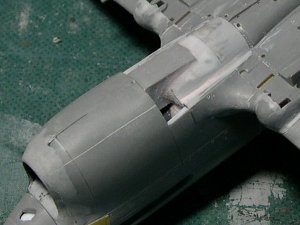
The jaw After glued the left and right fuselages, I carefully sanded the jaw to be correct shape. The cross section shape of the jaws of Allison type and Merlin type are different. Allison's jaw is rather triangular shape because it wraps up three cylinders of radiator and oil-coolers. On the other hand, Merlin's jaw is rounder shape. Hasegawa's Allison jaw is similar to Merlin. So if you construct this kit as type E or N, you'd better sand to shape up the lower quarter side of the jaw. I calculated the size of the air-intake from photos of the actual aircrafts. As the result of the calculation, the width of the intake was 10mm and the height was 9mm(from the bottom of the spinner end). I put CA glue and plastic powder on the lip and sanded to depict the correct shape of the intake lip. |
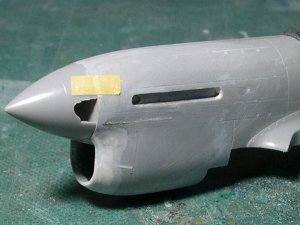 I put CA glue and plastic powder onto the lip and sanded to depict the correct shape of the intake lip. |
 The upper end of the lip slightly curves to the outside and forward. This is a one of a point of difference from the Allison type. |
 I use the etching saw for engraving. The guide on the curved surface was masking tape (piling up two or three pieces). |
|
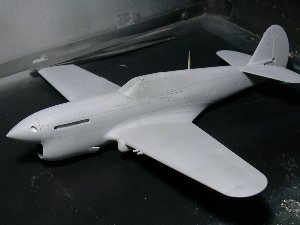
Then the reconstruction work of the nose was finished. Please compare the jaw with AMTECH and Hobbycraft. |
|
The wing |
 I put CA glue putty on the lower fuselage. |
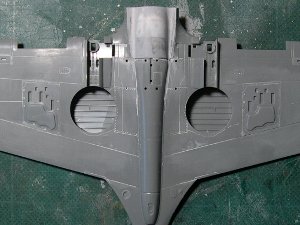 Hasegawa made a mistake on the wheel well. The angle and number of stringers aren't correct. |
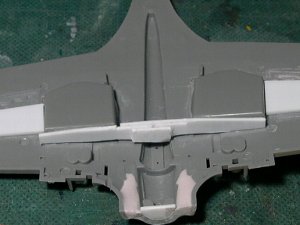 I corrected the dihedral. The correct dihedral of P-40 is 6 degree (center of the spar). Two wheel wells were tied with plastic plate to hold correct dihedral. |
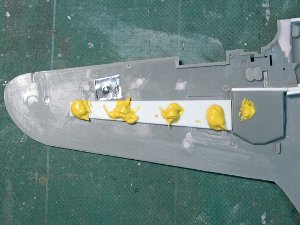 Before gluing upper and lower wing parts, I put some putty between two wing parts for the reinforcement. |
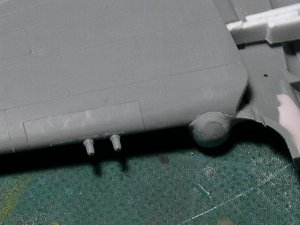 P-40L has only four machine guns. I delete the outer gun. But some P-40L were retrofitted two more guns. I put some putty to the edge of the bulge for the main gear. |
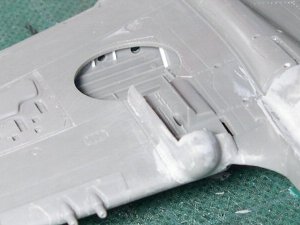 Some details were added on the wheel well. |
|
Was P-40 a second-class aircraft? I wondered P-40 was a really second-class aircraft? So I compared specs with rival aircrafts of P-40. These data were quoted from "The famous aircraft of the world, Bunrindo". |
| P-40F | P-40E | P-51A | P-51B | Zero21 | Bf109G-6 | Spitfire V | P-47D-25 | |
| Empty Wt(kg) | 2,808 | 2,686 | 2,918 | 2,971 | 1,745 | 2,268 | 2,230 | 4,536 |
| Gross Wt(kg) | 3,679 | 3,607 | 3,901 | ---- | 2,421 | ---- | 3,010 | 6,623 |
| Wing Area(m2) | 21.92 | 21.92 | 21.65 | 21.65 | 22.44 | 16.20 | 22.48 | 27.87 |
| Engine(hp) | V-1650-1 1,300 | V-1710-39 1,150 | V-1710-81 1,200 | V-1650-3 1,450 | Sakae 12 950 | DB605A-1 1,475 | Merlin45 1,470 | P&W R2800 2,000 |
| High Speed(km/h,m) | 586 6,100 | 570 4,570 | 628 6,100 | 708 9,100 | 533 4,550 | 630 6,600 | 594 5,944 | 690 9,140 |
| Time to Climb(m/min) | 4,570/7.6 =601 | 4,570/7.6 =601 | 6,000/9.1 =659 | 6,100/6.9 =884 | 6,000/7.5 =805 | *5,000/5.2 =962 | 6,096/5.6 =1,089 | 6,100/8.5 =718 |
| Range(Normal)(km) | 603 | 563 | 1,207 | 2,092 | ? | * 705 | 756 | 949 |
| Range(Max)(km) | 2,655 | 1,530 | 2,011 | 3,347 | more than 3,000 | --- | 1,826 | 1,658 |
|
*Time to Climb of Bf109 is F-2,Range(Normal) is F-4. *Time to Climb of P-40E and F are the same, so either may be a mistake. According to this comparison table, P-40 was certainly heavy, but was equal to P-51. P-51B was greatly transformed by Merlin engine. But P-40F was not greatly transformed by Merlin. Why? Packerd Merlin V-1730-3 of P-51B had the two-stage two-speed supercharger, but Packerd Merlin V-1730-1 for P-40F/L had the single-stage two-speed supercharger. |
|
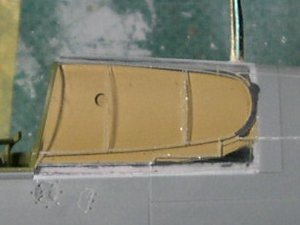
Reproduction of ribs |
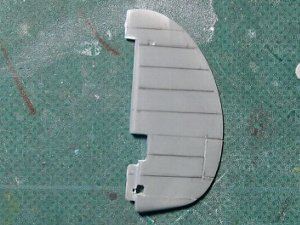 I sanded the kit rib and depict rib tapes with surfacer. First, I drew the line with a pencil. |
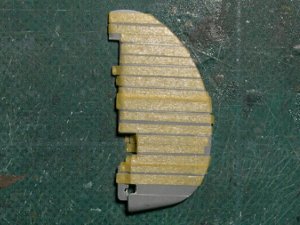 Next, I masked along pencil lines. Then, surfacer was painted thickly. |
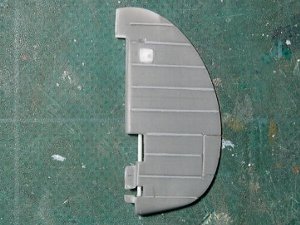 Finished. The small access panel was made of 0.1mm plastic sheet. |
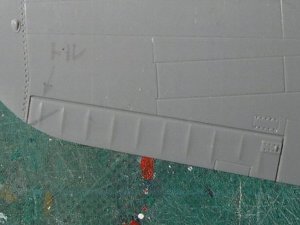 The most outside rib of the kit is a mistake. It should be diagonal. (But I forgot it.) |
|
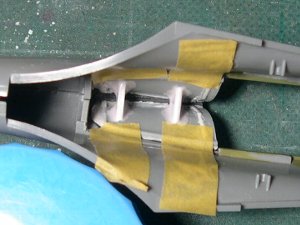
Assembly of the cockpit |
 The inside part of the rear window was glued with the fuselage. The antenna pole was glued at this time so as not to make the window dirty with CA glue. |
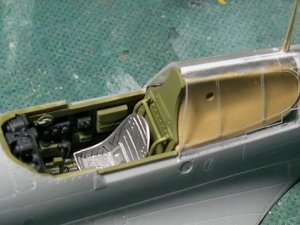 The cockpit floor and the bulkhead were also glued. |
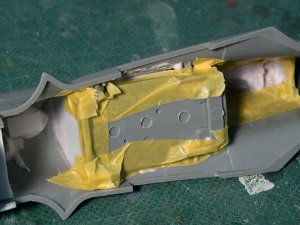 Gaps were covered with the tape so that the dust or mist of paint would not come in the cockpit. |
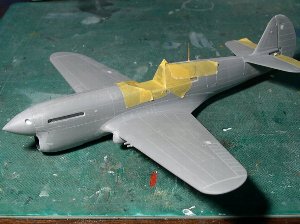 Afterwards, the main wing was glued to the fuselage. The fitting was very much good. |
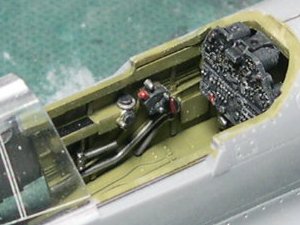
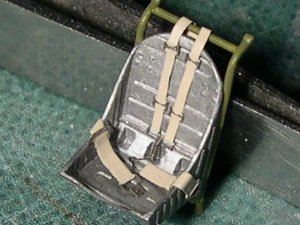 The seat is from Ultracast. It is excellent. The seat belts are etching parts of Finemold. |
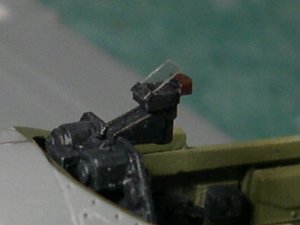 The N-3 gunsight was scratchbuilt. |
|
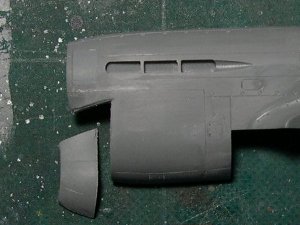
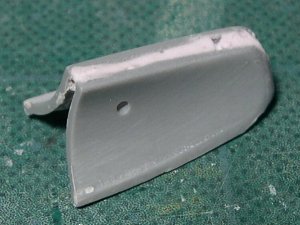
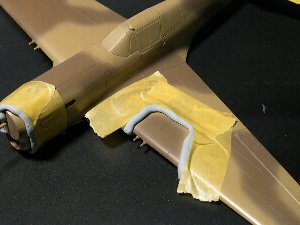
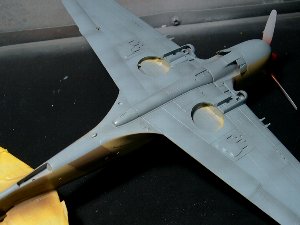
The "throat" I'd call the portion between the jaw and belly the "throat". I don't know the throat of Merlin P-40 exactly but I depicted it as shown in photos. I guess the part of box shape between the right and left flaps is the sand filter. What do you think? |
 There is no good photograph in which the throat is seen clearly. |
 I made the throat of a plastic plate and CA glue putty. |
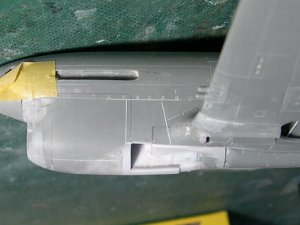 Judging from photos of the actual aircraft, the outline of the throat is like this. |
 To make easily to pick, I glued the stick to the cowl flap. |
|
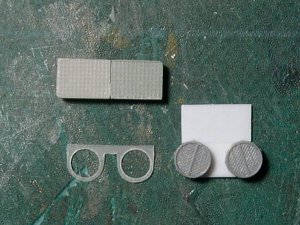
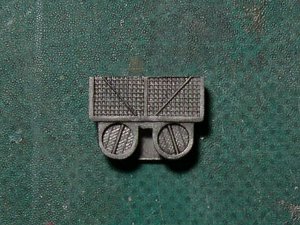
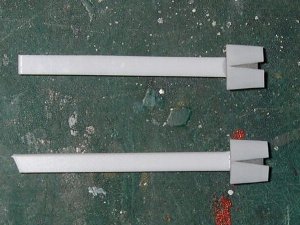
Details Tires were engraved by etching saw using the simple jig. I found this method was very good. |
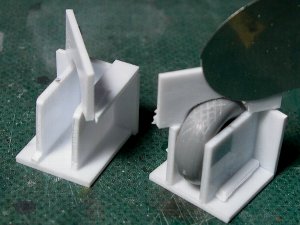 I made the jig of handmade to engrave the tread on the tire accurately and beautifully. |
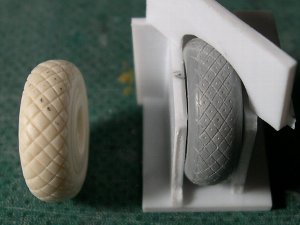 I compared it with Ultracast. I think that the parallel and the interval are more excellent than Ultracast but the diamond pattern was a little small compared with the actual aircraft. |
 Finally, I re-scribed. The grid of the diamond pattern is 1.5mm. |
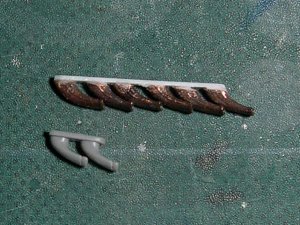 The exhaust tube was from Moskit. I cut it into six pieces, put them on the double-faced tape and glued with CA glue putty. |
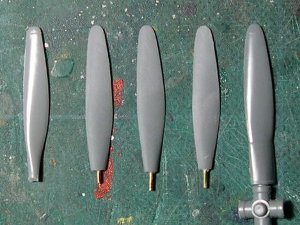 Propeller blades were from Tamiya's P-47D. Both was manufactured by Curtiss. The left is Hasegawa P-40 and the right is Tamiya P-47. |
 The base of the navigation light was made of 0.1mm plastic sheet. |
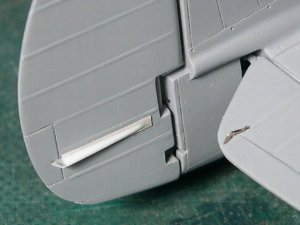 The trim tab rod was added. |
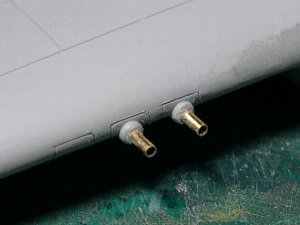 50 caliber machine guns were 0.9mm metal pipes. |
 These are parts of the main gear. The right half is kit original and the left is refined. |
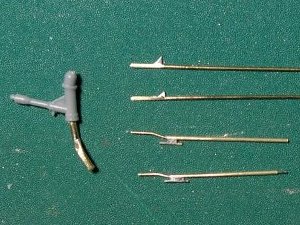 The pitot tube and tail gear were made from brass stick. The lower parts were for Macci C200 of my friend. |
|
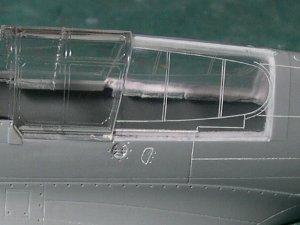
The canopy |
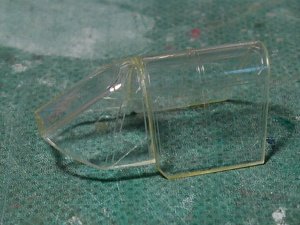 I glued two canopy parts first. Then I elaborately polished the inside and outside of the part. |
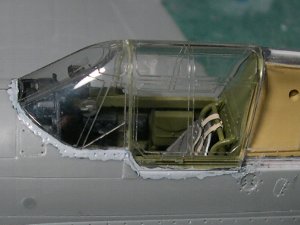 And after that, I glued canopy to the fuselage. I painted sections of the transparent part in Interior Green. |
 I masked the canopy with Scotch tape. The rearview mirror of the kit was too large, so I cut it small. |
 I sprayed surfacer. Then I checked the surface and sanded or scribed again. I repeated spraying and sanding. |
|
|
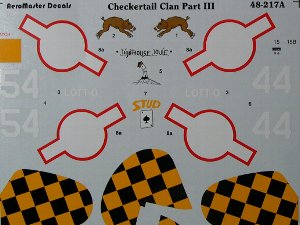
**Paint & Markings |
|
The 325th FG "Checker Tails" The markings represent the aircraft flown by Lt Col Gordon H. Austin from the 325th FG. I referred to his biography of this site. The 325th FG was established on June 24, 1942. It moved to North Africa with USS RANGER on January 8, 1943. The 325th FG flew first combat mission on April 17, 1943. After the combat of North Africa ended, the 325th FG fought over Sardinia. The island surrendered in September 1943, and then P-40 of the 325th FG was converted to P-47 thunderbolt. P-40s of 325th FG were spread to four FGs that remained in MTO, and the checker tails were painted with drab. "Lighthouse Louie" Actual photos of "Lighthouse Louie" are in "Checkertails The 325th Fighter Group in the Second World War, Squadron/Signal". I found that the serial number of this aircraft is 42-10664 in the photo. The serial slightly appears on the portside of the cockpit. And I was surprised that the color photograph of this 42-1066 is in "P-40 Warhawk In Color Photos from World War II, Motorbooks International". The aircraft belonged to the 324th FG. And the checker tail, aircraft number and nose art were painted with drab in this photo.The camouflage of the Desert Hawk Some references describe that the upper camouflage color might be US Sand 616 and lower color might be Neutral Gray. But I think this is a mistake. The reason is that upper two colors of color photographs are very similar to RAF Middle Stone and Dark Earth. The lower color is rather bluish light gray and not similar to Neutral Gray or RAF Azure Blue. Judging from these matters, I guess that three colors were painted at the Curtiss factory. A certain reference describes that Kittyhawks sent to RAF were painted in desert camouflage with RAF standardized colors from Du Pont by the order of RAF. I think Merlin Hawks sent to USAAF were the same. If you know the correct fact, please let me know. Anyway, I mixed the colors referring the original color photo. |
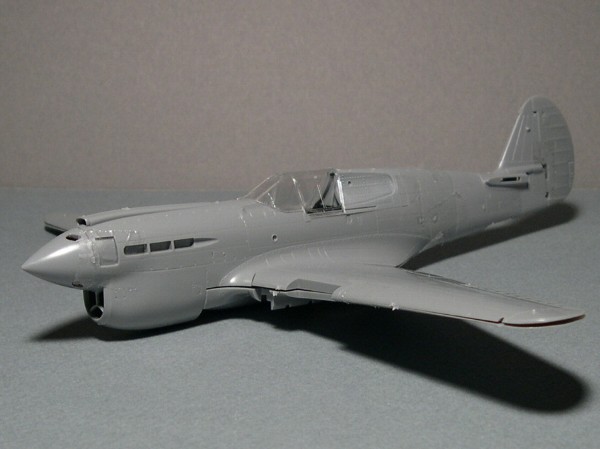
 Mr. 1200 surfacer was sprayed. Black + Silver was painted on the window frame and edge of wings. Then I polished with #2000 sand paper. |
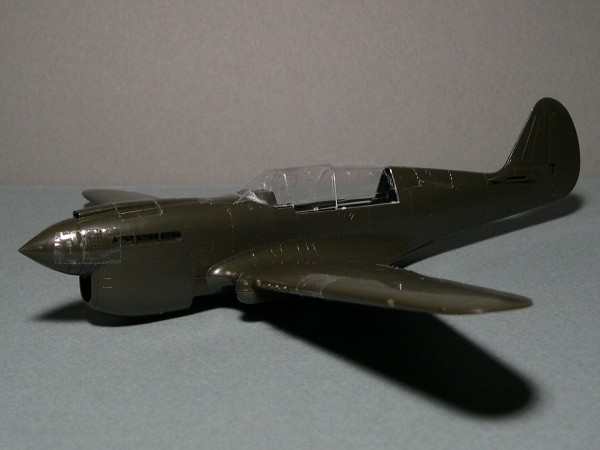
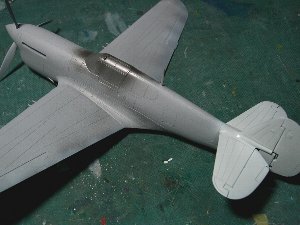
 First of all, the camouflage pattern was sprayed freehand. |
 Next, the demarcation was masked with Blu-tak. |
 The lower color was "Curtiss-Du Pont Azure Blue"!? |
|
The camouflage pattern shown in the instruction of the Aero Master Decal or some other references made a mistake. I read the pattern from photographs of actual aircrafts of the 325th FG. |
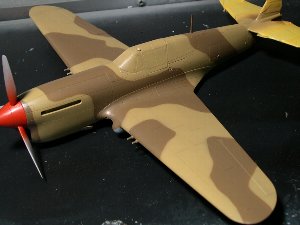 The actual A/C was painted using paper pattern in the Curtiss factory. So the gradation of two colors was very tight. |
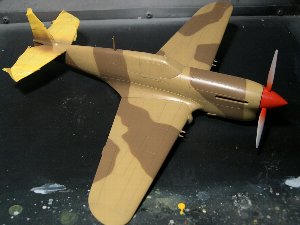 The starboard camouflage pattern is like this. Red of the spinner was mixed yellow and light gray. |
|
Markings Checkers are 12 inches. Some aircraft of the 325 FG had reversed pattern. The diameter of the national insignia of the fuselage and wing are 36inches and 32inches (excluding the yellow circle). However, AMD sheet made a mistake in the diameter. |
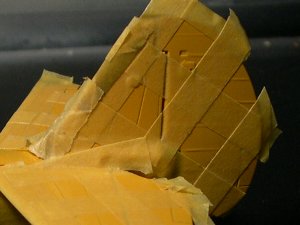 I painted checkers dividing into two times. I masked with tape of 6.4mm width. |
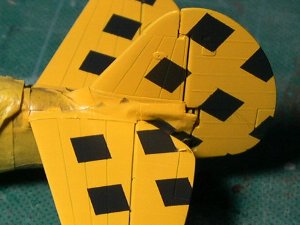 The first time painting finished. After that, I masked for second time along with these black squares. |
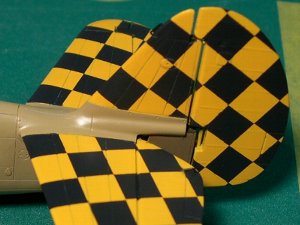 Finished. This method is easier than masking with square tapes. |
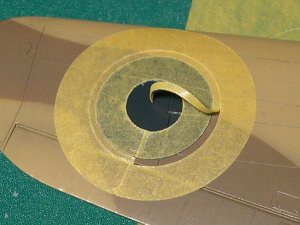 After painting blue circle, I masked for yellow ring. This masking work was not so difficult. |
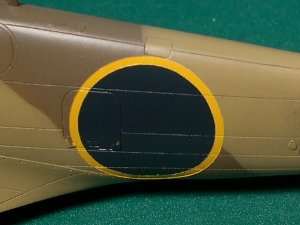 Because I had painted yellow next to blue, the layer did not become thick. |
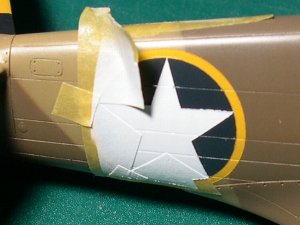 Finally, I painted the white star. Then I sanded by #2000 paper. |
|
There is no photograph of the number of Austin's aircraft. So I didn't know the correct size or style or position of the number. Then, I painted it referring to other airplanes of the 325 FG. |
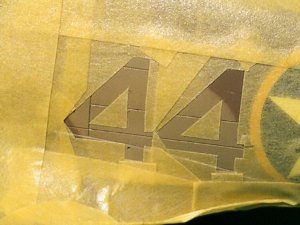 First of all, I drew "4" with the tape. Next, I masked the surroundings of "4". |
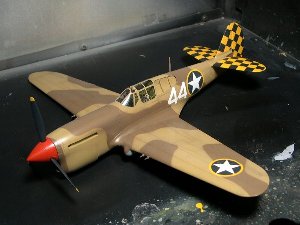 The camouflage and markings were almost finished. |
|
Decals The nose art, black rectangle filled with pilot name and two score marks were from Aero Master Decal sheet. I completely trimmed transparent fringes of decals. After applying decals, I repeated spraying flat clear and polishing with #2000 paper several times until the step of decal edge disappeared. |
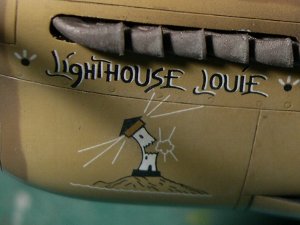 The nose art was based on the historical fact that the 325th FG shot enemy lighthouse. |
|
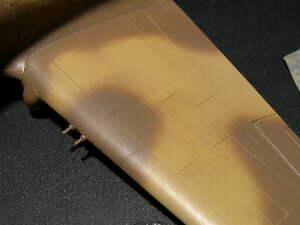
Weathering I intended the expression of the desert sun and dust. First, I thinly sprayed Tan on the upper surface. Next, I used some dark color pastels along panel lines. Then I painted chipping using very fine brush. |
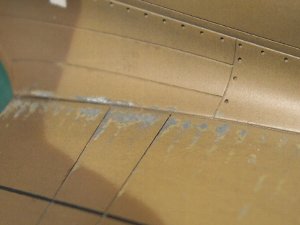
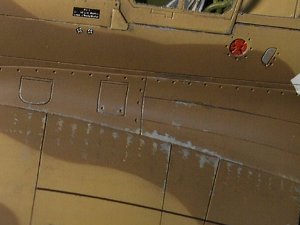 I chipped paint along rivet lines. The area of chipping was gradually expanded. |
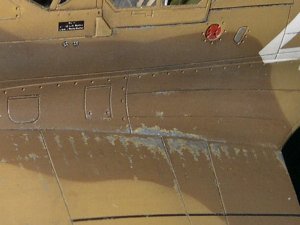 I depicted the layer of Middle Stone under Dark Earth paint. |
 Here is a starboard. I depicted the layer of "fresh" Middle Stone under stained surface. |
 I painted Medium Gray chipping along panel lines. |
|
Details After weathering works, I added some details. |
 The supercharger-intake was made from Evergreen's styrene pipe. |
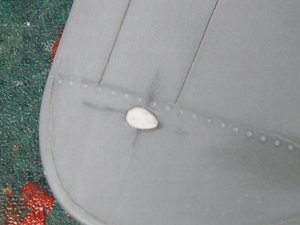
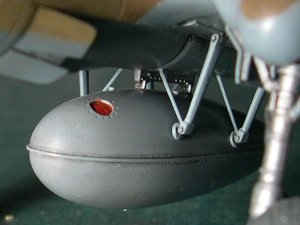
 The small blister of coolant drain was moved to this position. |
 The drop tank is fixed with double-faced tape. So it is detachable. |
|
|
**Completion |
|
Finally, I get the most elegant Hawk in the family. The construction period was about three months. I boast my model is (may be?) the only "brand-new Hasegawa" Merlin Hawk in the world. I am convinced Hasegawa won't release type F/L model. So, how do you try to construct it? References |
| 1 | The famous aircraft of the world | Bunrindo |
| 2 | P-40 Warhawk In Color Photos from World War II | Motorbooks International |
| 3 | Curtiss P-40 in action Aircraft Number 26 | Squadron/Signal Publications |
| 4 | Checkertails The 325th Fighter Group in the Second World War | Squadron/Signal Publications |
| 5 | D&S Vol.62 P-40 WARHAWK PART 2 P-40D through XP-40Q | Squadron/Signal Publications |
| 6 | Walk Around P-40 Warhawk Walk Around Number 8 | Squadron/Signal Publications |
| 7 | AVIATIK WWII AIRCRAFT No.1 Curtiss P-40F Warhawk | AVIATIK |
| 8 | MONOGRAFIE LOTNICZE 65 CURTISS P-40 XP-46, XP-60 cz.2 | AJ-PRESS |
| 9 | Aircraft of the Aces 43 P-40 Warhawk Aces of the MTO | OSPREY |
| 10 |
COMBAT COLOURS Number 3 The Curtiss P-36 and P-40 in USAAC/USAAF service 1939 to 1945 |
Guideline Publications |
| 11 | BUILDING THE P-40 WARHAWK | KALMBACH BOOKS |