P-47D-10-RE ThunderboltˇĘTamiya 1:48ˇË
 |
|
The impression of the TAMIYA kit
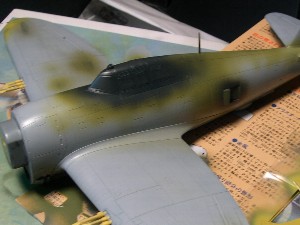
This is the Tamiya's excellent kit. It's almost perfect, but not perfect. Tamiya made a mistake in the plane form of the fuselage fundamentally. The correct width of the fuselage is about 29mm from the nose to the cockpit (1inch = 25.4mm). Both sides are straight and parallel. However, Tamiya's nose is thin and the center fuselage is thick. The lower part of the fuselage is also thick.
Therefore, the width of the cowling intake is insufficient 1mm, while the height is correct.
Most of drawings are the same. Though regrettable, Tamiya modelized based on a incorrect drawing. There are evidence of photographs of actual A/C. On the other hand, Hasegawa's plane form is correct.
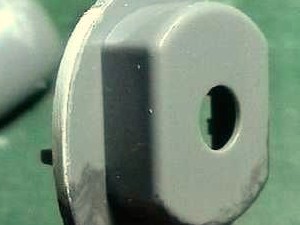
As for the side form, Tamiya is correct. Hasegawa is slenderer than Tamiya. Into details, the partition part in the cowling is incorrect. And the width and position of the bulletproof glass are incorrect.
|
This is the Tamiya kit. The central fuselage is thick and tip of the cowling is thin. |
The plane form of Hasegawa kit is correct. |
|
The cockpit
The interior color is zinc chromite green judging from some original color photographs, not dull dark green. Well, I know an article of D&S, but no evidence !!
|
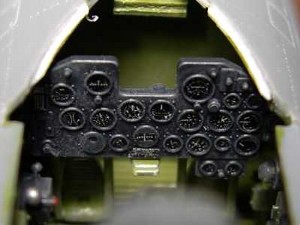
The cockpit is very good. I cut off and stick decals of each meters of an instrument panel. |
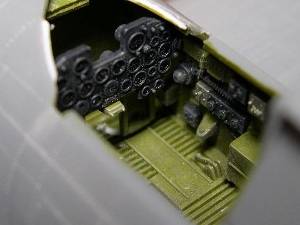
The position of the instrument panel is rather lower, but I didn't correct. |
|
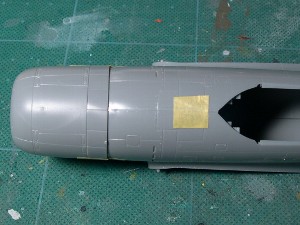
Correction of the fuselage width
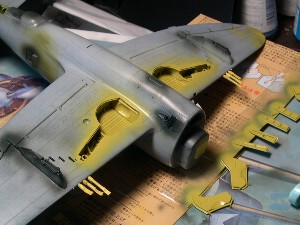
Fortunately, the fuselage can be corrected without sacrificing wonderful surface sculpture, as follows.
Basically, the width is adjusted by cutting adhesion lines. An important matter is the side shape should not be distorted. So I set up components resisting distortion.
|
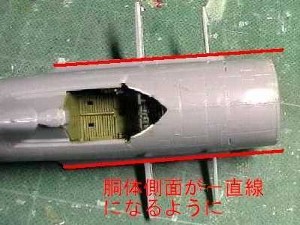
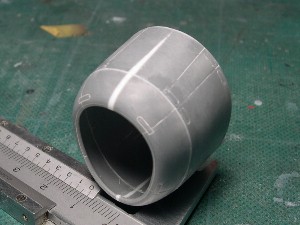
Both sides are straight and parallel. The width is 29mm.
|
The width of lower part is narrowed 1.5mm. |
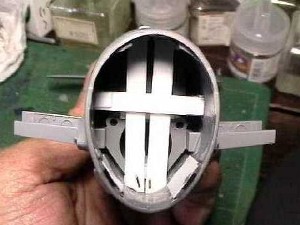
Beams are set up to prevent from expansion. |
The bulkhead is widen . |
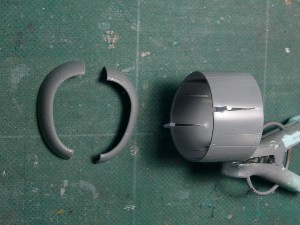
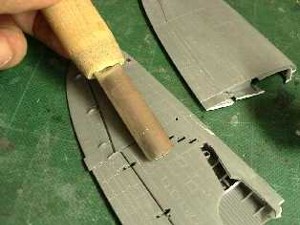
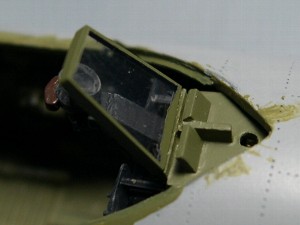
The cowling is divided into three pieces. |
Plastic plates are inserted in between. |
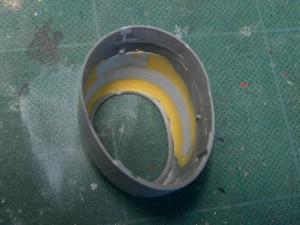
The reverse side is reinforced using putty and plastic plate. |
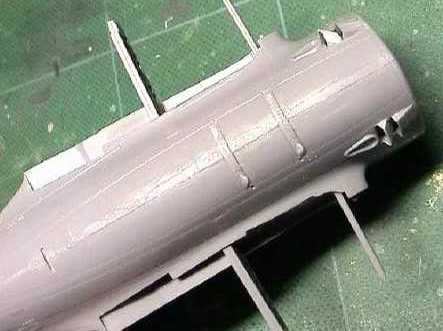
The roundness of the cowl tip is increased. |
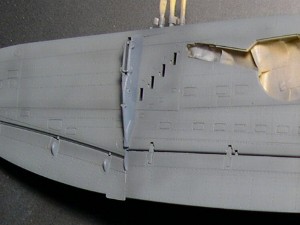
The plane shape is corrected. |
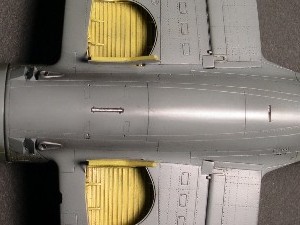
The lower fuselage is also made narrow. |
I use a needle and plastic plate with double faced adhesive tape for a guide. |
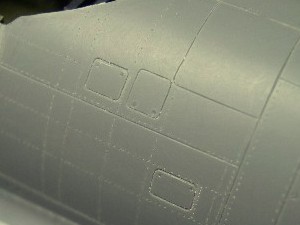
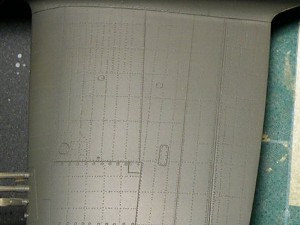
Using a graver, I remove unevenness of rivets. |
|
Wings assembly
The shape of main wing is excellent. Leading edges of the vertical and horizontal fins are to be sharpened.
|
Because of the correction of the fuselage, plastic plate is added to the wing root for fitting. |

Navigation lights are made of color plastic. |
|
Details
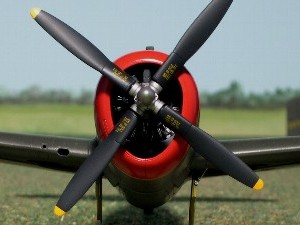
The partition part in the cowling is corrected. The tail wheel strut is made of a brass rod.Various outlets, the cockpit, machine guns, and several details are added as follows.
|

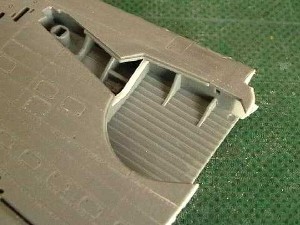
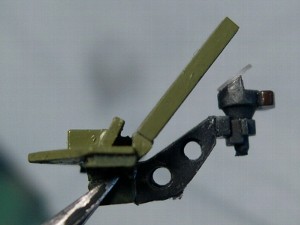
The air divider is cut at two points and wedges of plastic plate are put in there. |
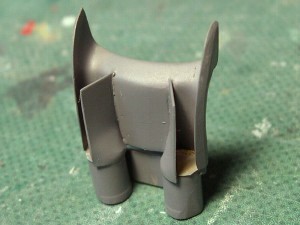
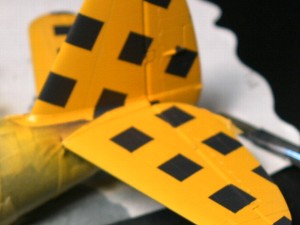
The shape of two fins are corrected using thin plastic plate. And oil coolers are glued. |
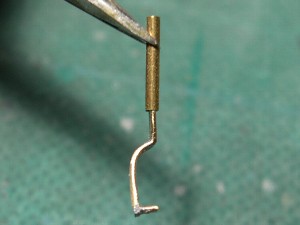
The tail strut is a 1.0x0.5mm brass stick engraved so that it may be easy to bend. Solder is poured and piled, then corner edges are sharpened. |
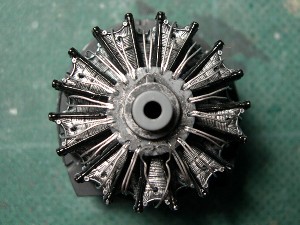
Plug codes are added to engine. |
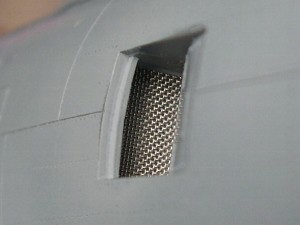
The intercooler of metal mesh is added. |
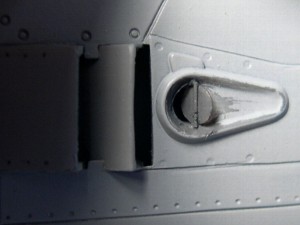
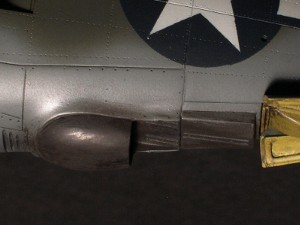
Oil cooler flaps are bended along to the body curve. The auxiliary exhaust pipe is opened, and the lid is made of thin plastic plate. |

Machine-gun pipes are 1.1mm plating pipes. |
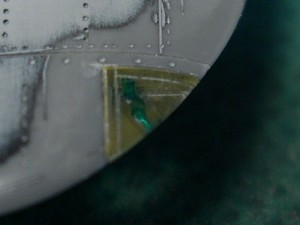
Wing tip lights are made of a clear sprue. |
The bulletproof glass is made of a case of a MO(magneto-optical) disk. |
The gunsight base is Tamiya kit. The main part is from Hasegawa F4U-5N.
|
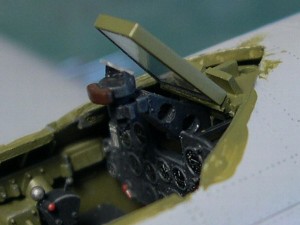
The kit bulletproof glass is narrow and the position is forward a little. |
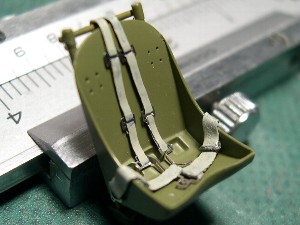
The edge of the seat is to be thin. The harness is made of lead plate and the etching. |
|
Historical investigation
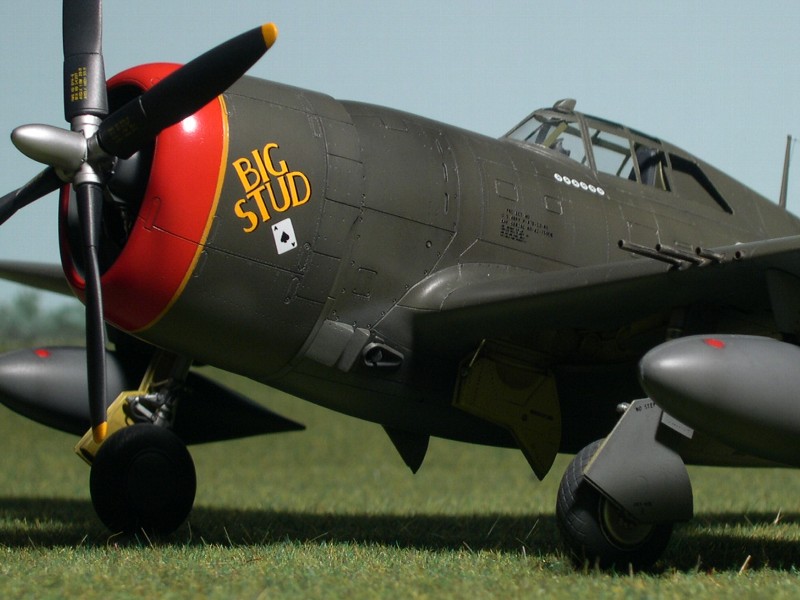
I selected "BIG STUD" flown by Lieutenant Colonel Bob Baseler of the "Checker Tail" 325FG. The original photograph is in "Walk Around P-47 Thunderbolt"(Squadron/Signal Publications
). And the close up of the cockpit is in "Republic's P-47 THUNDERBOLT"(
Widewing Publications). Although the paint figures are appeared in various publications, every figures make mistakes. Especially, styles of "BIG STUD" are incorrect.
As for "BIG STUD", the bulletproof glass was removed. However, I attach in the model intentionally. The gunsight grass was an ellipse form type.
The antenna line was not common. The branch line was stretched towards the body from immediately after the antenna pillar. The propeller was toothpick type. The existence of the personal marking on the starboard side is unknown. Some A/C had white numbers in the front lower part of cowling, the existence in "BIG STUD" is unknown.
There was no checker in the undersurface of horizontal fins. According to "Checkertails The 325th Fighter Group in the Second World War"(Squadron/Signal Publications), the reason was short supply of paints. But, P-51s were painted after sufficient supply.
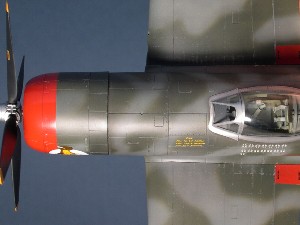
|
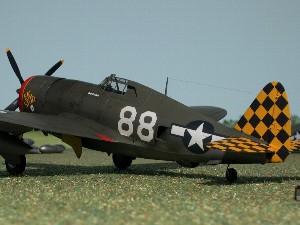
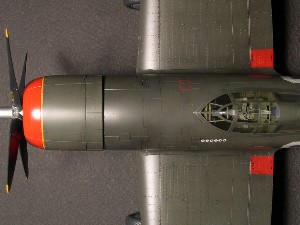
The same angle as the original photograph. |
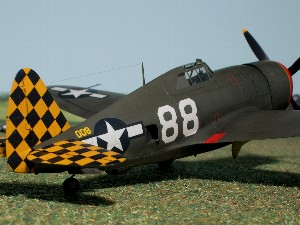
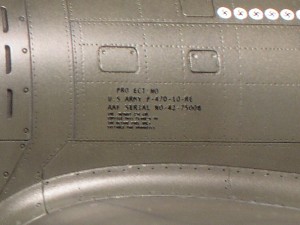
Last 3-figure number of the serial is entered in the starboard side upper the insignia.
|
|
Painting
Mr.color paints are used overall, and all of paints are blended specially. My original Olive Drab is OD 40% + RAF dark green 40% + neutral gray 20%. Neutral Gray is NG 75% + white 25%.
The order of spraying is that -- zinc chromite green (window frames) -> black -> zinc chromite yellow -> surfacer -> neutral gray -> olive drab. After that, the surface is polished by #1500 sandpaper. Next, a clear paint is sprayed and polished again.
|
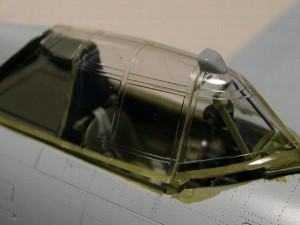
The sections of the canopy parts is painted. |
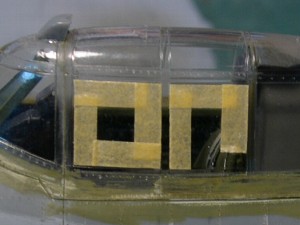
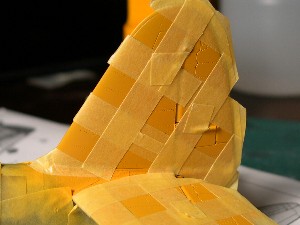
Masking tape is stuck like this photograph. It is not necessary to cut tape to the strict length. |
The color inside the canopy frame is applied. Black paint is sprayed in order to prevent light transmits. |
The sections of the wing tip lights are painted zinc chromite yellow. |
Shade is sprayed along panel lines. |
Fading is expressed by over spraying a brighter color. |
|
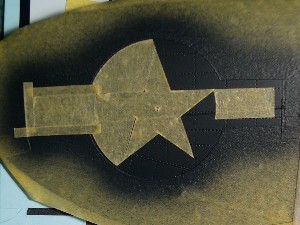
Markings
All of checker, insignias and A/C numbers are masked and spreyed. Red of cowl tip is Thunderbirds Red 40% + RLM23 30% + IJN Orange Yellow 30%. Orange Yellow of checker is IJN Orange Yellow 95% + Red 5%. Black is Gross Black 40% + Flat Black 40% + White 20%. Insignia Blue is Gross Sea Blue 40% + Flat Black 40% +White 20%.
|
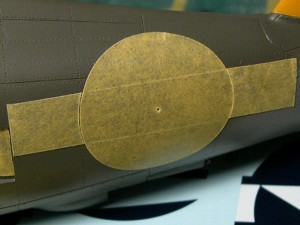
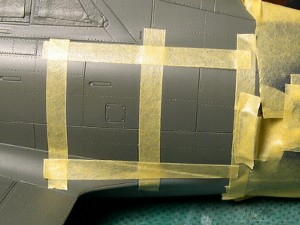
Calculated from the original photograph, masking tape is cut to 6.5mm width. |
This is in the state painted the half of the black portion.
|
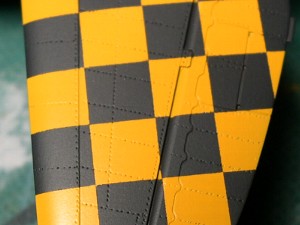
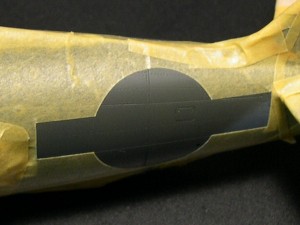
The remaining portion is painted similarly. In case of removing the tapes, Boundaries are cut with a knife very lightly. |
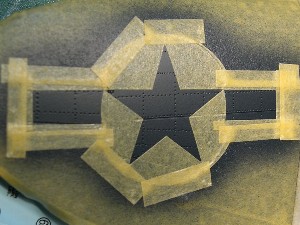
Tape is cut by a circle cutter, and stuck on the decal. |
The position is determined. |
Next, the circumferential portions are stuck on. |
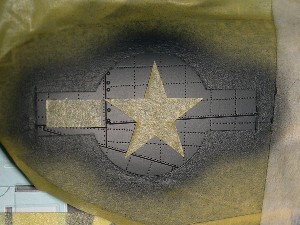
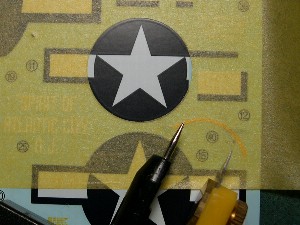
The position of the star is decided after painting blue. |
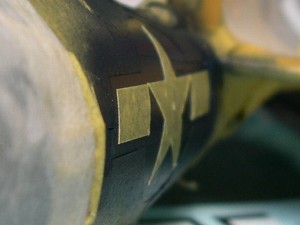
A bend is checked. |
The circumferences are stuck. |
Then the central portion is removed. |
The sizes of characters are calculated from the photograph. |
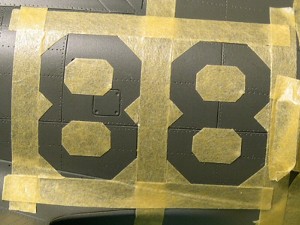
The remaining portion is stuck. |
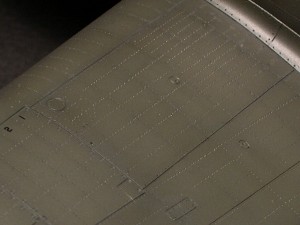
Small light gray dots are brushed on the position of rivets. And dark color pastel is applied along with rivet lines. |
Brown pastel are applied thickly.
|
|
Instant letterings (dry decals)
The characters of "BIG STUD" etc. are self-made instant lettering (dry decals). It can be ordered at the large-scale stationery store (ITO-YA) in Tokyo, and the price is 5,000 yen per sheet.
The block copy is made by Excel.
Manuscript of the instant letterings
|
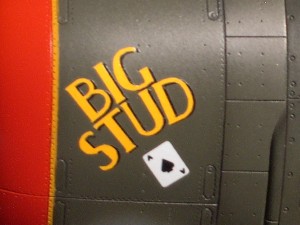
"BIG STUD" and the ace of spades are instant lettering. |
Stencil data are the same.
|
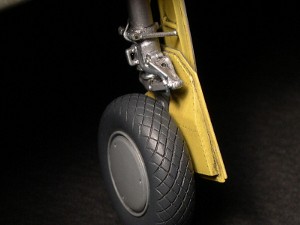
The brake line is 2 stage of diameters. Links of the main gear covers are brass sticks. The tread pattern is engraved by a etching saw. |
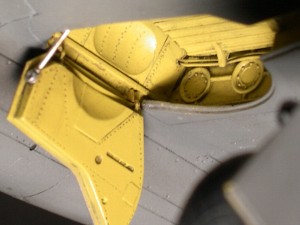
Some details are added to the wheel cover and wheel well.
|
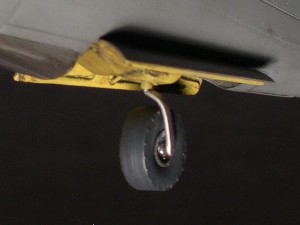
The tail wheel strut is made of brass stick. |
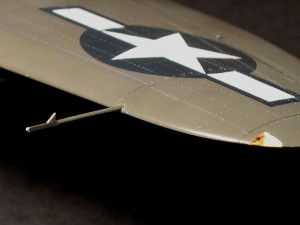
The pitot tube is also a solder work. |
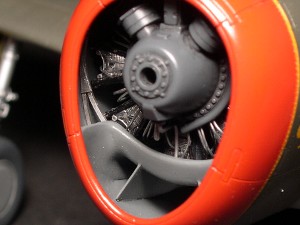
The inside of the cowling is finished. |
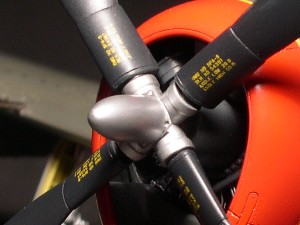
Fine details are added to the propeller hub. Stencils on propeller blades are from aeromaster decals.
|
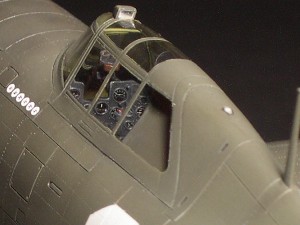
Details of the canopy. |
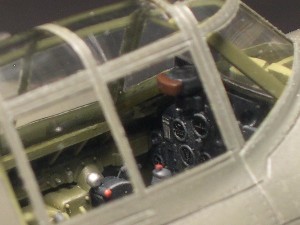
The interior is clearly visible. |
Thank you for reading so far. I'm very happy if I can hear your comments.
|
|
|
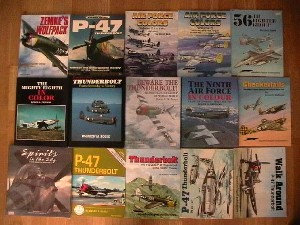
1 |
Republic'sP-47 THUNDERBOLT |
Widewing Publications |
|
2 |
WARBIRD HISTORY P-47 THUNDERBOLT |
Motorbooks International |
|
3 |
ZEMKE'S WOLFPACK The 56th Fighter Group In World War II |
Motorbooks International |
|
4 |
Beware The Thunderbolt! The 56th Fighter Group in World War II |
Schiffer Military History |
|
5 |
Royal Air Force THUNDERBOLTS |
Air Research Publications |
|
6 |
P-47 Thunderbolt in action Aircraft Number 67 |
Squadron/Signal Publications |
|
7 |
Walk Around P-47 Thunderbolt Walk Around Number 11 |
Squadron/Signal Publications |
|
8 |
D&S VOL.54, P-47 THUNDERBOLT |
Squadron/Signal Publications |
|
9 |
The Republic P-47 Thunderbolt in the Pacific Theater |
Squadron/Signal Publications |
|
10 |
WARPAINT SPECIAL No.1 Republic'sP-47 THUNDERBOLT |
Hall Park Books |
|
11 |
AIRCAM AVIATION SERIES No.2 REPUBLIC P-47 THUNDERBOLT |
Osprey publications |
|
12 |
FIGHTER COMMAND American Fighters in Original WWII Color |
Motorbooks International |
|
13 |
WWII WAR EAGLES Global Air War in ORIGINAL COLOR |
Widewing Publications |
|
14 |
WWII PACIFIC WAR EAGLES China/Pacific Aerial Conflict in ORIGINAL COLOR |
Widewing Publications |
|
15 |
The Ninth Air Force In Colour UK and The Continent - World War Two |
Arms and Armour Press |
|
16 |
Checkertails The 325th Fighter Group in the Second World War |
Squadron/Signal Publications |
|
17 |
AIR FORCE COLORS Volume2 ETO&MTO 1942-1945 |
Squadron/Signal Publications |
|
18 |
AIR FORCE COLORS Volume3 Pacific and Home Front,1942-1945 |
Squadron/Signal Publications |
|
19 |
56TH FIGHTER GROUP |
Squadron/Signal Publications |
|
20 |
ACES OF THE EIGHTH |
Squadron/Signal Publications |
|
21 |
The famous aircraft of the worldˇĘnew editionˇË |
BUNRINDO |
|
22 |
The famous aircraft of the worldˇĘold editionˇË |
BUNRINDO |
|
23 |
Aerodetail No.14 P-47 Thunderbolt |
DAINIPPONKAIGA |
HOME