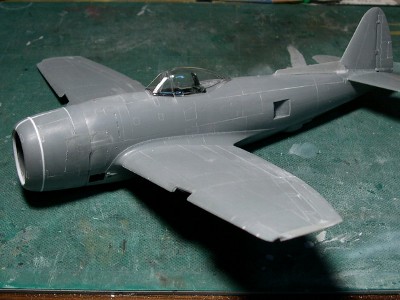
P-47N Thunderbolt(1/48 Tamiya)
|
|
|
|
**Introduction |
|
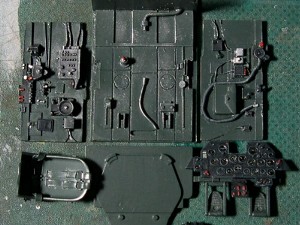
Thunderbolt is my favorite aircraft. So I've paid attention to Tamiya's Bubble Top since its release. But I already built Hasegawa's D bubble. Nevertheless, I havn't built N yet. I can't expect a new release of Tamiya's N. Then I decided to reconstruct N the strongest Jug from Tamiya's D. Construction plan The fuselage is from Tamiya. And wings are from "two" Tamiya's kits in one. Some detail parts are from Revel-Monogram's N. The cockpit is from Cutting Edge's resin parts. The engine gear-house is from Hasegawa's F4U-5. Rivetting works are done using beading tools. |
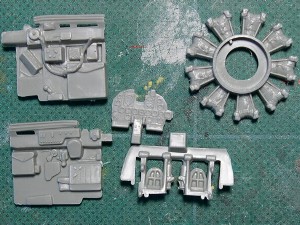
 These are Cutting Edge's resin parts and Hasegawa-Monogram kit's original decal (by Caltgraph). |
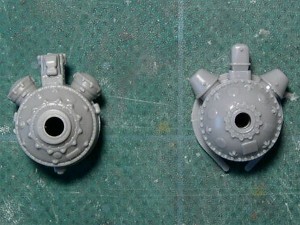 The left is Revel and the right is Hasegawa's F4U-5. |
|
Kit review Tamiya D bubble topThis is an excelent kit. But the plan shape of the fuselage is mistaken. The nose cowl is slender and the center of the fuselage is fat (see the article of P-47D-10-RE). Academy N The proportions of the fuselage and wings aren't good. I recommend to exchange the fuselage for Tamiya. As for wings, the plan and the cross section shapes are mistaken. |
 The upper is Academy, the lower is Tamiya. |
 Academy's gear houses are poor details. |
|
Revel = Monogram N The proportion is better than Academy. But fitting is the worst. Some detail parts, for example the engine and wheels, are available. Cartgraf's decal which is attached to Hasegawa = Monogram version is excellent. |
 Fron the left to the right, Tamiya, Revel and Academy. |
 These are Revel's available parts. |
|
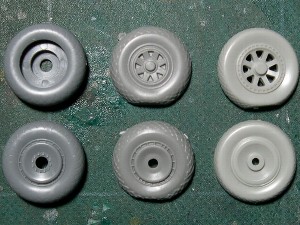
After market parts and decals I bought Ultra Cast 's wheels for P-47N. I regret to say that this wheel hub is just the copy of Academy's one. This wheel hub is somewhat large in diameter. So I chose Revel's wheel hub and Tamiya's tire. But I dare to say on UC's honor, the block pattern of UC's wheel is very fine and the shape of the tire is corrected (Academy is incorrect).I also bought two sheet of decals. But the nose art of "The SHELL PUSHER" is included only one set (actually they were written on the both side of the cowl) and is too much large in size, so it can't be use. |
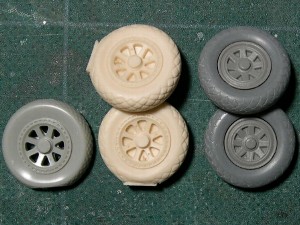 From left to right, Academy, Ultracast resin, Revel + Tamiya. |
 Superscale 48-956(left) and CAM 48-122(right). |
|
|
**Construction |
|
The Cockpit |
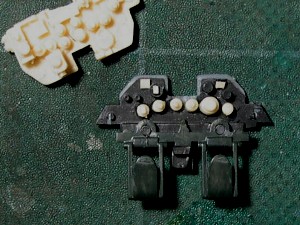
 Side walls, floor and seat are from Cutting Edge. The instrument panel and bulkhead are from Tamiya. |
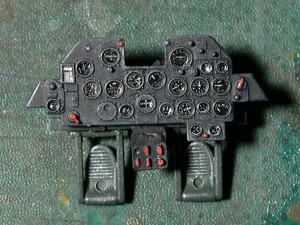 A control panel was added on the instrument panel. I cut and put decals for each meter. |
 The back side of instrument panel can be seen from outside, so details were added from the resin part. |
 Judging from color photos of Details & Scales, I thought that the cockpit was painted Dull Dark Green. |
|
The fuselage I corrected the plane shape of the fuselage. |
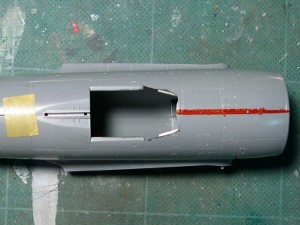 I cut off the portion painted red. |
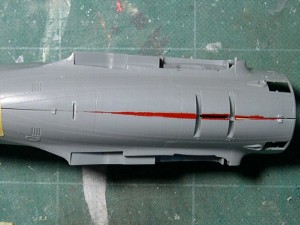 The lower side was the same. |
 Preventing from a distortion, a vertical beam was glued. |
 Please note that the main wing beam was newly constructed. |
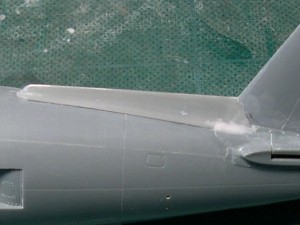 The dorsal fin was cut out from Revel kit. |
 The width of the base is quite wide. |
|
The cowling |
 I devided the cowl part into 4 pieces, and glued again putting plastic plate between each piece. |
 This is the correct plane shape. |
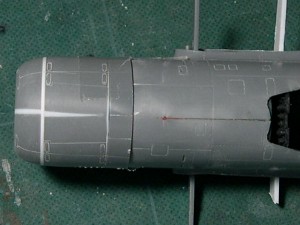
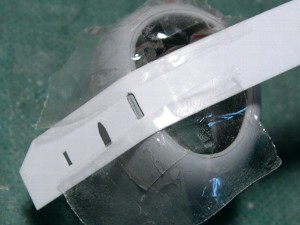 Panel fasteners were re-scribed using original template. |
 This tool is for engraving the cowl lip. |
|
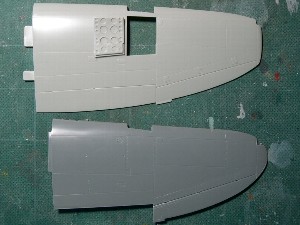
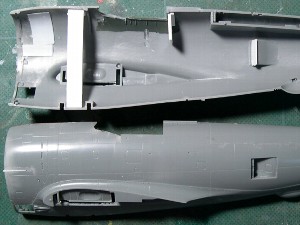
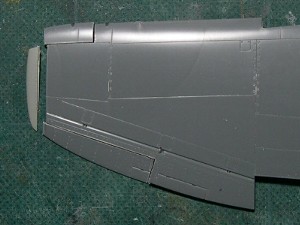
The wing I made the N's wing from two parts of Tamiya's D. I think this is the best way to get the correct N's wing easily. It's easy to build as flap down position. But I dare to built as flap up. |
 The extension portion was cut out from another part like this photo. |
 Other parts were also cut out. The wing tip is from Revel. |
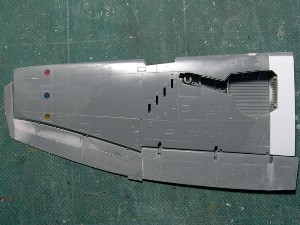
 The red marked part is the main wing beam glued on the fuselage part. The inner side wall of the wheel bay is from Revel kit. |
 The position for the landing light is the same as the late D model. I cut off the kit's light and moved. |
|
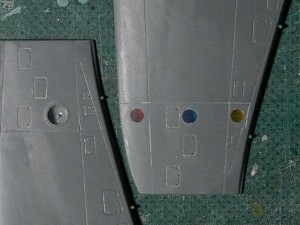
The leading edge of the N's wing is slightly bended at machine guns. This fact is confirmed by a large size photo. |
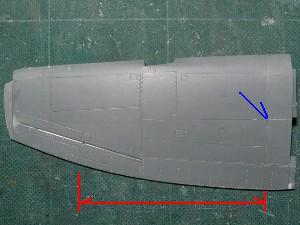 Two parts were matched at the point of the panel line of the blue arrow. The plane shape of the wing indicated red line is same as D model. |
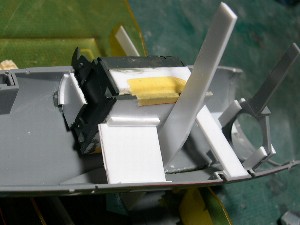
 The flap was also extended using two parts. This white portion of the wing root is plastic plate. |
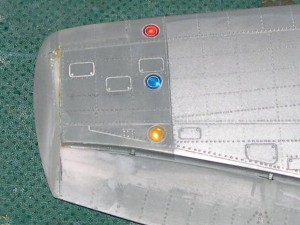 These lights were made of colored plastic. |
 Aluminum plates were depressed using punching metal and set behind lights. |
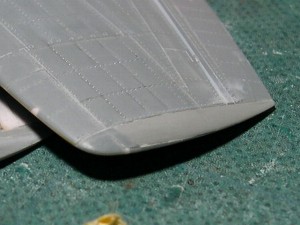 The wing tip was carefully sanded. |
 These plastic plates are reinforcements. |
 At last, the whole shape of the N model came out. |
|
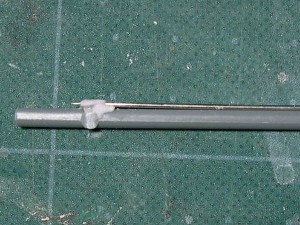
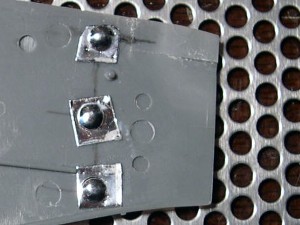
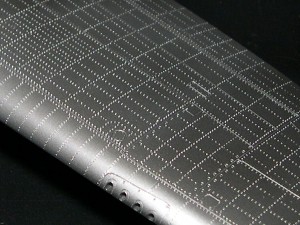
Rivets First of all, I prepare beading tools. This web site is for internet order (I think only for Japanese). I used #1 beading tool mainly and #2 and #4 for panel fasteners.So as to drive ribets in a straight line, I used a guide of plastic plate. |
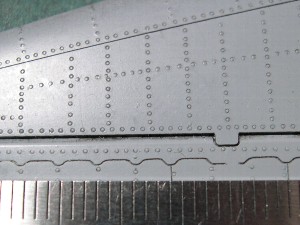 These are test shots using #2 (0.35mm). |
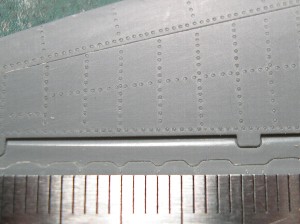 These are #1(0.3mm) shots. |
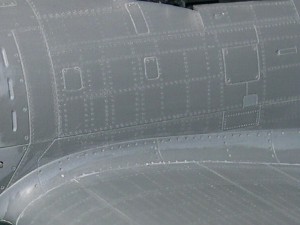
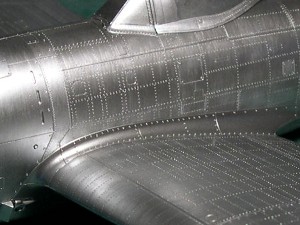
 The fuel tank is added after the gear bay. Large rivets are used around this tank. |
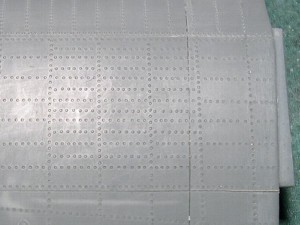 This is the upper surface of the wing. |
 The #2 tool was used for cowl flaps. |
 Some lines are double. |
|
Details |
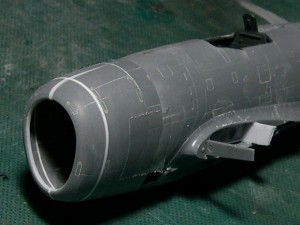
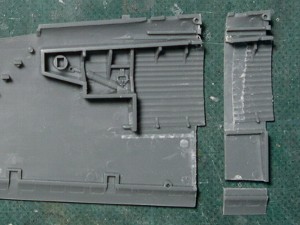
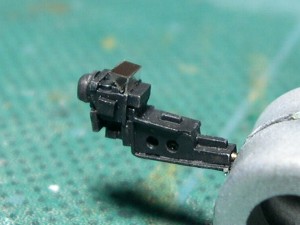
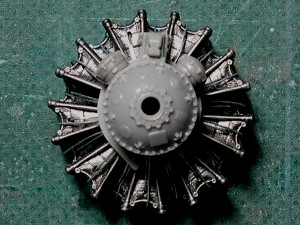 Tamiya's cylinders, Hasegawa's gear case and Revel's instruments. |
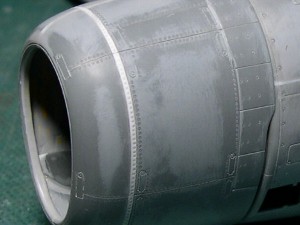
 The oil-cooler flaps were corrected. |
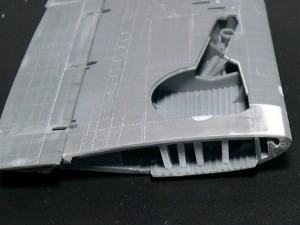
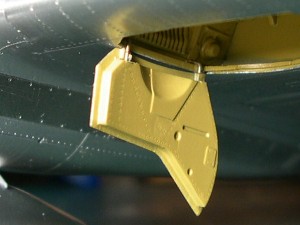
 The edge of the gear cover was thinned. |
 The inner part was also corrected. Some details were not yet added. |
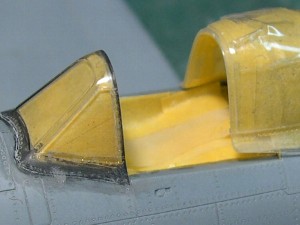
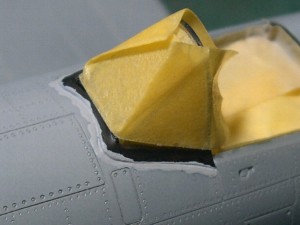 Edges of the wind shield and canopy were thinned. |
 |
|
|
**Painting |
|
"Hybrid Painting Method" for natural metal This method is hybrid of airbrush and brush painting. First, Mr.color's Super Metallic Chrome Silver was sprayed (slightly mixed #2 black). Second, Mr.color's Chrome Silver (straight from the bottle) was drybrushed on the sprayed surface. Drybrushed silver can express hairlines on the natural matal surface. Detailed painting method is as follows.#1000 surfacer -> #8 Silver (for the base) -> Chrome Silver + #2 Black (spraying) -> Chrome Silver (drybrushing) -> #46 Clear (spraying) -> Markings(Yellow, Olive Drab, Insignia, etc) -> #2000 sand paper polishing (only for marking portions) -> decals -> #46 Clear & #30+46 Flat Clear (only for Olive Drab portion) -> weathering |
 Chrome Silver + #2 Black was sprayed. |
 This is the close-up of the left photo. |
 Chrome Silver was drybrushed. |
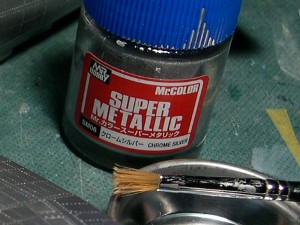 These are tools used. |
|
The Markings |
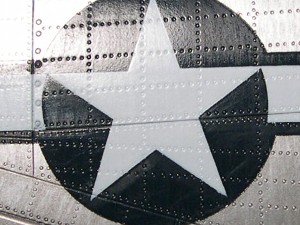 Insignia was painted after Silver was finished. |
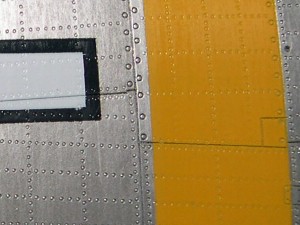 The width of this yellow band may be mistaken. I think it should be narrower. |
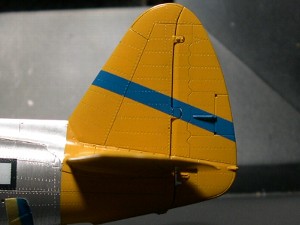 The width and angle is like this. CAM's instruction is inaccurate. I don't know the band was painted on the horizontal fin or not. (Please teach me!) |
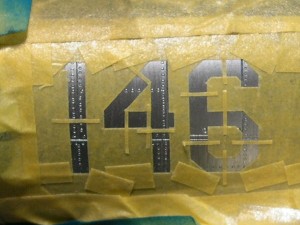
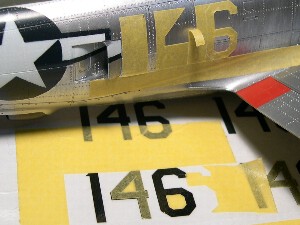 The A/C number of CAM decal is inaccurate. So I painted. |
 Masking works was finished. |
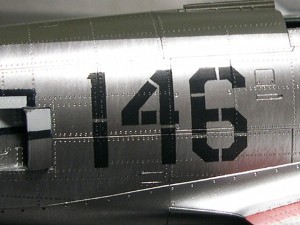 Finished. |
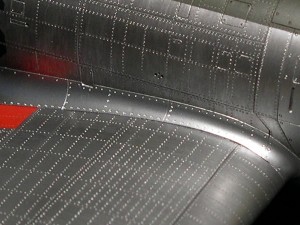 The fillet was Alcrad White Aluminum (air-brushed only). |
 Some panels were Mr. Super Stainless + #2 Black (air-brushed only). |
|
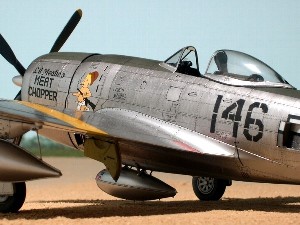
Historical investigation I selected "Li'l Meaties' MEAT CHOPPER" flown by Lt. Oscar F. Perdomo of the 464fs, Ie-shima island. Some documents describe that his A/C was P-47N-2-RE. But N-2 was field improvement type of N-1. Therefore, I think his A/C was N-1 when he first arrived at Ie-shima island. Anyway, if you build as N-2, you must add 5 sets of rocket launchers under each wing. |
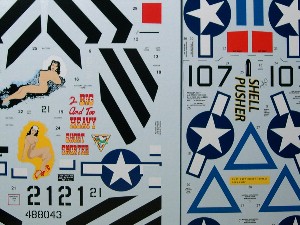
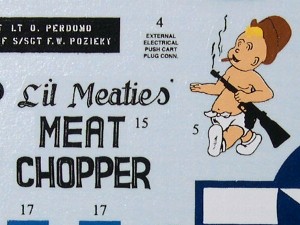 CAM48-112 sheet. This nose-art is excellent, but the black rectangle for the pilot's name is too much large. |
 Instruction of CAM48-112. There are some doubts in it. |
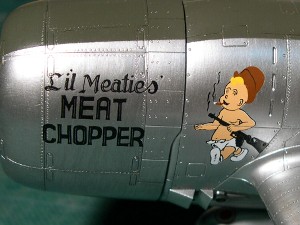 Nose-art decals are very fine as you see. |
The establishment is early july 1945. Then, there is no score marking, no rocket launcher, only one antenna pillar. |
|
The instruction shows Olive Drab was not painted backward the canopy. But I judge that Olive Drab was also painted. Please see this photo. I guess that Olive Drab was faded and only forward portion was re-painted. |
**Details and Finishing |
|
Details |
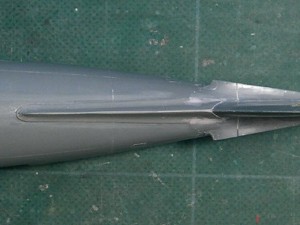
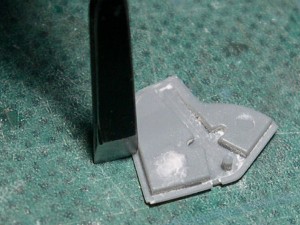
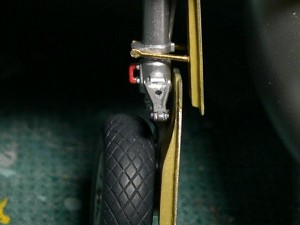
 The oleo scissors were engraved. Detail was added on the base of the spinner. |
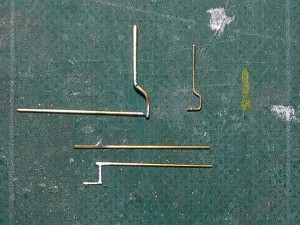 The pitot tube and tail gear. |
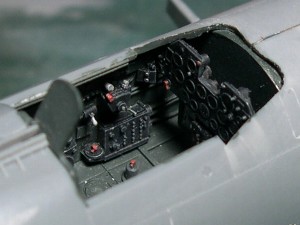
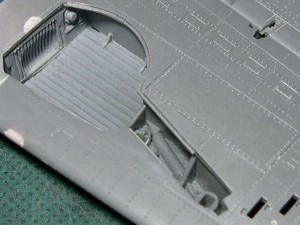
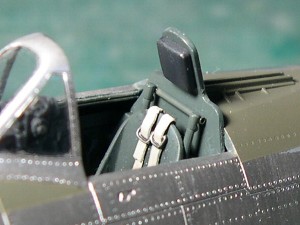
 The K-14 gunsight is from Cutting Edge. |
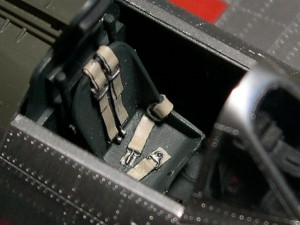 The seat is also from CE. The expression of the seat belt is very good. |
 The positions of the bulletproof plate and seat were adjusted. |
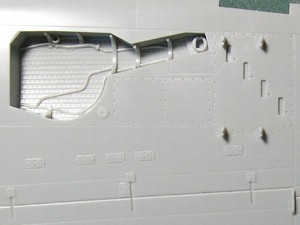
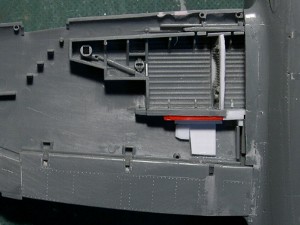
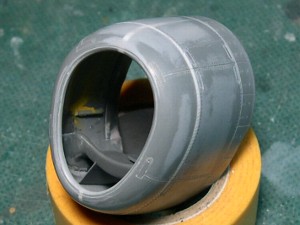
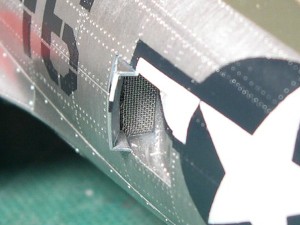 The intercooler was expressed by a metal net. But it isn't accurate strictly. |
 This inner wall is from Revel's kit. |
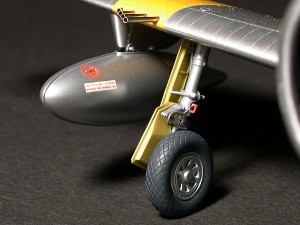
 The tread pattern was engraved by a photoetch saw. |
 Gun barrels were lined up. |
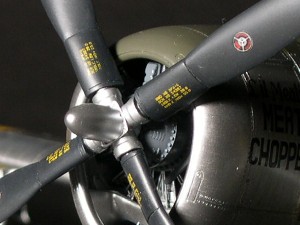 Details was added on the spinner. |
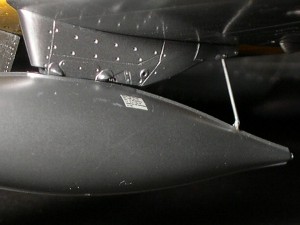
 The 75 US gallon tank is from Tamiya's P-51D. |
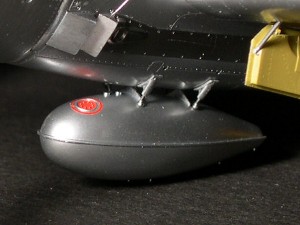
 The 150 US gallon tank is from kit. |
|
|
**Completion |
|
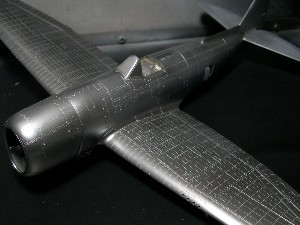
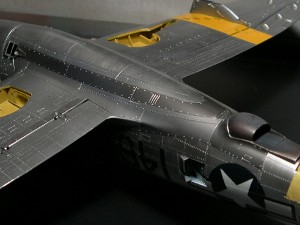
Completion Finally, I completed 2nd Lt. Oscar Perdomo's P-47N-1-RE. As for the story of Lt. Oscar Perdomo, I refered to this web site. After completion, I look my model. It is a really happy hour permited only for the constructer. I think that wings of N are the best matches for the huge body of P-47 and therefore beautiful.References Please look at my P-47D-10-RE. As for N model, "Republic's P-47 THUNDERBOLT" by W.Bodie, Widewing Publications is very much substantial. And web sites are as follows.
|