Spitfire LF.Mk.XIVe (1/48 Airfix)
since 18/1/2005
|
|
|
|
**Introduction |
|
If someone were to ask me which is the most beautiful warbird, I would have to answer "Spitfire". In particular, the beauty of Griffon Spitfire is unsurpassed. So, I love Griffon Spitfire as much as Thunderbolt. Construction plan I used three kits. One, the Airfix FR.22/24 for the fuselage and spinner. Two, the Hasegawa Mk.IX for the main wing, horizontal fin and other detail parts. Three, the Academy Mk.XIVe for the canopy and vertical fin. Well, I know this is the hard way of modeling a Griffon Spitfire, and it would be easier to build Academy's Mk.XIV straight from the box, but I firmly believe that this is the best way to get "correct" Mk.XIV !!Kit review Airfix There are two boxings, one for the Spitfire FR.22/24 and one for the Seafire FR.46/47.The shape of the fuselage is almost perfect, but the nose air-intake of FR.46/47 is incorrect. The demarcation line for side cowl and lower cowl is also incorrect and the shape of the canopy isn't very good. The cross-sectional shape of the radiator should be rectangular. The shape of the nose bulge isn't very accurate, particularly the demarcation line for the upper cowl.Academy There are two offerings, one for the Razorback Mk.XIVc and one for the Bubbletop Mk.XIVe. The shape of the canopy is good, although the size is a little off. Unfortunately the fuselage is too much fat, destroying the delicate beauty of the Spitfire's lines. |
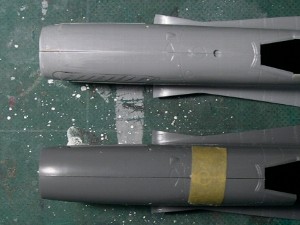
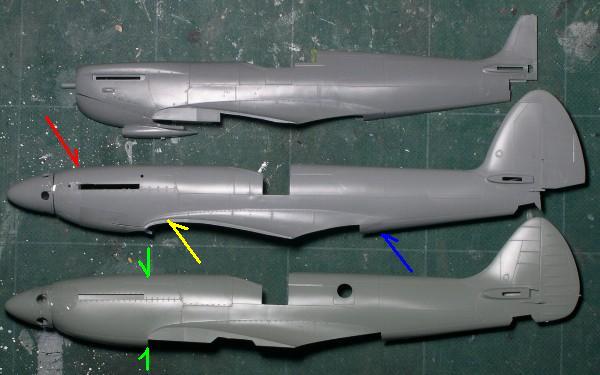 From top to bottom, pictured here are; the Hasegawa IX, the Airfix 22/24, and the Academy XIVe. The Academy fuselage is too much fat (2 or 3 mm high at the green pointer). The Airfix fuselage is almost correct. The lower fuselage should be slimmer by about 1mm (blue pointer) and the upper nose should be straight (red pointer). The join between fuselage and filet is a little off (yellow pointer). |
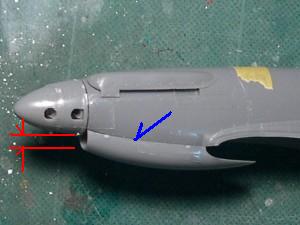 This is the intake of FR47. The kit intake is too narrow and too tall (red pointer), and the position of the panel line (blue pointer) is too low. |
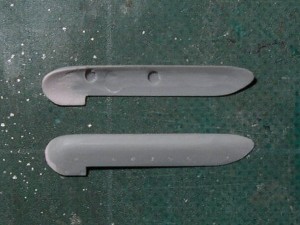
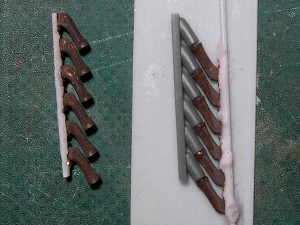
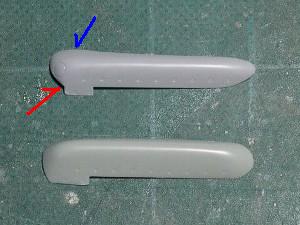 The upper is the Airfix rocker cover, while lower is Academy. Basically, the Airfix one is better although the demarcation line is incorrect (red and blue pointer). |
 Airfix FR.47. It's way off. |
 Academy. Oh, much better. |
|
The wing Spitfire wings is a very complicated subject. To summarize (and I won't even get into the earlier Merlin types or Super Spitfire).
|
**Construction |
|
The fuselage The vertical fin was replaced with the one from the Academy fuselage. As for Academy's fin, the side shape is almost correct but the cross section shape is wrong. The first quarter is too thin and the middle is too thick. So I applied CA glue and plastic powder which I then sanded to shape. |
 This is Academy's vertical fin. |
 Plastic sheet (white) and "ALTECO" CA glue putty (pink) are for reinforcement. |
|
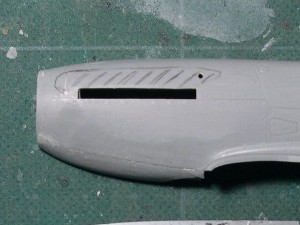
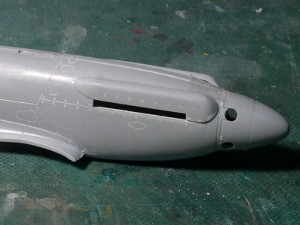
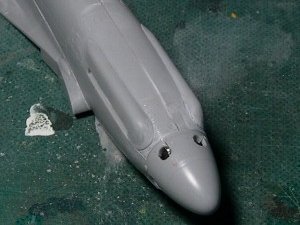
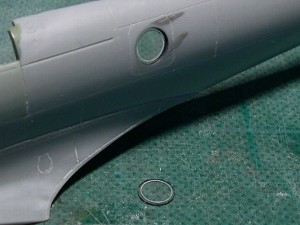
I opened the camera window. Note that the position of the window is different from Mk.22, and that Mk.XIV has the access hatch for the camera on the port side and no hatch on the starboard. |
 It was 6 mm in diameter. |
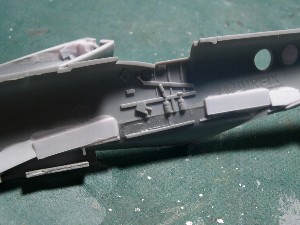
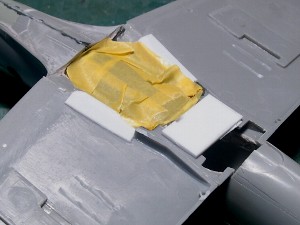
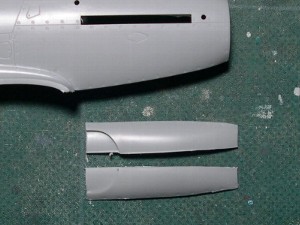 The under cowl panel was cut in two and glued to each fuselage half. |
|
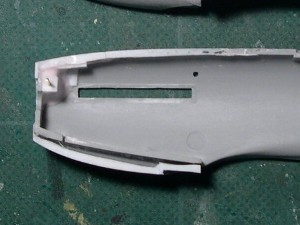
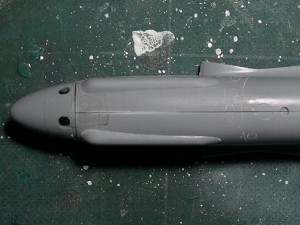
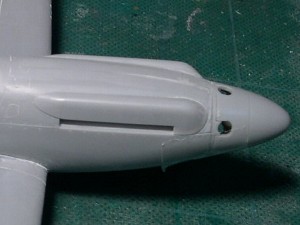
The camera window of FR.XIV At first I thought FR.XIV has two lower fuselage windows so I cut the fuselage parts and opened the windows, but subsequently I learned that the FR.XIV doesn't have the lower camera window (FR.XVIII or PR.XIX have them). You can confirm this fact from the photo of the Belgian FR.XIV in the Squadron "In Action" book. You can also see that some XIV's have the IFF antenna in the camera window position. |
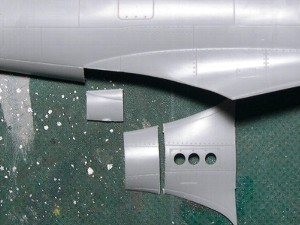 This was a futile effort. |
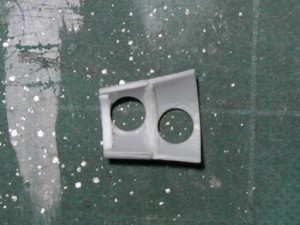 This was useless too. Ooooo, sigh. |
|
The nose cowl The shape of the nose cowl is essential to the look of the Griffon Spit, so I corrected it until I was satisfied. |
 This is the original Airfix. The right and left cylinder banks aren't parallel. (This is logically inconsistent.) |
 So I shimmed it with sheet plastic to widen the nose (upper one). |
 I had to sand the hatched area a bit to get the rocker cover bulge to fit. |
 The metal pin (in front of exhaust) connects right and left fuselage parts. |
|
The tip of rocker cover bulge was corrected with CA glue putty. First, I patch Scotch tape (Sellotape) on the fuselage part. Next, set the bulge and put putty, then remove bulge from the fuselage. After applying the putty, I sanded it. While I was sanding, I was conscious of the existence of the cylinder heads. |
 I applied putty and sanded it roughly to shape. |
 I glued bulges and sanded again. |
 Almost finished. The vertexes of the forefront and last cylinder were defined. |
 Parallel!! Please notice that white plastic plate was inserted. |
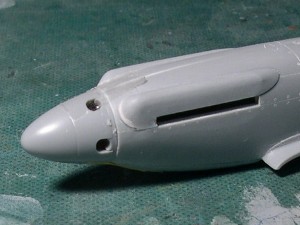
 Done, finally. Note the angle or the shape of the tip and the demarcation line between it and the cowl. |
 Note the width of the bulge. |
|
After market parts |
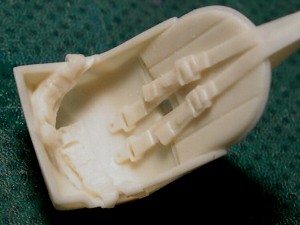
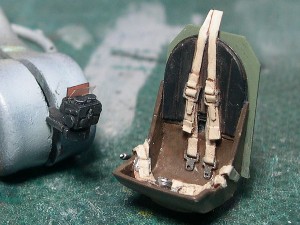
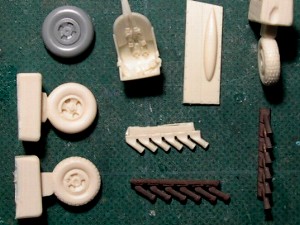 These are Ultracast resin parts and Moskit exhaust pipes. |
 This seat is very good. The casting of the seat belt is very fine. |
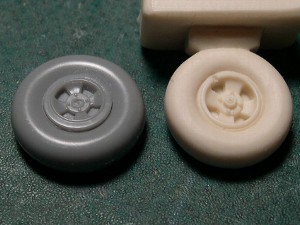 The left is Hasegawa IX, the right is Ultracast. |
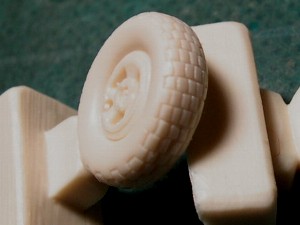 Ultracast's block pattern is fine. |
|
The wing filet At last, I decided to exchange the filet for Hasegawa IX. There were two reasons. One, Airfix doesn't depict the small bulge on the filet and Hasegawa does. Two, I corrected the position of the wing assembly. The position of Airfix's wing filet is a little low, and Hasegawa's wing is a little thick compared with Airfix's. |
 The filet was removed from Airfix's fuselage. Oh, what a slender body ! |
 Hasegawa's filets were temporary fixed on Hasegawa's wing. Then filets and fuselage were sanded to match. |
 I made a very small step between the fuselage and filet to represent the thickness of thin duralumin panel. |
 This created a joint line in the cockpit, but it couldn't be helped. |
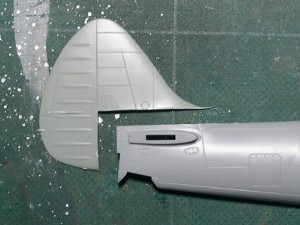
 The Airfix original filet and wing. Note that there is no bulge. |
 This is Hasegawa filet and wing. Note the position (height) of the wing as compared with the left photo. |
|
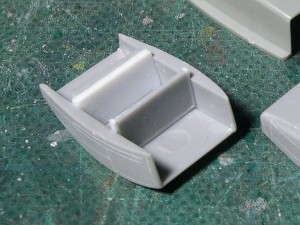
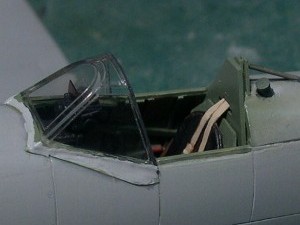
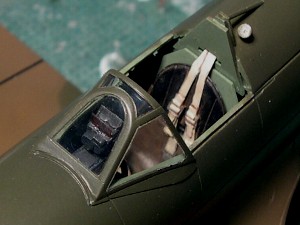
The cockpit |
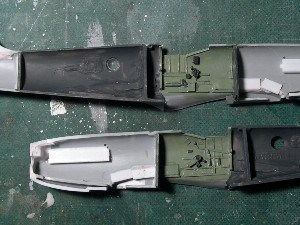 I made three bulkheads in order to prevent from dust or mist from entering the cockpit. |
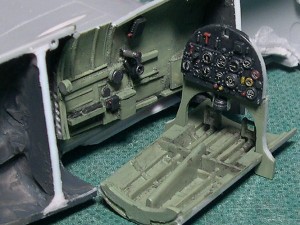 The cockpit floor (of course, Spitfire doesn't have the floor) is Hasegawa. The instrument panel is Airfix. |
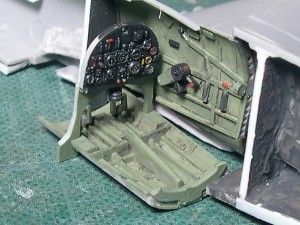 Some Hasegawa's cockpit parts were used. I regret that my model doesn't exactly reproduce the Mk.XIV's cockpit. |
 The camera window was cut out from Tamiya 0.4mm clear plastic sheet. |
|
The fuselage and wing I checked the fit of the canopy to the fuselage. Academy's canopy is narrower than Airfix's fuselage because Academy's fuselage saddle is too narrow. So I had to cut out fuselage joint line by 2 mm.In order to avoid distorting the fuselage, I took care with the order in which I assembled things. First, the fuselage was glued together. Next, the upper wings were glued to the fuselage. Then, reinforcing behind the fillet with CA glue putty, the lower wing was glued on. |
 White plastic sheet is reinforcement. |
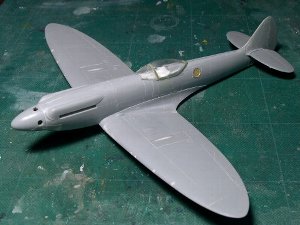 Finally, the whole aircraft appeared. |
|
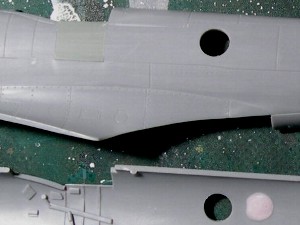
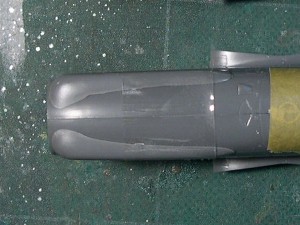
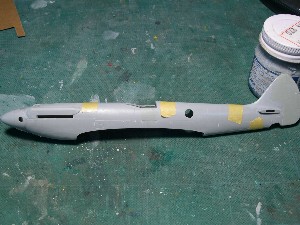
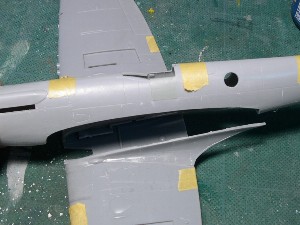
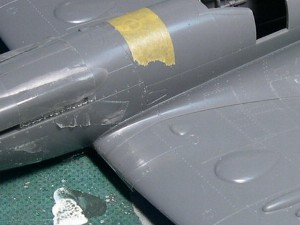
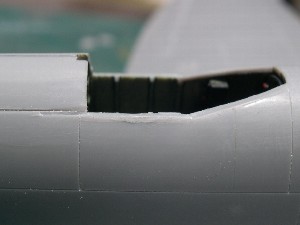
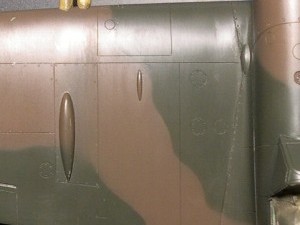
Some panel lines of the Mk.XIV were different from the Mk.22 so I filled or scribed accordingly. Please check by yourself. (the starboard of the nose cowl, the lower of the fuselage fuel tank, under the windshield, etc. ) |
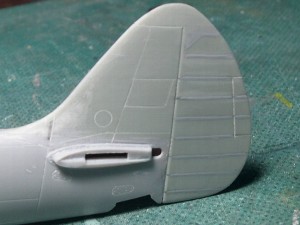 Note the re-scribed panel lines. The base of the horizontal fin was cut out. |
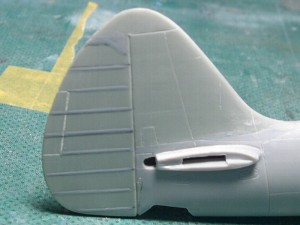 Rib tapes were reproduced with Mr. Surfacer. The position of the tab was corrected. |
|
The radiator and air-intake I used Airfix's radiator part. Now I know that the shapes of the Mk.XIV and Mk.22 are different, especially in plan view, but I only corrected the side view, front view and panel lines.The engine air intake was from Airfix. The connection between it and the fuselage was corrected - the distance from the top of the fuselage to the bottom of intake should be 32 mm. |
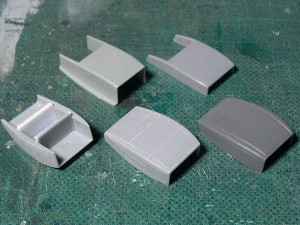 The front row from left to right: Airfix (corrected), Airfix (corrected) Airfix (original). In the back row, the left is Academyand the right is the Hasegawa IX. |
 I cut the corner of Airfix's part and made it a square. |
|
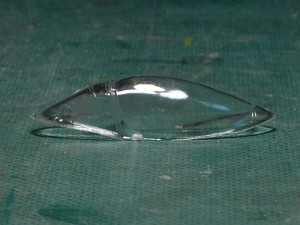
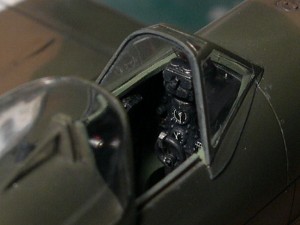
The canopy The canopy was the biggest challenge. The fit of Academy's canopy to Airfix's fuselage is the worst. And the sit of the canopy is too high as compared with Airfix's "accurate" fuselage. ( However, Academy's fuselage is too much high, so if you build Academy's kit as it is, you may not find that the canopy is too high.) I cut down the lower part of the canopy by 1 mm, and the canopy frame had to be entirely scratchbuilt. |
 0.2 mm clear plastic sheet was glued for the frames. The inside of the canopy was protected with masking tape. |
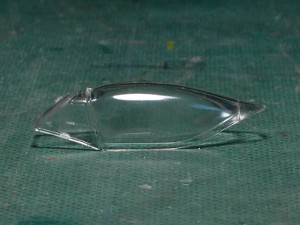
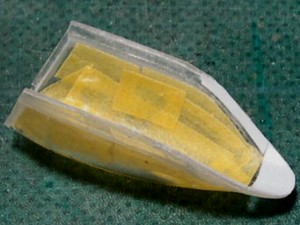 0.3 mm white plastic sheet was glued to the inside of the rear portion. |
 The lower part of the canopy was cut down by 1 mm. |
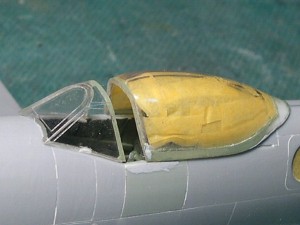
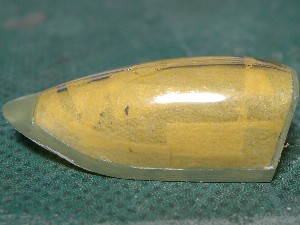 Then I carefully sanded the frames. I painted them to check the finish. |
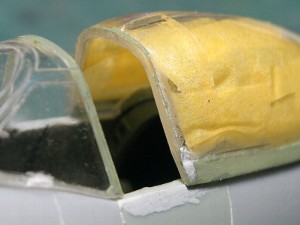 The wind shield was also sanded carefully to adjust the hight and fit. |
 The fuselage was cut down to the canopy slide line. |
|
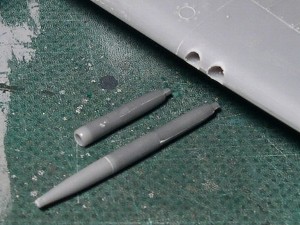
The propeller and spinner The spinner is from Airfix. It is almost perfect and needs no correction. The propeller blades are from Academy. They are too thick and too wide so I sanded and sanded, and sanded some more. Airfix's blade is too slender and too long.There are two types of Spitfire blade. They differ at the width of the tip. The Mk.XIV was only equipped with the slender type but some restored A/C have the wide type. |
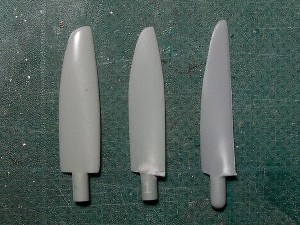 The left : Academy (original), center : Academy (corrected), right : Airfix |
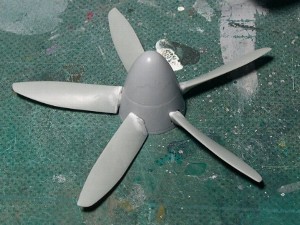 The shape is quite complicated. |
|
Details |
 The 20mm cannon and 50cal. machine gun are from Hasegawa. They were joined to the Airfix parts. The wing bulge for the 20mm cannon is from Ultracast. |
 Tab rods and tail light were scratched. |
 The Mk.IID gyro-gunsight is made from the Tamiya P-47D gunsight. The seat is from Ultracast. I cut the base of Moskit's part and glued in plastic sheet. The Airfix part was the guide. |
 The base of the wind shield is made of 0.1mm plastic sheet. |
 The base of the wind shield is made of 0.1mm plastic paper. |
 |
|
|
**Historical investigation |
|
Range of the Griffon Spit It is said that the Spitfire has short legs. But some Griffon Pilots said that range was not a problem. So I studied fuel capacity of each type of Griffon Spit mainly from the article of "War Bird Tech". |
| Type | Internal Fuel Capacity (gal/Liter) | Maximum Fuel Capacity (gal/Liter) | Note |
| Mk.XII | 85/380 | 115/520 | fuselage tanks only |
| Mk.XIV | 109/490 | 279/1260 | extra wing tank added |
| Mk.XVIII | 175/790 | 345/1550 | rear fuselage tank added |
| PR XIX | 254/1140 | 424/1910 | ammunition bay tanks added |
| reference | |||
| P-51D | 249/950 | 465/1780 | USgal/Liter |
| P-47D | 370/1410 | 590/2240 | USgal/Liter |
| P-47N | 570/2170 | 970/3690 | USgal/Liter |
Note |
**Paint & Markings |
|
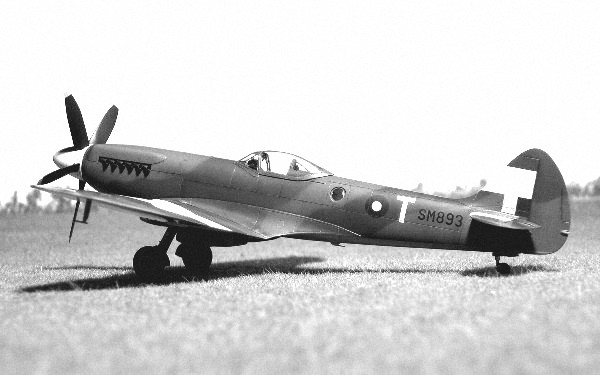
The historical investigation of the marking I selected the 28 sqn. code letter "T" serial SM893 in Malaya 1946 from "Supermarine Spitfire / Bison Books" by Chaz Bowyer. SEAC Mk.XIVs were finished Dark Green / Ocean Grey / Medium Sea Grey with large size roundel and Sky band at the factory, sent to India and re-painted at the depot. Some A/C still remained in the Dark Green / Ocean Grey scheme, Dark Green was overpainted on roundels and SEAC 16inch roundels were repainted (e.g. some A/C of 17sqn or 28 sqn). And some A/C were repainted Dark Earth on Ocean Grey. The undersurfaces remained Medium Sea Grey and large roundels were repainted.The actual photo of "T" SM893 shows that this A/C was Dark Green / Dark Earth scheme with White spinner, 28in White band on main wing, 18in band on tail fin, 16in SEAC roundel, 12x18in fin flash, 18in White code letter and 8in Black serial on the fuselage. This A/C has the IFF antenna under the fuselage. Other Mk.XIVs of the 28 sqn. can be seen in "Eyes for the Phoenix / HIKOKI Publication" by Goffrey J. Thomas. Painting |
 The basic painting is finished. All were sprayed freehand at this time. |
|
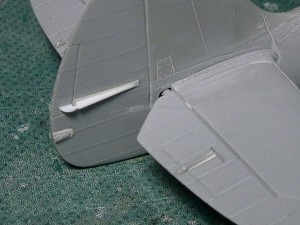
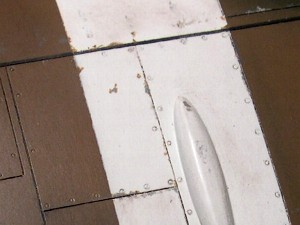
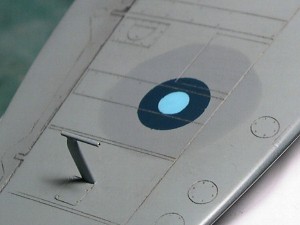
The wing again Damn it! I noticed the mistake on the wing of my model. The XIV have no blister for the tire on the wing. To be exact, there is no large blister , and only the small slender blister. Then I studied other types determined the following.The very late IX and XVI have blisters exactly same as Hasegawa's IX kit. Only these types have the small gear indicator post on the wing. The PR XI and XIX have no blister (no slender bulge). The Seafire XV and XVII don't have them either. The VIII (and perhaps the VII) doesn't have the blister (for this type, I found the definite evidence photo of live VIII in "RAAF CAMOUFLAGE & MARKINGS 1939-45 Vol.2 (Kookaburra)"). A good many of drawings of VIII which I've seen describe the bulge, but these are erroneous. |
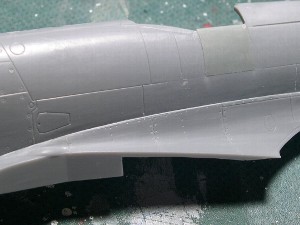
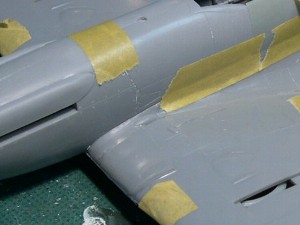
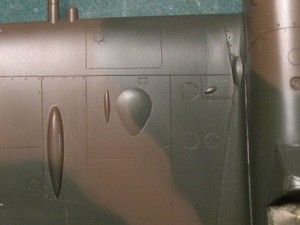 Before correcting. Note that the panel line of the extra wing tank was scribed. |
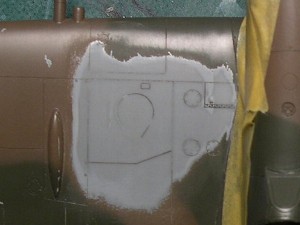 I cut off the slender blister with a knife and sanded the large blister. The very small blister on the wing root was also removed. |
 After correcting. The panel line aft of the blister should be removed. |
|
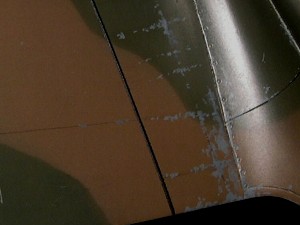
More painting I imagined that this A/C had the normal size roundels overpainted at the depot in India. So I depicted that. I mixed black into DG then sprayed on the portion of "original roundels" and "original sky band".I used Blu Tak for the demarcation line between the DG and DE (please see refer to the Wirraway article). The turtledeck beneath the canopy was painted same (DE/DG) as the other portion of the fuselage. Original photos confirmed that there is a walkway on SEAC scheme . It might have been re-painted after SEAC scheme was applied. |
 The walkway was masked and sprayed. |
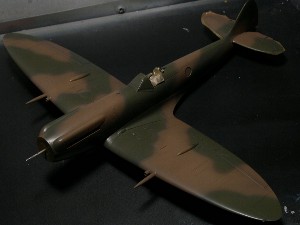
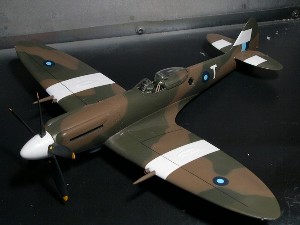 Camouflage and markings complete. |
|
The instant lettering (dry transfers) |
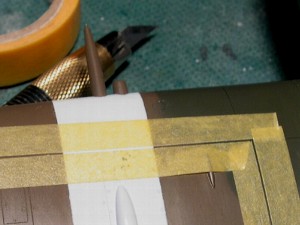
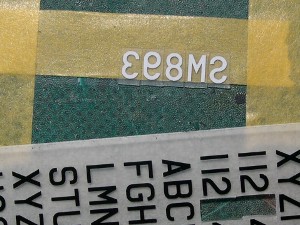 The serial number is a dry transfer. I depicted exactly the RAF regulation style and size. Each letter was cut out and put on tape. |
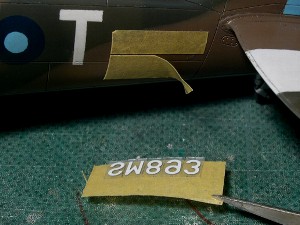 First, the upper masking tape which was cut as the size of serial was put in order to determine the correct position. The lower tape was placed as a guide for applying the dry transfers. |
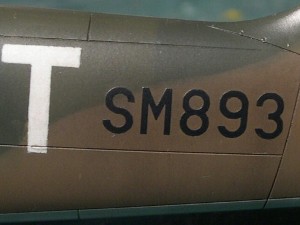 Finished. |
|
|
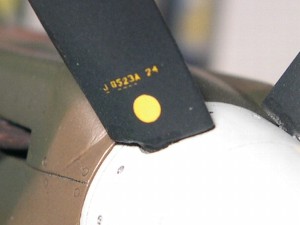
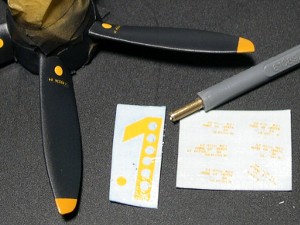 The yellow circles were cut with a metal tube. Numbers are from a P-38 decal sheet, so they are not correct. |
 The incorrect P-38 stencils. |
|
Weathering Weathering method was done by my usual method. I applied chipping with a fine brush, and applied pastels. |
 This chipping is Medium Sea Gray. The rivet line was marked with a pencil. |
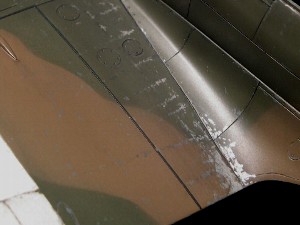 Silver was used partially. Then dark color pastels were used around the chipping. |
 The ammunition panel was heavily chipped. |
 Around the cockpit. |
|
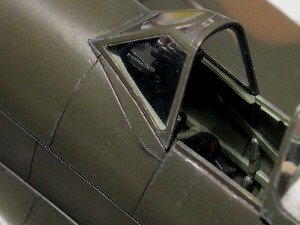
Details Academy's windshield is a little different at the window frame. The angle of the upper frame of the side window is incorrect, and the side frame of the front window is also incorrect. The width is not the same on the actual A/C. |
 Academy's windshield is a little off, but my model was not corrected. |
 The edge of the wind shield was thinned. |
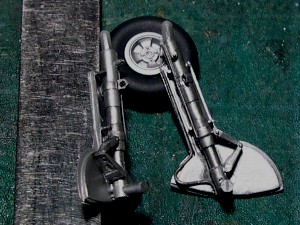 The entire landing gear is from the Hasegawa IX. The main leg was shortened by 1mm. The brake line and ring were added. |
 The pitot tube is soldered brass tubes. Please note the over painting of the normal size roundel. |
**Completion |
|
Finally, I completed the construction. This was the hard way of modeling, but I enjoyed it and satisfied the result. And this model was published in Japanese model magazine "Scale Aviation (August 2005)". Acknowledgment I would like to address special thanks to Mr. Tony Bell for his great effort of proof read.References Please see refer to the Spitfire II article. |