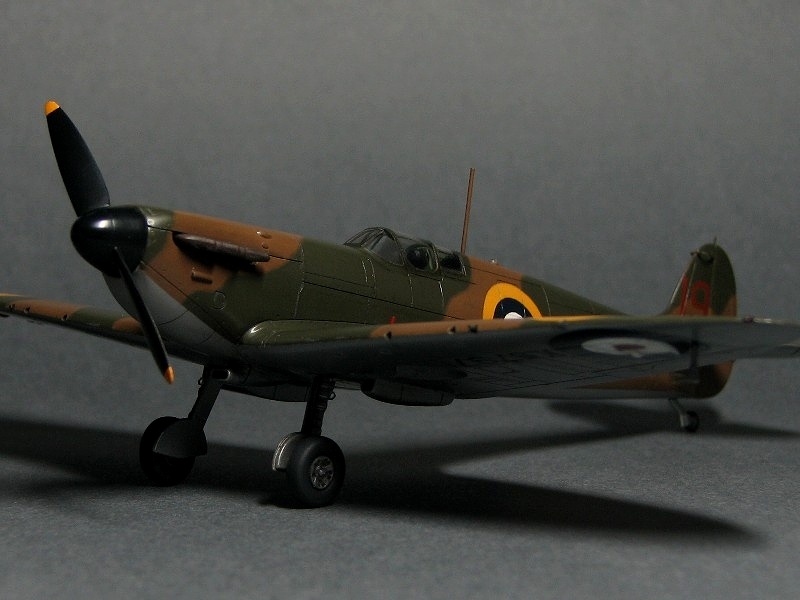
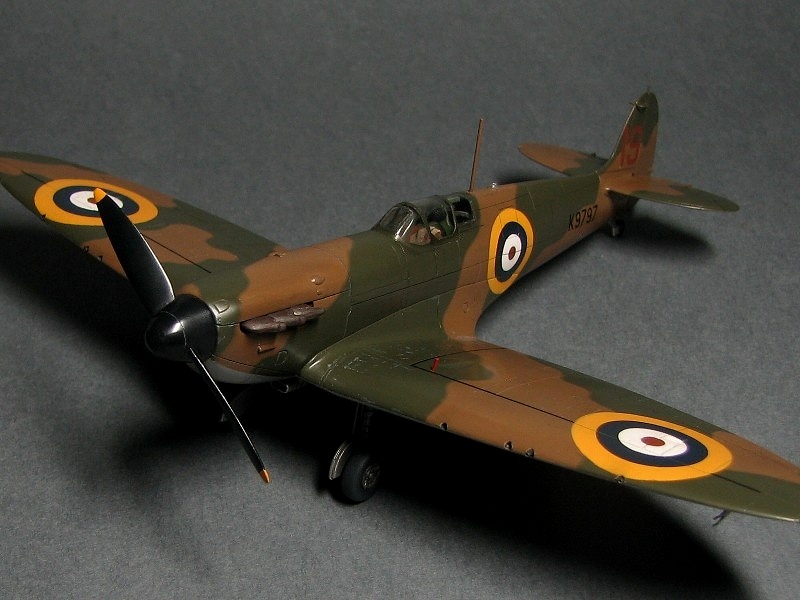
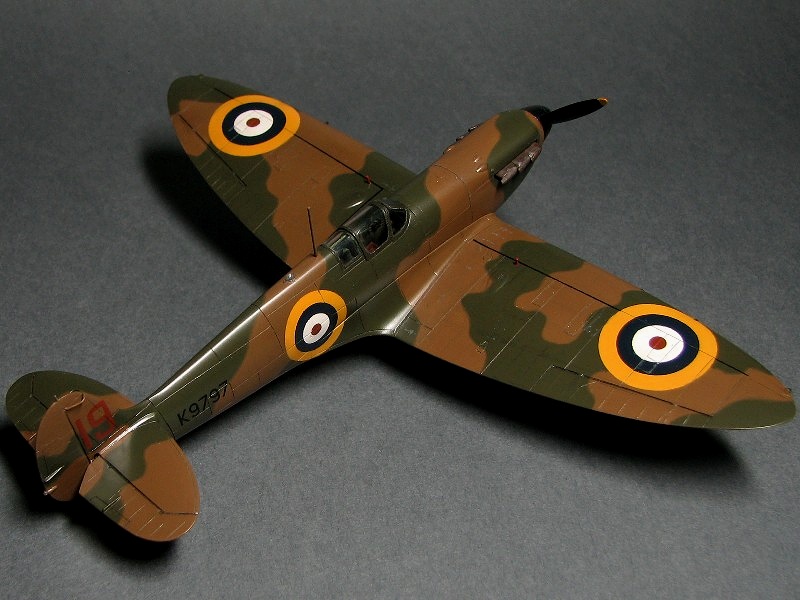
Spitfire Mk.I Tamiya 1/72


Introduction

A few years ago, I started building of the FIRST Spitfire Mk.I using Tamiya kit. If I start now, I might use new Airfix kit. But at that time, it was not available. Tamiya was the inevitable choice. The concept of this modeling was to correct and brush up the outline shape as much as possible, especially, to depict perfect outline of the Merlin engine cowling.


Drawings

Before starting, I made original drawings.


Side view drawing

Full Size Drawing

  • The port side is the late production, and the starboard is the early production with Watts two blades propeller.
  • The blue lines are low degree of certainty.
  • The fuselage side view is drawn from photos of actual existing aircraft. These photos were taken from right beside and enough far. So I proud the shape of this drawing is sufficiently accurate. The length of the fuselage is calculated from the fuselage station diagrams.
  • The location of the firewall (5th frame) is not located on the panel line but the center of the double rivet lines afterward of this panel line.
  • The airfoil of the main wing is NACA2413 (root). The angle of incidence (root) is 2.
  • The spinner and upper cowl of existing aircraft are different from original WW2 aircraft. So they were drawn from original WW2 photos.
  • The lower edge of upper cowl is not exactly parallel to the fuselage reference line.
  • The canopy slide rail is not parallel to the fuselage reference line as well. It inclines 044".


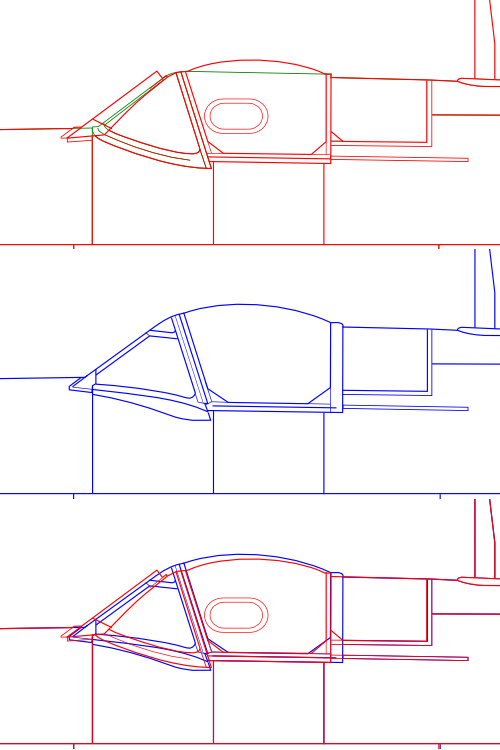
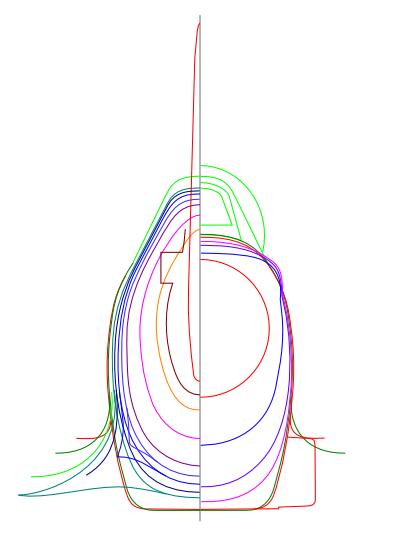
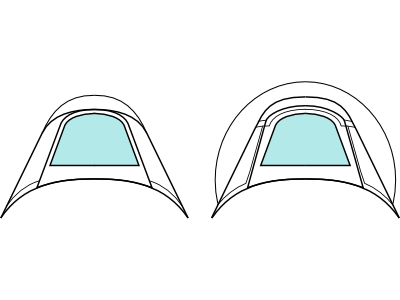
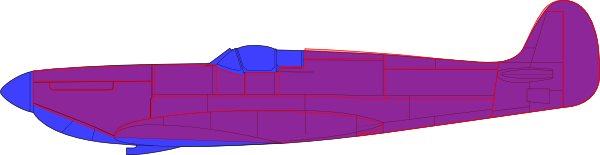
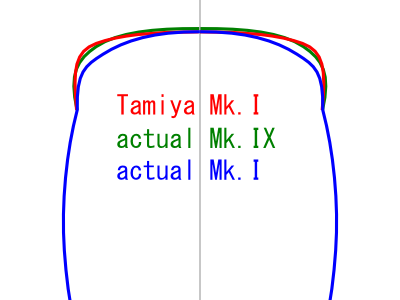
The shape and size of the Mk.I slide canopy are different from the late Mk.V canopy. See the following figure. The late Mk.V (Blue) is higher and longer than Mk.I (Red). Be careful that many of kits don't distinguish them. On the other hand, the angle of the windscreen is unchanged through very early Mk.I (Green) to late Mk.V .


Top and bottom view drawing

Full Size Drawing

Full Size Drawing


  • The widths of the fuselage, upper cowl, exhaust and canopy are carefully calculated. Thus I recommend you to use them for your modeling.
  • The main wing is drawn under the calculation from the coordinate tables.
  • Rivet lines are traced from photos of existing aircraft. There are some minor variations shown in blue lines.
  • The bent line of the wing reference plane is shown with the red line. It is 31 inches from the center.


Cross section drawing

Full Size Drawing


  • Each cross section figure of the fuselage (section #5 to #22) is drawn from factory drawings.
  • Cross sections of the engine cowl (section A to D) are drawn from photos of the actual aircraft.
  • The filet is drawn from photos of the actual aircraft as well.


The superimpose of cross sections shows the transition of the surface.


Front view drawing

Full Size Drawing


  • The left side is B wing and the right side is A wing.
  • Some references state that the diameter of De Havilland metal propeller is 9'8". But that does not match to photos of the actual aircraft. The correct diameter is unknown but it is almost 10'9" which is the same as Mk.II and IX.
  • The red outline of the propeller blade is developed figure.
  • The angle of gear leg is 92.4. The angle between the gear leg and wheel axis is 98 (Mk.I to V) or 94(Mk.IX)


Kit review

Tamiya 1/72 Mk.I and V are excellent kits and had been the best kit of 1/72 scales until the new Airfix Mk.I was released. Sharp and crisp panel lines and parts fitting are superior to new Airfix. One of wake points is the shape of the canopy. The canopy side of the actual Mk.I is flat but kit is a bubble shape. Other wake points are rather maniac. The length of the fuselage is short by 2mm (0.08"). The height of rear fuselage is high by 1mm (0.04"). The tail fin is thick. The presence of engine cylinder heads is excessively represented.


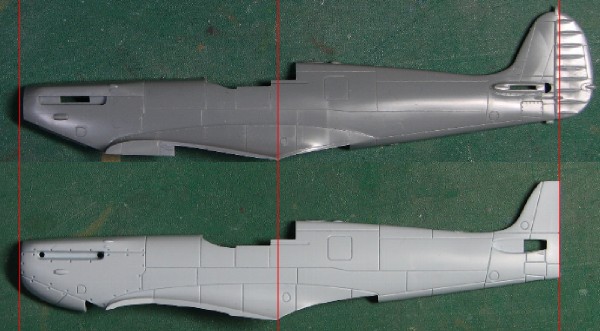
The upper is Tamiya and the lower is new Airfix. The Tamiya fuselage is a little short.


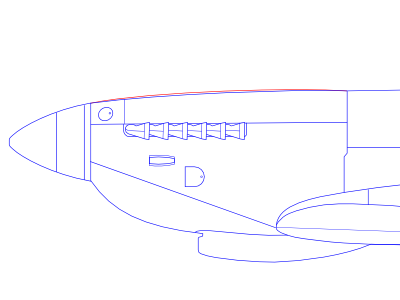
Tamiya is red and the actual aircraft is blue. The fuselage length is adjusted.

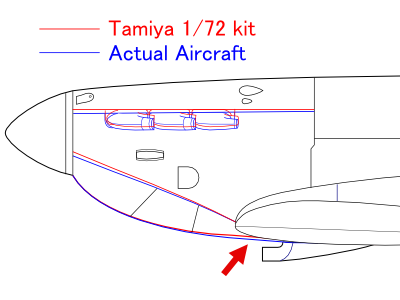
The blue line is actual aircraft and the red line is Tamiya kit. Note the step of Tamiya kit at the red arrow.


The upper cowl

Most of kits excessively represent the presence of the Merlin V12 engine cylinder heads. Tamiya 1/72, 1/48 and new Airfix 1/72 are unexceptional. See the following picture. The nose line of the actual aircraft is almost straight from the front of the engine to fuselage fuel tank. On the other hand, kit nose line is bent as the crank. (Note the red circle.)

Calculating from photos of the actual aircraft, the correct width of the upper cowl is 72cm (28.3"). The maximum width of Merlin engine (1 stage type) is 76cm (29.8") in the catalog. Thus, the engine cylinder head is not the maximum width. I think it includes the generator.


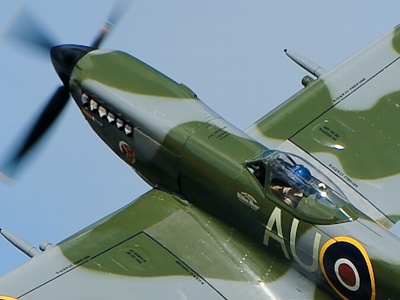
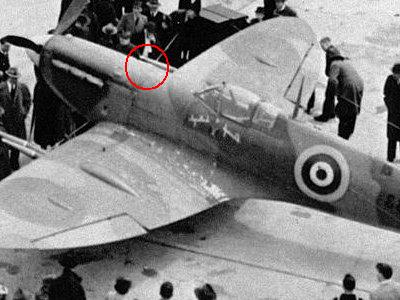
Seeing from this angle, the nose line of the actual aircraft is not bent at the red circle but almost straight. Be careful this picture is mirror-reversed.

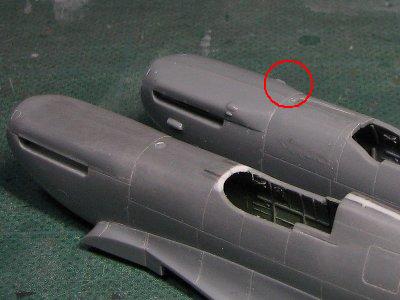
The upper is Tamiya original. The line is bent at the red circle. The lower is under correction work (not finished).

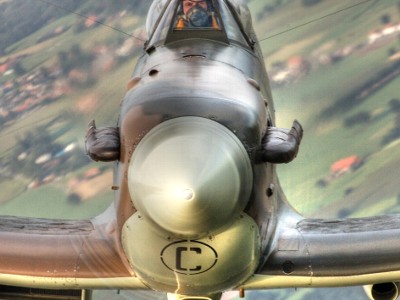
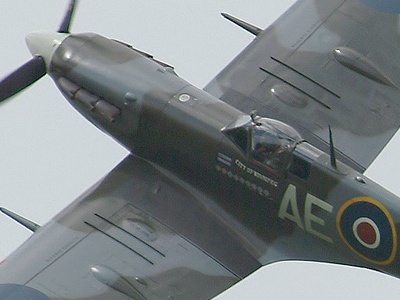
The nose line is slightly bent in this angle.

The Mk.IX cowl is a little different from Mk.I.

Though, the engine cylinder head is out of the firewall.

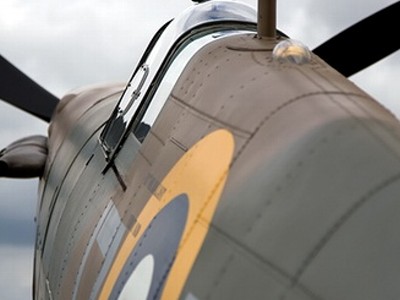
This photo shows the absolute width of the upper cowl.

Merlin engine is inside. This picture is mirror-reversed as well.

This is the typical image. This image is important in correction works.


The blue line is the actual aircraft, the red is Tamiya kit and green is actual Mk.IX.


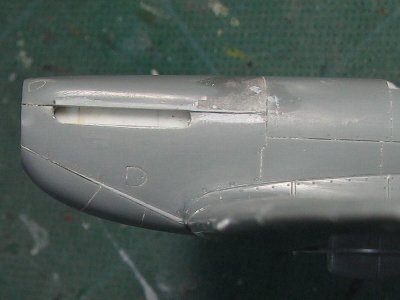
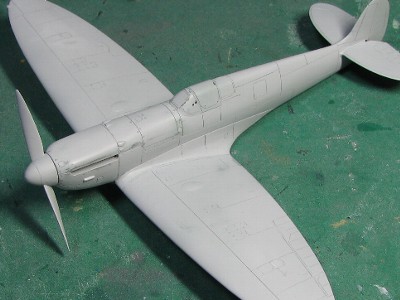
In accordance with above analysis, I corrected the kit nose cowl.


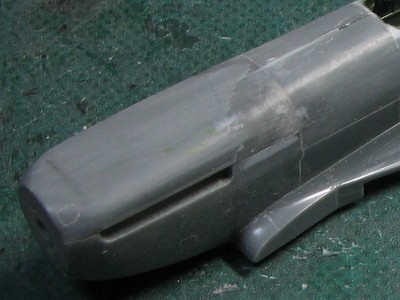
The correction work is finished.

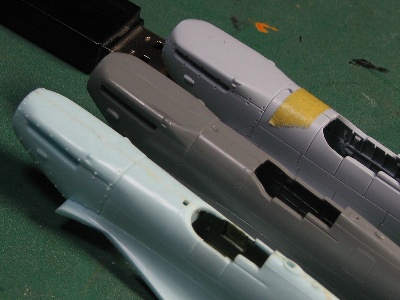
The upper is new Airfix, the center is Tamiya original and the lower is old Airfix. The old Airfix is the best as for above point.


The fuselage and wing

Other weak points were to be corrected as well. The height of the fastback fuselage was cut down by 1mm (0.04"), the position of the canopy was reduced according to the rear fuselage, the tail fin was thinned.


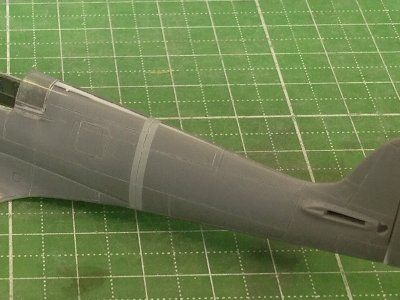
Furthermore, the length of the rear fuselage was extended by 1.5mm (0.06").

At first, only the upper wing parts were glued on the fuselage with thin cement. After that, the lower part was to be glued.

I mistook the color of rear fuselage. Silver is correct. But when I noticed, I already glued the canopy and wing.

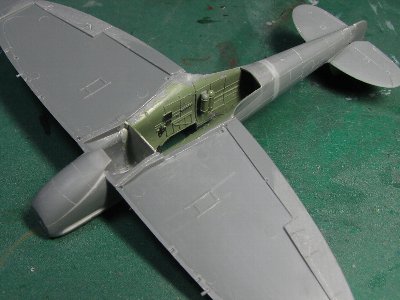
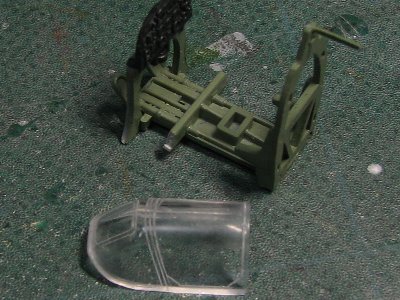
The bulkhead and floor were glued to block dust and to keep windows clean.

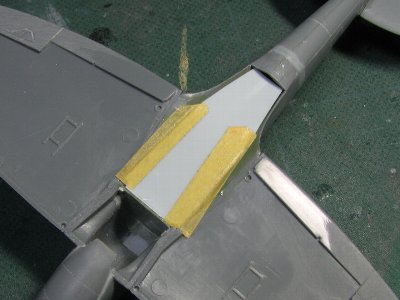
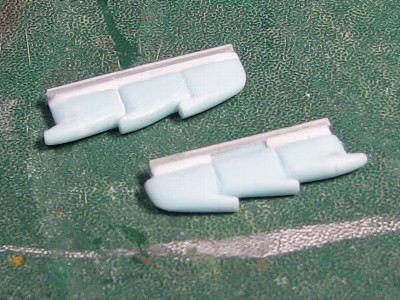
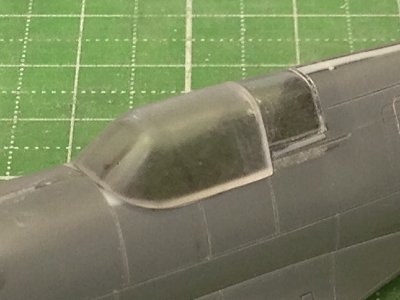
I used the new Airfix early Mk.I canopy part. The third fixed canopy was cut out and glued on the fuselage first. Then the surface was sanded to flat.

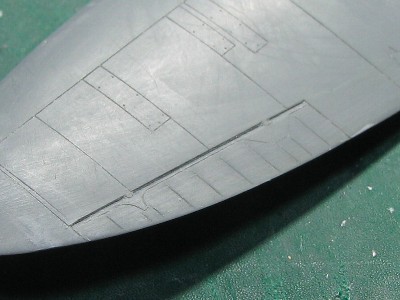
The kit frames were sanded to flat and they were newly engraved.

The lower cowl was corrected. The styrene sheet shim was inserted to the kit lower cowl

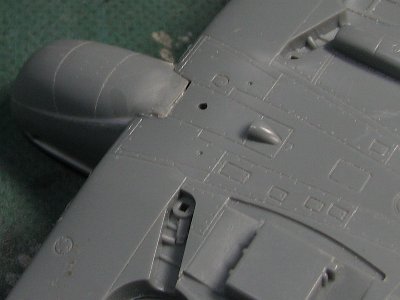
The gap between the lower cowl and wing was covered with the air intake.


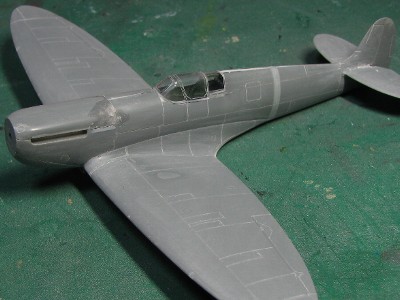
The kit mold of aileron was sanded and rib tapes were depicted with a knife.


The wing


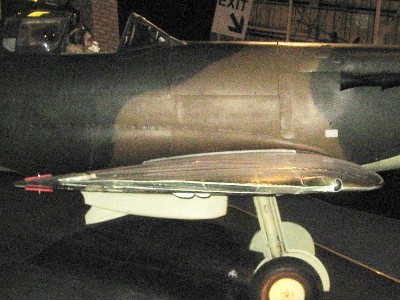
The washout of the spitfire is more than 2. See this photo. Tamiya 1/72 kit is not perfectly represent.

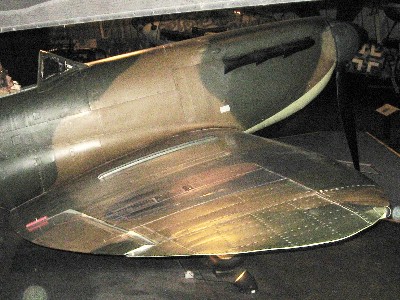
The wing tip is very sharp.


Details


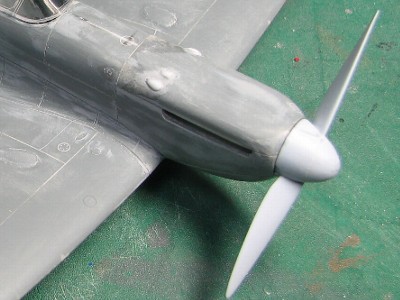
The propeller and spinner were from the new Airfix kit. The kit parts are generally correct. So I made only minor corrections.

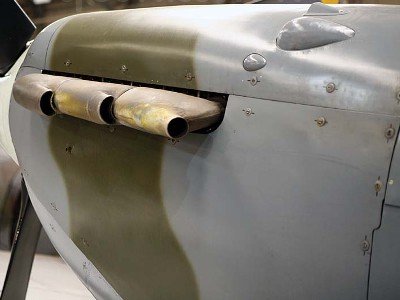
Exhaust pipes were from old Airfix Mk.I.


Painting and marking


Mr. Color Surfacer was sprayed.

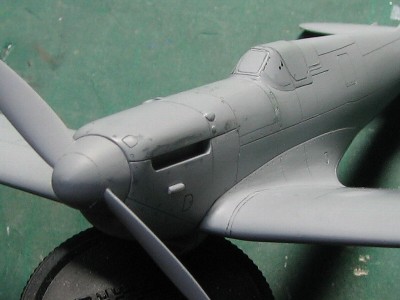
See the corrected cowl.


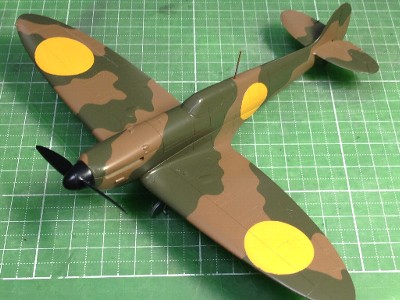
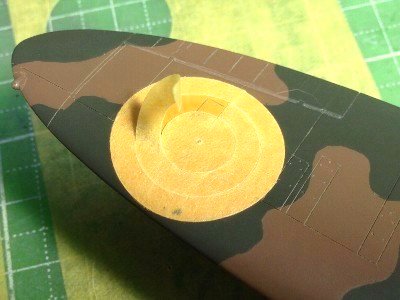
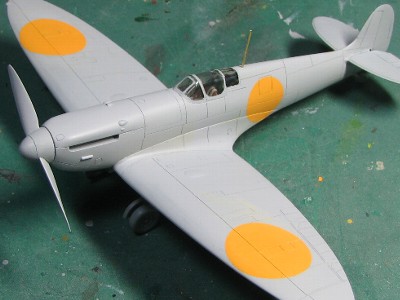
All of roundels were painted. At first, Yellow circles were masked and painted. Then these circle were masked for the camouflage.

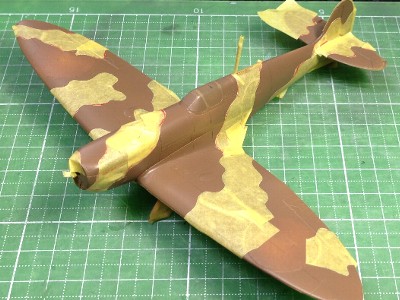
The yellow circle and camouflage colors were painted side by side. The camouflage pattern was masked with masking tape.

The surface was polished with Mr. Laplos #6000.

The under surface was painted Silver.

Blue and White were painted side by side.

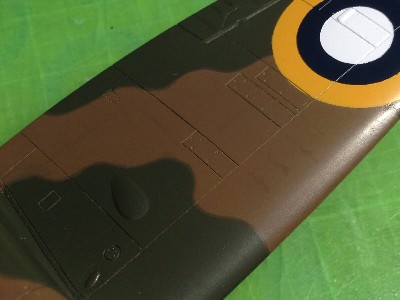
The demarcation line between Dark Earth and Dark Green were drawn by a fine brush with 50 : 50 of DE and DG.

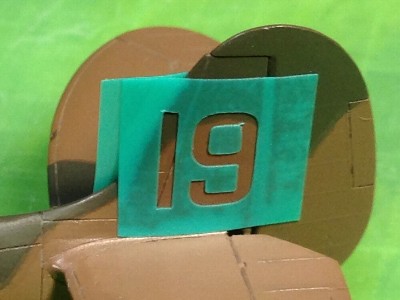
Masking film of the unit marking of "19" was cut with the cutting machine.

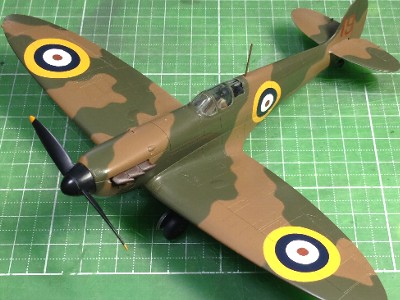
The roundel and unit marking were finished.

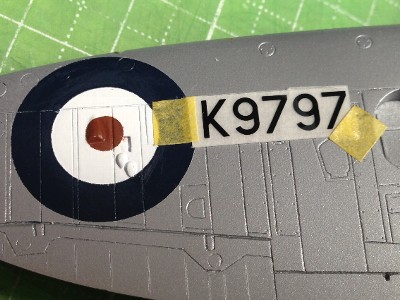
The serial number was custom made dry decals.

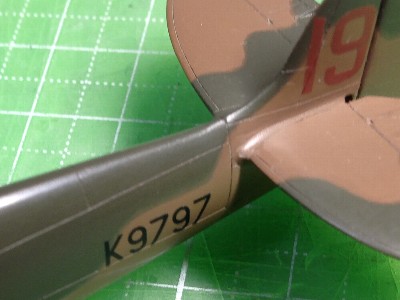
The fuselage serial number was the same.


Completion

Finally, the First mass-produced model of Spitfire was completed. I was very satisfied with the corrected outline shape especially the nose cowl.


Appendix


Spitfire Trivia 1

Each length of three individual fish tail exhausts of Mk.V is not equal. The last one is longer than others. On the other hand, Mk.I's straight exhausts are equal lengths.


Spitfire Trivia 2

The shape of bullet proof grass is not changed. The left figure is Mk.I and the right is late Mk.V. The angle is not changed as well.


Spitfire Trivia 3

There are two variations in the engine upper cowl of the 2 stage Merlin model. The blue line is early type and the red is late type. Tamiya 1/32 kit correctly represents this difference.


Spitfire Trivia 4

There is a variation of Mk.V oil cooler fairing. Some aircraft have this fishtail style fairing.


The side view drawing of Mk.V

Full Size Drawing


  • The port side is the early production model from Castle Bromwich Aircraft Factory. The late production of CBAF-built Mk.V equips late-style windscreen and canopy.
  • The starboard side is the tropical late production model of Supermarine.
  • The Westland-built Mk.V is the same as the Supermarine.
  • Some aircraft have the small air intake below the windscreen (port side only).
  • This small intake can be seen both CBAF and Supermarine.


The top and bottom view of Mk.V

Full Size Drawing

Full Size Drawing


  • The "D" shape small access panel rearward the tire house on the upper side can be seen on some existing actual aircraft. However this panel is not drawn in any existing drawings.
  • Details of access panels rearward the tire house of lower side is not clear.
  • The reinforce ribs on the tire house (red lines) are retro fit.


Color profiles

This is the early production of Mk.I K9797 of the 19th Sqn., in October 1938, Duxford. The 19th Sqn. was the first front line unit which equipped Spitfire. The scales of this profile is the same as other my profiles (FM2, F6F, F8F, P-51). These profiles were drawn with Inkscape.


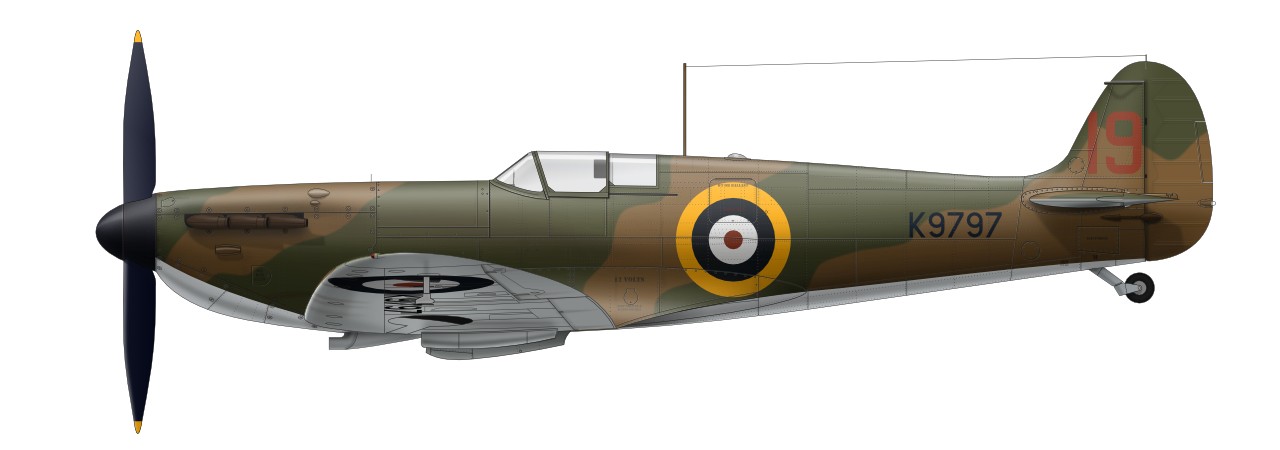
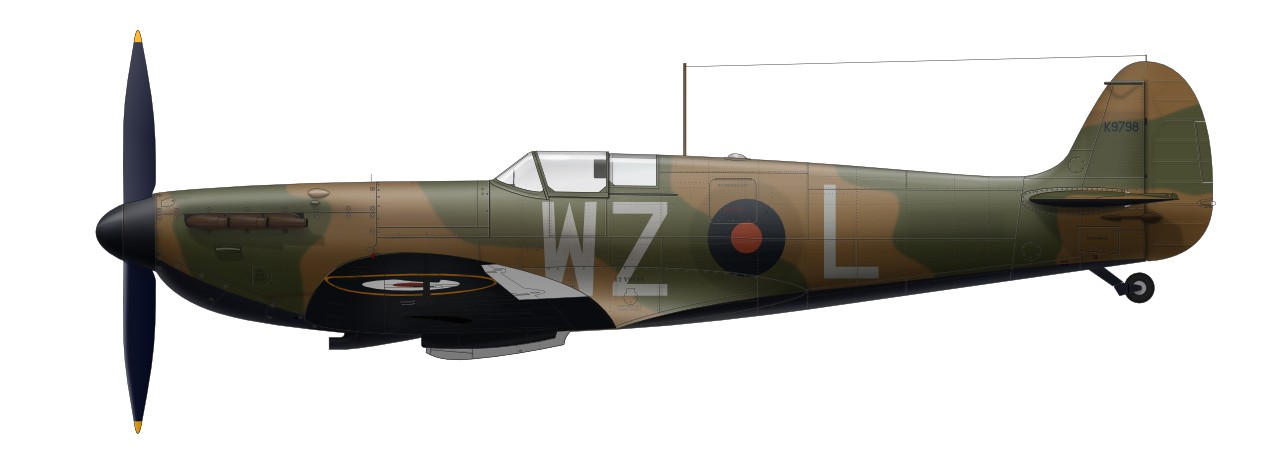
One more early Mk.I illustration is the same 19th Sqn., in April 1939. The new B type roundel might be painted on the deleted A-1 type roundel. The photo of the actual aircraft seems that the lower wing roundel was A type.


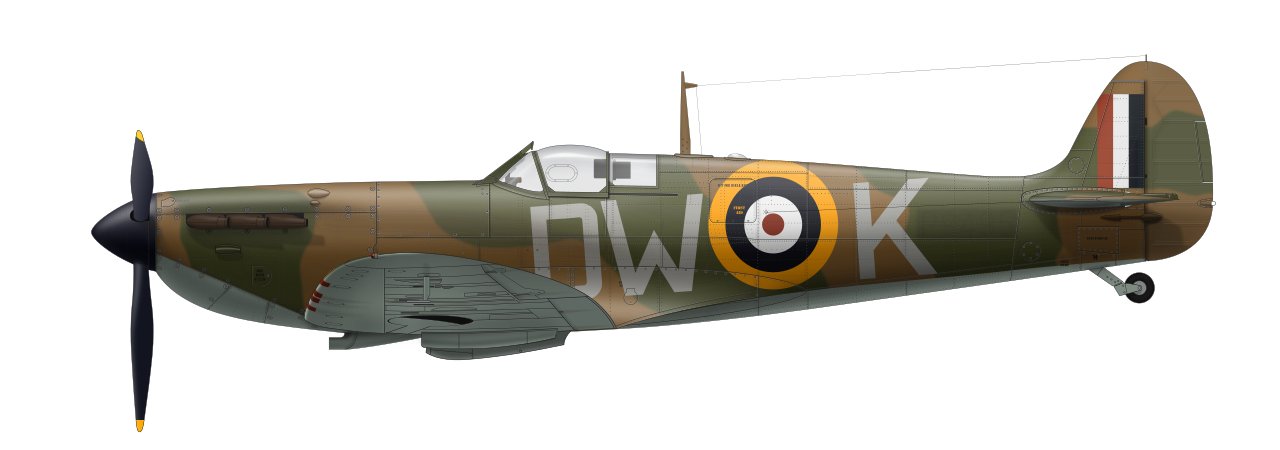
The next is late production Mk.I of 610 Sqn., July 1940. According to the article of "On Target special 8", the lower side was painted rather dark Duck Egg Blue which was equivalent with BS381 No1 Sky Blue.


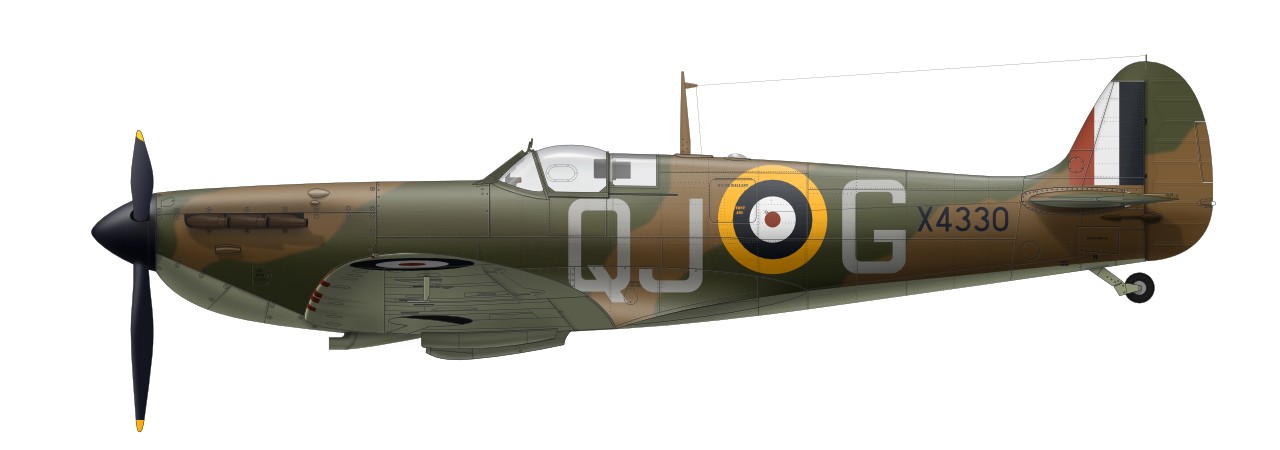
Another late Mk.I is 616 Sqn., in September 1940. According to "On Target special 8", the lower side was painted official Sky.


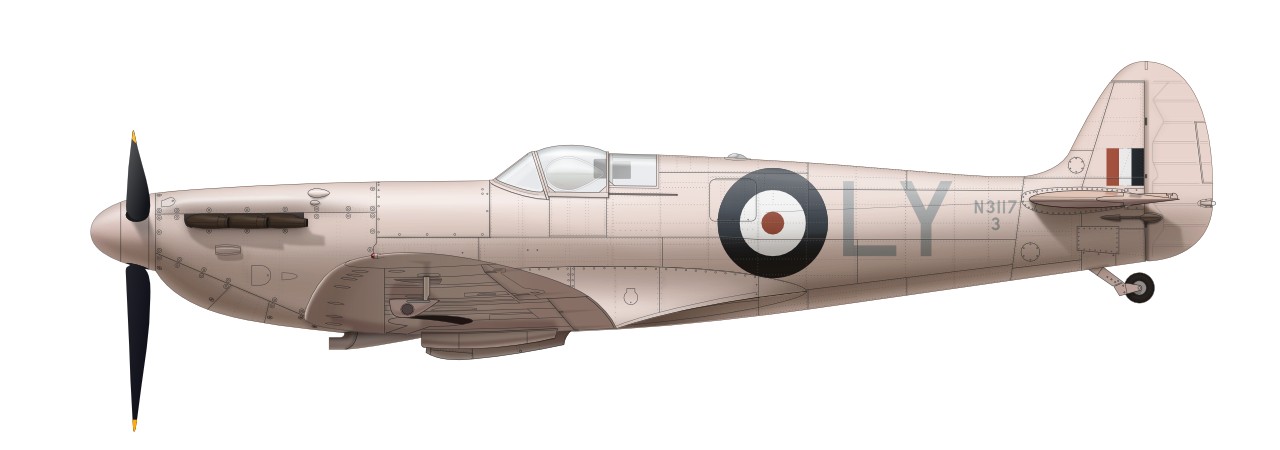
The next is Pink Spitfire PR.Mk.IE N3117 of PDU ,in July 1940. The original photo of this aircraft is included in "The Spitfire Story". The Mk.II type round spinner and Rotol metal blades are confirmed by this photo. The exact shape and position of the camera pod are unclear.


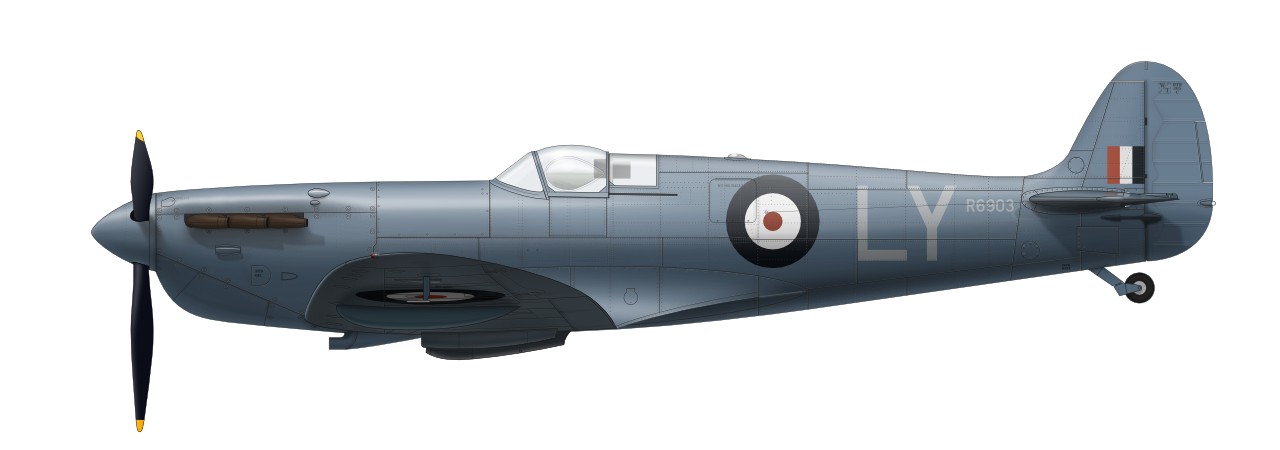
This PRU Blue aircraft is PR.Mk.IC R6903 of PRU, in February 1941. There seems to be the roundel on the lower wing according to the photo of "The Spitfire Story". Be care that the size and shape of the port fuel pod and starboard camera pod are different. The port pod is long and sharrow, the starboard is shot and deep.


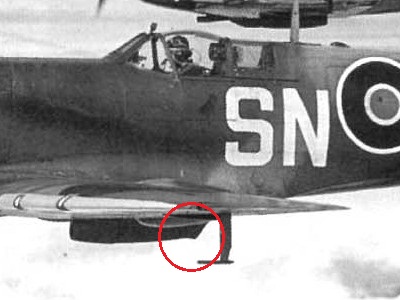
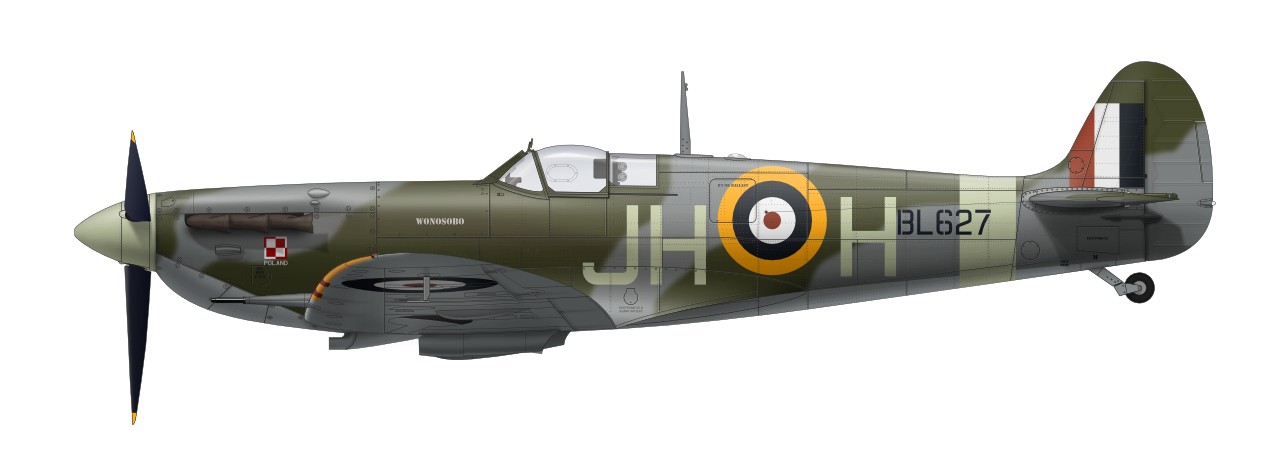
The next two Mk.Vs are from different manufacturers. The first one is Mk.Vb Castle Bromwich Aircraft Factory made BL627 of 317 Sqn.. The upper side was painted "Mixed Gray". Note the small air intake below the wind shield (port side only).


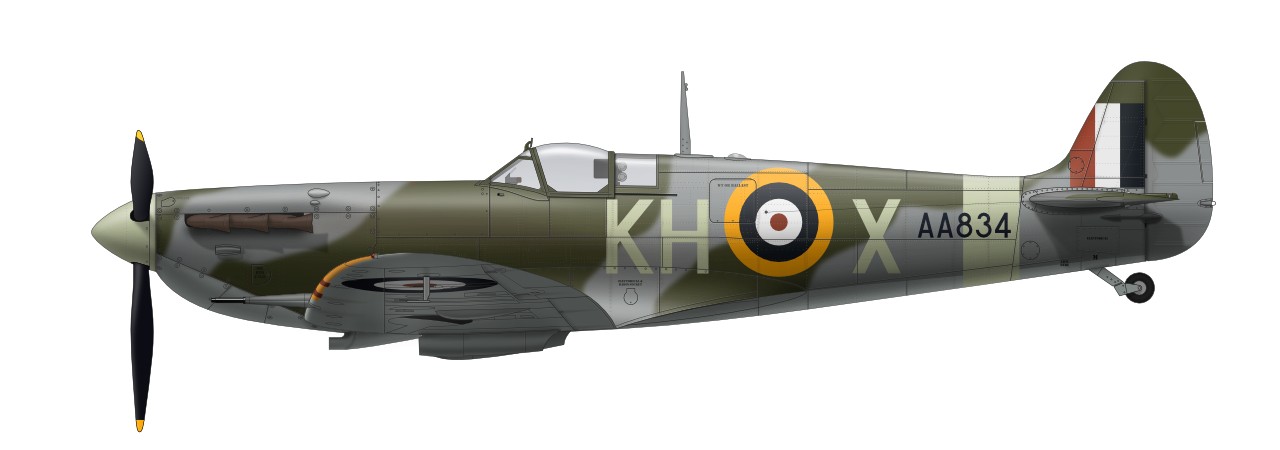
The second Vb is Supermarine made AA834 of 403 Sqn.. The canopy side is flat and there may be the knock out panel. See the differences of the location of the fuselage roundel and serial number.


As far as Mk.V, the difference of the manufacturer significantly came out on its appearance. CBAF-built Mk.Vs equipped the long spinner and Rotol wooden blades except for the very early production model equipping the round spinner and Rotol metal blades. On the other side, all of Supermarine-built and Westland-built Mk.Vs equipped the short pointed spinner and De Havilland metal blades. Supermarine and Westland introduced the late-style windscreen and canopy in the early period. On the other hand, CBAF used the early-style windscreen and canopy for long time. See the following chronological table.
  • 11/40 The Sky spinner and fuselage band were introduced. (Camouflage was still DE/DG/Sky.)
  • 3/41 The first Supermarine Mk.V was built.
  • 5/41 The late-style windscreen and canopy were introduced in Supermarine.
  • 6/41 The first CBAF Mk.V was finished.
  • Summer?/41 The fish tail exhaust was introduced (both factory?).
  • 8/41 The Gray camouflage (OG/DG/MSG) was introduced. The A-1 type roundel was unchanged.
  • Late?/41 The long spinner and Rotol wooden propeller were introduced in CBAF.
  • 10/41 Malcolm hood was introduced.
  • 12/41 The first Westland Mk.V was built.
  • 1/42 The first tropical type was built at Supermarine.
  • 2/42 New C type roundel and new fin flush was introduced. But it might delay at the front line.
  • 5/42 The late-style windscreen and canopy were introduced in CBAF.
  • 5/42 The first tropical type was built at CBAF.
  • Supermarine : R,X,W,AA,AB(-536),BP,BR,BS
  • CBAF : P,AB(779-),AD,BL,BM,EN,EP,ER,ES,JG,JK,JL,LZ,MA,MH
  • Westland : AR,EE,EF


HOME