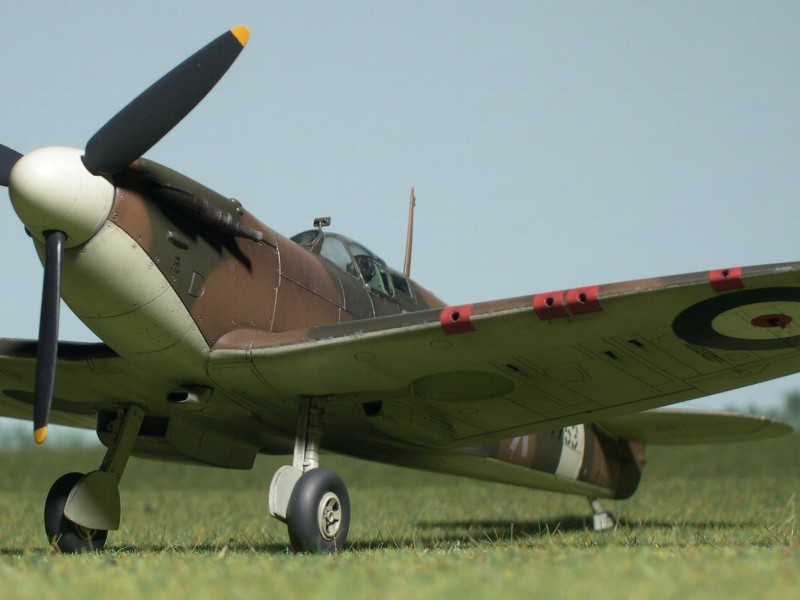
Spitfire Mk.IIa (Tamiya 1/48)
|
|
**Introduction |
|
|
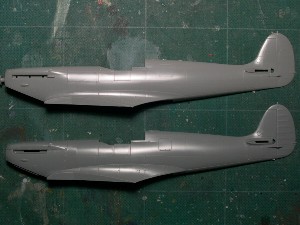 Upper is Hasegawa V, lower is Tamiya I. |
 This side is Hasegawa V,the opposite side is Tamiya. |
|
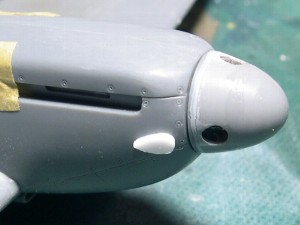
Next is the nose. There is no difference between Tamiya and Hasegawa as for the side shape. And Tamiya is better than Hasegawa, as for the cross section shape. The accurate width of engine cowl for cylinder head portion is 16mm in 1/48 scale which calculated from actual photographs and data of R&R Marline engine (actual width is 76cm = 15.8mm in scale). But Tamiya is slightly excessive. Hasegawa IX is 18mm and it is too much excessive. |
 Upper is Hasegawa V, lower is Tamiya. |
 Tamiya's wind shield has a strange fringe and it gives bad impression. |
** Construction |
|
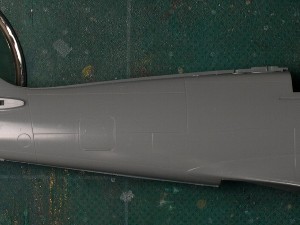
The fuselage I cut the upper portion of the rear fuselage, delete 1mm at cutting line and glue again. Therefore, the height is lowered 1mm.Tamiya's fuselage has the bended line at the canopy rail. But the line of the actual A/C is very slight. So I shaved to correct it includeing upper ridge of rear fuselage. |
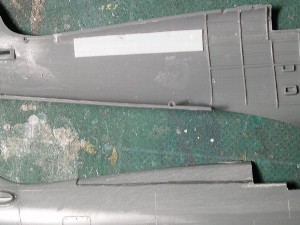 This pencil line is cutting line. The plastic plate is a reinforcement. |
|
Tamiya's vertical stabilizer is thick, especially, the lower rudder is not a curved surface. The hinge line of actual A/C is straight, but kit is bended line which is an illusion caused by cross section shape. So I correct them and the lower fuselage simultaneously.
|
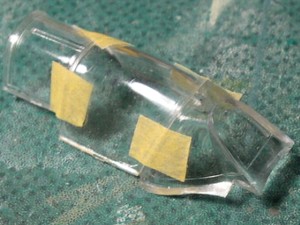
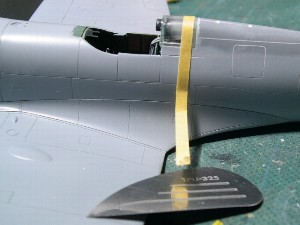
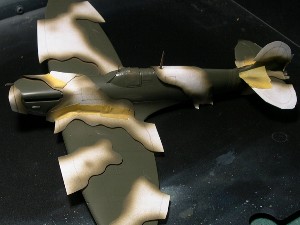
| To prevent from entering the mist of paints, all of the openings are sealed by musking tape. And a ball of kitchen film is put into the rear fuselage. The mist makes the inside of canopy window dirty. |
|
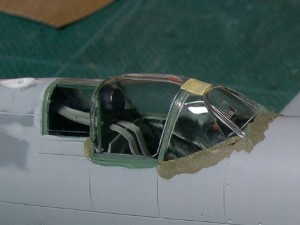
The canopy and cockpit Some adjustment is necessary to assemble the canopy, because the rear fuselage is lowered. The glue line between the canopy and the fuselage is deleted 1mm height. And the width of the central part of fuselage is made narrow 1mm. Luckily, it improves the plane shape of nose. Canopy frames are deleted and engraved again. |
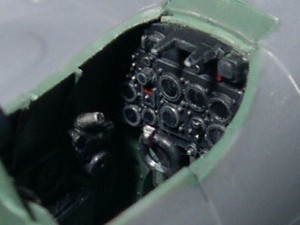 The instrument panel is dry-brushed. |
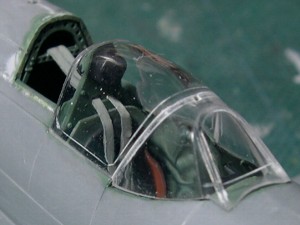 The wind shield and slide canopy are glued with each other at first. The position of seat belt is a mistake, the correct position is on the lower side of horizontal beam, not the upper side. |
|
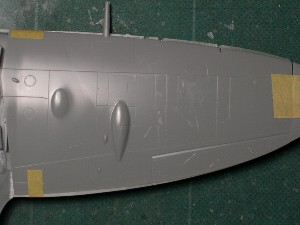
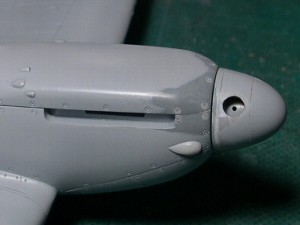
Surface finish Panel lines are engraved by a etching saw. Small bulges on the cowling are engraved by a template and needle. |
 The rudder is made thin. Rib tapes are drawn by Mr. Surfacer 500 with fine brush. |
 This is a making of the bulge. After this, the plastic plate is shaved by a graver. |
|
Small articles The late version of Mk.I & II equiped with the bulletproof plate behind a pilot's head. This part is from Hasegawa V. The pilot seat is from Hasegawa V, but Hasegawa IX is better. The color of the seat is brown and the back is black. The spinner of Mk.II is from Hasegawa's Hurricane I. The propeller blades are from the same. |
|
This is a way of engraving a spinner. An eching saw is holded with a magazine. |
|
|
Correction of cowling The round shape of front corner of kit's cowl needs sanding to the flat. |
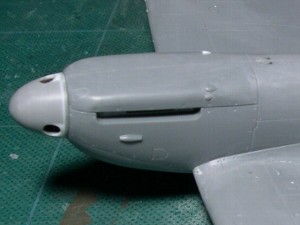 Before. |
 After, no change ? |
|
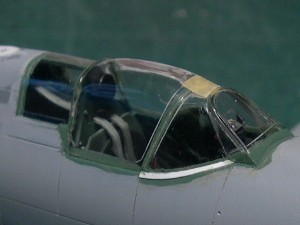
The canopy The 3rd canopy is glued and sanded without a noticeable step. Simultaneously, the side shape of the upper ridge after of the cockpit is corrected. It bends slightly just upper the roundel.Then the 1st and 2nd canopy are glued. |
 I use an etching saw. The guide is "double" masking tape. |
 The lower edge of the 1st canopy require some putty and careful sanding. |
 Thin plastic paper is cut. |
 Plastic paper is glued on putty. |
|
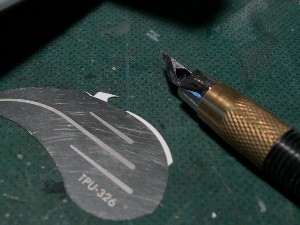
The canopy is masked with "Sello-tape". Sorry, I don't know the correct name and purchase-ability in foreign. First, I cover the window with "Sellotape", then cut out by design knife carefully. |
**Painting & Markings |
|
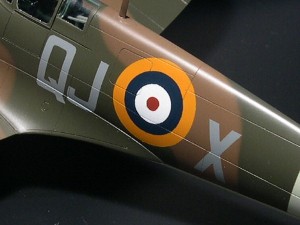
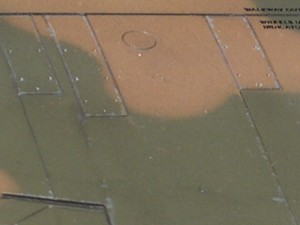
Historical investigation The markings are "QJ@X", Spitfire Mk.IIa P7753, the usual aircraft of Flt.Lt.L.H.Casson on charge to No.616 Squadron, Tangmere early in 1941. The photograph is in "this site" and "Spitfire in action aircraft no.39",(Squadron/Signal Publications). This photograph is used orthocromatic film, so yellow portions appear black and luminosities of the camouflage pattern are reversed.The code letter "QJ" is assigned double to the 92nd SQ. but the size or style is different. The caption of Spitfire in action mentions "early in 1941". The camouflage of lower side is considerable. The port wing is painted Black since November 1940 until April 1941, and then returned Sky. I think both states existed as for this A/C. There is a small rhombus of poison gas detector paint on the port wing. The camouflage pattern is B scheme. |
 I don't know the regulations of the roundel, I guess the diameter is 35 inches (a multiple of 7). |
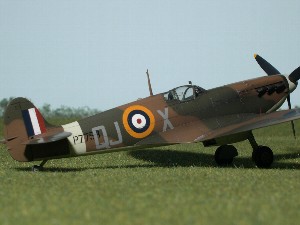 The starboard is "QJ@X" judged from another A/C in the same photograph. |
|
Painting All of the markings are painted except for S/N. Mr.color paints are used overall. Dark Earth is DE 80% + Yellow 20%, Sky is Sky 80% + White 15% + Blue 5%, the spinner and fuselage belt are added White 20% more, Dark Green is 100% original Mr.color paint. |
 The camouflage is masked with paper fixed by strings (0.1inch in diameter) of double faced adhesive tape. |
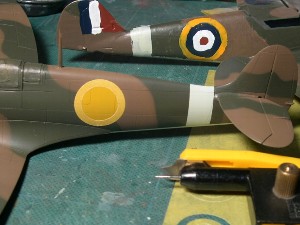 The yellow portion is masked. The next model is a color sample. |
|
Marking Roundels and fin flashes are all painted. Dull Blue is Thunderbirds Blue 70% + Ocean Gray 30%, Dull Red is Thunderbirds Red 50% + Yellow 25% + Neutral Gray 25%, Yellow is IJN Orange Yellow 100%, Medium Sea Gray is 100% original Mr.color (slightly dark?).The size of the code letter is 12 X 7 mm (1inch = 24.5mm) calculated from the actual photograph. Masking tape is cut along the block copy of Excel. |
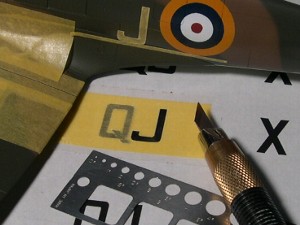 Masking tape is cut and put on the model like this photograph. The "J" on the model is for the position determination. |
 Tamiya's wing filet is a little large, so the relation of the code letter and filet is differ from the actual A/C. |
|
A boundary is cut very slightly using a sharp knife before removing masking tape. Then Flat clear (#46clear + #30flat base) is sprayed and sanded by #2000 sand paper. |
**Details & Finishing |
|
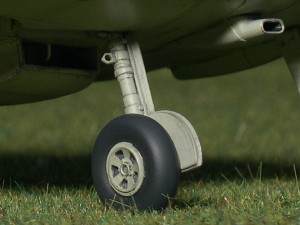
Details The rearview mirror and pitot tube are solder works. The tire and hub are from Hasegawa V. Exhaust pipes are from Moskit. |
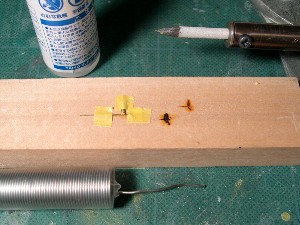 Parts are put on a piece of wood by masking tape. |
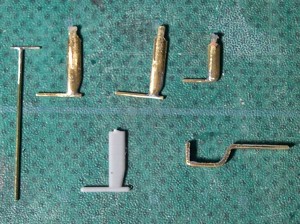 The P-51's pitot tube and tail strut are made at the same time. |
 The lock ring is made of plastic plate. |
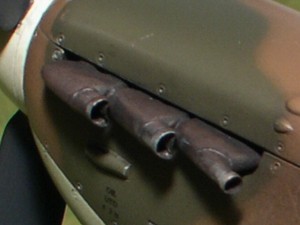 Moskit exhaust parts are excellent. |
|
Weathering The image source is the original color photograph of heavily weathered "RN@N". My methods are using pastel (dry and wet), fine brush, air brush and scratching. |
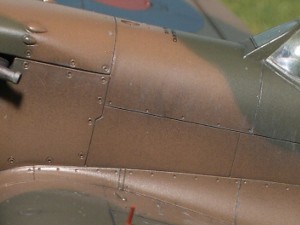 After sprayed Black and Tan of Tamiya color for exhaust, rain effect is express using Tamiya thinner and fine brush. |
 Light Gray is brushed along with the panel line. This is the expression of the difference in level of panel. |
|
Dry Decals The serial number and stencil data are dry decals (instant lettering). Here is a block copy. Sorry, I have nothing to do with accuracy. |
** Conclusion & Reference |
|
Notice The vertical panel line below the window frame between 1st and 2nd canopy on the starboard side should be deleted. The small air intake forward of this panel line is omitted.Completion I am really glad to have finally finished this model. I think the slenderer nose and rear fuselage express grace and sharpness of Spity.Reference |
| 1 | The famous aircraft of the world (new edition No.25,102) | BUNRINDO |
| 2 | The famous aircraft of the world (old edition) | BUNRINDO |
| 3 | Koku Fun Illustrated No.93 | BUNRINDO |
| 4 | Koku Fun Illustrated No.111 | BUNRINDO |
| 5 | Aerodetail No.8 Spitfire Mk.I-V | DAINIPPON-KAIGA |
| 6 | Aerodetail No.27 Spitfire Mk.VI-XVI | DAINIPPON-KAIGA |
| 7 | Osprey Series Aces of Spitfire MkI/II 1939-1941 | DAINIPPON-KAIGA |
| 8 | Osprey Series Aces of Spitfire MkV 1941-1945 | DAINIPPON-KAIGA |
| 9 | Model Art No.387 Spitfire | Model Art |
| 10 | Spitfire in action aircraft no.39 | Squadron/Signal Publications |
| 11 | Fleet Air Arm | Squadron/Signal Publications |
| 12 | Supermarine Spitfire | Bison Books |
| 13 | The Royal Air Force of World War Two in Color | Arms and Armour |
| 14 | Aerodata International No2 Supermarine Spitfire I&II | Vintage Aviation Publications |
| 15 | Warpaint series No.20 Supermarine Seafire | Hall Park Books |
| 16 | The spitfire, Mustang and Kittyhawk in Australian service | Aerospace Publications |
| 17 | Sie flogen die Spitfire | Motor Buch Verlag |
|
Website |
|
http://www.the-battle-of-britain.co.uk/ http://www.rafweb.org/Index.htm http://www.rafcommands.currantbun.com/Fighter/indexF.html http://www.turner.force9.co.uk/616sqd2.htm http://www.airliners.net/ |