Spitfire Mk.VIII Eduard 1/72
|
|
|
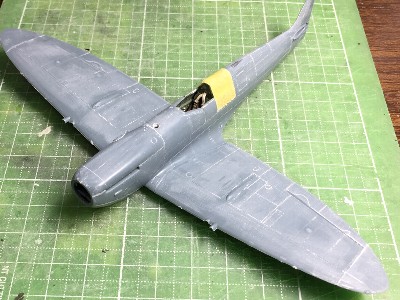
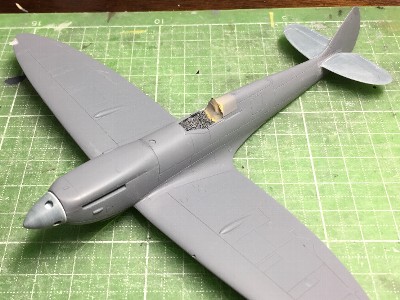
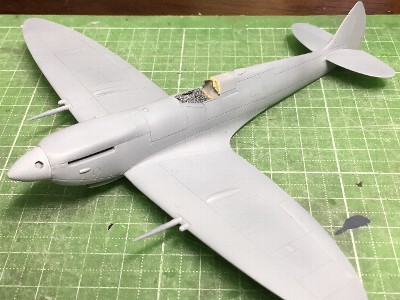
I built this kit as almost straight from the box. One of a few modifications were the slide hood. I built as open position. But the kit open position hood was too much large. So I replaced it close position hood. In addition, I brushed up some minor points. Propeller blades were a widened. The tire and wheel were replaced SBS resin parts. The excess depiction of rib tapes were sanded off and replaced dry decals.
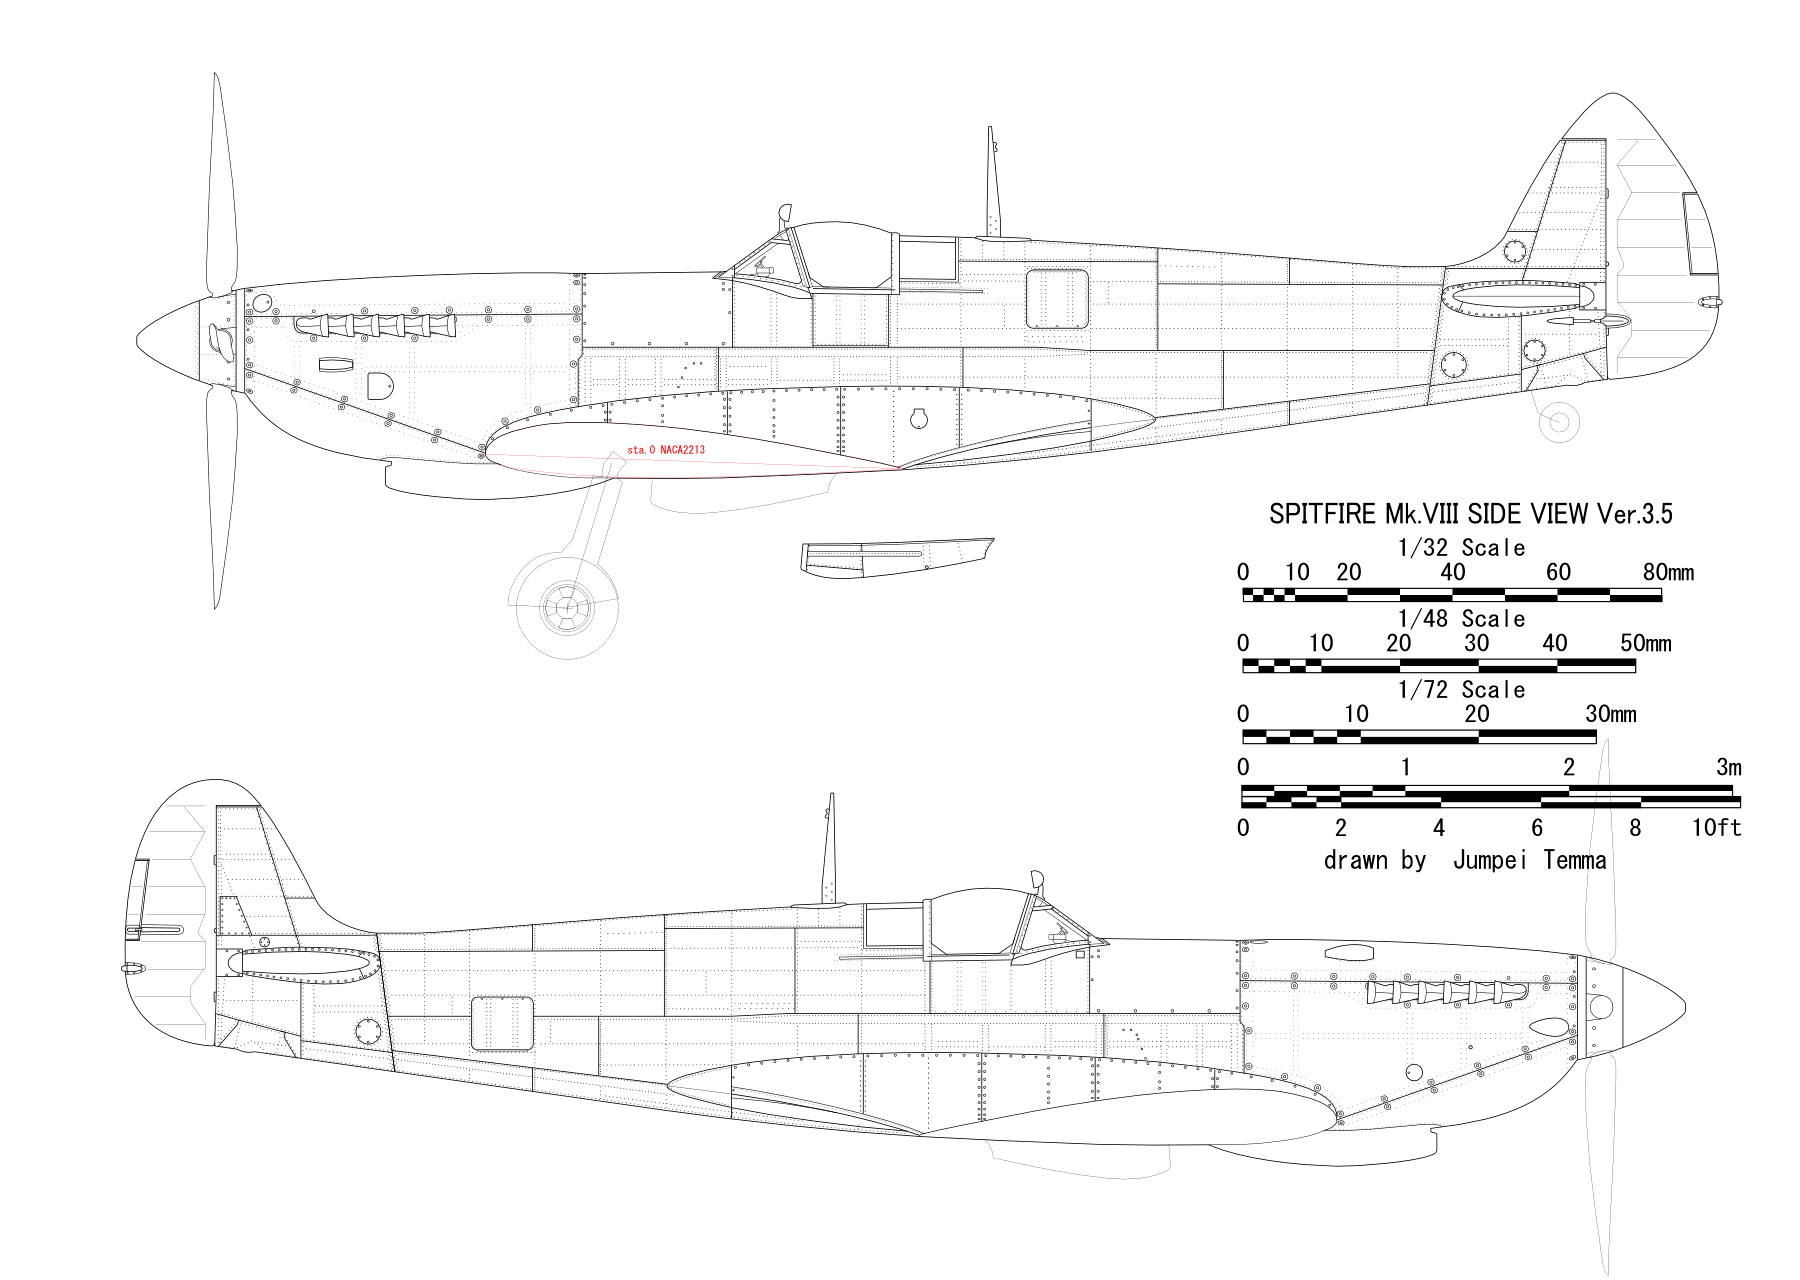
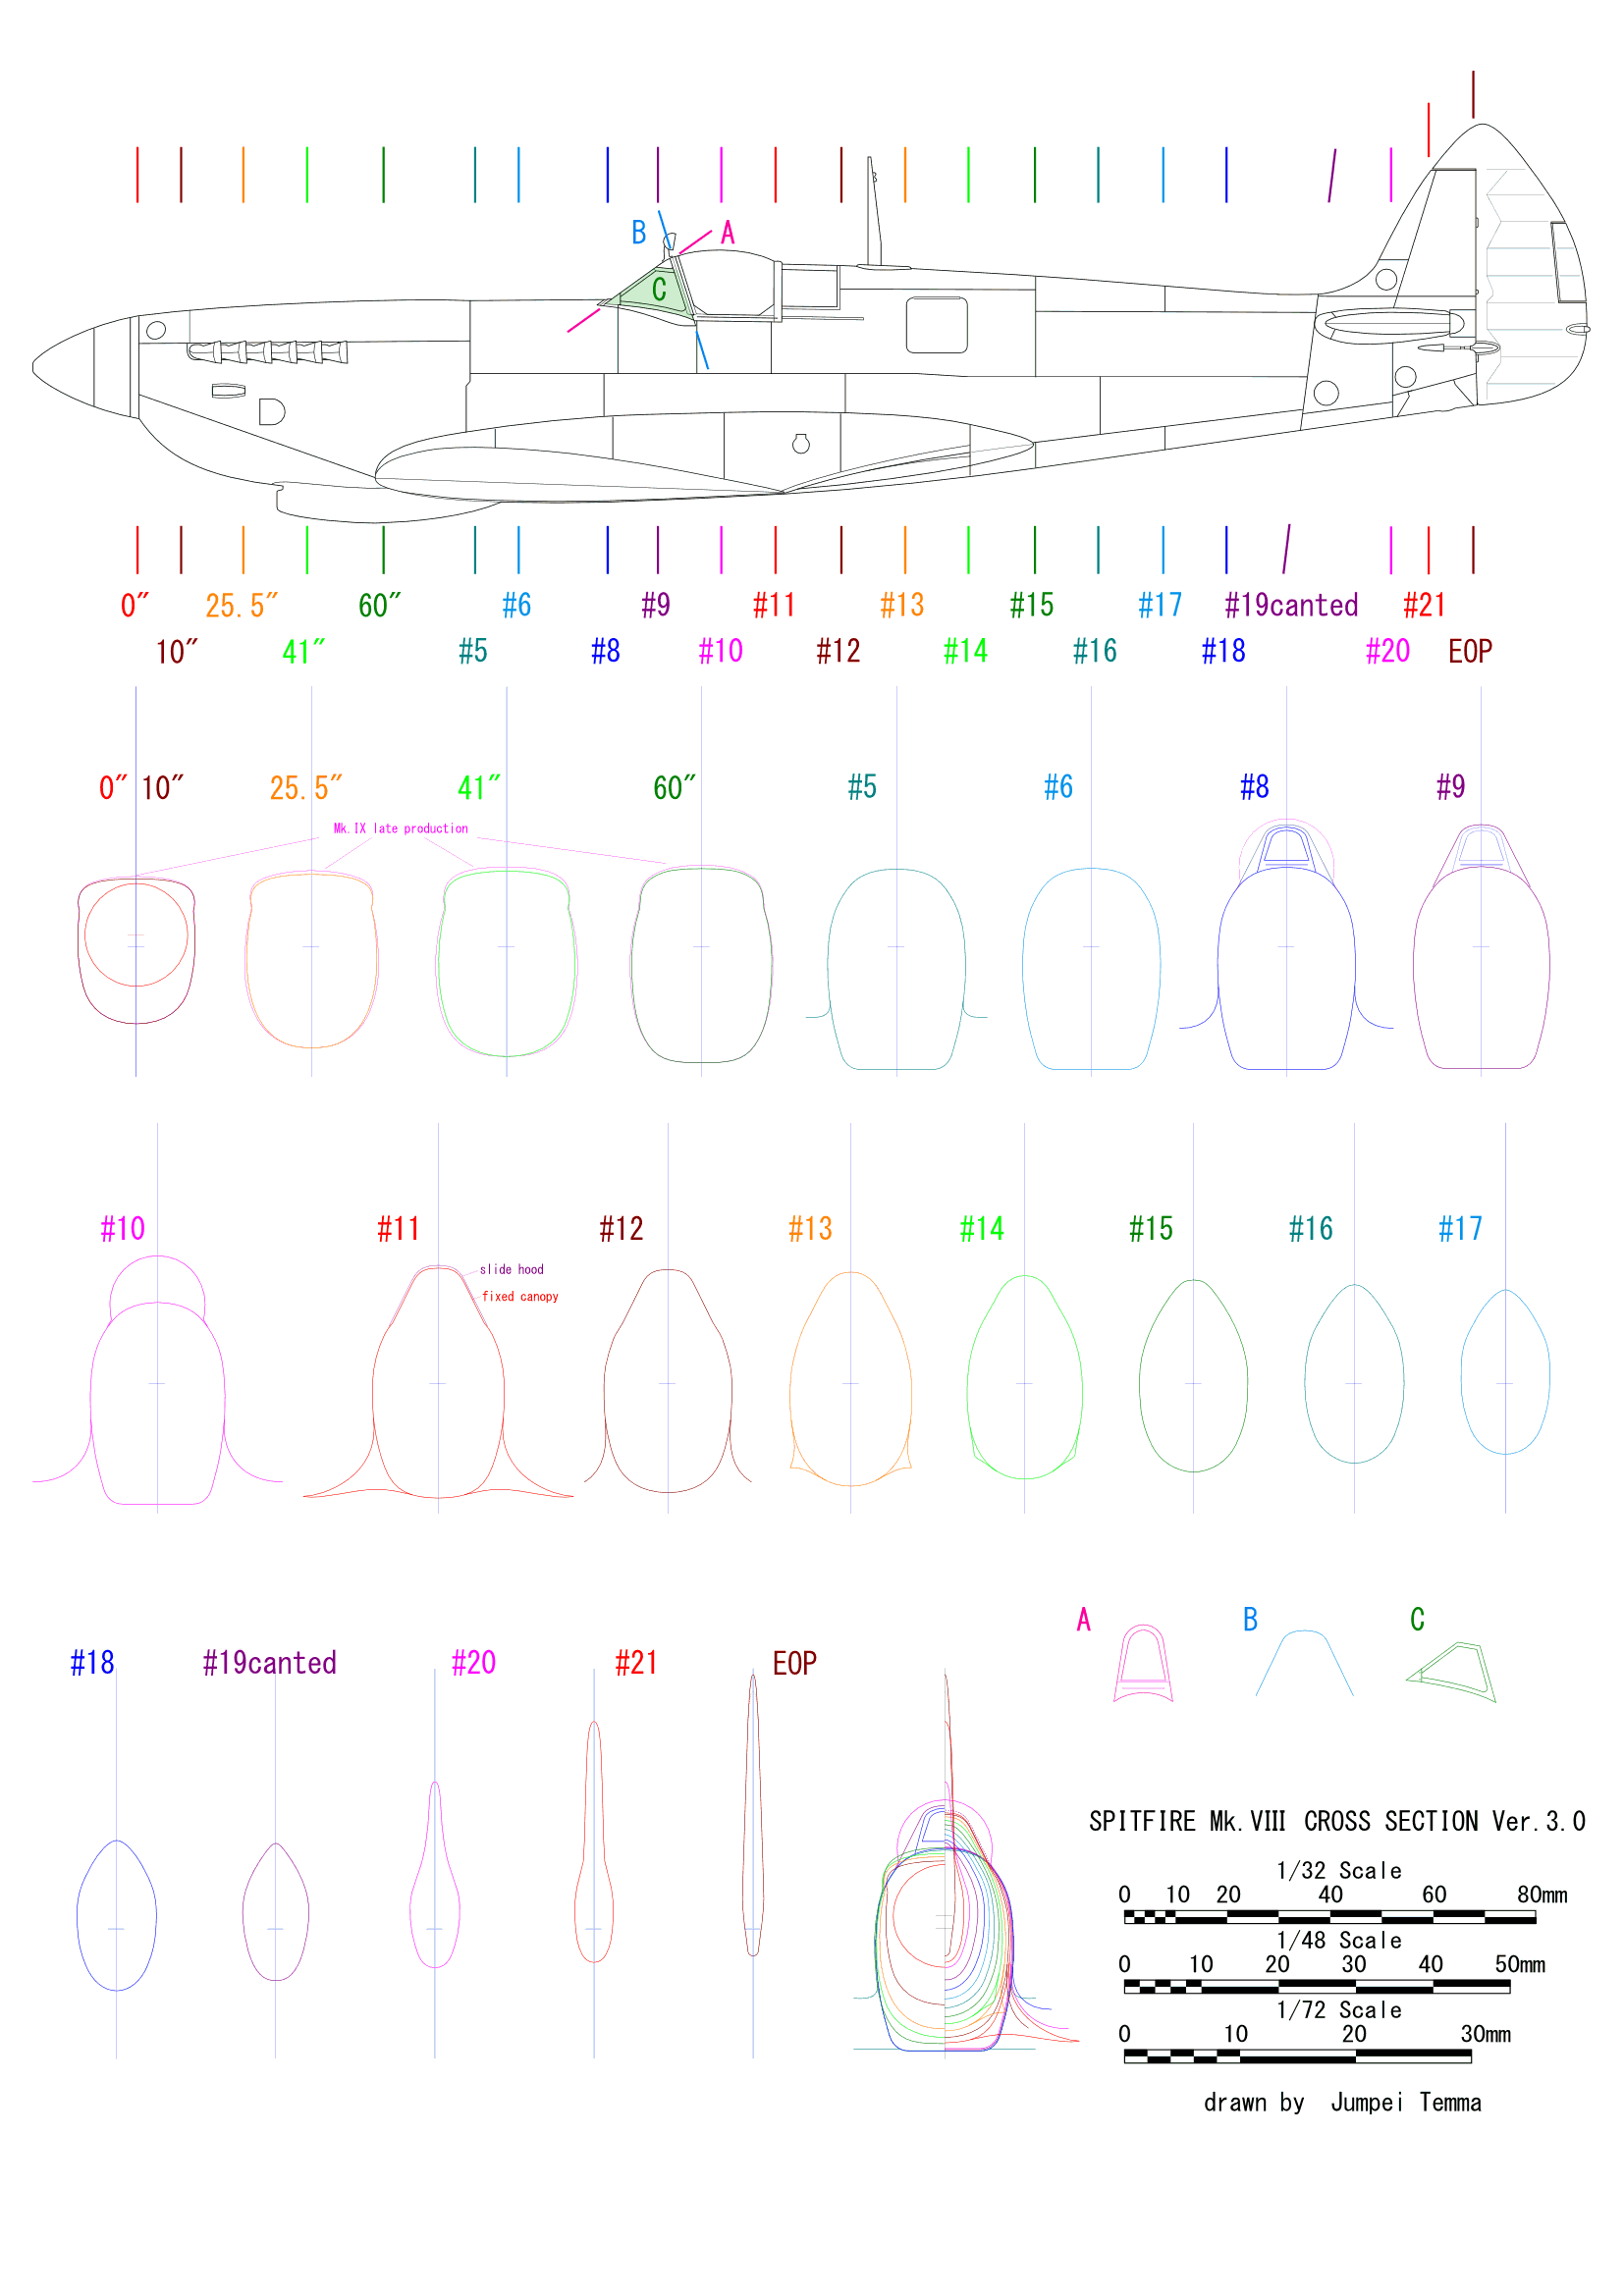
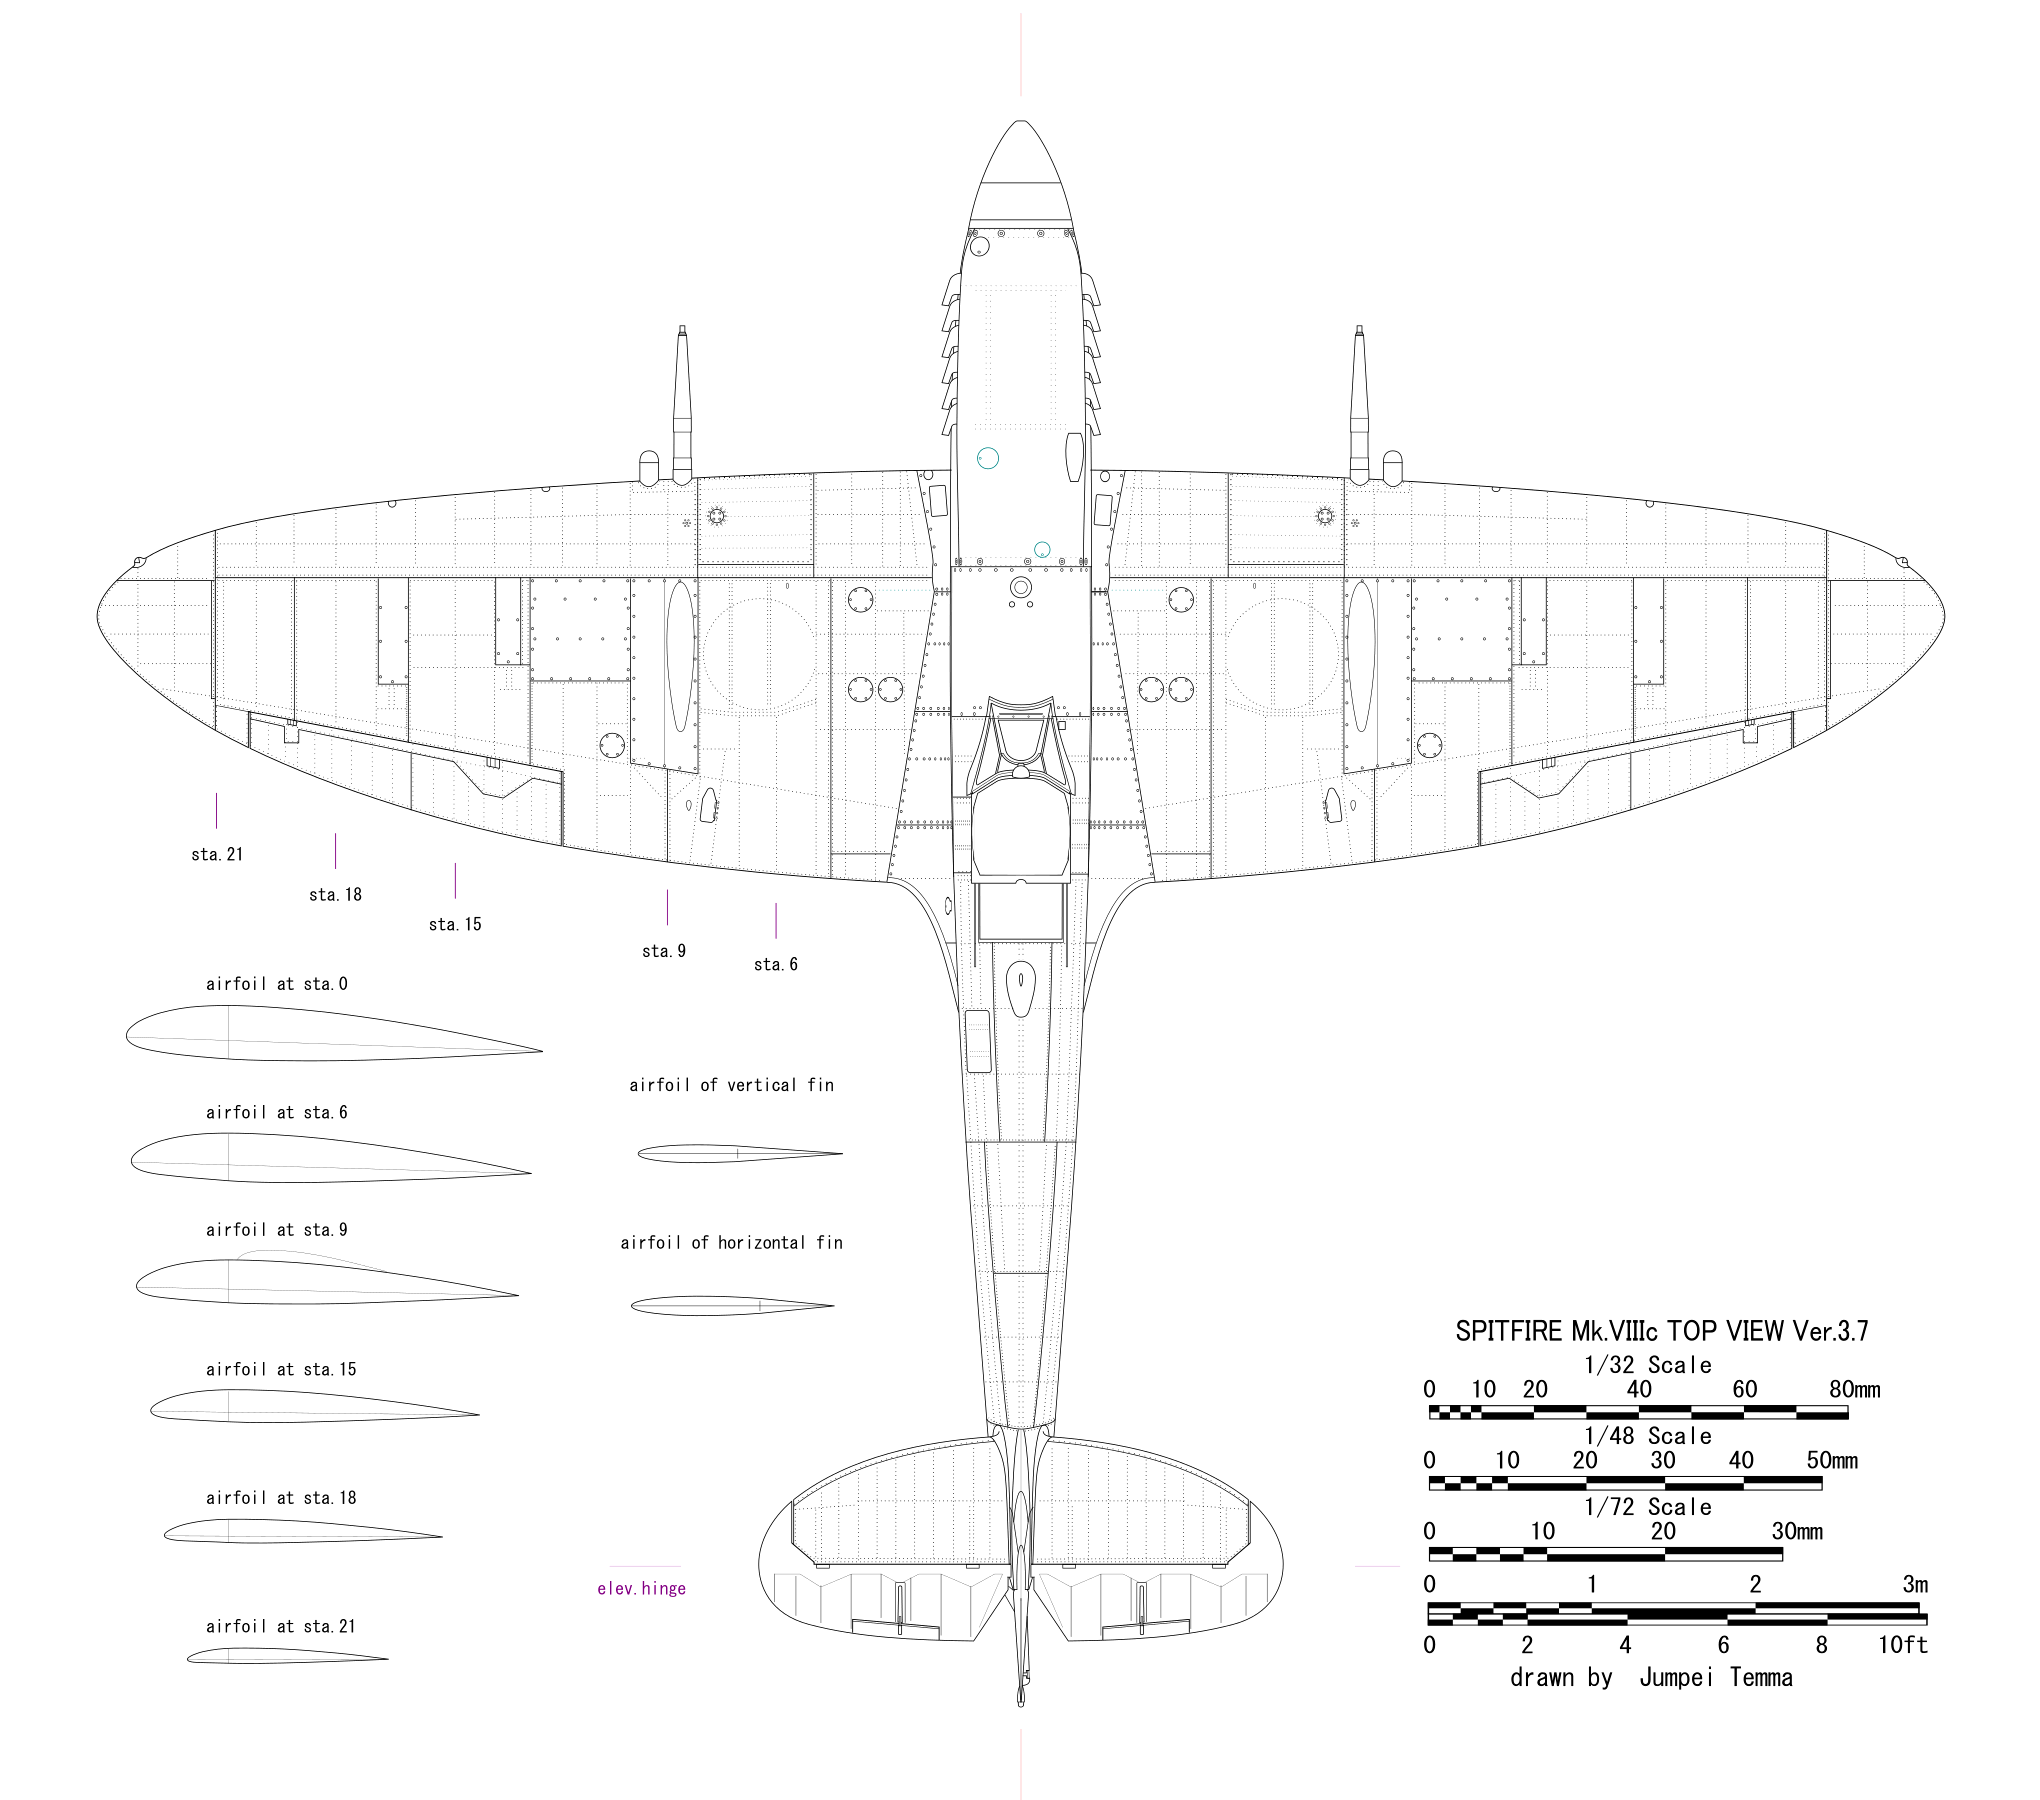
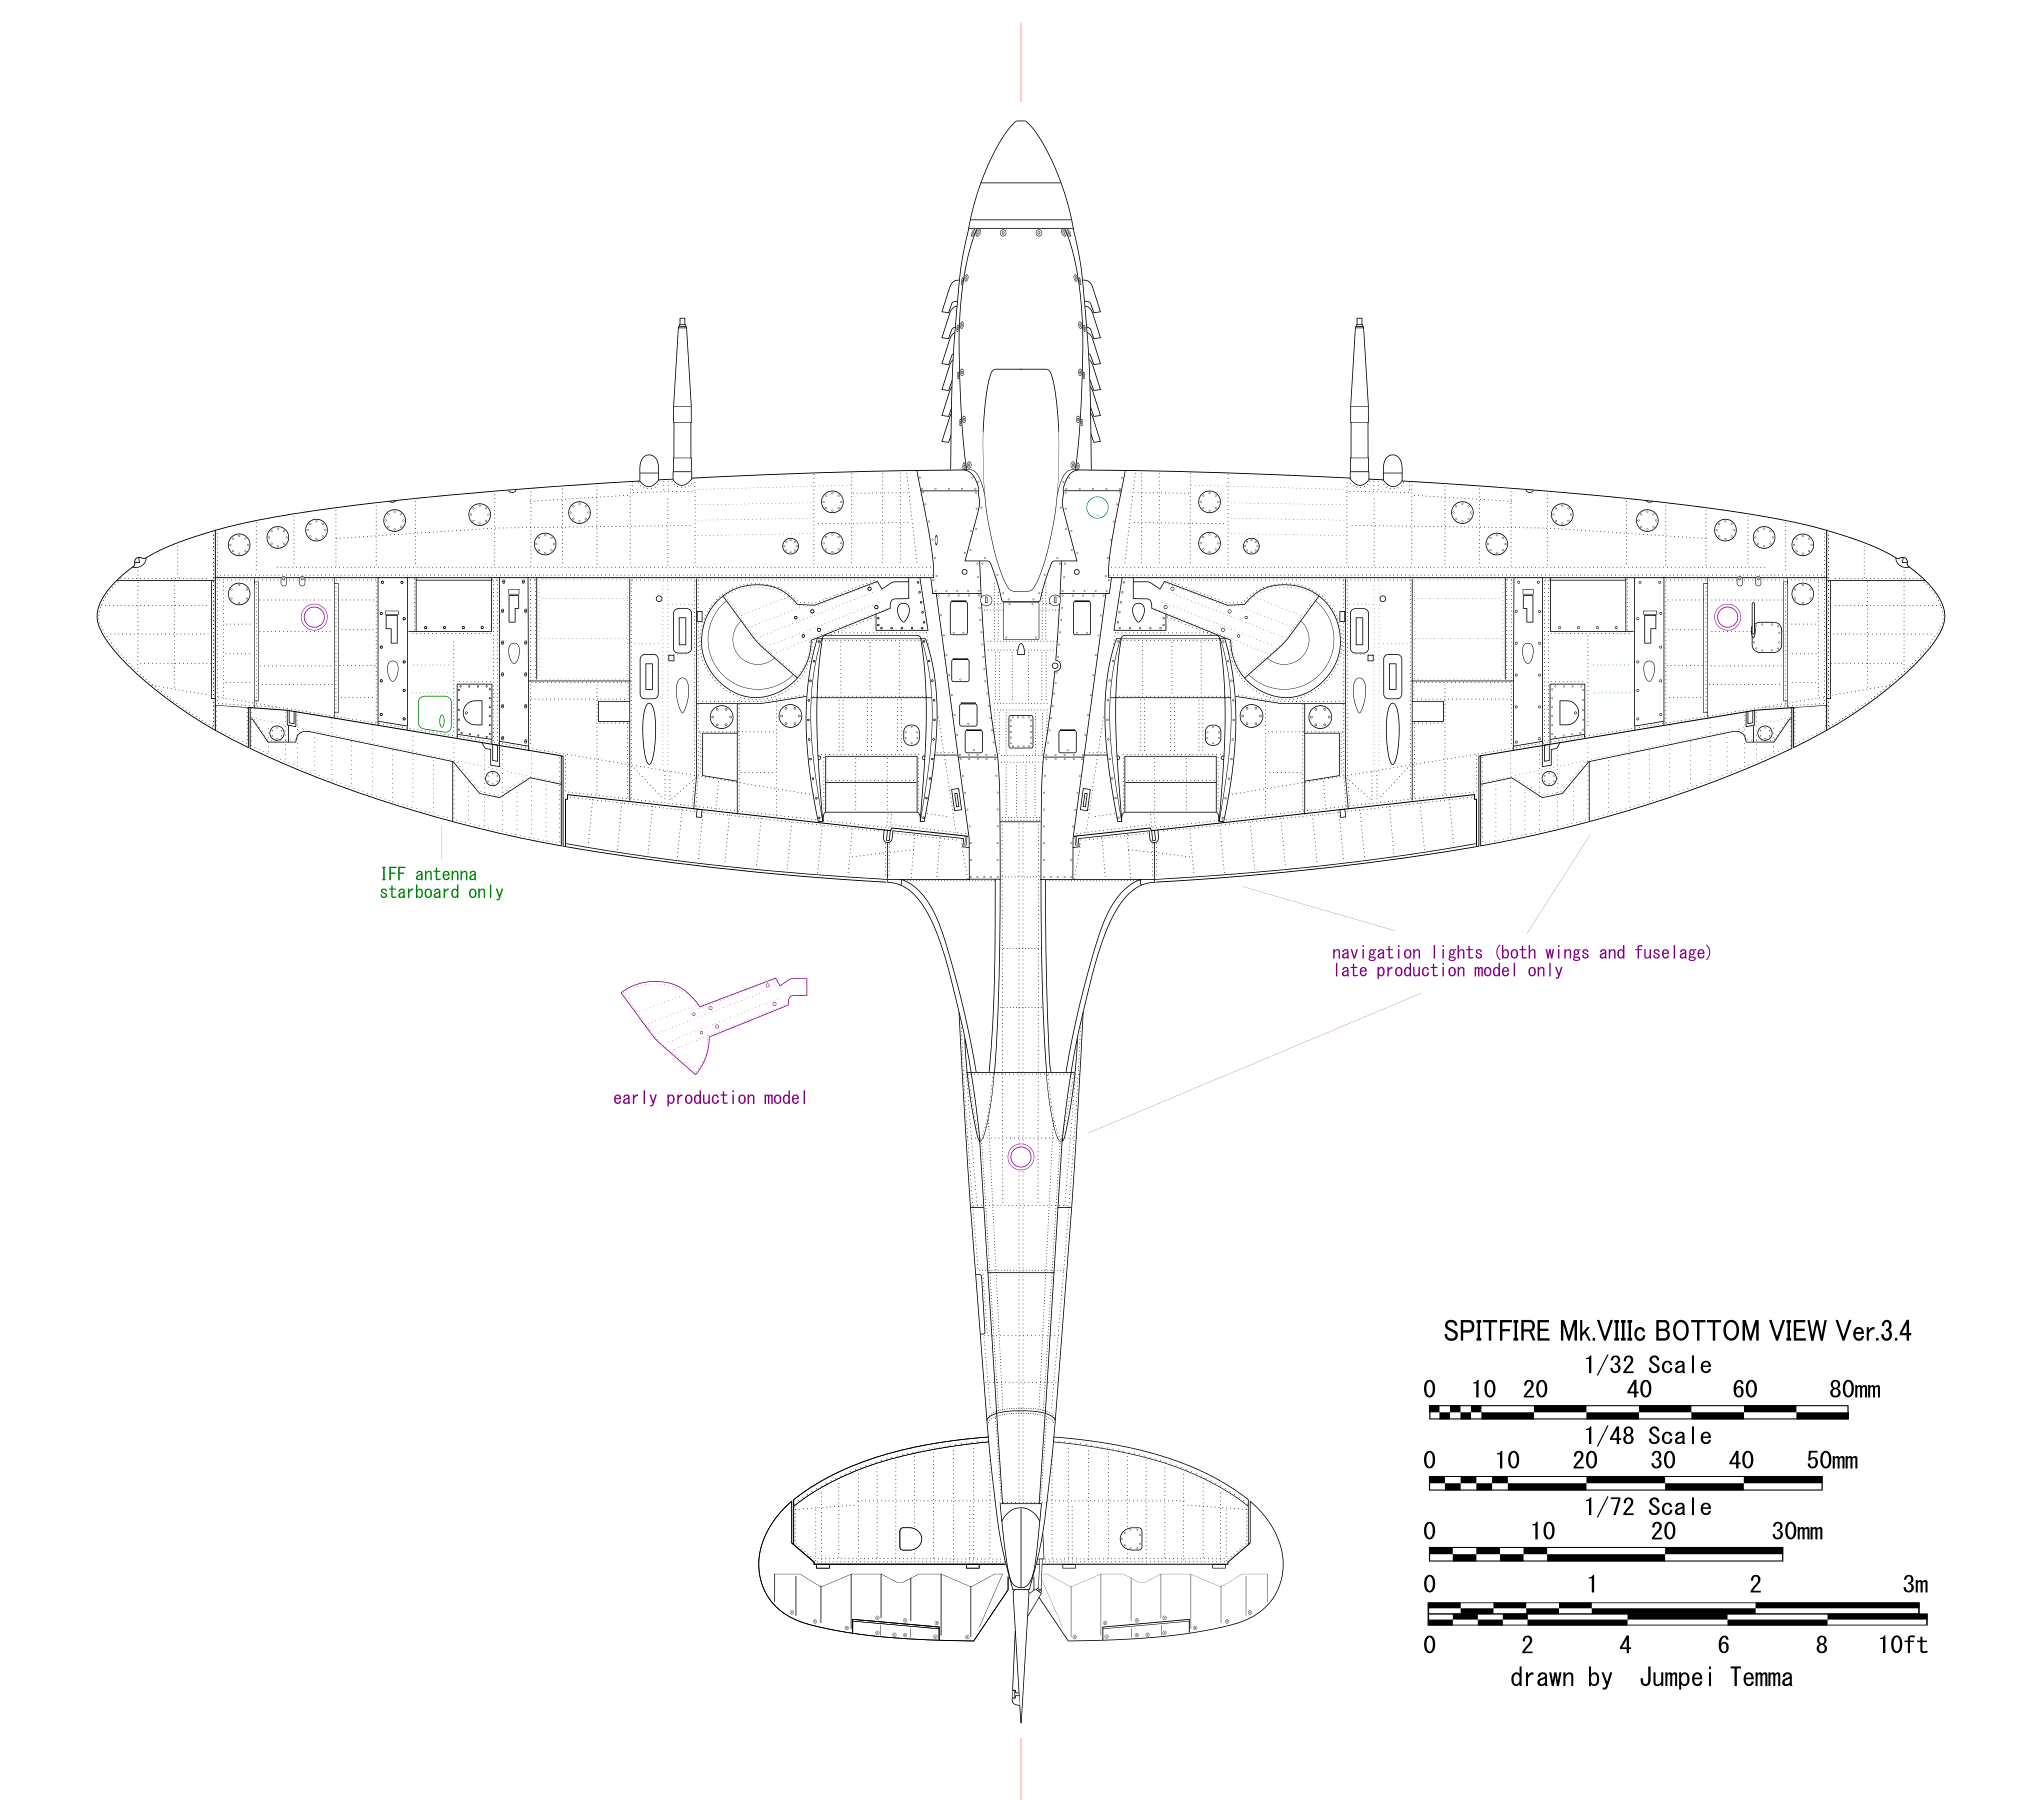
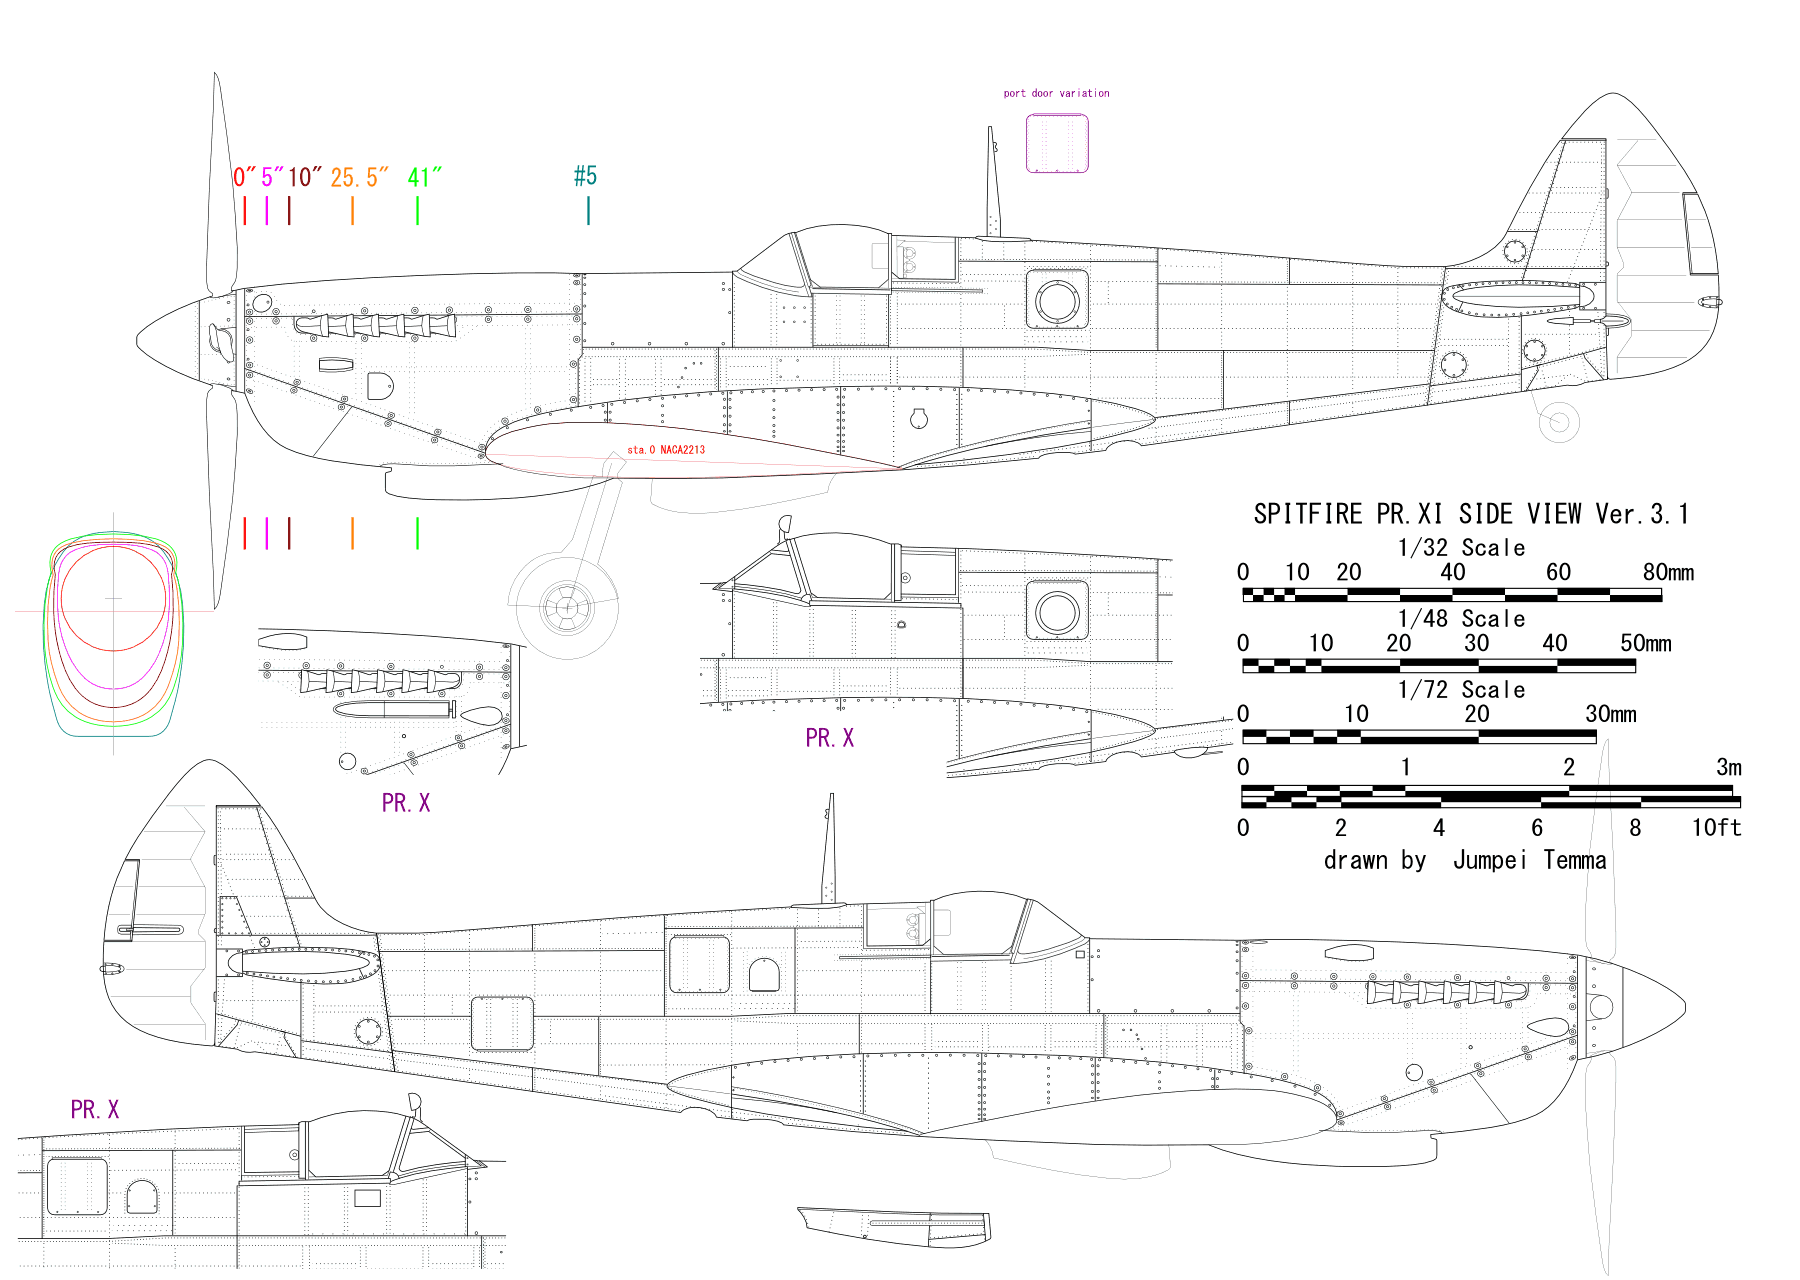
Drawings of other marks are HERE.
|
 I only painted kit parts. |
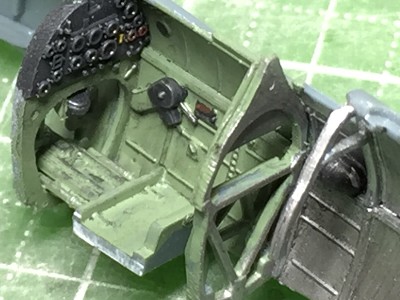
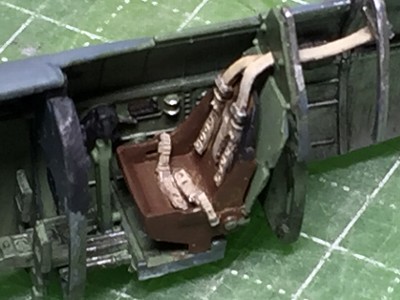
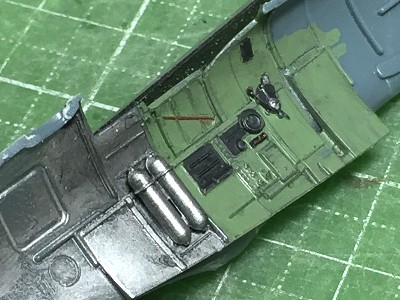 The cockpit was from the bow. |
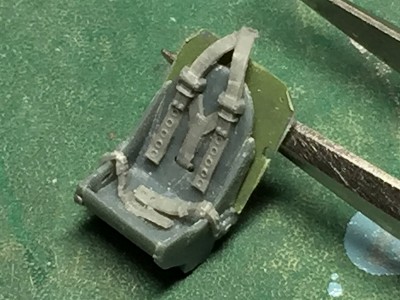 The edge of kit seat was thinned. The harness was FineMolds' Nano Aviation Series. |
 FineMolds' harness was rather wide. The width of the belt was narrowed. |
 The rear fixed canopy was glued. |
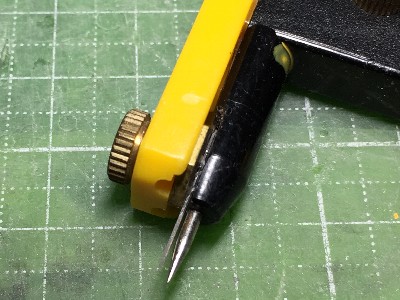
 Window frames were engraved with double needles. |
|
|
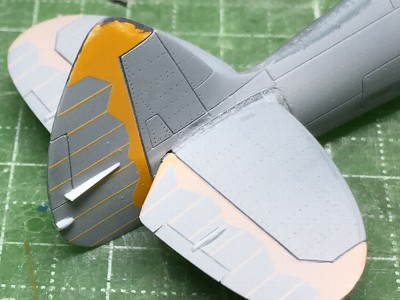
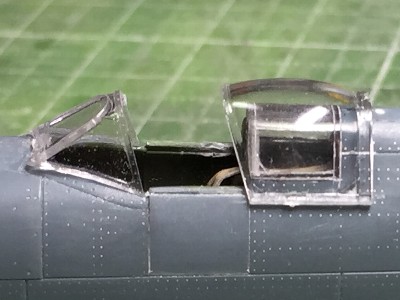 This is the kit open position slide hood. It is too much large. |
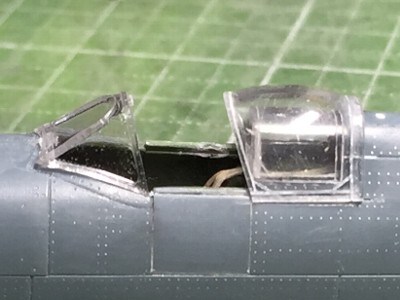 This is the close position slide hood. The rear fixed canopy was cut off. The inside of the canopy had to be sanded to fit. |
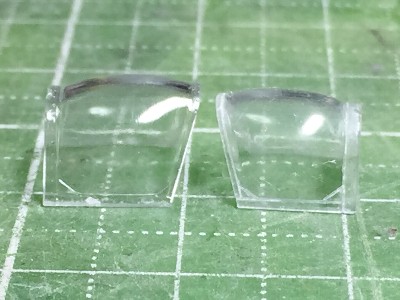 Two parts were compared. |
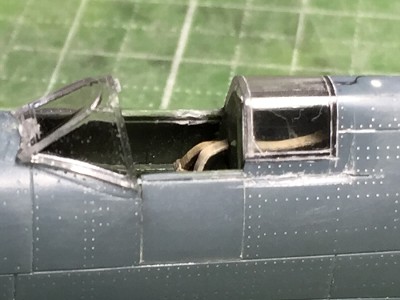 The fuselage behind the slide hood should be cut down from the outside. |
|
|
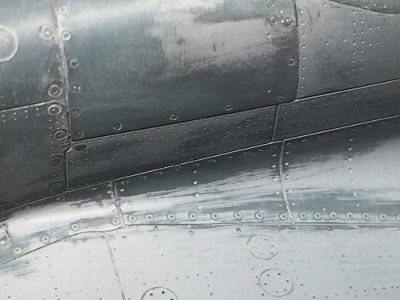
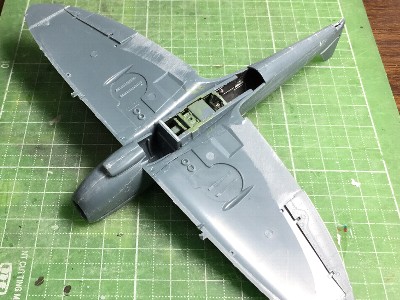 In order to avoid a step and gap between the wing and fuselage, the upper wing part was glued on the fuselage first with thin liquid cement. |
 After that, the lower wing part was glued. |
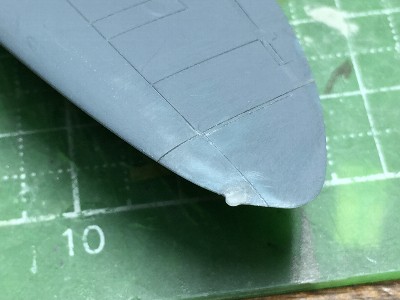
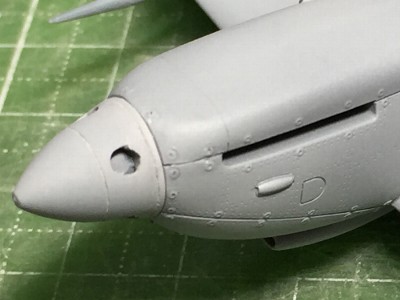
 The horizontal fin was glued. The diameter of the spinner was small. So, plastic sheet (white) was glued on the rear end. |
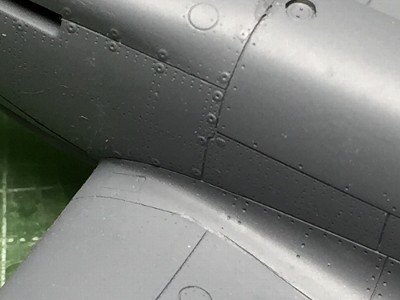
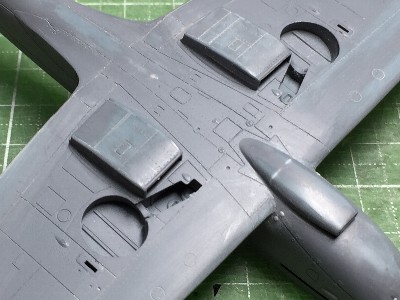
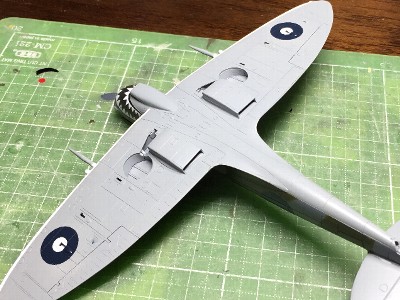
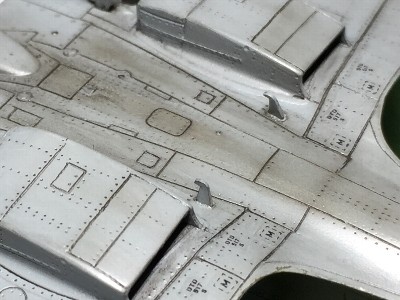
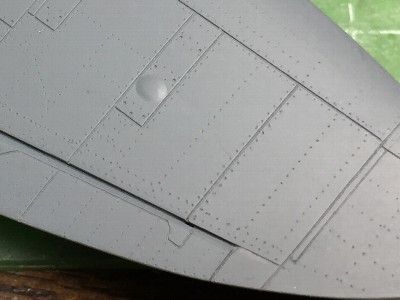 Rivets of the kit on the wing area were almost disappeared with sanding. I had to engrave rivets with a needle. |
|
|
 The convex mold of the fastener was not easy to reproduce. |
 Small pieces of sliced extended sprue were glued. |
 The radiator was glued. |
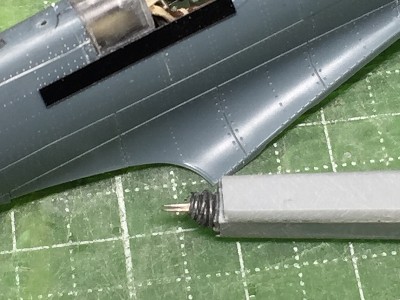
 The navigation light was made of clear sprue. |
|
|
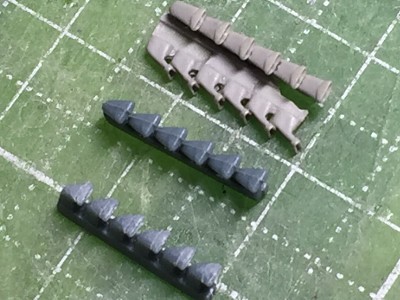
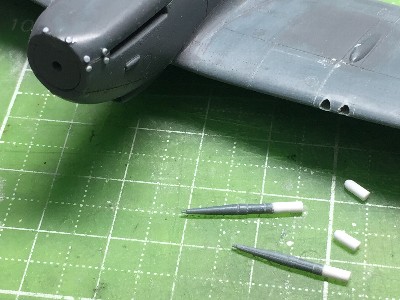 The base of wing gun was sanded off to depict the correct airfoil. So the gun fairing was extended with plastic rod. |
 The gun was glued. The wing tank was engraved. |
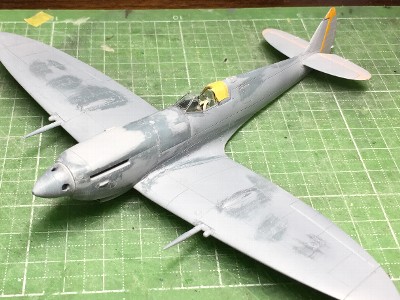
 Mr.Color surfacer was thinly sprayed to check the model surface. |
 These fasteners were reproductions. |
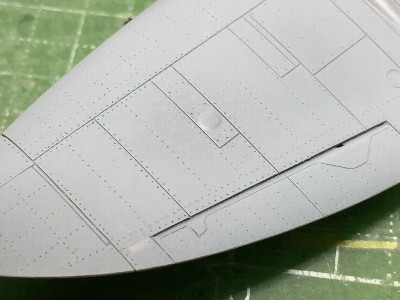 These rivets were engraved. |
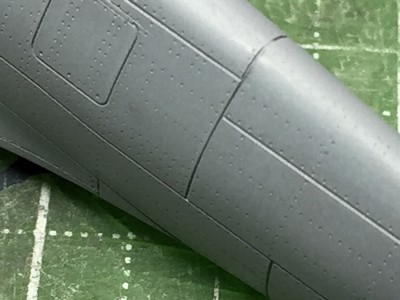 On the other hand, fuselage rivets were almost kit original. |
|
|
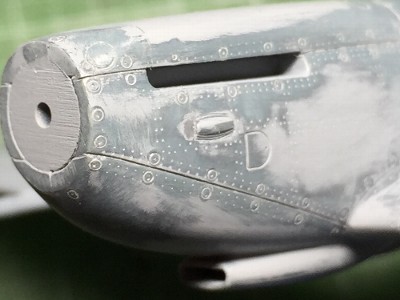 I had intended to left kit convex fasteners and tried to reproduce faded fasteners. But I couldn't satisfy the result. In the end, all of fasteners were sanded off and they were engraved with a beading tool. |
 Other fansteners were engraved as well. The cowl fasteners were #8, others were #3 or #2. |
 Frames of the wind screen were sanded off to flat. Then, frames were engraved with a needle. In order to thin the frame cross section, the edge was sanded from the inside. |
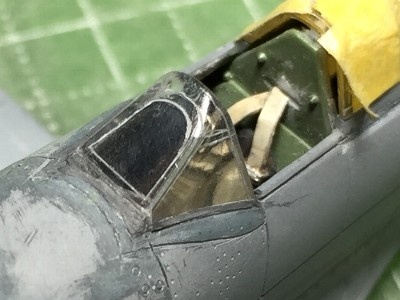 Both inside and outside window were polished with rubbing compound. The wind screen was glued. |
 Rib tapes were depicted with custom made dry decals. |
 |
|
|
 |
|
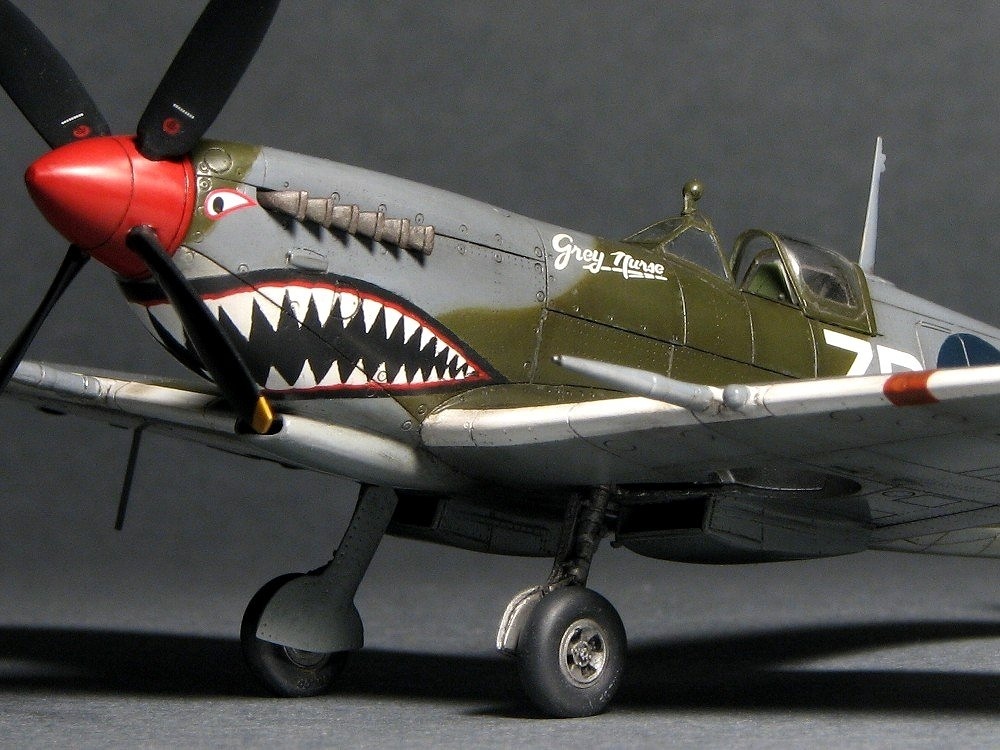
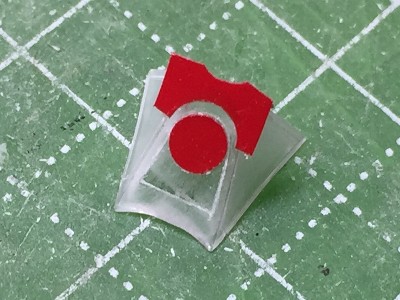
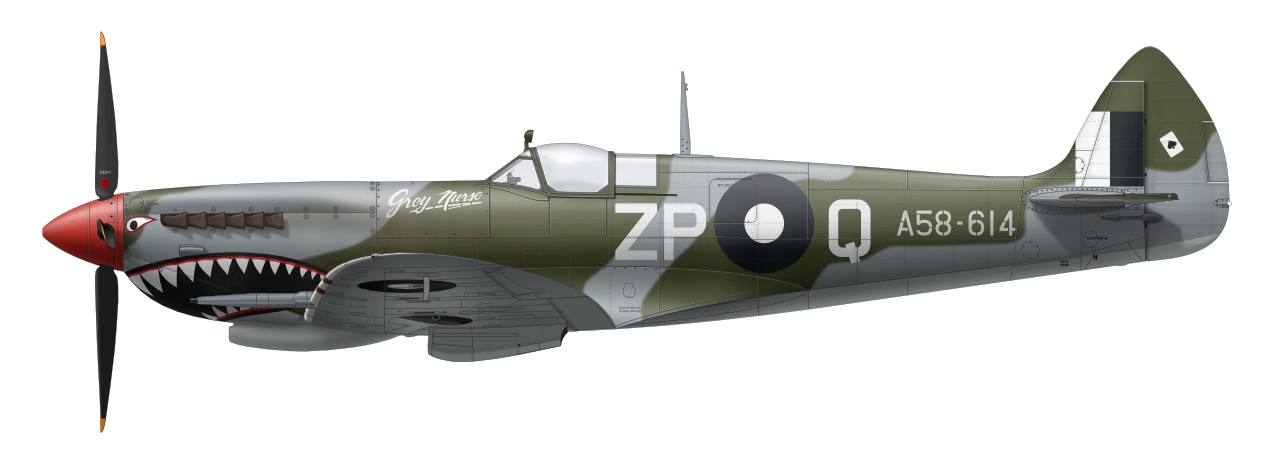
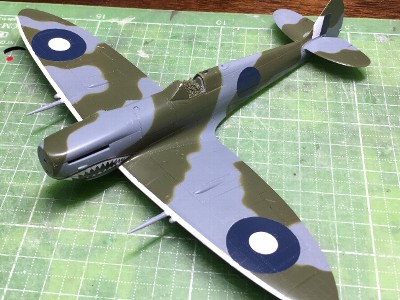
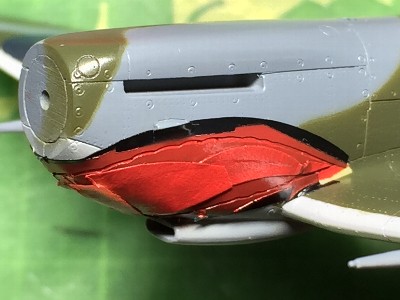
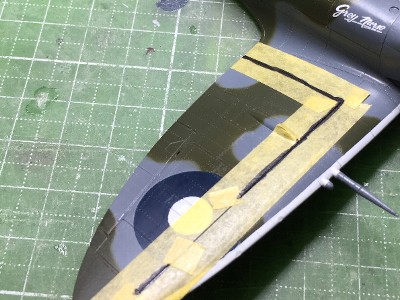
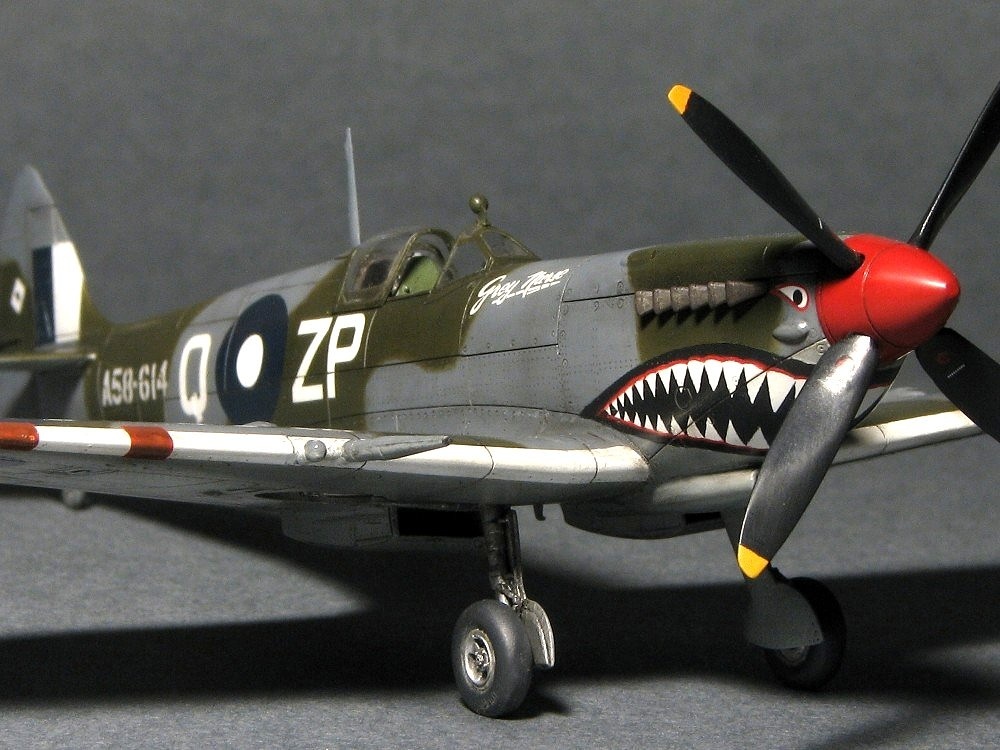
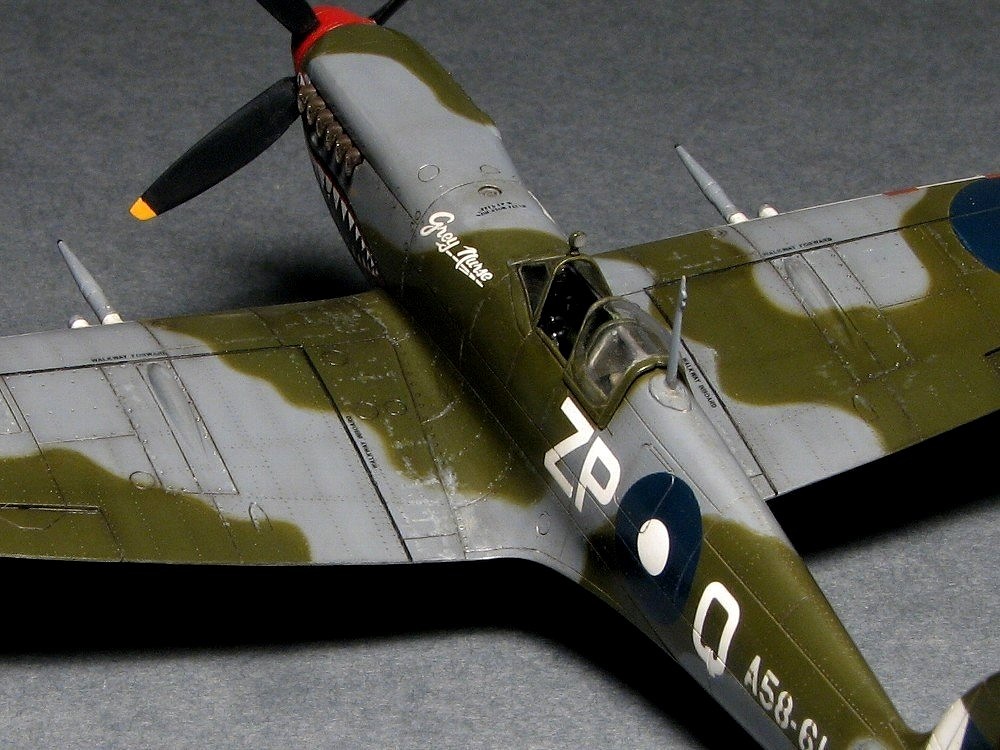
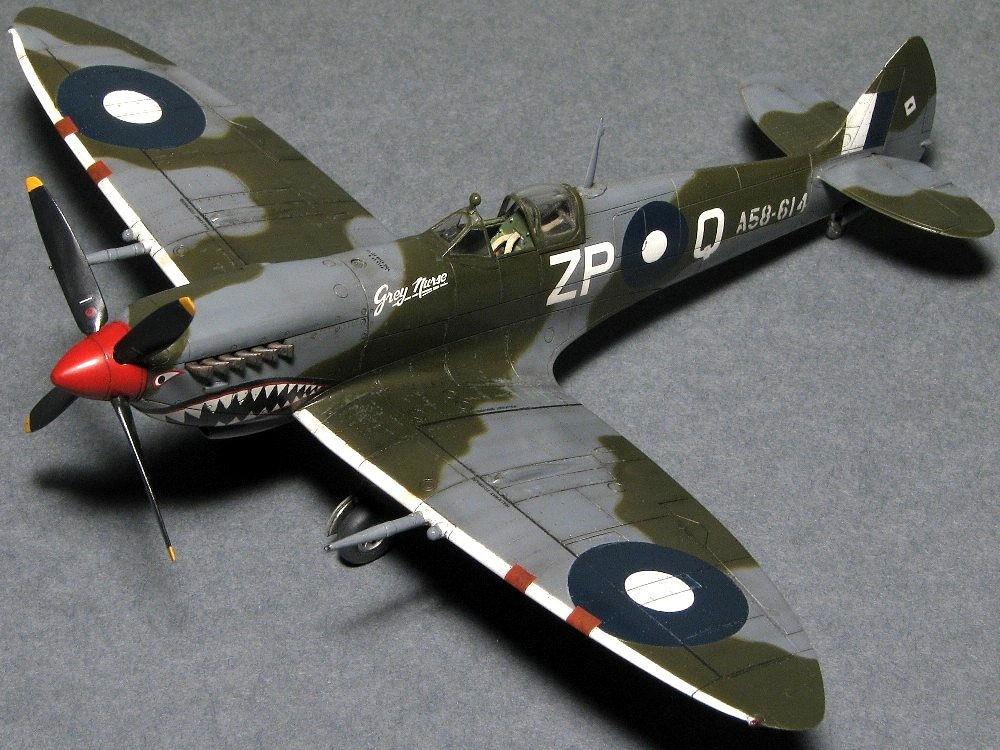
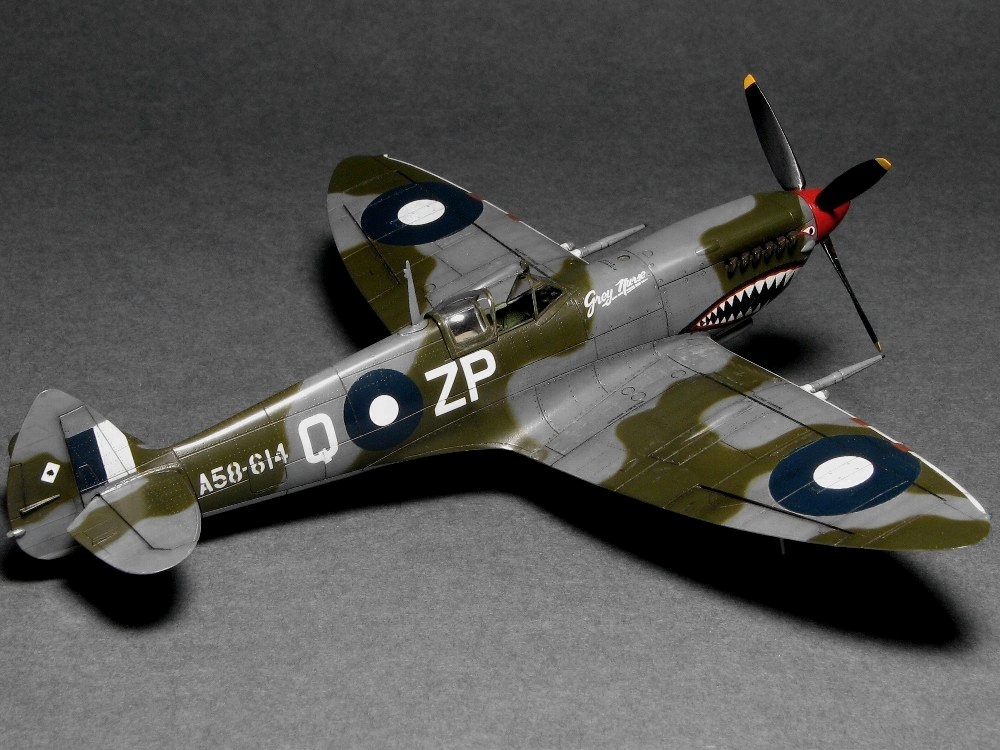
I considered how to paint shark teeth. The painting order was very important. The order was; White => mask teeth and red line portion => Black => remove all of masking => mask for red line => Red. Masking sheet of teeth and red line were cut with a home use cutting machine. Red was a mixture of GX3, #327, #114, #13 with 4:4:1:1. The upper roundel of A58-614 was 56 inches size. It was confirmed by the WW2 photo of actual aircraft. As for RAAF Spitfire, there were three variations. One was 56 inches and large white circle (it might be the same as RAF B roundel). The second one was 56" blue and small white circle (approx 12"). The third one was 32" blue and 12" white. In the same way, there were variations for the leading edge white paint portion. |
 This was the practice with a waste kit. |
 Mr. surfacer and GX1 White were painted. |
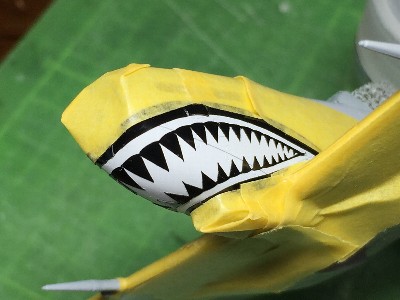 Masking for black was applied. |
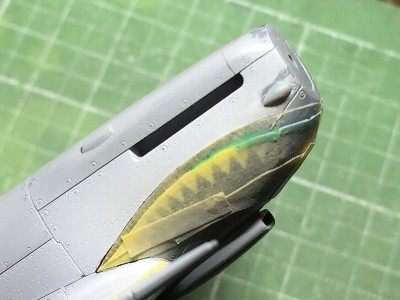 Black (with 20% of white) was painted. Then all of the mouth was masked for camouflage painting. |
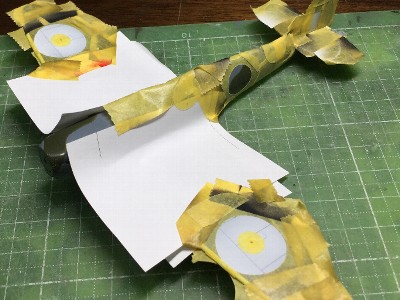
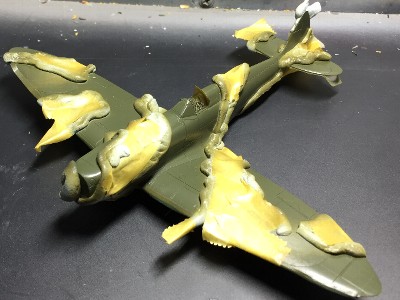 Other white portions (wing roundels and fin flash) were masked. Then, camouflage colors (Medeum Sea Gray => Dark Sea Gray => Dark Green ) were painted. |
 This was masking for Dull Blue. |
 Basic painting was finished. Stray paints and over-and-short of gradation were retouched with a fine brush. Then flat clear was over sprayed. |
 The lower roundel was masked and painted. After flat clear coating, unevenness of painting was polished. |
 The red line was masked and painted. |
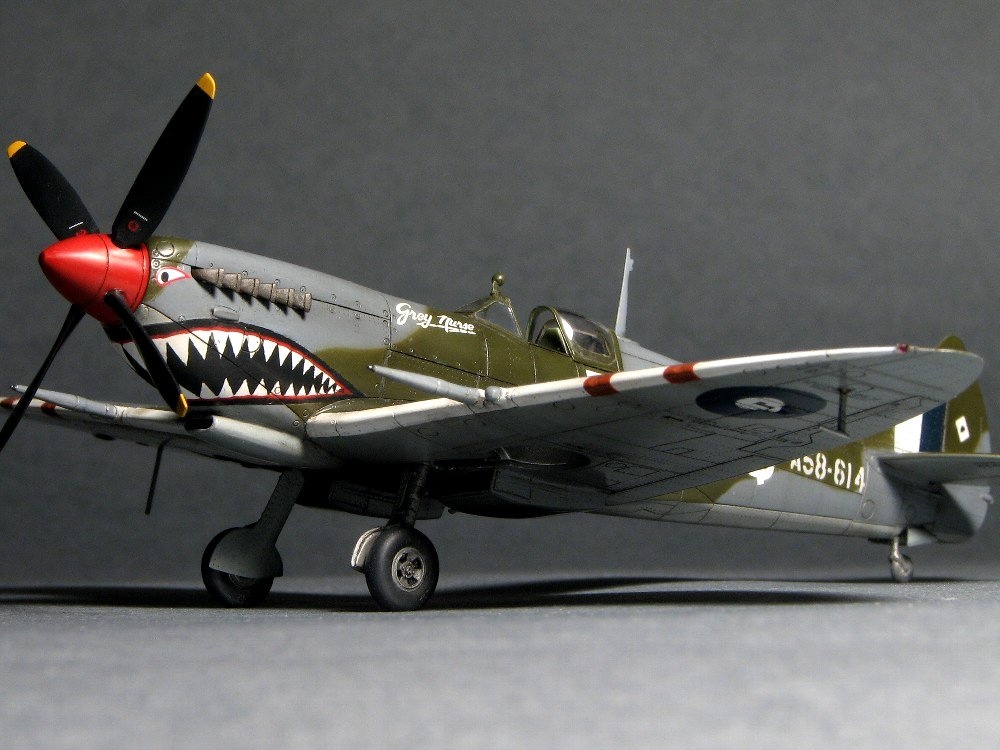
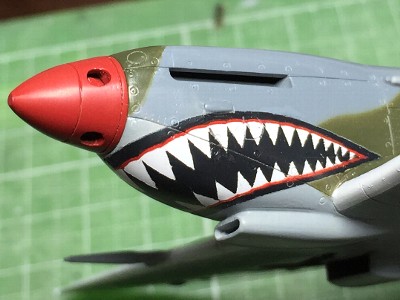 The shark mouth was finished. |
|
|
 |
|
|
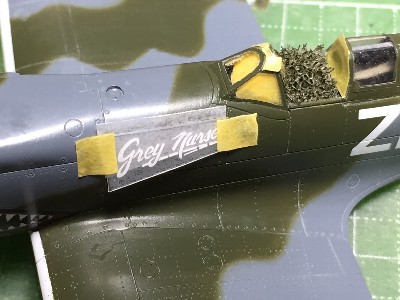 The position was adjusted with back paper. Then back paper was removed and dry decals was transferred. |
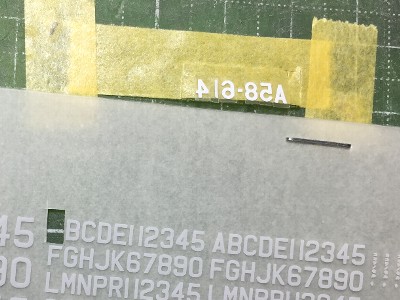 The serial number was a make-ahead general-purpose RAF/RAAF light gray letters. (Oops, the font was a little different for my Spitfire!) Each letter was lined up on reversed tape. |
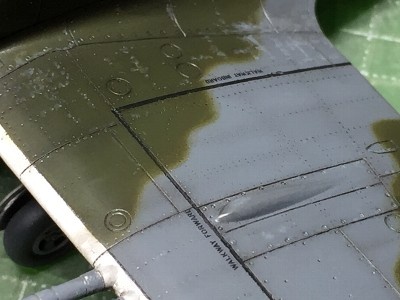
 The walkway was painted with a brush. |
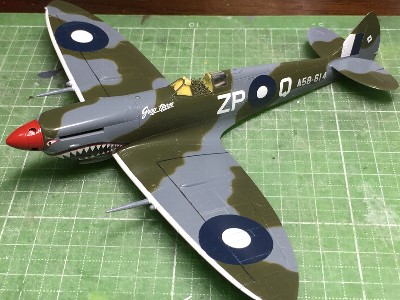 Almost all markings were finished. Flat clear was sprayed again and the surface was polished with Laplos #6000. |
|
|
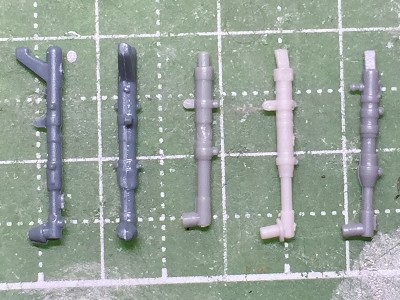
 Uppers are Quick Boost's resin exhausts. Lowers are kit parts. The shape of the kit part is superior to QB. |
 I used the kit exhaust. The fringe panel was engraved and the rear end was drilled. |
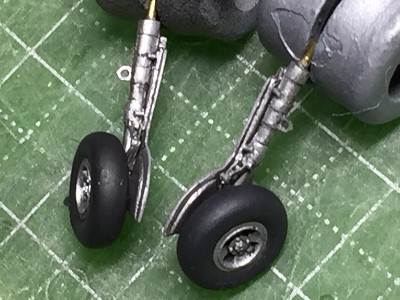
 From the left to the right, these are Eduard, Hasegawa IX, Tamiya I/V and Fujimi XIV. I selected Hasegawa. |
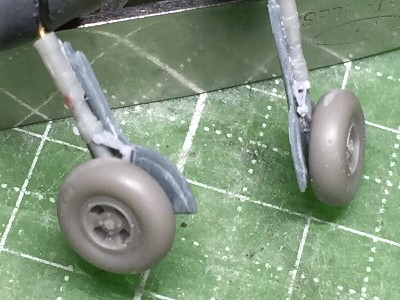 The torque link was made of 0.5mm (.02") plastic sheet. It was engraved with a carving knife. The tire was replaced with S.B.S. model's resin. |
 Other details were added. |
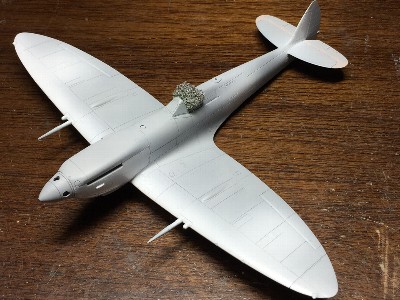
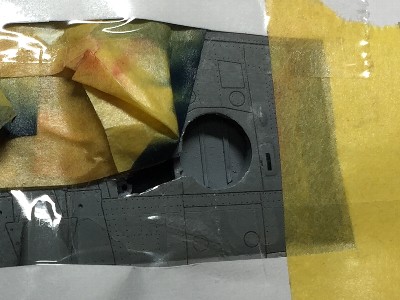 This is masking for the gear well. |
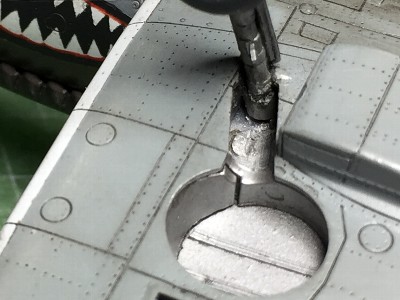 Hasegawa's gear leg was short for Eduard's gear well. So it was glued on a piece of sprue. |
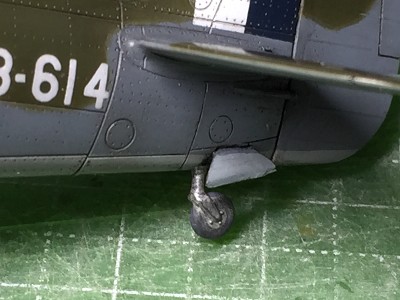 The tail gear and cover were from the kit. |
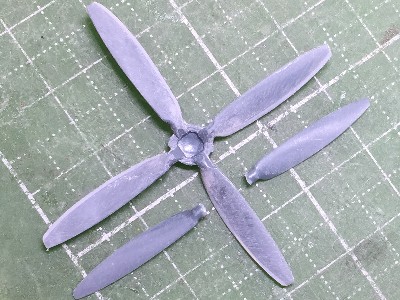 The width of the kit propeller blade was narrow. 0.5mm (.02") plastic sheet (light gray) was glued on the trailing edge. |
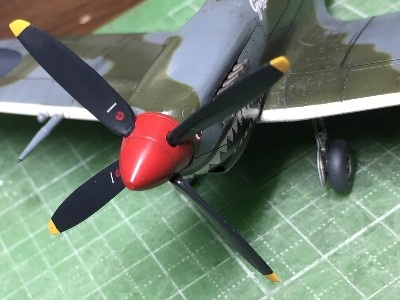 The shape of the blade was trimmed. |
 The caution of the walkway was from kit decals. Chippings were painted with a fine brush. I think the gear indicator was not introduced in Mk.VIII and late Mk.IX. |
 The lower caution stencils were from kit decals as well. |
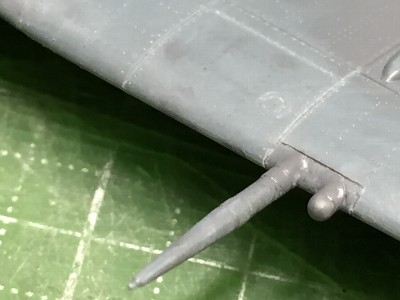
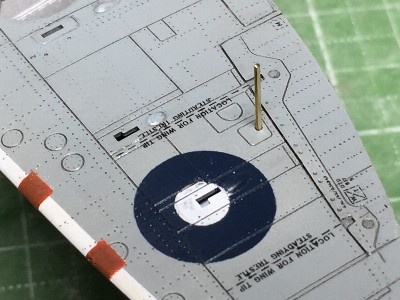 IFF antenna was made of brass rod. RAAF Mk.VIII commonly equipped with this rod antenna. |
 The hook of the slipper tank wad added. |
 The gunsight was from the kit. The reflector glass was clear plastic sheet. The stay of the kit rear view mirror was thinned. |
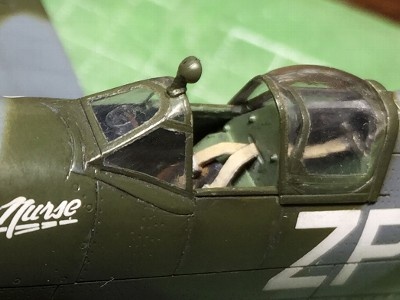 The rear view mirror was glued. The slide hood was glued with wood glue. |
|
|
|
|
 |
 |
 |
 |
 |
|
|
 |
|
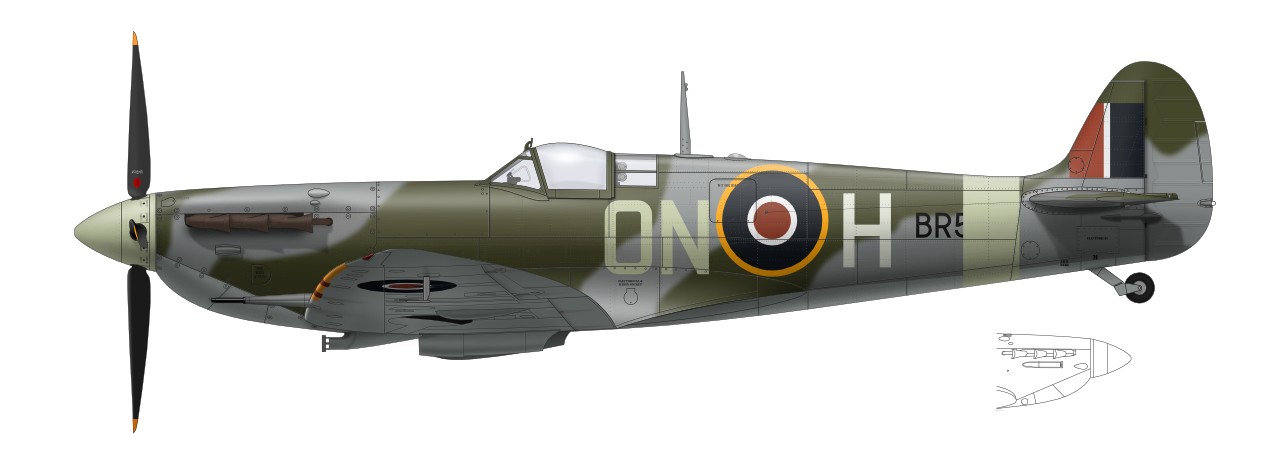
MK.VIb BR579/ON-H flown by Flt.Lt. Mike Kilburn of 124th squadron, Debden, summer 1942. |
 |
|
Mk.IIa P7895/RN-N of 72nd squadron, April 1941, Acklington. |
 |
|
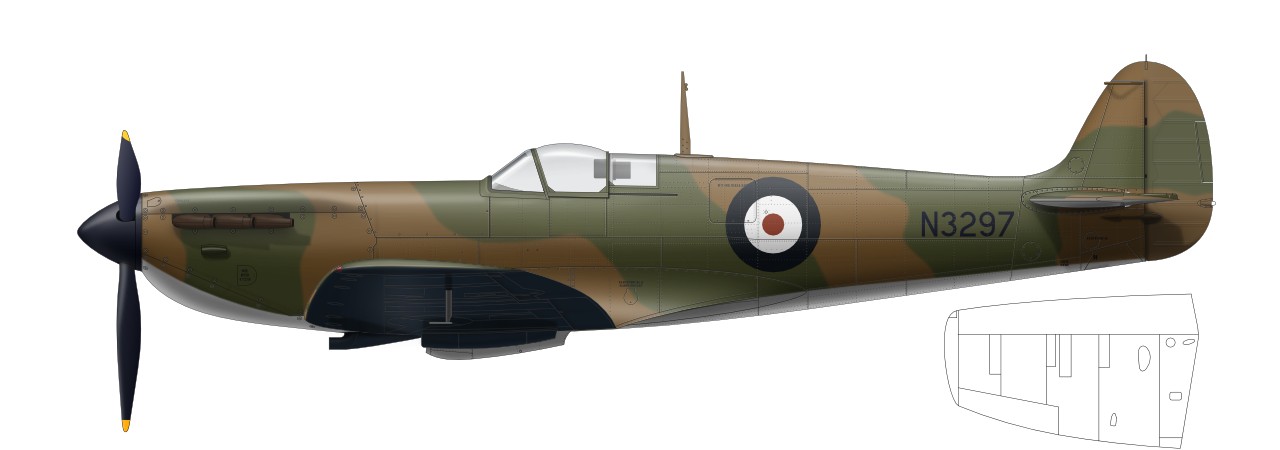
Mk.III N3297 was equipped Merlin XX engine. The total length was extended to 30ft4in. I assumed that the engine was moved forward by 4.5" which was the same length of Hurricane Mk.II extension. The wing span was reduced to 30ft6in. |
 |
|
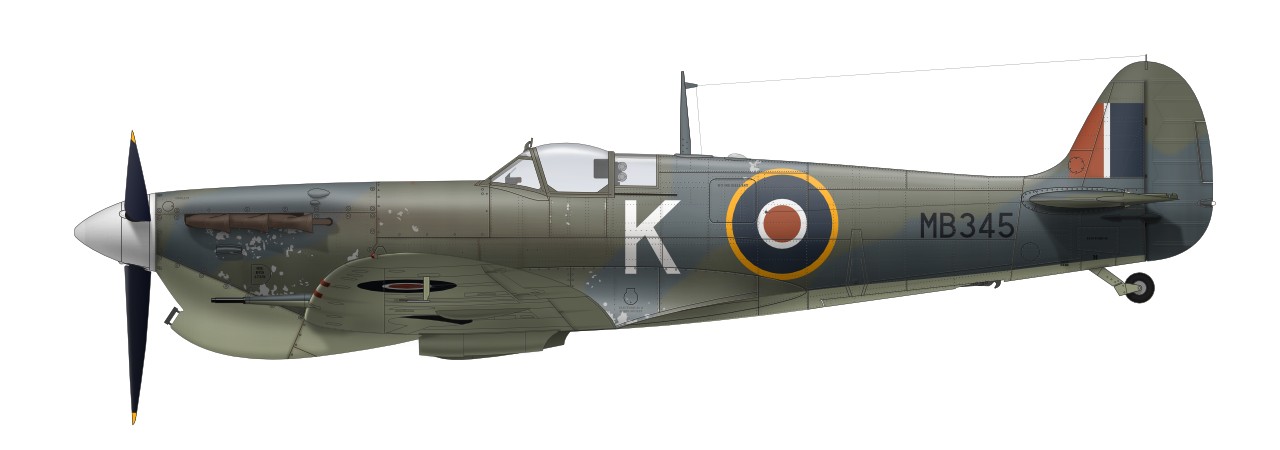
Seafire Mk.Ib MB345/K 885th squadron HMS Formidable, Feb. 1943. |
 |
|
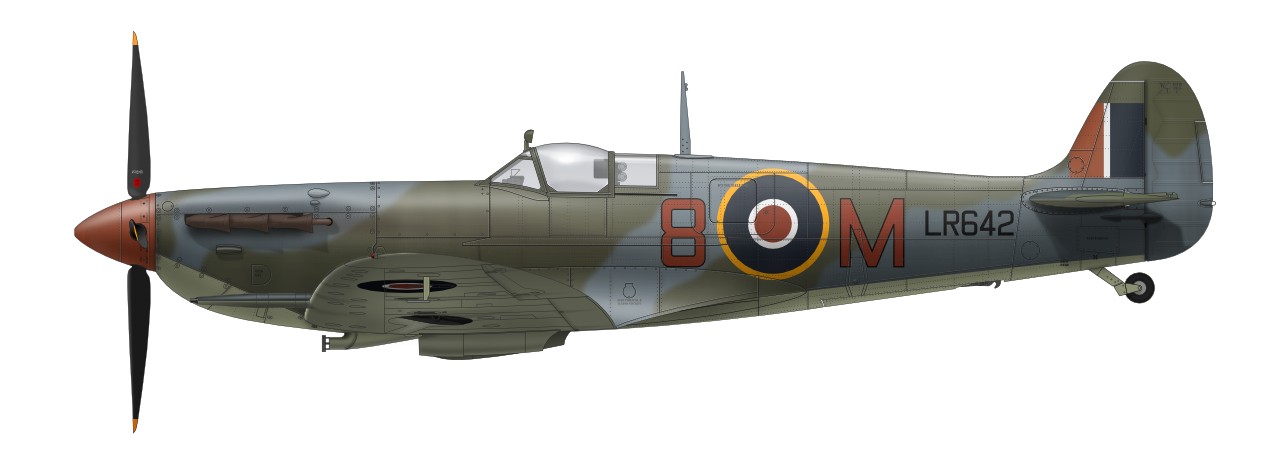
Seafire Mk.IIc LR642/8M of 807th squadron HMS Battler, summer 1943. |
 |
|
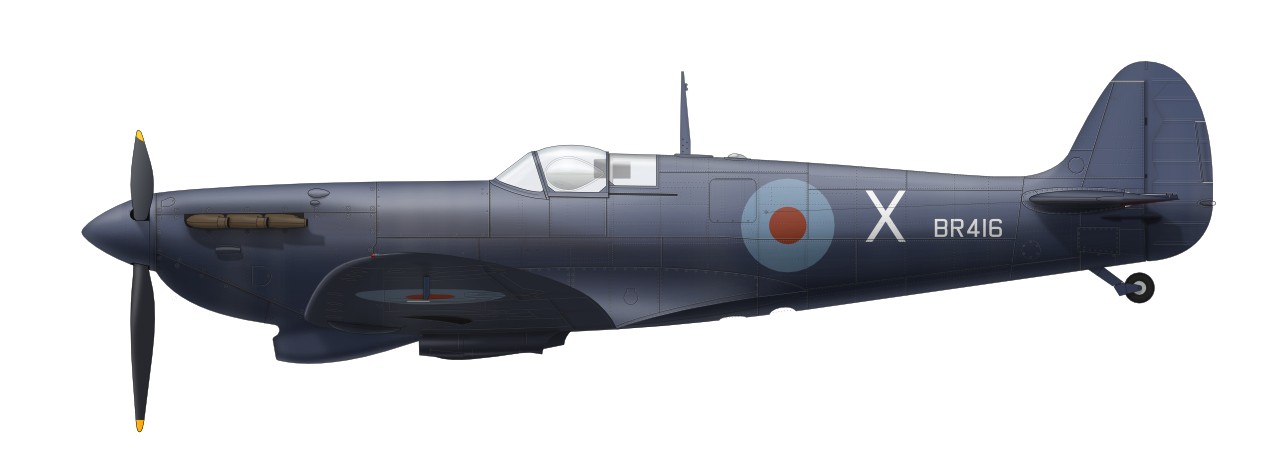
PR.IV BR416/X of 74th OTU, Palestine,1944. |
 |
|
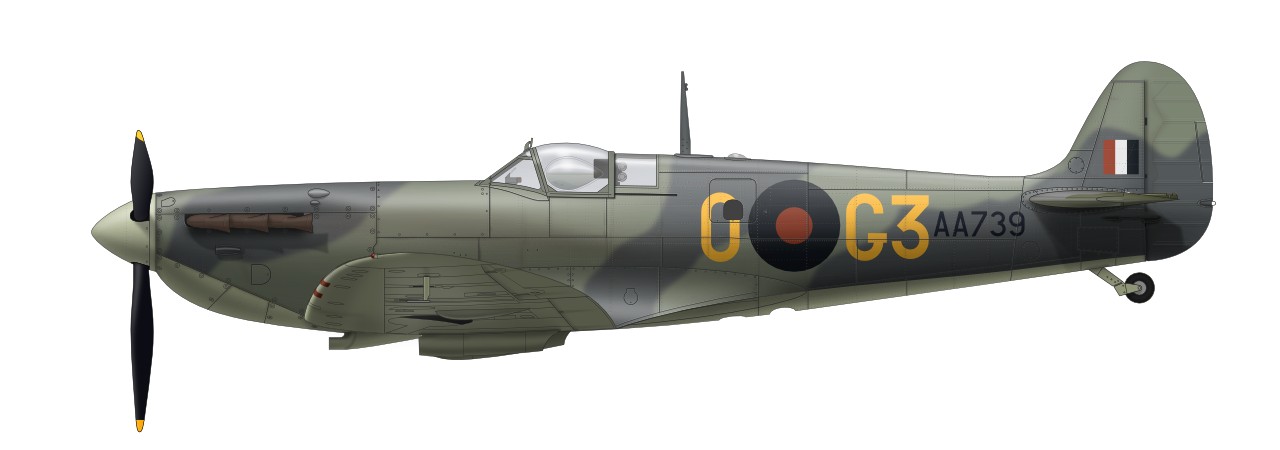
PR.XIII AA739/G3-O FAA 718th squadron, 1944. |
 |
|
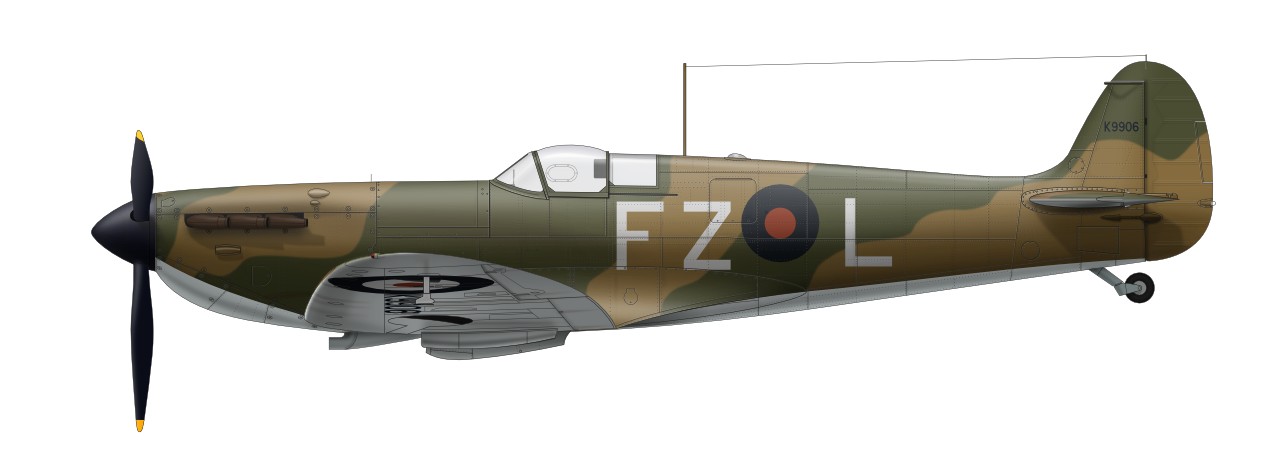
K9906/FZ-L of 65th squadron flown by Flt.Lt. Robert Stanford Tuck, March 1939. |
 |
|
Mk.IXc EN398/JE-J flown by 147th wing CO Wng.Cmdr. Johnny Johnson, spring 1943. |
 |
|
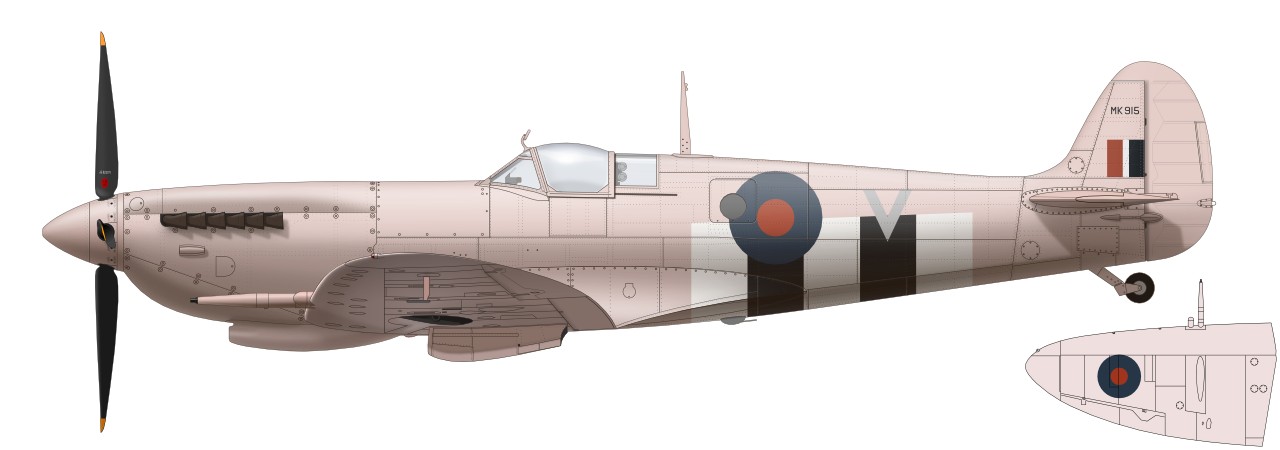
FR.Mk.IX MK915/V of 16th squadron, Normandy, autumn 1944. |
 |
|
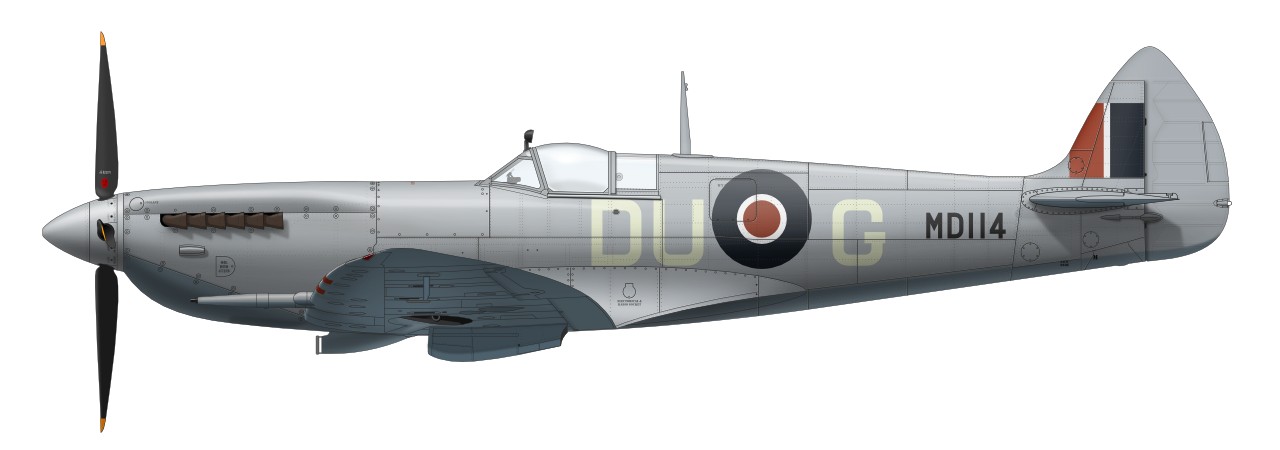
Mk.VII MD114/DU-G of 312nd squadron, Skeabrae, Feb 1944. |
 |
|
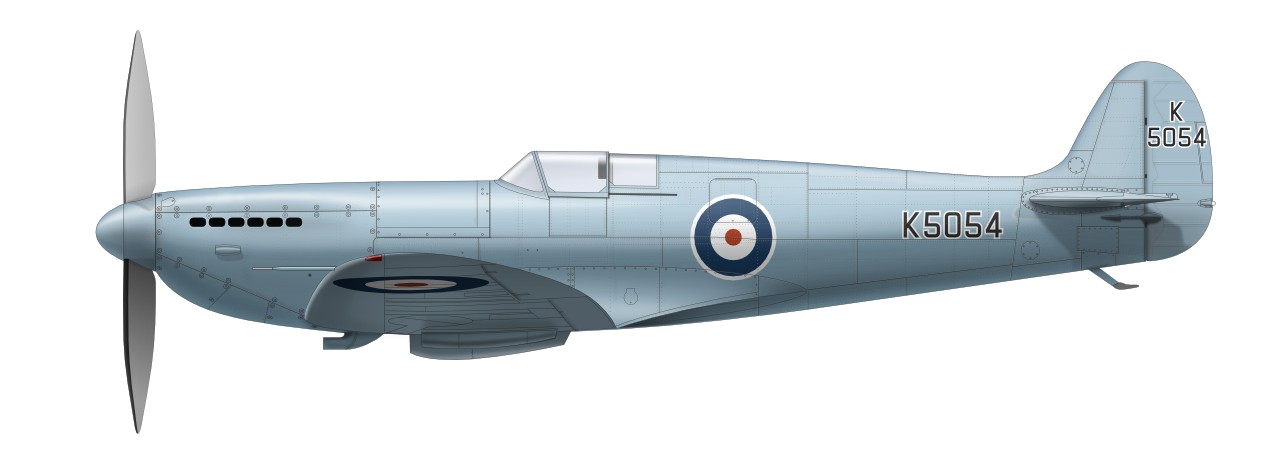
Supermarine Type 300 K5054, March 1936. |
 |
|
Other illustrations are here.
|