This is the collaborative work with my boy. This is his first scale model ever.
I helped him with painting and some more difficult tasks.
F-86F Sabre part2
|
|
|
This is the collaborative work with my boy. This is his first scale model ever. |
I helped him with painting and some more difficult tasks. |
|
|
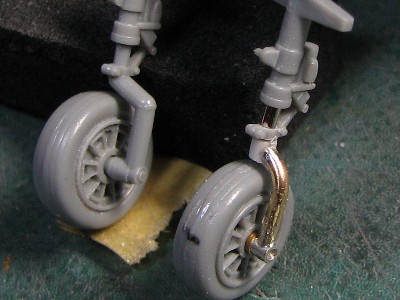
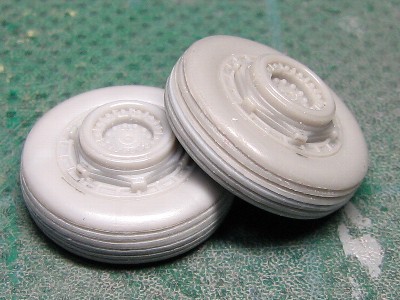
 The front wheel is cut in half. Then six triangular openings are drilled with a drill bit and hobby knife. |
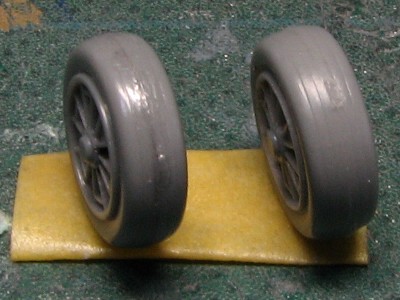 The kit original part (right side) is a little too thick. So the width is reduced as well, "killing two birds with one stone." |
 The phase of the left and right wheel shifts 15 degrees. This phase shifting makes different appearance of openings from the different points of view. |
 The kit main wheel is too thin so 0.5mm thick plastic sheet is inserted. |
|
|
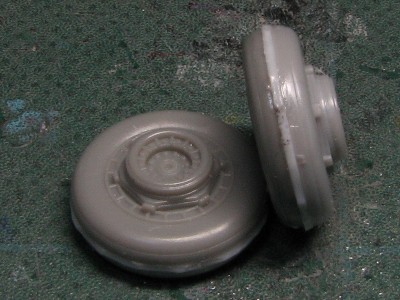
 These are kit original parts. |
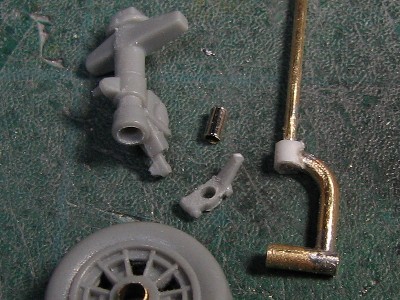
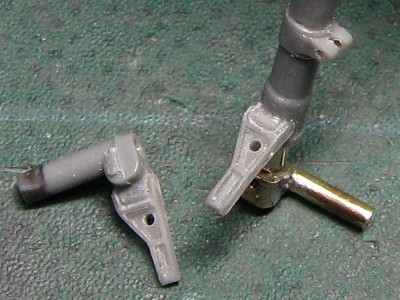
 The front fork is made of 1.2mm brass rod. 0.8mm brass rod is soldered on the top of the fork. |
 The wheel axis is 1.4mm brass tube. After soldering the parts together, unwanted material is cut off. |
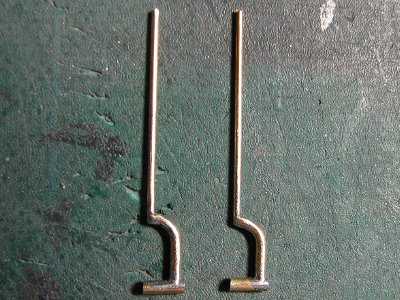 I made three sets and select the best one. |
 The plastic rod is drilled. |
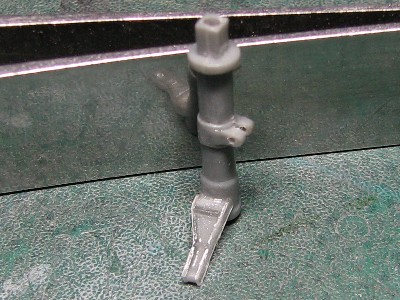
 The 0.9mm hole is drilled on the upper portion of kit gear leg to insert 0.8mm brass rod. The oleo strut is made of 1.1mm thick tube. |
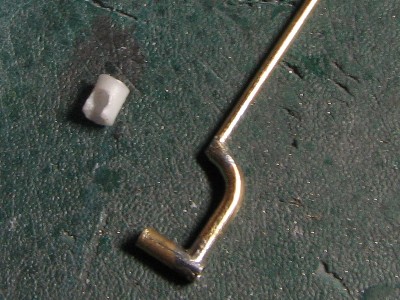
 Then all parts are assembled. The left is kit original parts. The shape of the kit front fork is not correct. |
 The toeing ring and the gear lock are added. |
|
|
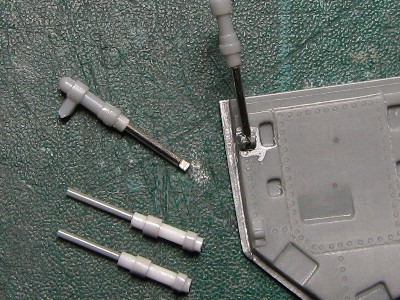
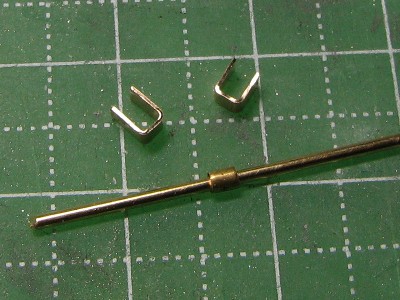 The "U" shaped parts are made of 0.3mm brass sheet. The center axis of the gear leg is 1.0mm brass rod. |
 The wheel axis is 1.2mm brass tube. |
 After soldering, metal part is trimmed and inserted to the kit gear leg part. |
 The fringe of 0.2mm clear plastic sheet is added on the kit torque link. |
 |
 The oleo strut is made of 1.5mm plate tube. |
 "?" shape of 0.2mm brass rod is glued on. |
 The tire tread are engraved with PE saw. |
|
|
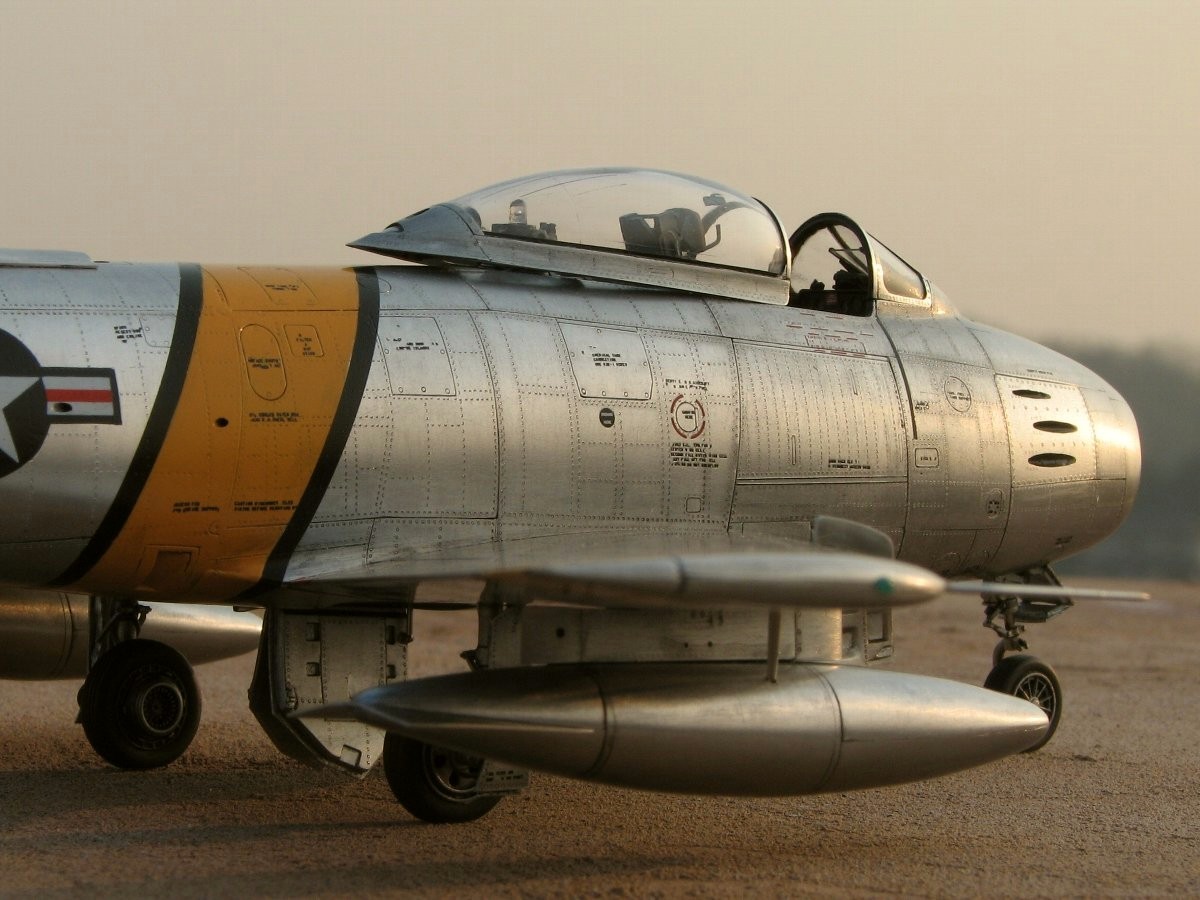
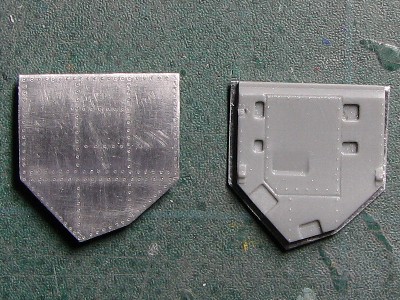
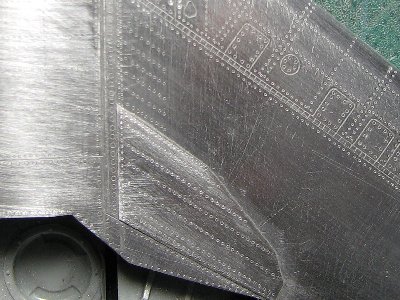
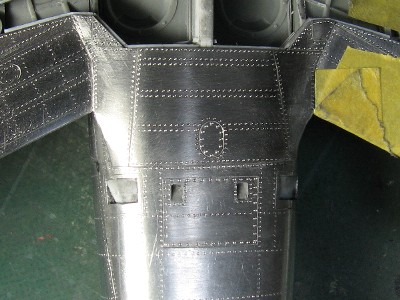
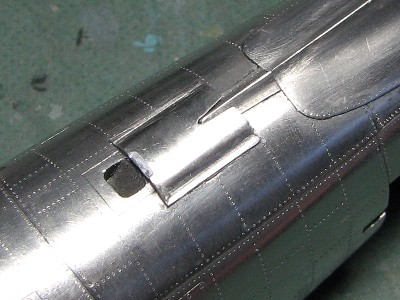
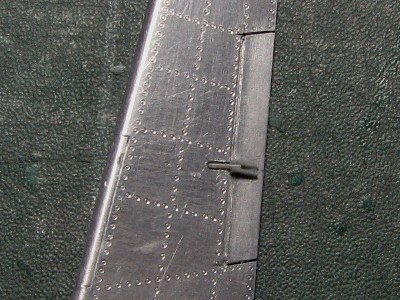
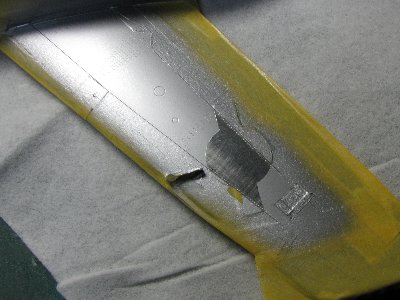
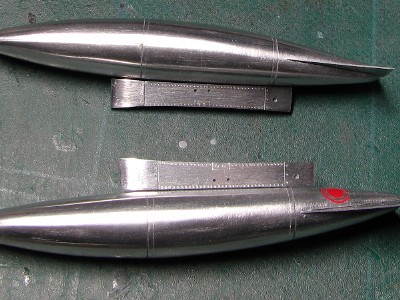
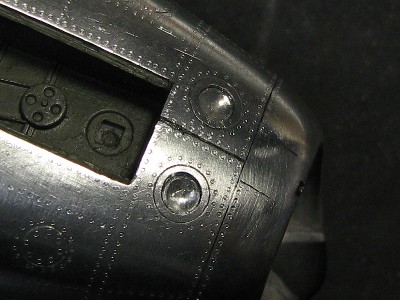
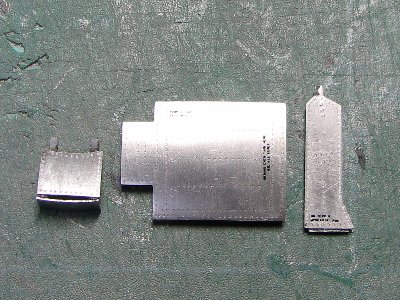
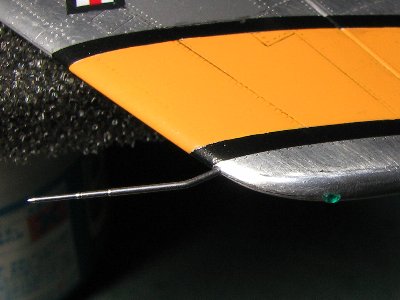
 0.3mm aluminum sheet is glued on the kit airbrake part. Rivets are engraved and the surface is polished before gluing. |
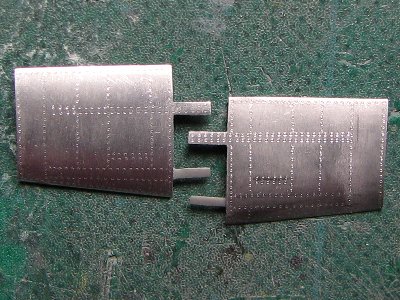 Rivet lines are copied from photos of the actual aircraft. |
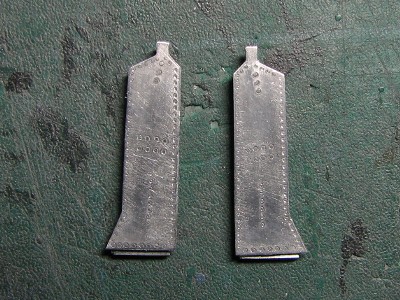
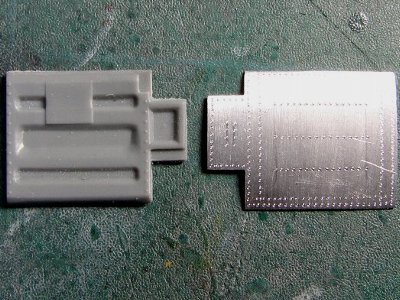 The same method is applied. |
 |
 |
 |
|
|
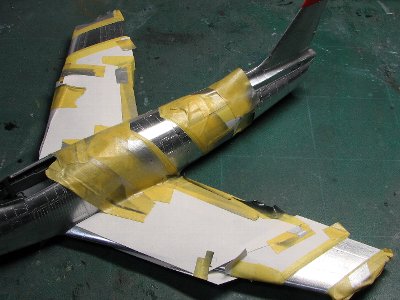
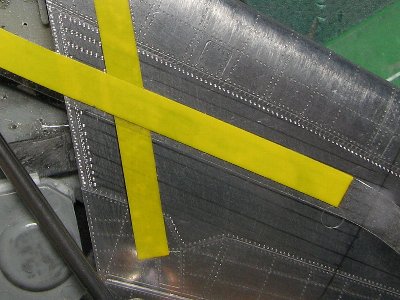 Rivets are engraved using the yellow masking tape as a guide. |
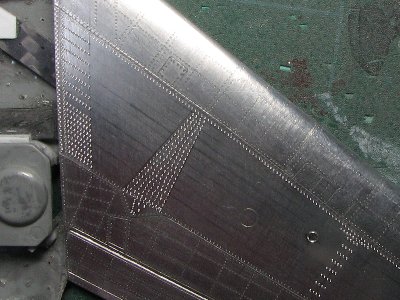 |
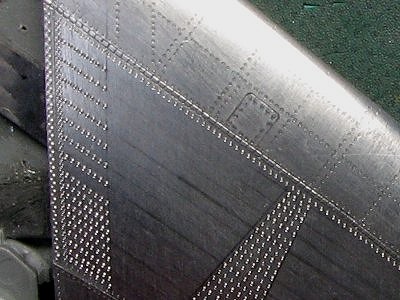 There are 17 rivet lines are on the wing root. Position of these lines is determined from the photos of the actual aircraft. |
 I made a mistake on the lower side. There is one rivet line more than should be. The reinforcement panel is made of 0.1mm aluminum sheet. |
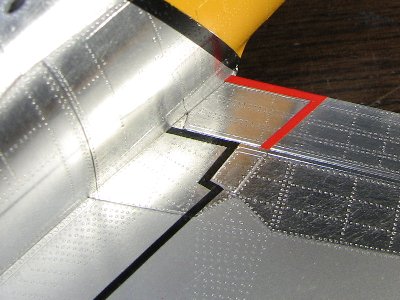
 The slit for wing fence is cut with etching saw. |
 The fence is made of 0.3mm aluminum. |
|
|
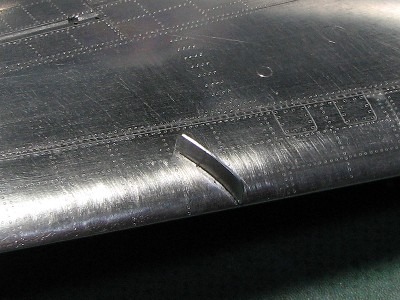
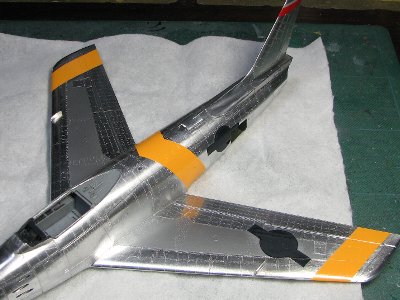
 Aircraft from F-86A model to F-30 model have these two square air outlets. The kit doesn't feature these outlets as the kit basically represents F-40 model. The large square panel line is my mistake. |
 I made an error in computing the gravity center. Additional weight is put into the fuselage. |
 Rivets are engraved. |
 |
|
|
 |
 |
 |
 |
|
|
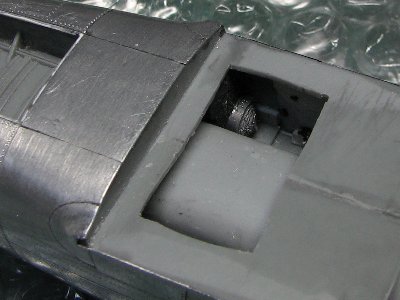
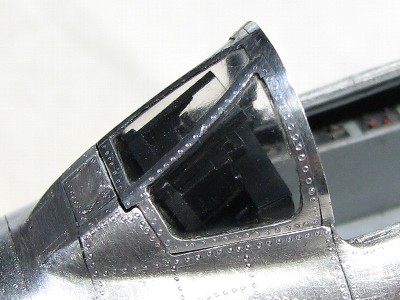
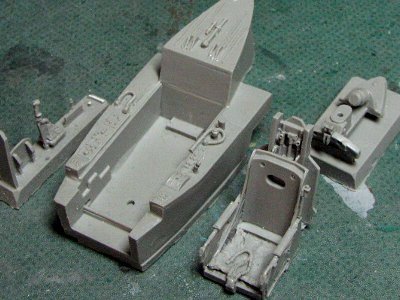 These are Aires's resin cockpit set. |
 I copied the Aires's details, but they are not fully accurate. |
 The pilot seat is from Aires. The crank shaped seat position adjustment lever and some details are added. |
 Seat belts are made from thin lead sheet. Buckles are cut out from Aires's etching parts. |
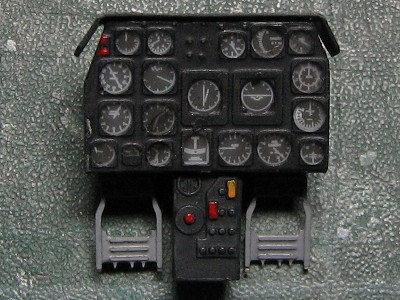 Hasegawa kit duplicates F-40's instrument panel which differs from F-30 model. So I had to use the Aires part. The rudder pedals are from Aires as well. |
 The background of the instrument panel is painted black for F-30 model. However some F-40 were painted light gray. |
 The inner frame is from Aires. |
 Each part is set in the cockpit. |
|
|
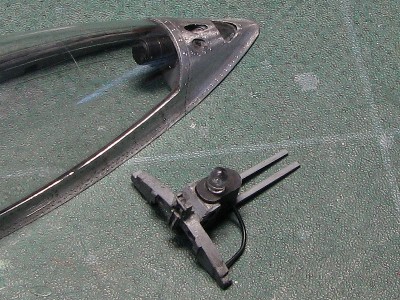
 The A-4 gunsight is a Cutting Edge's resin part. |
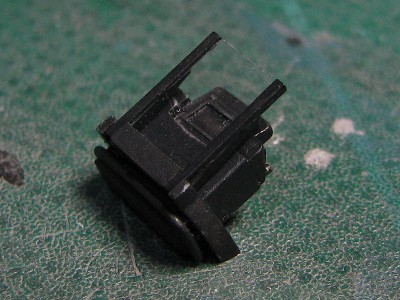 The reflector glass is from 0.2mm clear plastic sheet. Unfortunately I lacked exact details. |
 The gunsight is put on a skewer. The reflector glass is parallel with the windshield. |
 |
|
|
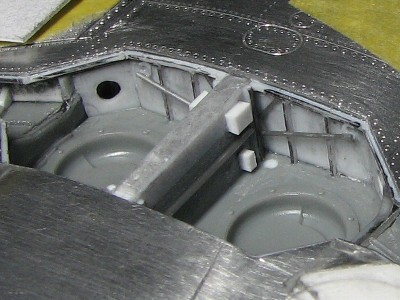
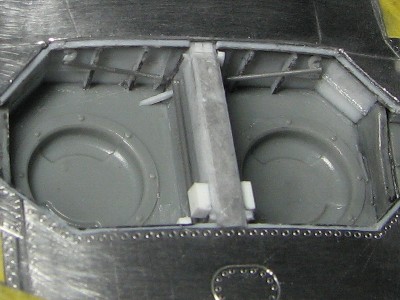
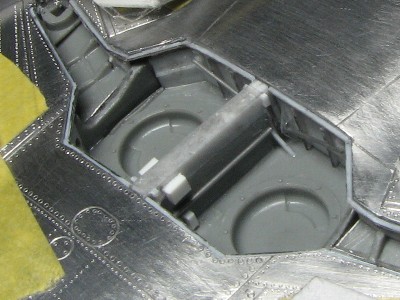
 I painted the gear bay and the inside of airbrake in the equivalent of FS34079, but later I found the description in a some references that they were actually painted FS34151. |
 The heat proof plate is glued on the back. |
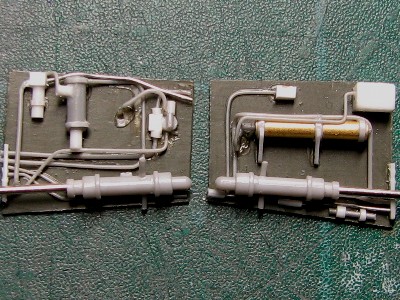 The interior of the airbrake is built in module assembly. |
 The actuator is kit part and the rod was replaced with 0.7mm diameter paper clip. |
 The rudder trim tab rod is added from plastic tip. |
 The gear cover actuator and the main gear actuator. |
|
Some decals (for example, kit and AMD) got the size of insignia wrong. 25in on the fuselage and 30in on the wings are the correct dimensions. The Cutting Edge is accurate in the size but I didn�ft like the shade of insignia blue. It is too bright. Be careful that US insignia is indicated by the diameter of the circle that the star inscribes. The USAF lettering is 30in high and parallel with the trailing edge. The checkerboard of the 51st FIS is 12in and squadron color band on the upper tail fin is 7.5in.
The width of the fuselage yellow band at the lower side is a little wider than the upper side. Please see the upper stage of above picture. But some aircraft (E and early F ?) may have the lower stage type band.
|
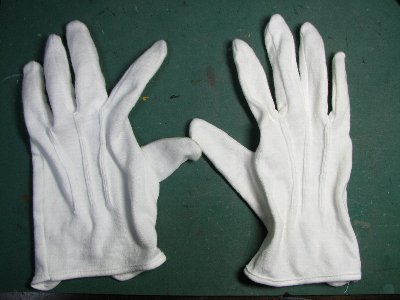 Cotton gloves are used to avoid fingerprints. |
 The size and position are checked with masking tape. |
 This "Aluminum color spray clear" is used for both metal primer and clear coating. |
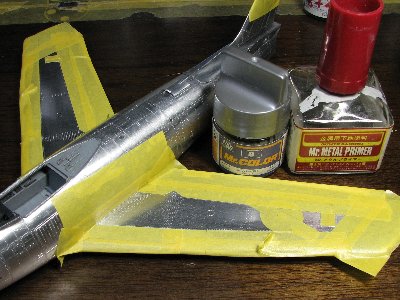 This is masking before silver paint application. Then the Aluminum color spray clear is airbrushed as a metal primer. |
 Mr. color #8 silver + #46 clear is airbrushed. Then Aluminum color spray clear is airbrushed again at this condition of the photo to coat the edge of silver paint. |
 This is masking of insignia blue and red band. |
 At first, Aluminum color spray clear is airbrushed, then insignia blue and red are airbrushed. |
 Masking tape is removed. |
 Masking of yellow bands is applied. Then, Aluminum color spray clear first, next white for the basecoat and finally orange yellow are airbrushed. |
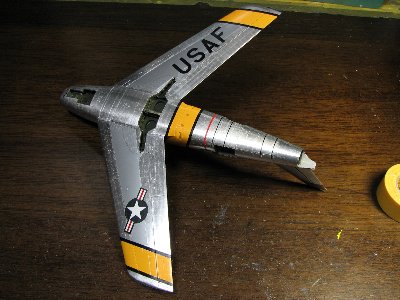
 All painting is finished. |
|
|
 These are kit's Cartograf decals, Cutting Edge CED48024, CED48174 and Aeromaster AMD48-448. |
 All decals are applied. |
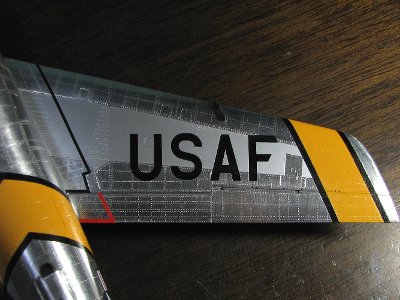 Check position of USAF lettering and 28in yellow band. |
 The walkway is painted alongside the small trapezoid panel. |
 The lower side is the same as the upper. |
 |
|
|
 The checker board is dry transfers form Hobby Decals. |
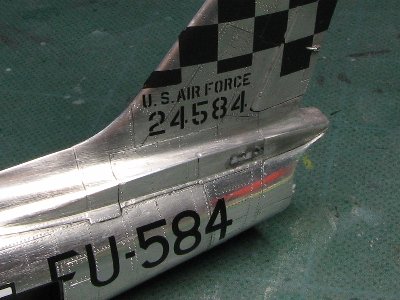 I wasn�ft able to apply the small letters from Hobby Decals sheet. I don't know why. Therefore each letter comes from the custom-made dry transfers. |
 Mig Mad Marine is also custom-ordered dry transfer. At first red is applied, next black shadows, and yellow fringe is the last. |
 The nose art "Lyn Annie Dave I" was applied in the same manner. |
|
Here is the artwork for custom-made dry transfers. (download)
I made caution stencils font for Windows of my own work using free software "fontforge-mingw". You can download the file bellow and install on your PC at your own risk. (Copy "usafstencil.ttf" and paste to "Fonts" folder in "Windows" folder.) After decals and dry transfers are applied, the whole surface is airbrushed in Aluminum color spray clear again. Next, the surface is polished with 1500 grit sand paper. Finally semi-gross clear is airbrushed as the top coat. |
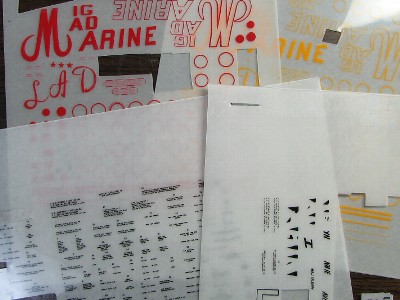 These are custom-made dry transfers. |
 Caution stencils are custom-made dry transfers as well. |
|
|
 The kit original part is on the left. The corrected one on the right. |
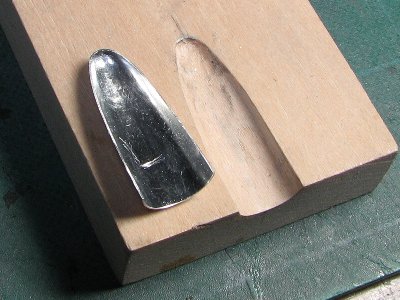 The curved shape of the tip is crated using this female die. |
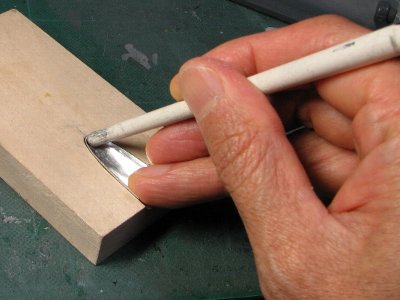 Aluminum sheet is pressed with a stick. |
 Aluminum sheet is glued and polished. |
|
|
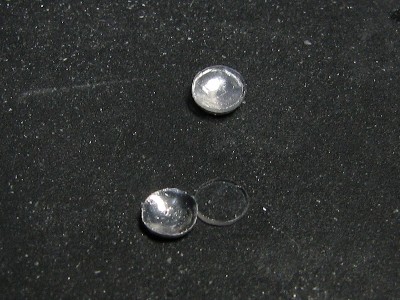 The landing light is made of aluminum sheet and clear plastic. |
 |
 The upper edge of the nose gear cover (the left) is curved line to fit the fuselage. |
 The rear view mirror and the hand grip are added. |
 The landing gear is painted SM01 super fine silver. |
 The inside of the gear bay door is painted SM06 chrome silver. |
 The brake line is annealed 0.5mm and 0.3mm brass rod with 0.7mm brass tube. |
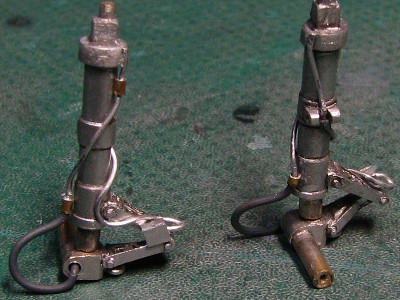 The line from the scissors switch is 0.3mm lead wire. |
|
|
 The port airbrake is assembled. Two gray lines are made of annealed 0.5mm brass rod. |
 Starboard. |
 These three photos are of the port landing gear. |
 The gear leg and wheel are weathered with Tamiya Weathering Master and water. |
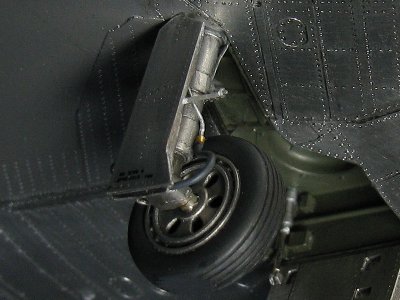 The main landing gear is extended by 0.5mm at the attachment point to achieve the "nose down landing position". |
 At the same time, the nose gear is shortened by 0.5mm. |
 The actuator strut is built using 0.5mm nickel silver rod. |
 Some details are added to kit parts. |
 The pitot tube is Finemolds brass parts. The navigation light is sanded from clear sprue. Of course, this photo is upside-down. |
 The pitot tube and the tie rod of the external fuel tank are painted SM06 chrome silver. |
 |
|
|
| 1 | Famous airplane of the world (new edition) No.20 North American F-86 Sabre | Bunrindo |
| 2 | Famous airplane of the world (new edition) No.93 North American F-86 Sabre ISBN4-89319-092-X | Bunrindo |
| 3 | Famous airplane of the world (old edition) F-86D/K/L Sabre | Bunrindo |
| 4 | Maru extra number F-86 Sabre | Ushioshobo |
| 5 | Model Art extra number No.302 F-86F Sabre | Model Art |
| 6 | Koku-fun Air Ccombat No.6 | Bunrindo |
| 7 | Koku-fun Air Ccombat No.7 | Bunrindo |
| 8 | Koku-fun Illustrated No.27 Air War at Korean War | Bunrindo |
| 9 | Seimitsu-zumen wo yomu No.5 Early US Jet Fighters | Kantosha |
| 10 | F-86 Sabre In Action Aircraft No.33 | Squadron/Signal Publications |
| 11 | Walk Around F-86 Sabre Walk Around Number 21 ISBN 0-89747-409-0 | Squadron/Signal Publications |
| 12 | Canadair and Comonwealth Sabre (Warpaint Series No.40) | Warpaint Books |
| 13 | F-86 Sabre Aces of the 4th Fighter Wing (Aircraft of the Aces) ISBN 978-1-84176-996-7 | Osprey Publishing |
| 14 | F-86 Sabre Aces of the 51st Fighter Wing (Aircraft of the Aces) ISBN 978-1-84176-995-0 | Osprey Publishing |
| 15 | Korean Air War ISBN 0-7603-1511-6 | Motorbooks International |
| 16 | Air War Korea 1950-1953 ISBN 0-7603-0551-X | Motorbooks International |
| 17 | Air War Over Korea ISBN 0-89747-415-5 | Squadron/Signal Publications |
| 18 | Mig Alley ISBN 0-89747-081-8 | Squadron/Signal Publications |
| 19 | Planes, Names & Dames Vol.II 1946-1960 ISBN 0-89747-291-8 | Squadron/Signal Publications |
| 20 | North American F-86 SABRE ISBN 1-86126-358-9 | Crowood Press |
| 21 | F-86 Sabres Of The 4th Fighter Intercepter Wing ISBN 1-84176-287-3 | Osprey Publishing |
| 22 | F-86 Sabre Fighter-Bomber Units Over Korea ISBN 1-85532-929-8 | Osprey Publishing |
| 23 | Osprey Aircraft of the Aces 4 Korean War Aces ISBN 1-85532-501-2 | Osprey Publishing |
| 24 | Warbird Tech 3 F-86 Sabre Jet Day Fighters ISBN 0-933424-66-3 | Specialty Press |
| 25 | F-40 Flugzeuge der Bundeswehr 17 Canadair Sabre CL.13B Mk.6 ISBN 3935761171 | ??? |
| 26 | Famous airplane of the world (old edition) F-86F Sabre | Bunrindo |
|
|