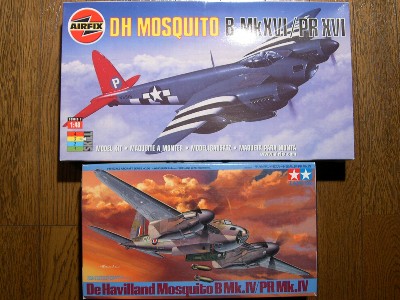
Mosquito PR.XVI (Tamiya 1/48)
16.Nov.2006
|
|
The Wooden Wonder
|
|
Introduction |
|
The next issue was which type should be built. As for Mossie, my favorite was the bomber type with the elegant line of the grass nose. There were excellent B.IV kits from Tamiya. But many modelers already had built them. And I thought that the latter two-stage supercharger type was more major for the bomber type, I couldn't satisfied without "cut & paste" modeling recently, and I might manage bubble canopies by heat pressing of transparent styrene sheet... So, though I was somehow burnout syndrome after hard modeling of Helldiver, I decided to build PR.XVI of 680 Squadron with the red and white candy striped tail.
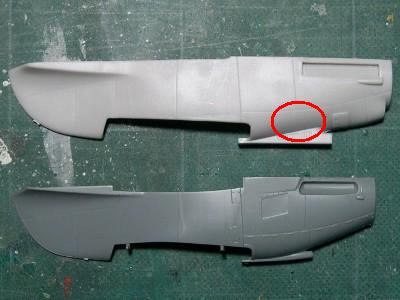
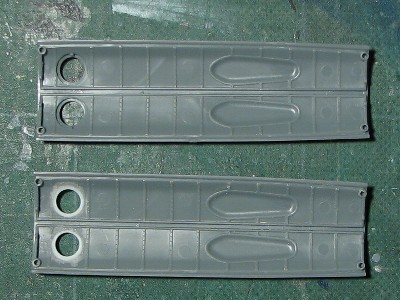
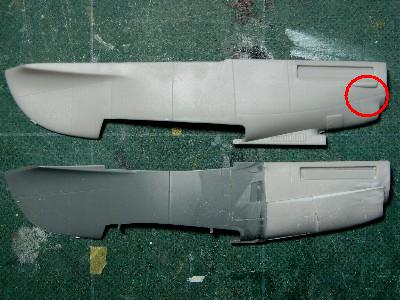
On the other side, as for Airfix, the size of the tail fin and the fuselage in the vicinity of tail is roughly accurate. However, Airfix's fuselage is about 1.5mm thinner (lower) in the vicinity of the main wing rear end. Tamiya is accurate. Therefore, if accuracy is requested, the both of Airfix and Tamiya need some correction work. In width of the fuselage and the cross section shape, two kits are almost same, especially bomb bay doors are completely compatible (though there are differences of accuracy). |
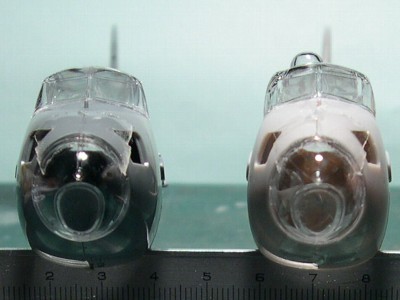
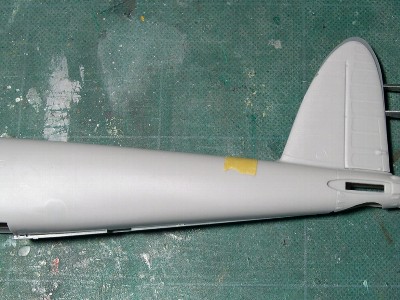 Airfix : on this side, Tamiya : behind. These two kits are matched in the top of the fuselage. |
 Which company copied? |
|
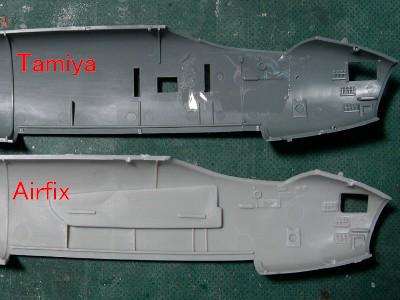
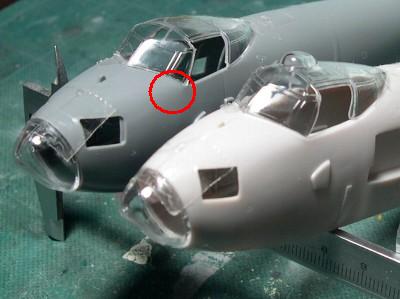
The nose Generally speaking, Airfix is roundish and Tamiya is smart. Tamiya is squarish at the part of the "cheekbone" forward of the windshield. However, it's not easy to correct. Because, once the cheekbone is corrected, it influences windshield clear parts. Airfix is superior in the impression of the nose. |
 Tamiya : on this side, Airfix : behind. The outlines from the nose to the canopy are different. |
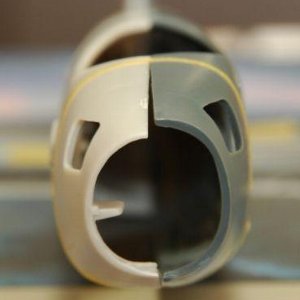
 Tamiya : left, Airfix : right. Please compare the cross section shape (yellow tape). The side windows are also different. The angle of Tamiya's upper former corner is acute. |
|
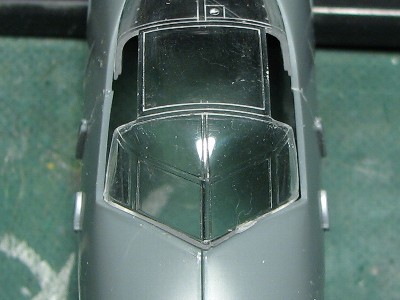
The canopy At the first sight, both Tamiya and Airfix are similar. But, of course, there is no compatibility (In a word, Airfix's canopy is not suitable for the Tamiya's fuselage). Especially, Tamiya's canopy is too wide at the front. This width is brought by the shape of the squarish cheekbone. And because of the width, Tamiya's canopy looks slightly flat.On the other hand, Airfix is not bad at the total atmosphere of the whole shape. Unfortunately, the side frame of the windshield ("A-pillar" when saying with the car) is curved but it's not easy to correct. The A-pillar of Tamiya is straight and correct. |
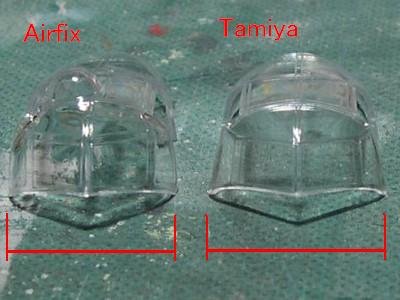 Both parts are differ at the width and cross section. |
 The cheekbone (the red circle). |
|
The nose windshield To compare the cross section, Tamiya is normal oval shape though Airfix looks like an egg. Mmm.. I cannot mention which is correct. However, at the view of model parts, Airfix is thick and dull window frames, causes weld line. So I hesitate in use. |
 Please note the shape at the boundary of the nose windshield and the body, the nose section shape, the relation between the fuselage and canopy. |
|
The cowling |
 The upper Airfix, the lower Tamiya. Airfix is overall ill-shaped less details. The volume near red circle is insufficient. The engine air intake is too small. |
|
|
 The left is Airfix, the right is Monogram. |
 Mmmm... |
|
|
Construction |
|
|
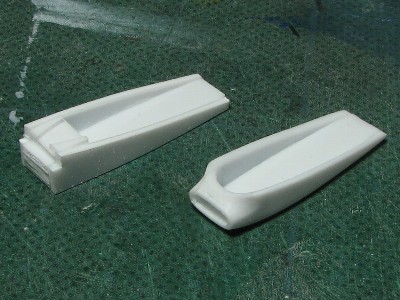
 This is Airfix. The shape of the side blister is not good. It likes a trapezoid seeing from the top and likes a triangle from the front. |
|
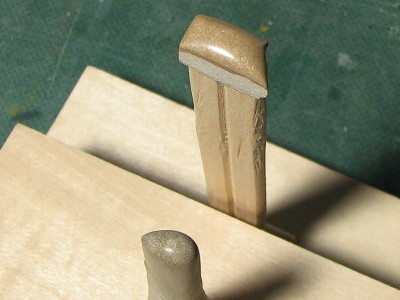
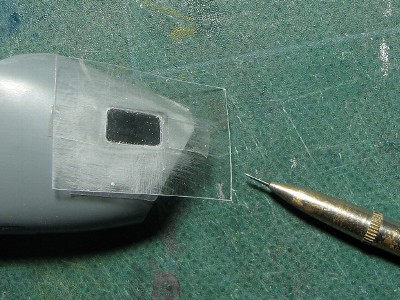
Side blister is made by heat pressing of transparent 0.4mm Tamiya Praban (styrene sheet) as same method as Helldiver. First of all, I carved the wooden form (magnolia hypoleuca). The procedure is deciding side shape to fit lacks of kit parts exactly, copying shape of surrounding window frames, cutting down to fit front shape and plane shape of swelling of the blister, finishing up in sphere, and fine-tuning shape in consideration of thickness of transparent Praban. |
 Deciding side shape to fit lacks of kit parts exactly. |
 Cutting down to fit front shape of swelling of the blister. |
|
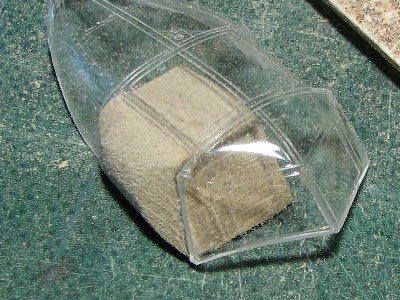
The way of the heat pressing was as follows, same as Helldiver (see the photos in Helldiver article). To heat 15cm X 15cm size 0.4mm transparent Tamiya Praban slowly 15cm above the weakest flame of the gas range. Off course, you have to put on gloves. Then, Praban shrinks by heat. But don't pull it. Both hands are brought close as Praban shrinks. Still heat for a while. Then, press on the wooden form. Aim at 0.8mm thickness (thickness is adjusted by pressure). After heat pressing, cut out by disk saw. Fitting with the kit parts was carefully adjusted, but fitting was not satisfied, adjusted the wooden form, heat-pressed again, adjusted fitting, fitting was not still satisfied, ... repeated the same process several times again until the satisfied one was get. |
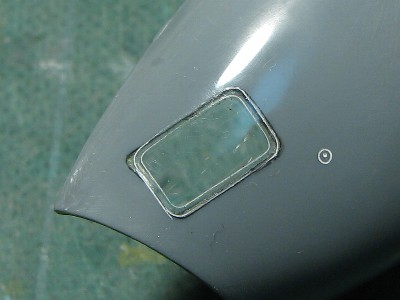
 The wooden form was coated with CA glue. This side is for the astrodome. |
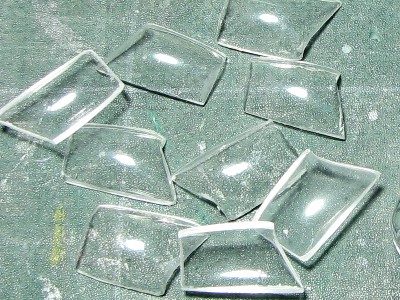 A pile of failure. |
|
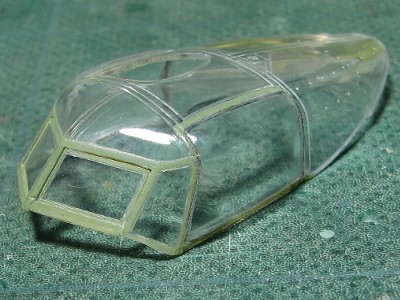
Tamiya's canopy has the problem of its width. The width of the lower side of the windshield was narrowed about 1.5mm and it was corrected to 20mm. The latter half part was also narrowed in width about 0.5mm. The guide was made from 0.5mm Praban, it was fixed with Scotch adhesive tape, and the canopy part was dipped into the hot water. |
 The width of Tamiya parts was corrected. Under such a condition, it was soaked in the hot water. |
 The corrected canopy was placed on the Tamiya fuselage. Note the gap. |
|
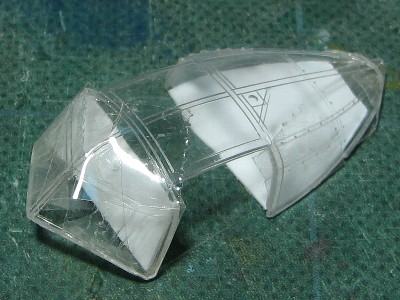
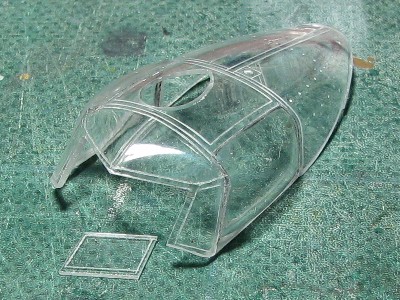
Some frames exist only inside of the canopy. These frames would be depicted with extended sprues later. So I sanded and polished the inside of the clear part. Please note that these internal frames of early type and late type are different. Late type lacks some frames at the rear. |
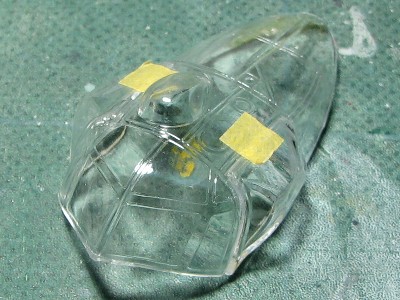
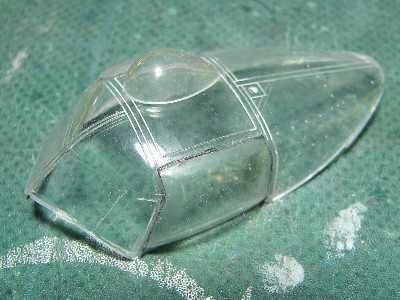 At last, PR.XVI canopy appeared. Dark Gray was painted on the bonding surface of side blister. It would be polished more to improve the transparency. |
Again, Airfix clear parts. |
|
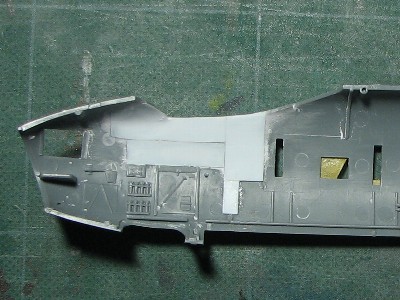
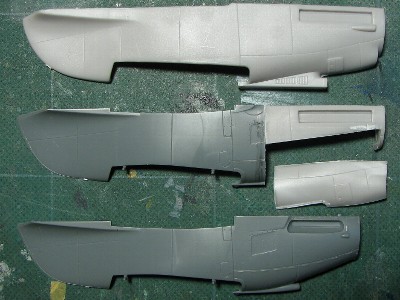
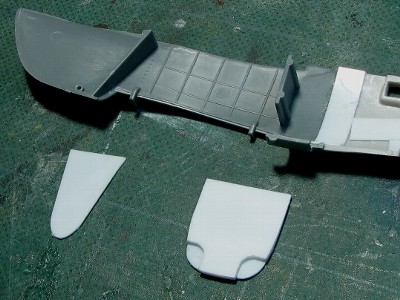
It was impossible as already stated that the fuselage was not corrected and only the tail was corrected. Tall tail fin looked like not so bad. "Ok, I've decided to build without correction. This is the way of adult modelling." ....But.... When I noticed, I had the etching saw in my hand and was cutting the fuselage. Afterwards, a tail undercarriage near body that remains on the side after the person cuts it is lightly bent like being suitable of the section. |
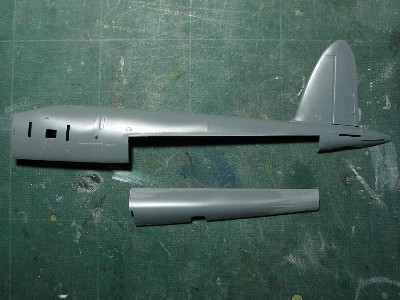 The fuselage was cut like this. Only the rear fuselage was thinned by 1mm. The forward fuselage was not corrected the height. |
 The height of the fuselage is assumed to be 18mm in front of a vertical tail. The tail cone (near tail gear) was bended to fit the cutting down fuselage. |
|
|
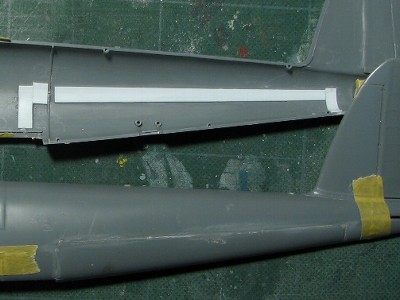
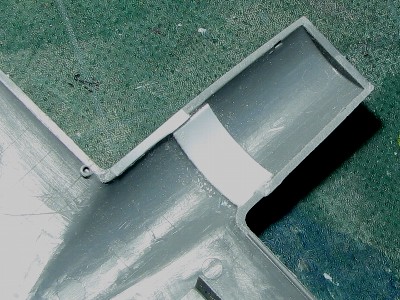
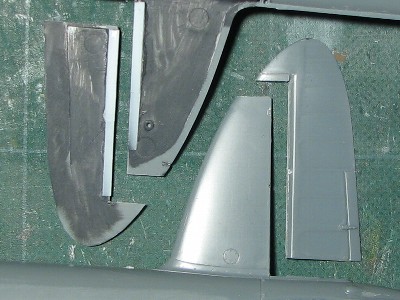 The rudder was cut out from the tail fin to depict rib tape with surfacer later. Praban was glued to keep the thickness of the rudder in the section. |
|
The thickness of the vertical stabilizer (root) is 4mm calculated from the photograph of the actual plane, and Tamiya kit is as the same. It is wonderful!
|
 0.5mm plastic sheet was glued from inside. |
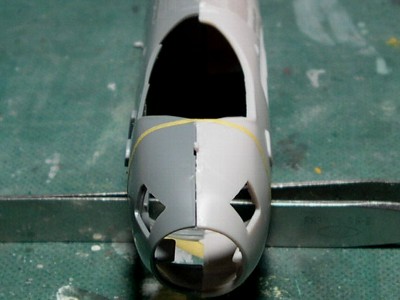
 After the nose was sanded. |
|
|
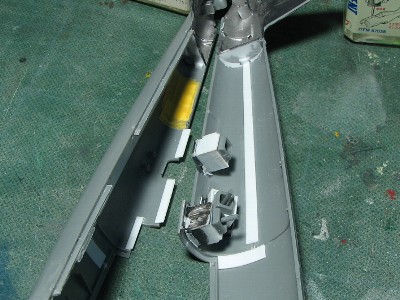
 Some portions of starbord fuselage were glued on to the port fuselage. Cameras were kit parts. |
 Windows were 0.4mm clear plastic sheet. |
 Plastic sheet was glued to change flat windows. I think that camera windows of bomb bay doors are flat glass. |
 |
|
|
| Tamiya kit x 2 | Å@5,600 yen |
| Airfix kit | Å@3,500 yen |
| Cutting Edge cockpit | Å@4,400 yen |
| Moskit exhaust x 2 | Å@4,000 yen |
| Total | 17,600 yen |
 Cutting Edge resin parts. |
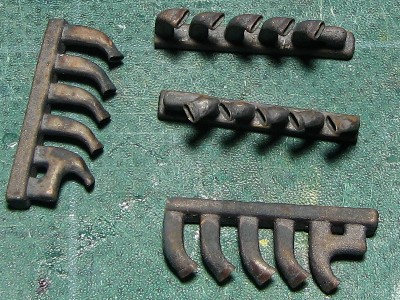 Moskit's exhaust. These parts are for early 1 step Marlin engine type. So two sets are needed for late type. |
|
|
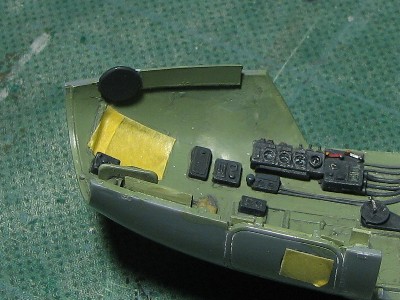
 The color is Gunze-Sangyo #364 Aircraft gray green. |
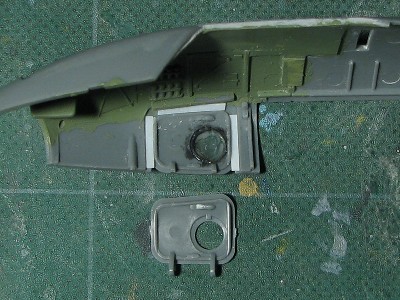
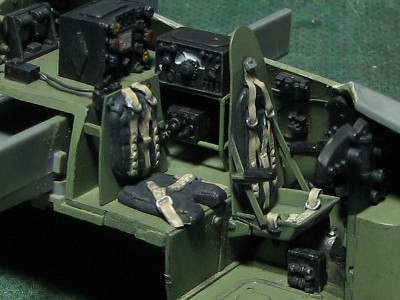
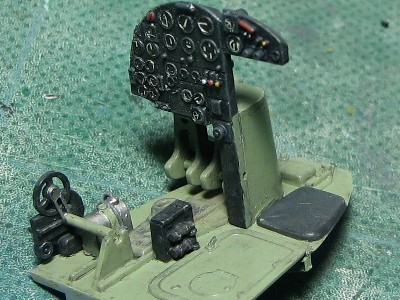 The instrument panel is Tamiya kit. Each instrument of kit decal is cut our by round punch and paste on the panel. |
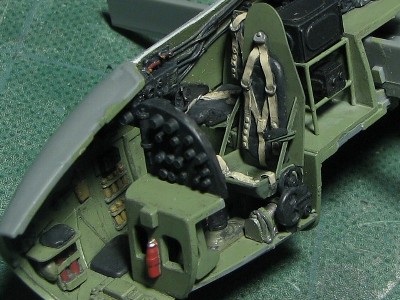 The bulletproof board is 0.3mm plastic sheet. Armrests are kit parts. Other details are CE resin parts. |
 |
|
Å@
|
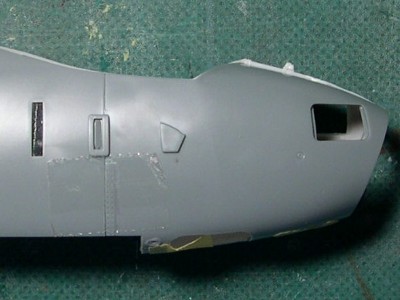
 I cut out the front windows. |
 The precompression cabin type has step type front windows. |
 The shape of front quarter windows is corrected. |
 |
|
|
 Reinforcement of adhesion portion was cut out from another fuselage part. |
 To hide adhesion line, the head pad was added. |
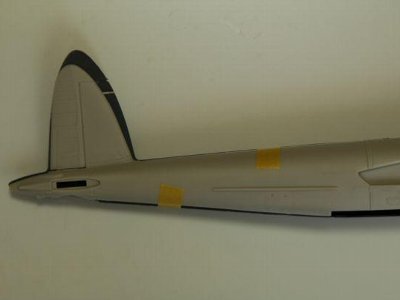
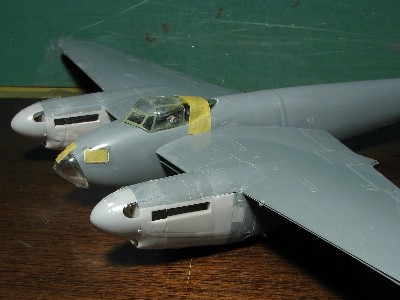
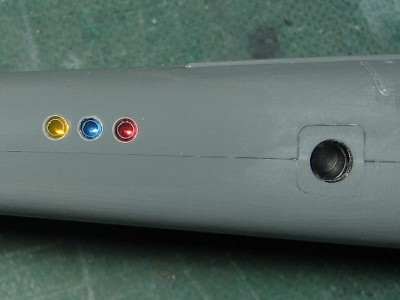 B.IV has two navigation lights, but PR.XVI has three lights. |
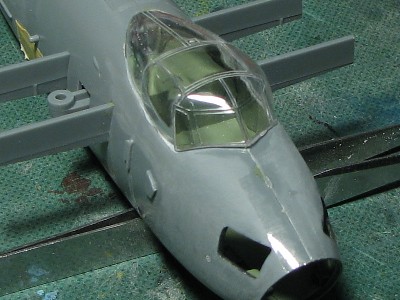
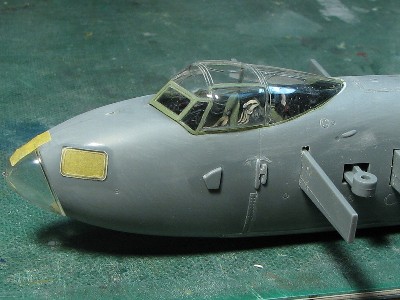 I checked the shape. The fuselage was glued but the canopy and the grass nose are not yet glued. |
|
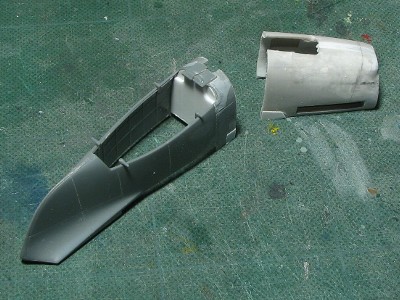
Next, I corrected the intercooler air-intake. I estimated correct size of the air-intake from the photo of the actual aircraft. The height was 3mm (from the bottom edge of the spinner to the intake lip), and the width was 9mm. I piled up superglue and plastic powder on the intake lip and sand it. |
 From top to bottom : Airfix, Airfix + Tamiya , Tamiya. Arifix's cowl was cut like this. |
 The under cowl part was cut back and forth again. Plastic sheet was inserted between the gap. |
 The upper cowl part of Tamiya kit was extended from another box of the kit. |
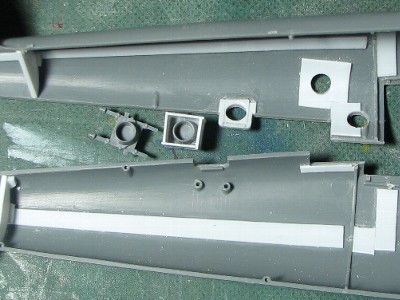
 Bulkheads of the wheel bay were replaced with plastic sheet. |
 I checked outline by dryfitting. The thrust line of my model was slightly upward. |
 So I had to cut each cowl and adjust thrust line. |
 The supercharger air-intake was made of 1.2mm plastic sheet. PR.XVI doesn't have louver panel on the side of the intake. |
 The thrust line was adjusted like this. |
|
|