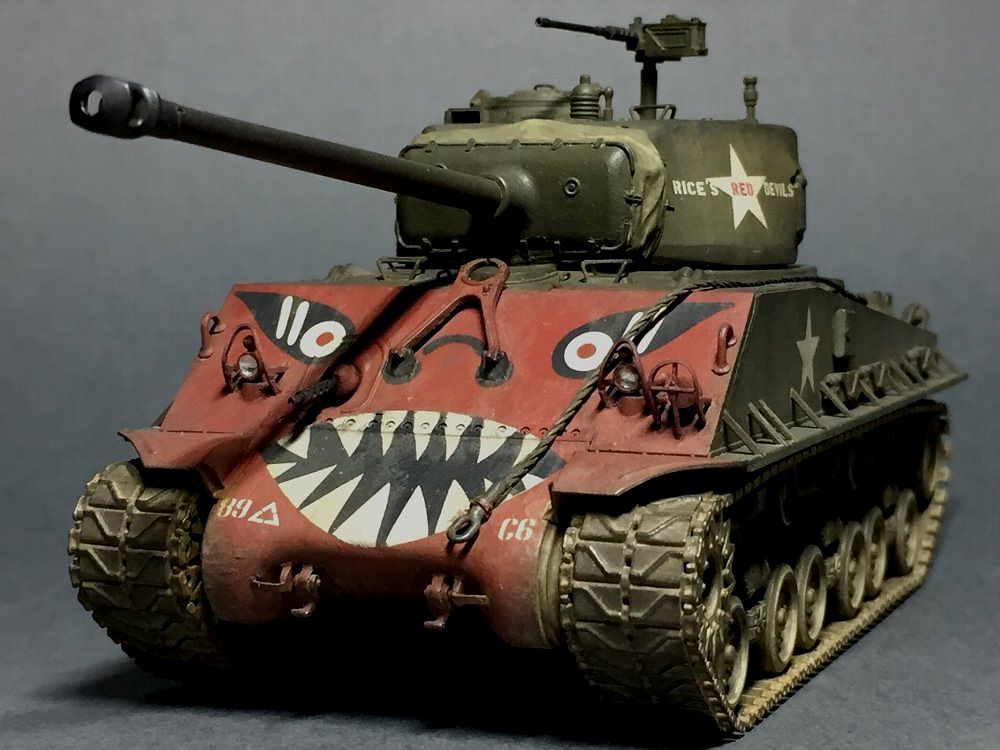
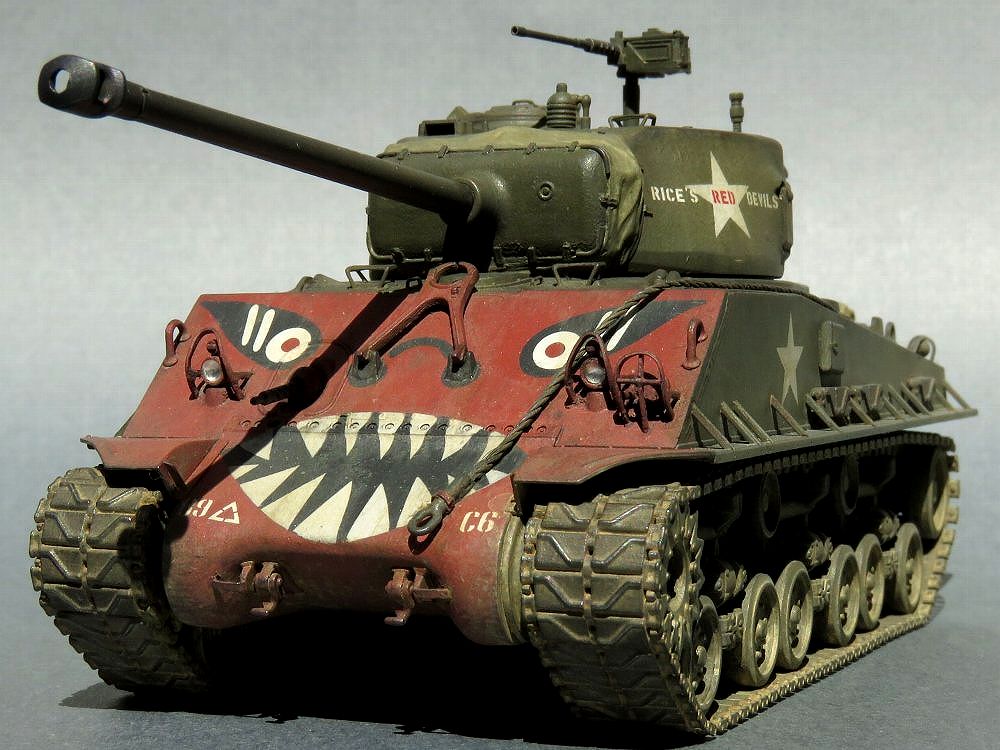
M4A3E8 Sherman Easy-Eight 1/48 Tamiya
|
|
|
Outputs of the light curing 3D printer are slightly expanded in their sizes. Therefore, each piece of track fits perfectly on the computer data, but it does not fit well in the output product. On the other hand, 3D printing does not have to be considered about the direction for the demolding of injection kits. Therefore, it would be wise to make one shot in combination as much as possible. Note that Fusion 360 command terms in this article may be different from the actual ones because of direct translation of the Japanese language. |
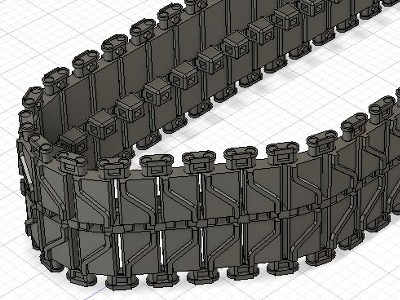 This figure shows the final image. Each track aligns without deviation because it is CAD. Subtle slack is also easy to reproduce because it is CAD. |
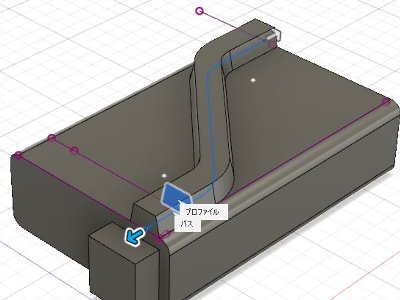 The box is extruded by sketching a rounded rectangle. Click on the surface to draw a crank and round the corners with fillet. Build ´ Create a plane along the path, sketch and sweep the trapezoid. |
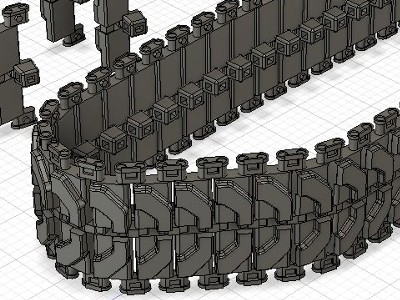
 Make a half and duplicate it in the mirror. The center guide has holes in two directions. This is only possible with a 3D printer (although it is almost invisible after completion). |
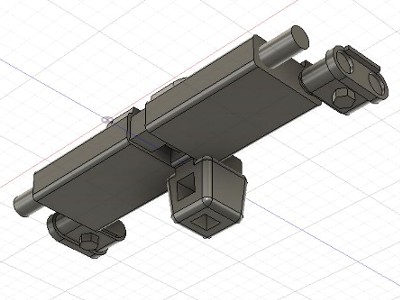
 For straight and curved sections, the connector angle is changed. Since the sprocket wheel has 13 teeth, it is bent by 360 13 2 Á 13.8 . The idler wheel is about 15 degrees. |
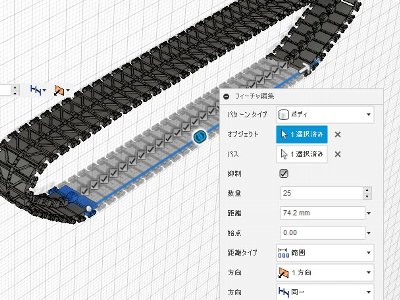
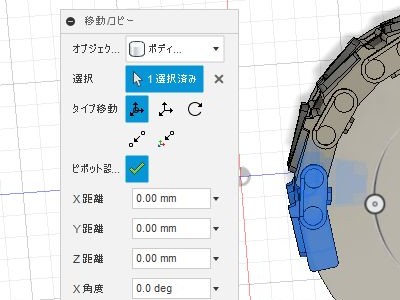 Make a cylinder of the outer line of the drive wheel, and align it along the cylinder with move / copy. At this time, you can change its position by clicking "Pivot Setting". |
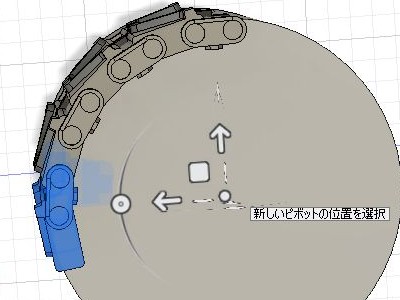 Align the pivot with the axis of the cylinder and click to confirm, click "Pivot Setting" again to return to the body movement mode. Input 360 13 Á 27.2 as the rotation angle. |
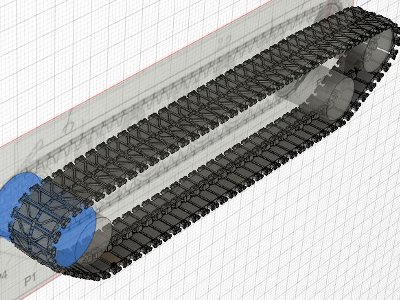 Insert the picture of kit's instruction adjusted to the actual size of the track, and align tracks according to this. |
 The lower tracks don't fit perfectly. Therefore, , tracks are put equally with "creation ´ pattern ´ rectangular pattern" in accordance with a length and a number (path is appropriately drawn). |
|
|
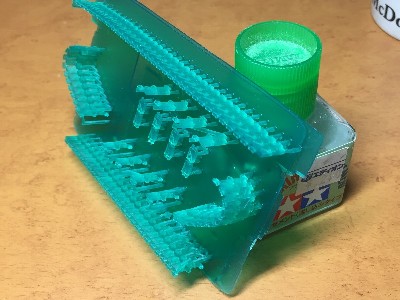 This picture is just after 3D output. In consideration of molding defects and breakage at the time of assembly, some pieces of tracks are also printed. Supports are cut off with a rotating saw. |
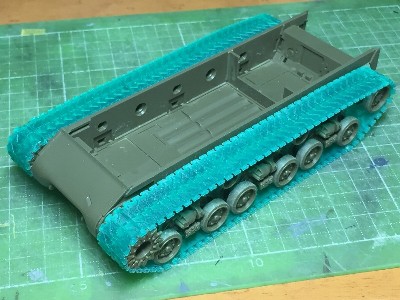 The truck is assembled. The drive wheel parts are fitted inside and outside separately and then glued to each other. The idler wheel is slightly misaligned due to design error (?). The shaft is cut and glue again. |
|
Assembly precautions. Excess part at the track joint should be cut. When the drive wheel is assembled, it is good to widen the track slightly open, but if you widen it too much track may be broken. CA glue is suitable.
* Download links are only written in Japanese article. |
|
T80 steel track |
 T84 rubber block track. |
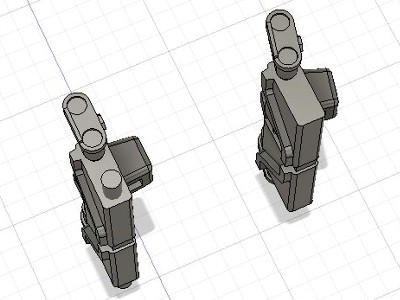
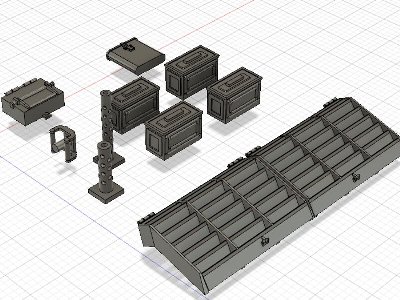 Deflector, ammunition box, first aid box and gun sleeve. |
 periscope guard, periscope and ammunition box. The rod of the periscope guard is designed a little long. So you had better to cut a little. |
|
|
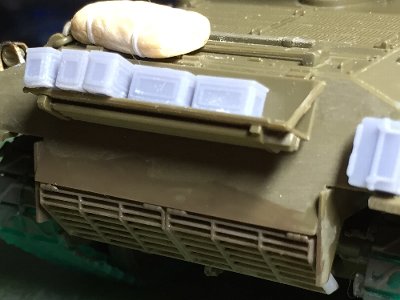
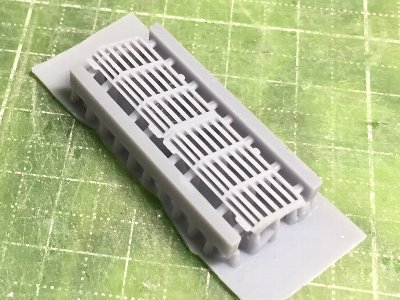 The deflector is printed. It tends to distort. So thick supports are set. The shape of the side wall is mistaken. But I noticed after the completion. |
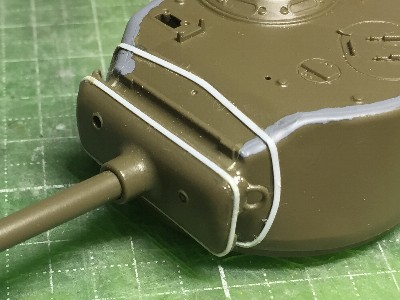 Plastic sheet is glued with thin cement. |
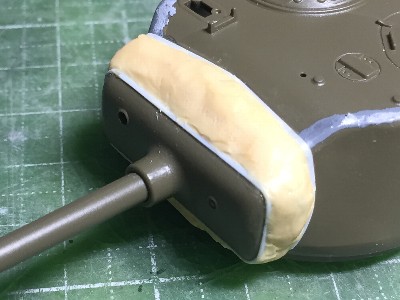 Tamiya epoxy putty is filled. |
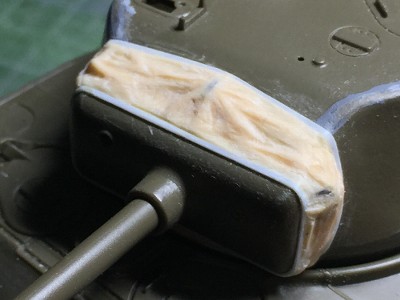 After putty is half solidified, details of cloth is depicted with chisels. |
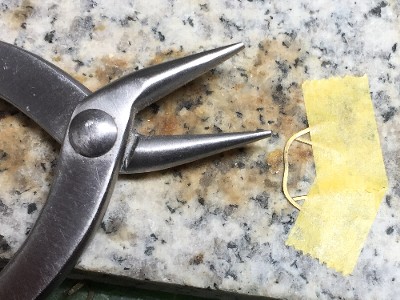 The light guard is made of brass strip. |
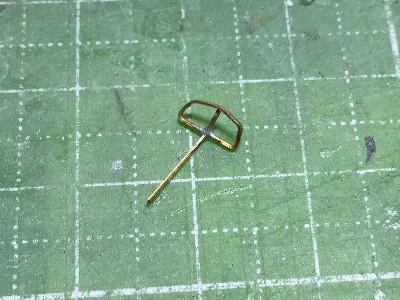 I intend to make a cross. It is difficult to solder three parts. So brass strip is bent and soldered. Then excess parts are cut off. |
 The cross and surrounding inverse U shape are not soldered but glued with CA glue. |
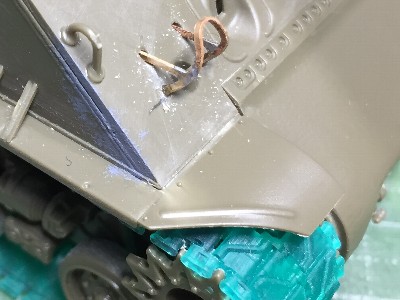 Guards are finished. |
 ammunition box has convex detail on all sides. This is also 3D printed. |
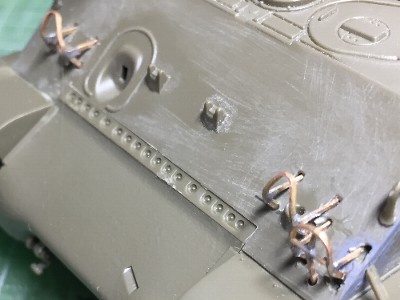
 When I tried making the hole of the machine gun sleeve, it is surprisingly formed well. This one is on the front of the hull. |
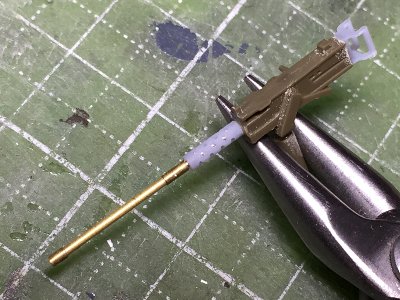 3D resin is very weak. So brass rod must be inserted. The center hole is made at the design stage. Light is the same method as Firefly. A 0.1 mm aluminum plate and a polyvinyl chloride plate removed with a 2 mm punch. |
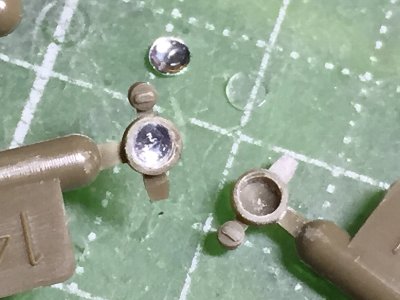 The head light is the same method as my Sherman Firefly. 0.1mm thick aluminum sheet and a polyvinyl chloride sheet are cut out with a 2 mm punch. |
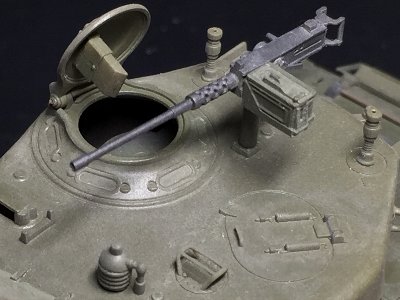
 Replace the hatch handrail with brass rod. Snaps of the shield canvas is made of 0.3 mm plastic sheet. They are soften with thin liquid cement. |
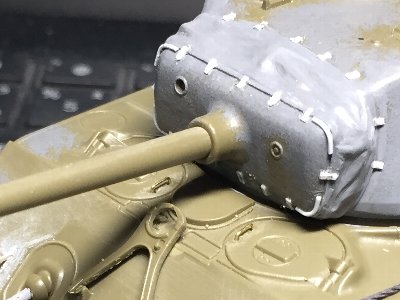
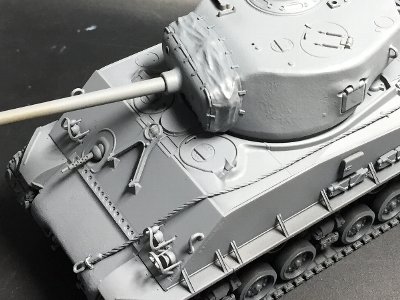 The upper part of the track is painted in dark gray and the upper and lower parts of the hull are glued. Then surfacer is sprayed. |
|
|
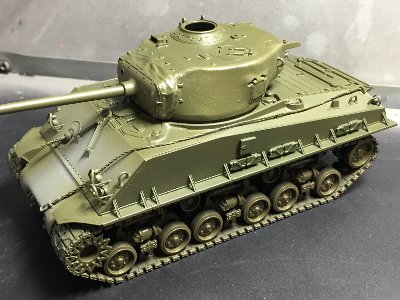 Pure dark green is sprayed. |
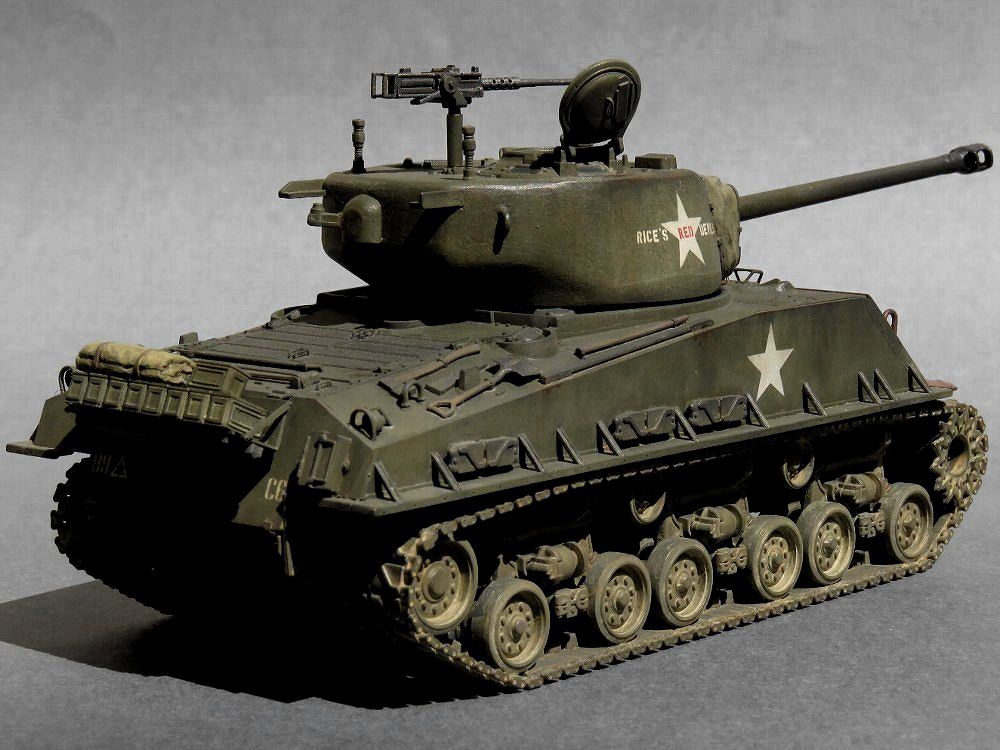
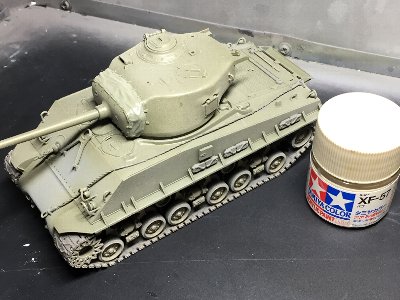 Tamiya acrylic XF-57 buff is thinly diluted with soapy water and airbrushed. |
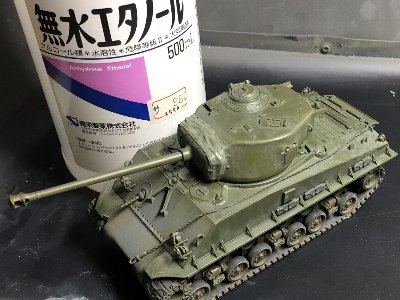 Then buff is wiped out with anhydrous ethanol. |
|
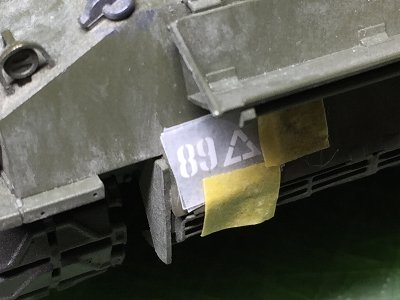
https://www.how-amps.org/89th-tank-battalion-rices-red-devils/ |
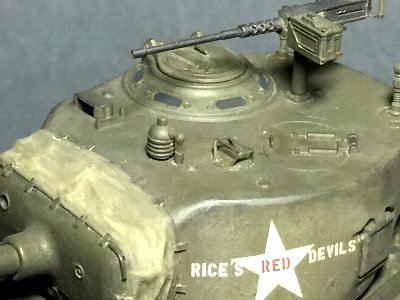
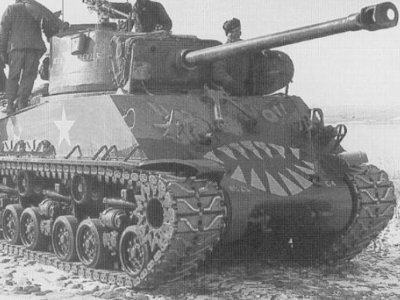 The number of teeth, position of the star are different from Tamiya 1/35 decals. |
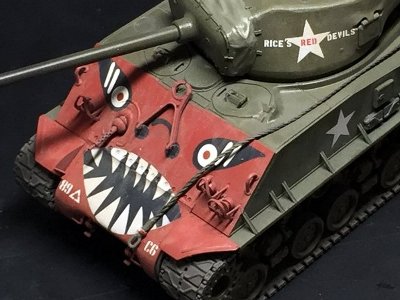
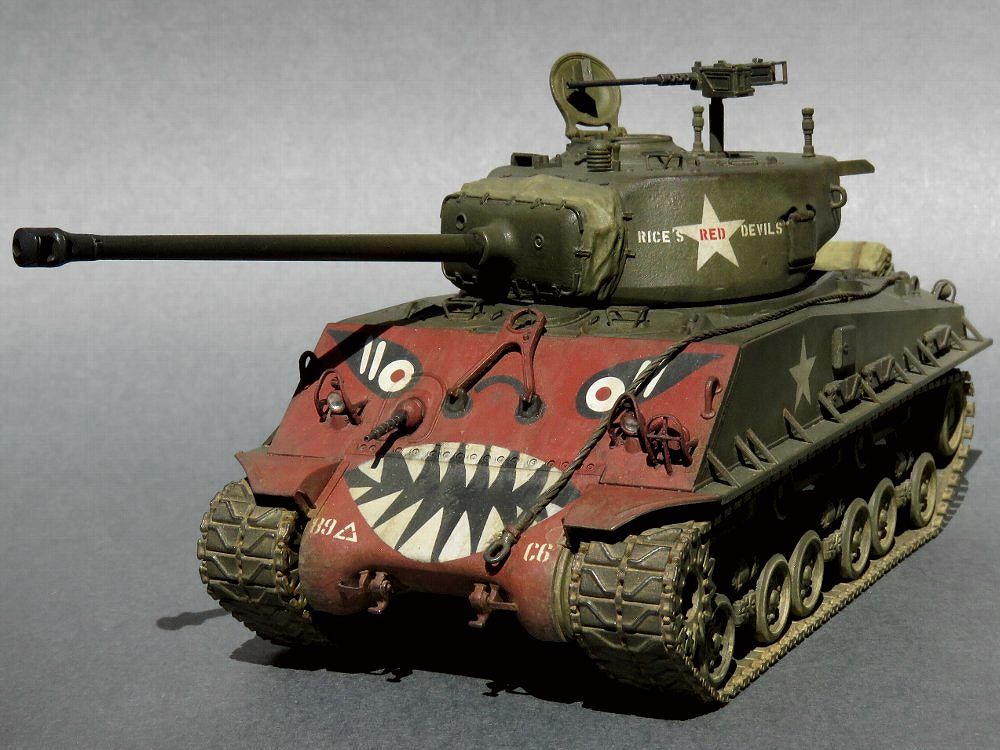
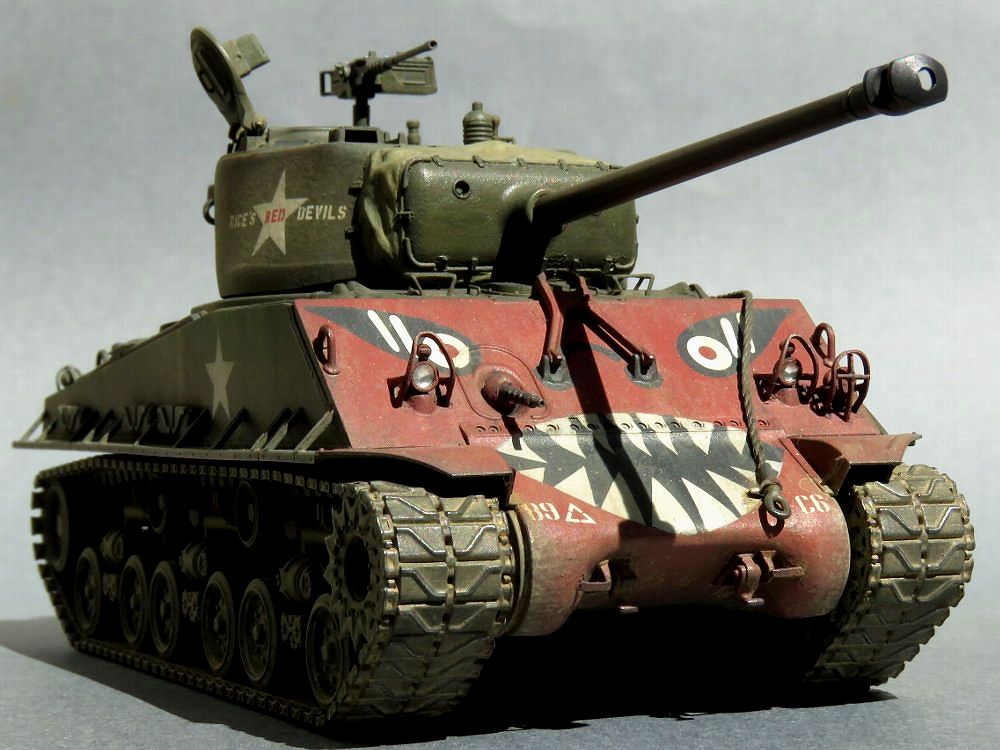
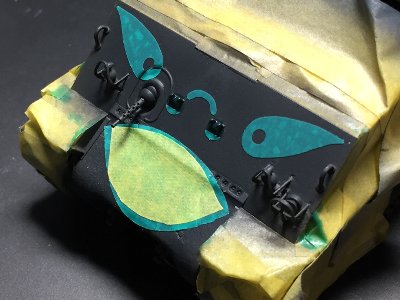 Eyes and mouth are painted with masking sheet cut by machine. The black portion is painted black with 30% of white. The red portion is RLM 23 red. |
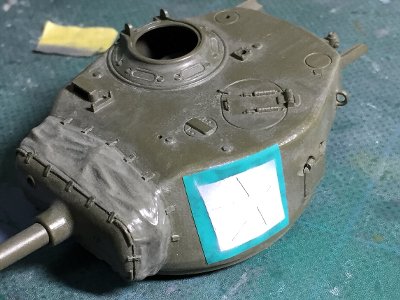 The white star is also masked and painted. |
 Painting works are finished. |
 Hull numbers, white portions of eyes and "Rice's Red Devils" are custom made dry decals. |
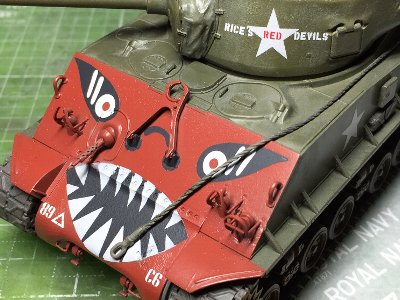 All dry decals are applied. Then flat clear is thickly over painted for coating. |
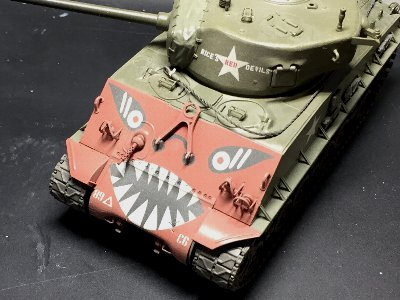 Tamiya buff is thinly sprayed on the devil's face. |
 Then buff is wiped with alcohol. |
|
|
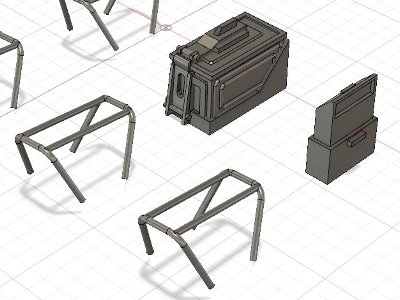
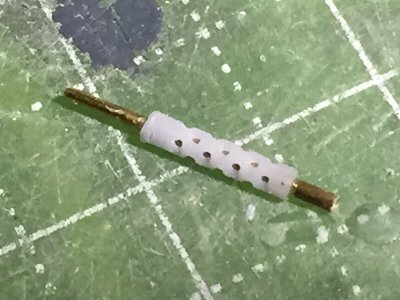
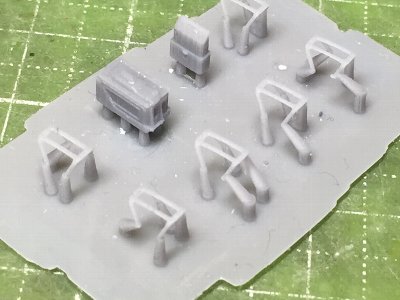 These are 3D printed periscope guards. Rods are sanded at this stage. |
 The periscope guard, gun sleeve, ammunition box, gun handle and periscope are 3D printed. |
|
|
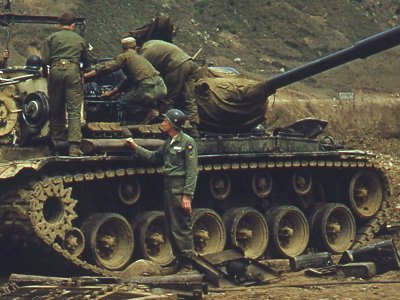 M26 Pershing in Korea. I feel soil color of Korea is a little different from west Europe. |
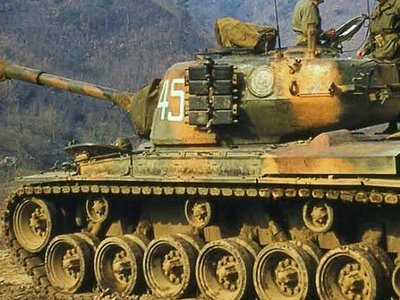 M26 Pershing in Korea. Korean soil is rather red and dark. |
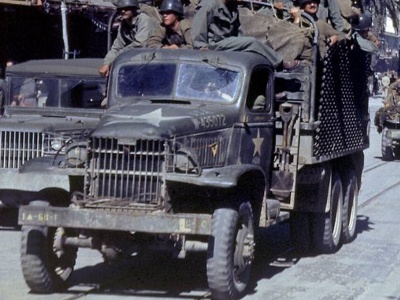 US truck in WW2. Dust is very light but olive drab under dust is very dark. |
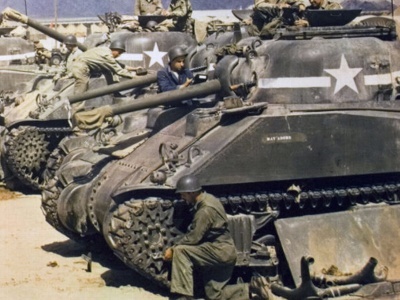 M4 in WW2. Olive drab is darker than imaged. |
|
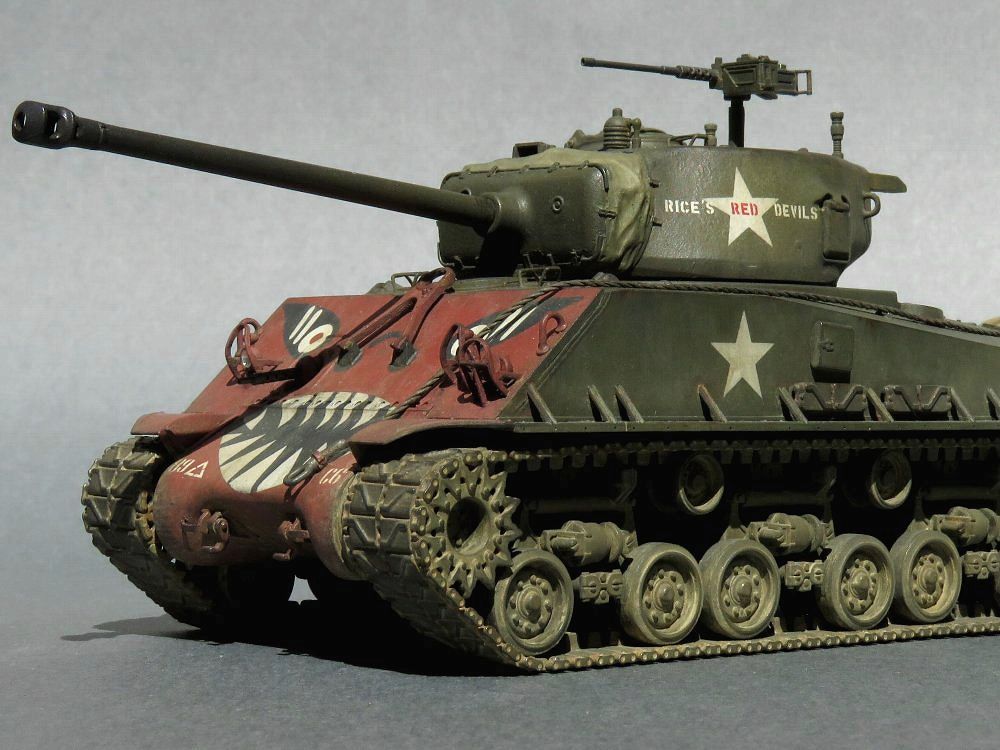
The weathering technique is my own way. I think that it is different from the general technology of AFV. It is easy and the result is not so bad. The basic is Tamiya Weathering Master. It is diluted with soapy water and wiped off with tissue or cotton swab. First, soot + rust is thinly applied. Next, sand and light sand is washed. The excess is wiped off with a wet tissue or a wet brush. Flat clear is sprayed for fixing of Weathering Master. As the result, the sand tone may become thin, then wash the Weathering Master one more time. Dry brush or chipping of dark gray is applied on the edge. This is an image of exposed paint under dust and rust on the edges. Sand is airbrushed on the part that lacks dusty tone. Dark gray is airbrushed on places where needed a sense of "tightening" of dark color. Powder of a pencil is rubbed on the track and the muzzle. |
 Canvas, gun etc. are painted with fine brush. |
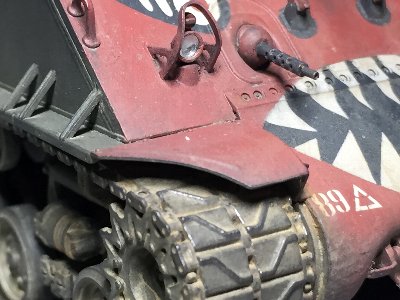 Note the mold of tracks and the glitter of front light. |
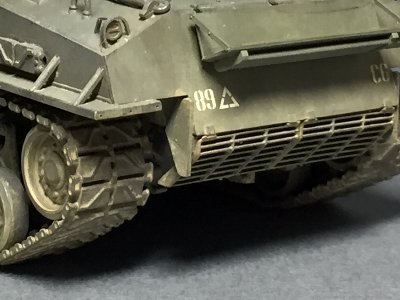 The 3D printed deflector is crisply molded. |
 Unfortunately, Korean mud expression is inadequate. |
 |
 |
 |
 |
 |
|
|
| 1 | Armor At War 7001 The M4 Sherman At War The European Theatre 1942-45 | Concord |
| 2 | Armor At War 7002 D-day tank warfare | Concord |
| 3 | Armor At War 7003 Tank Warfare in Korea 1950-1953 | Concord |
| 4 | Armor At War 7027 British Tanks of WW2 (1) France & Belgium 1944 | Concord |
| 5 | Armor At War 7036 The M4 Sherman At War The European Theater 1943-1945 part 2 | Concord |
| 6 | Armor At War 7045 The Battle Of The Bulge | Concord |
| 7 | Armor At War 7062 British Sherman Tanks | Concord |
| 8 | Armor At War 7068 Armor At War British Armor in Sicily and Italy | Concord |
| 9 | New Vanguard 73 M4 (76 mm) Sherman Medium Tank 1943-65 | Osprey |
| 10 | New Vanguard 141 Sherman Firefly | Osprey |
| 11 | Vanguard 15 The Sherman Tank in British Service 1942-45 | Osprey |
| 12 | Vanguard 26 The Sherman Tank in US and Allied Service | Osprey |
| 13 | Vanguard 27 Armour of the Korean War 1950-53 | Osprey |
| 14 | Vanguard 30 polish armour 1939-45 | Osprey |
| 15 | Campaign 145 Battle of the Bulge 1944 (2) Bastogne | Osprey |
| 16 | Duel 2 Sherman Firefly vs Tiger | Osprey |
| 17 | Modelling 35 Modelling the M4 (75MM) Sherman | Osprey |
| 18 | Armor Color Gallery 3 Camouflage & Markings of the Sherman in New Zealand Service 1943-45 | Progres |
| 19 | Armor Photo Gallery 11 M4A2 Pt.1 | Progres |
| 20 | Armor Photo Gallery 13 Sherman VC Firefly | Progres |
| 21 | Armor Photo Gallery 21 Sherman IC Firefly | Progres |
| 22 | Armor in Action 2016 M4 Sherman | Squadron/signal |
| 23 | Walk Around 5701 M4 Sherman | Squadron/signal |
| 24 | Squadron 6021 British Tank Markings and Names 1914-1945 | Squadron/signal |
| 25 | Squadron 6038 Armor in Korea | Squadron/signal |
| 26 | Waffen-Arsenal 45 Sherman | Squadron/signal |
| 27 | Wydawnictwo Militaria 13 M4 Sherman | Warszawa |
| 28 | Wydawnictwo Militaria 99 M4 Sherman vol.II | Warszawa |
| 29 | Wydawnictwo Militaria 124 polish sherman vol.I | Warszawa |
| 30 | Wydawnictwo Militaria 216 Francja 1944 vol.II | Warszawa |
| 31 | Wydawnictwo Militaria 308 Tank Power vol.LXXIII M4 Sherman | Warszawa |
| 32 | Sherman A History of American Medium Tank | Presidio |
| 33 | M4 Sherman at war | Zenith |
| 34 | Sherman Tank Production Models 1941-1945 | Almarks |
| 35 | History & Model 1 Sherman Ic Firefly | Rossagraph |
| 36 | Jungle Armour Shermans | Factory Publishing |