F6F-5 Hellcat (Hasegawa 1/48) part 1
June 9. 2012
|
|
Great thanks to Larry for English text!!
|
|
Introduction |
|
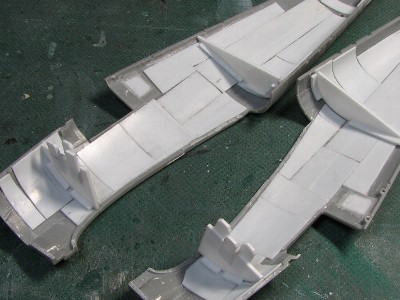
In this project, the main theme is: Complete replication of Hellcat's true outline form and depict the sharp, tough, brawny, and vicious presence of the Hellcat! The second theme was a gimmick of wing folding. To me, the Hellcat is quite unspectacular in a model exhibition, so I flashed; if the wing folded, it is spectacular. There were two tasks. One was ensuring compatibility between the accuracy for scale model and the ability to fold the wings. The second was; keeping the wings rigid, both folded and extended.
The Eduard kit is new but, its cowling is too square. The windshield and canopy however, are shaped very well. The cross sectional shape of the rear fuselage is incorrect so it doesn't depict the wide flat area like the real aircraft does. Also, the main wing position is 1mm (0.04") to low and the thickness of the center wing is the same as Hasegawa's kit, being tapered instead of constant like the real aircraft is. The Otaki 1/48th kit resembles the Hasegawa kit and some say Otaki's "Cat grin" is better than Hasegawa but overall I think the Hasegawa 48th kit is superior in basic shape. Hobby Boss 1/48 and Trumpeter 1/32Åc they are out of the question. Most of all, every kit manufacturer made the same mistakes with the width of the cowling and fuselage. The actual A/C is much wider than all of the kits. I suppose these mistakes were made by incorrect drawings, and the incorrect drawings were caused by misunderstanding fuselage width data, as I discuss later. |
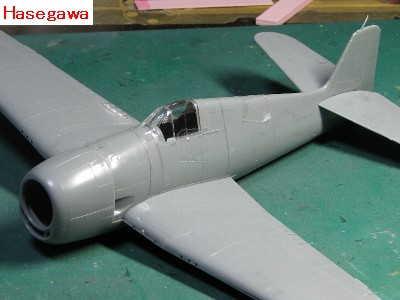 Hasegawa F6F-3. |
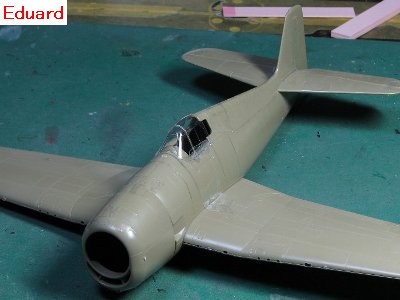 Eduard F6F-3. |
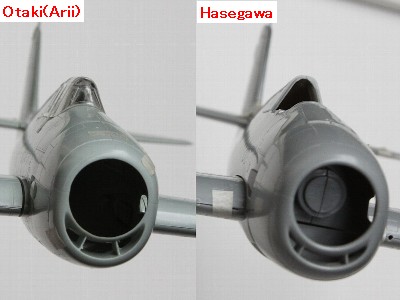 Otaki and Hasegawa. |
 Otaki. |
|
|
 See the sharp ridge of the nose. |
 The highlight line clearly shows the shape. |
 The curve of the front window lower line shows how sharp the nose ridge is. |
 The cross section of the cockpit, left is forward. |
 F4F Wildcat |
 F8F-2 Bearcat |
|
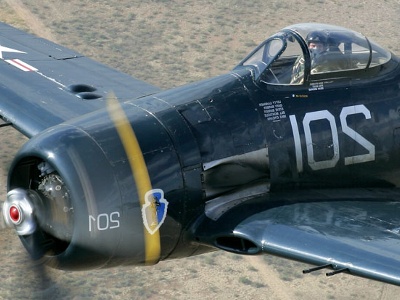
Cyclone R-2600 at 1,397mm (55") diameter was mounted in the XF6F-1 and it was replaced with the smaller Double-Wasp R-2800 at 1,341mm (52.8") diameter after F6F-3 model. So the design of the fuselage was fit to Cyclone engine. |
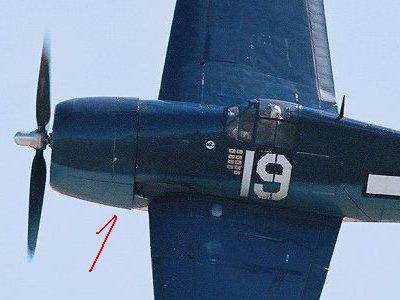
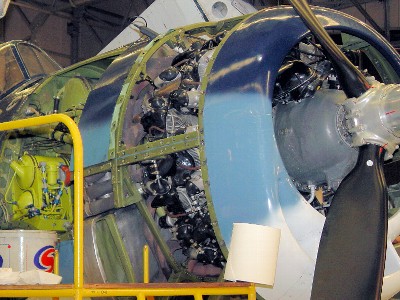 See the gap between the engine and cowling. |
|
|
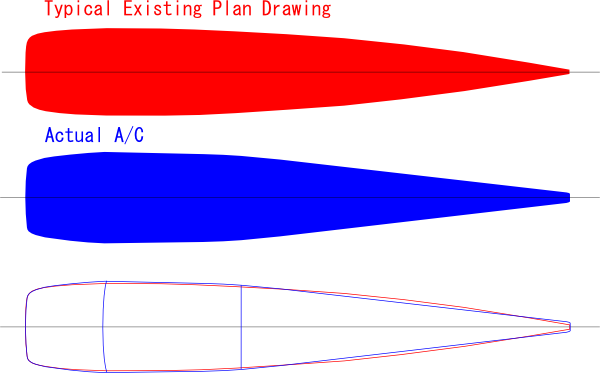
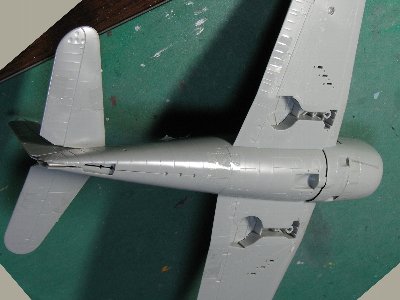
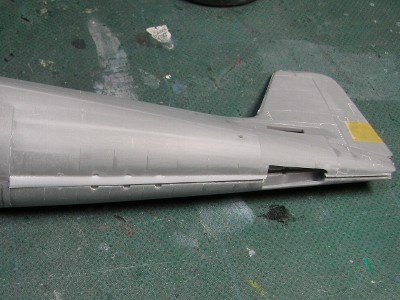
 The slope of the fastback is a plane surface. |
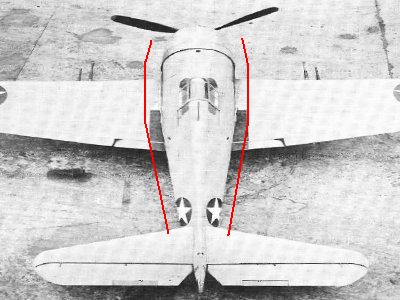 The plan shape of the rear fuselage is the straight line. |
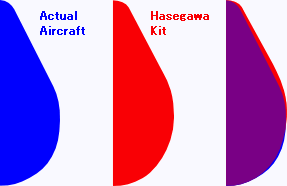
 Actual A/C is rather square-jawed but every kit is not enough. |
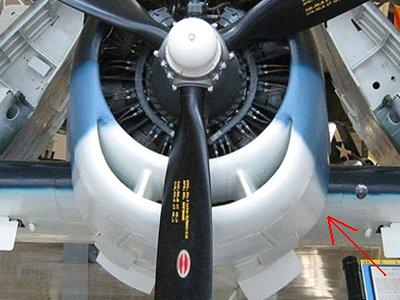
 See the width of rear end of the cowling. Panel lines on lower cowling are not parallel. |
 See how massive the lower cowling is? |
 Kit cowling is not wide enough. |
|
|
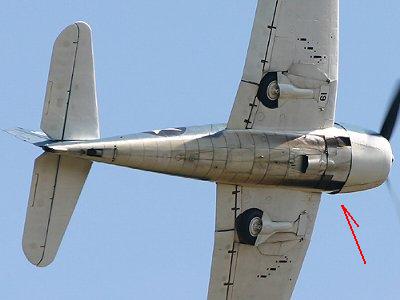
 See how wide the cowling is. |
 |
|
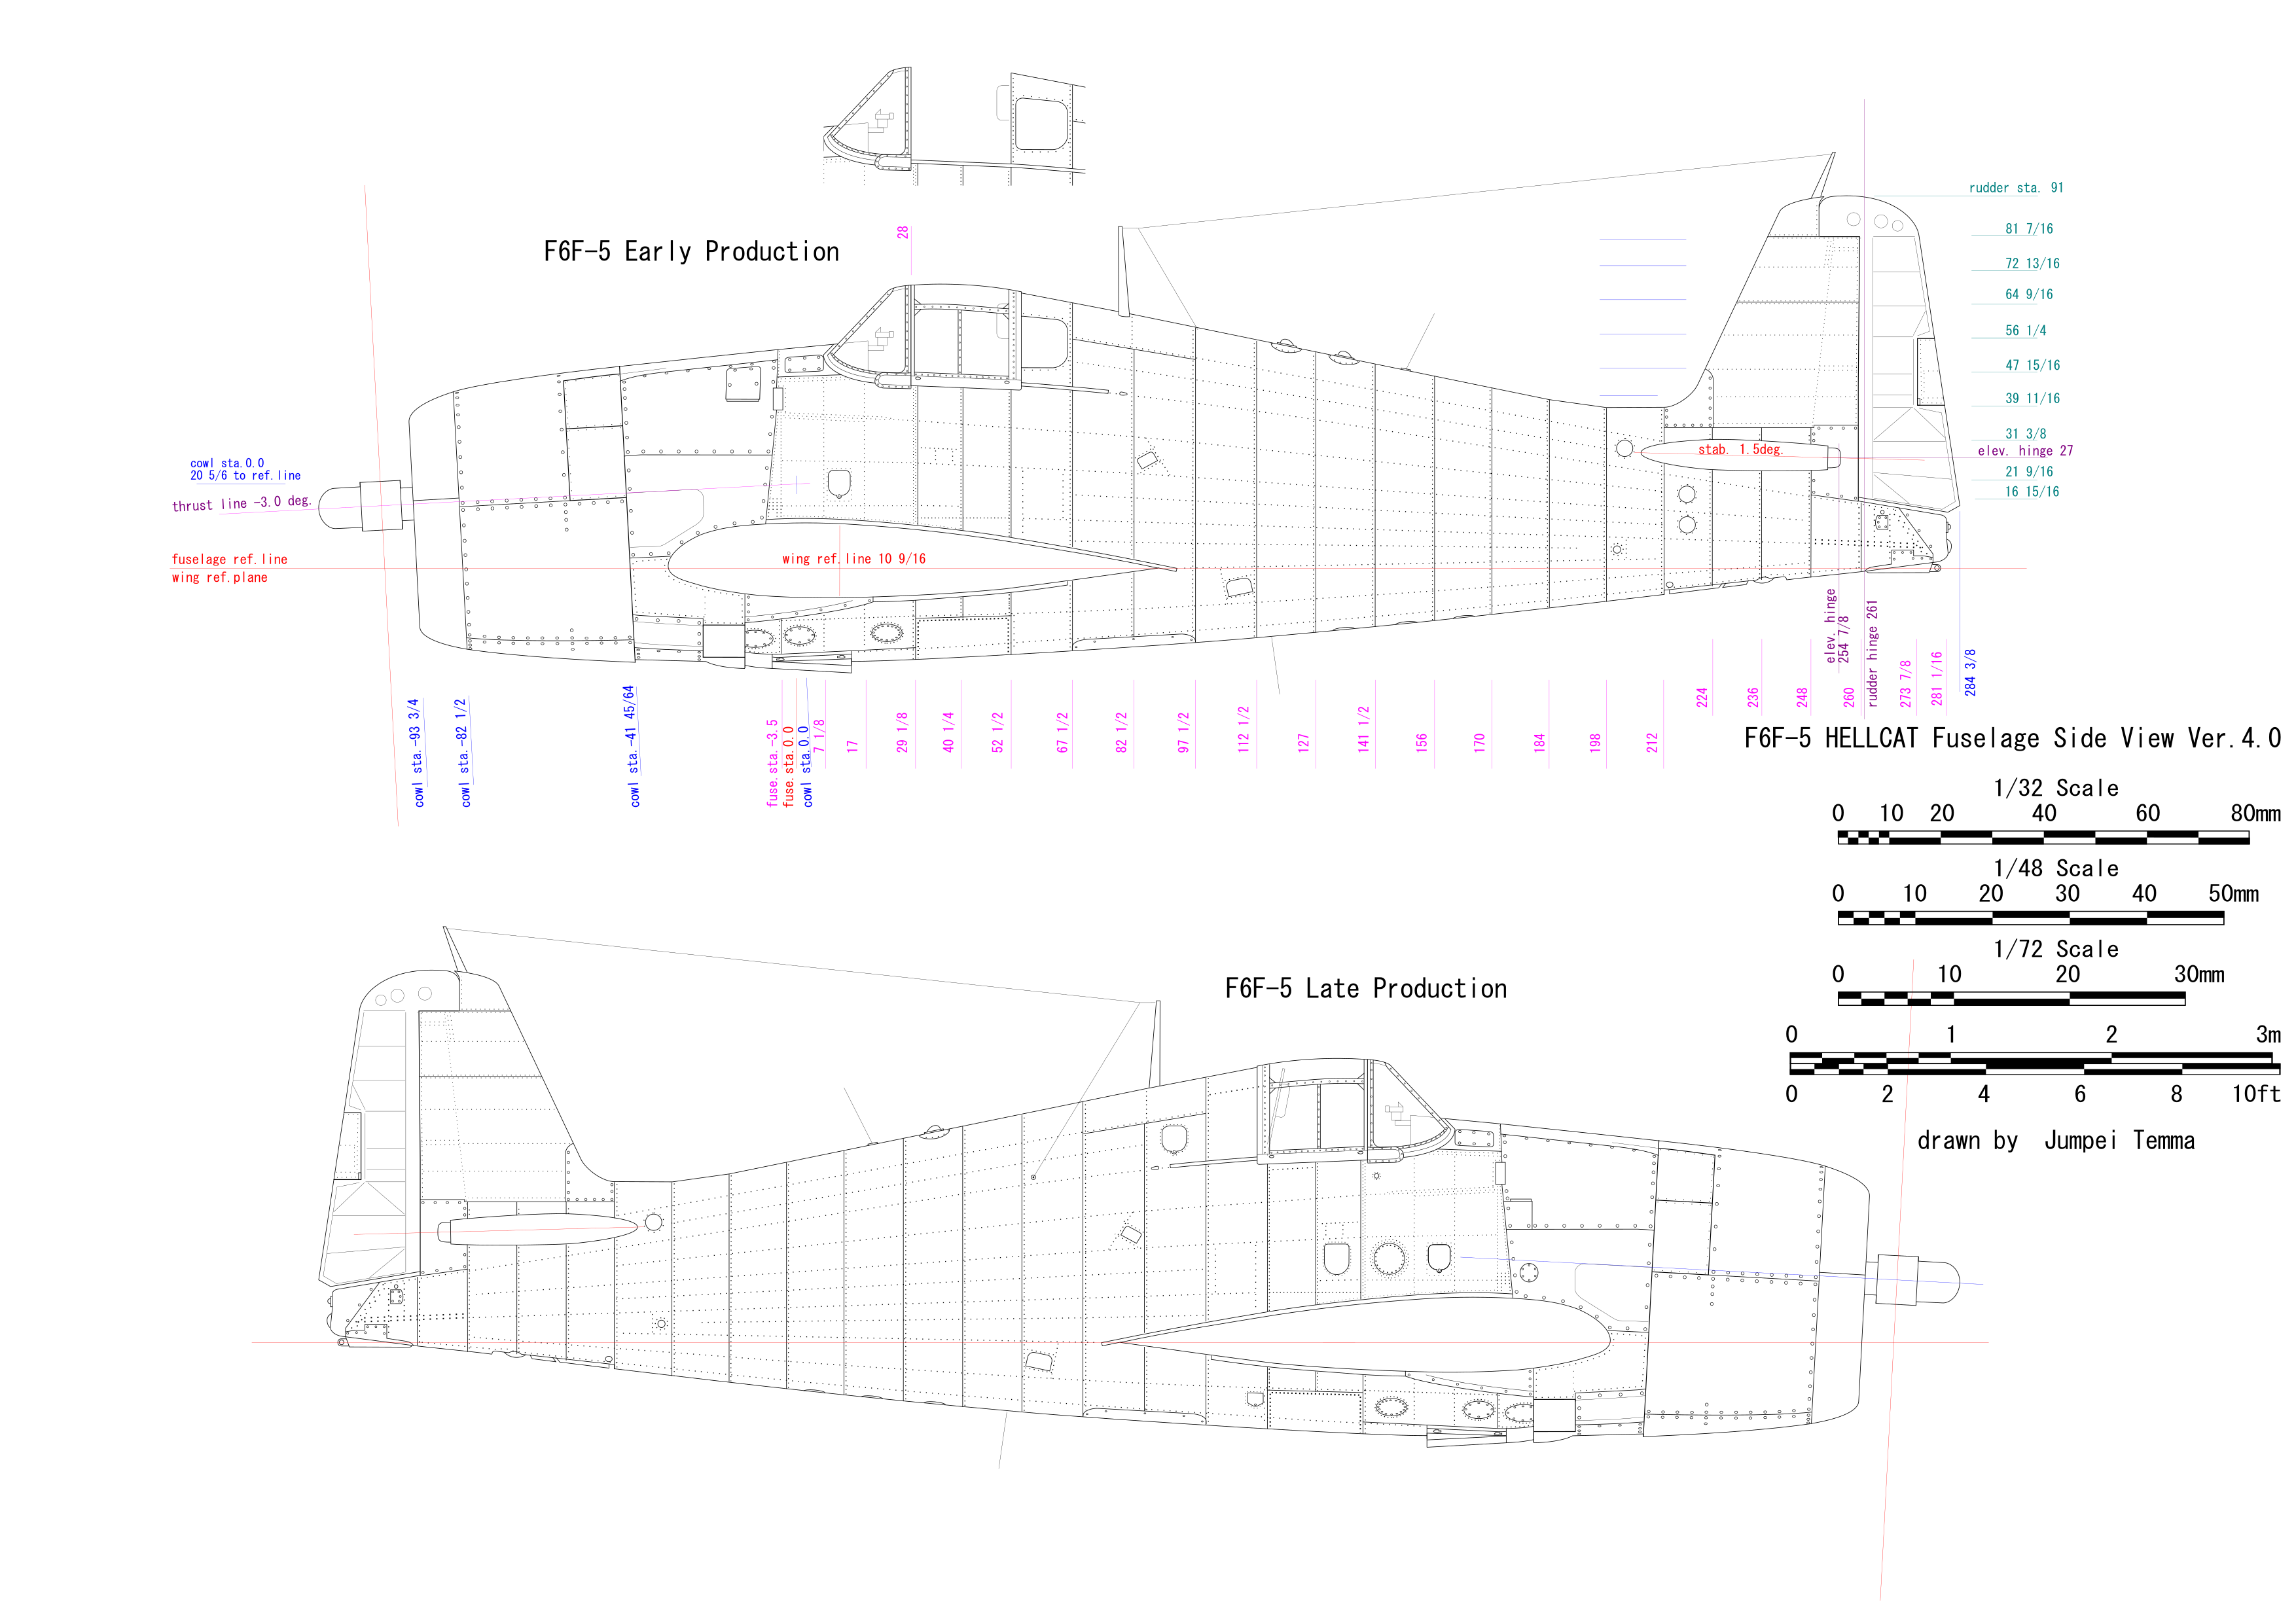
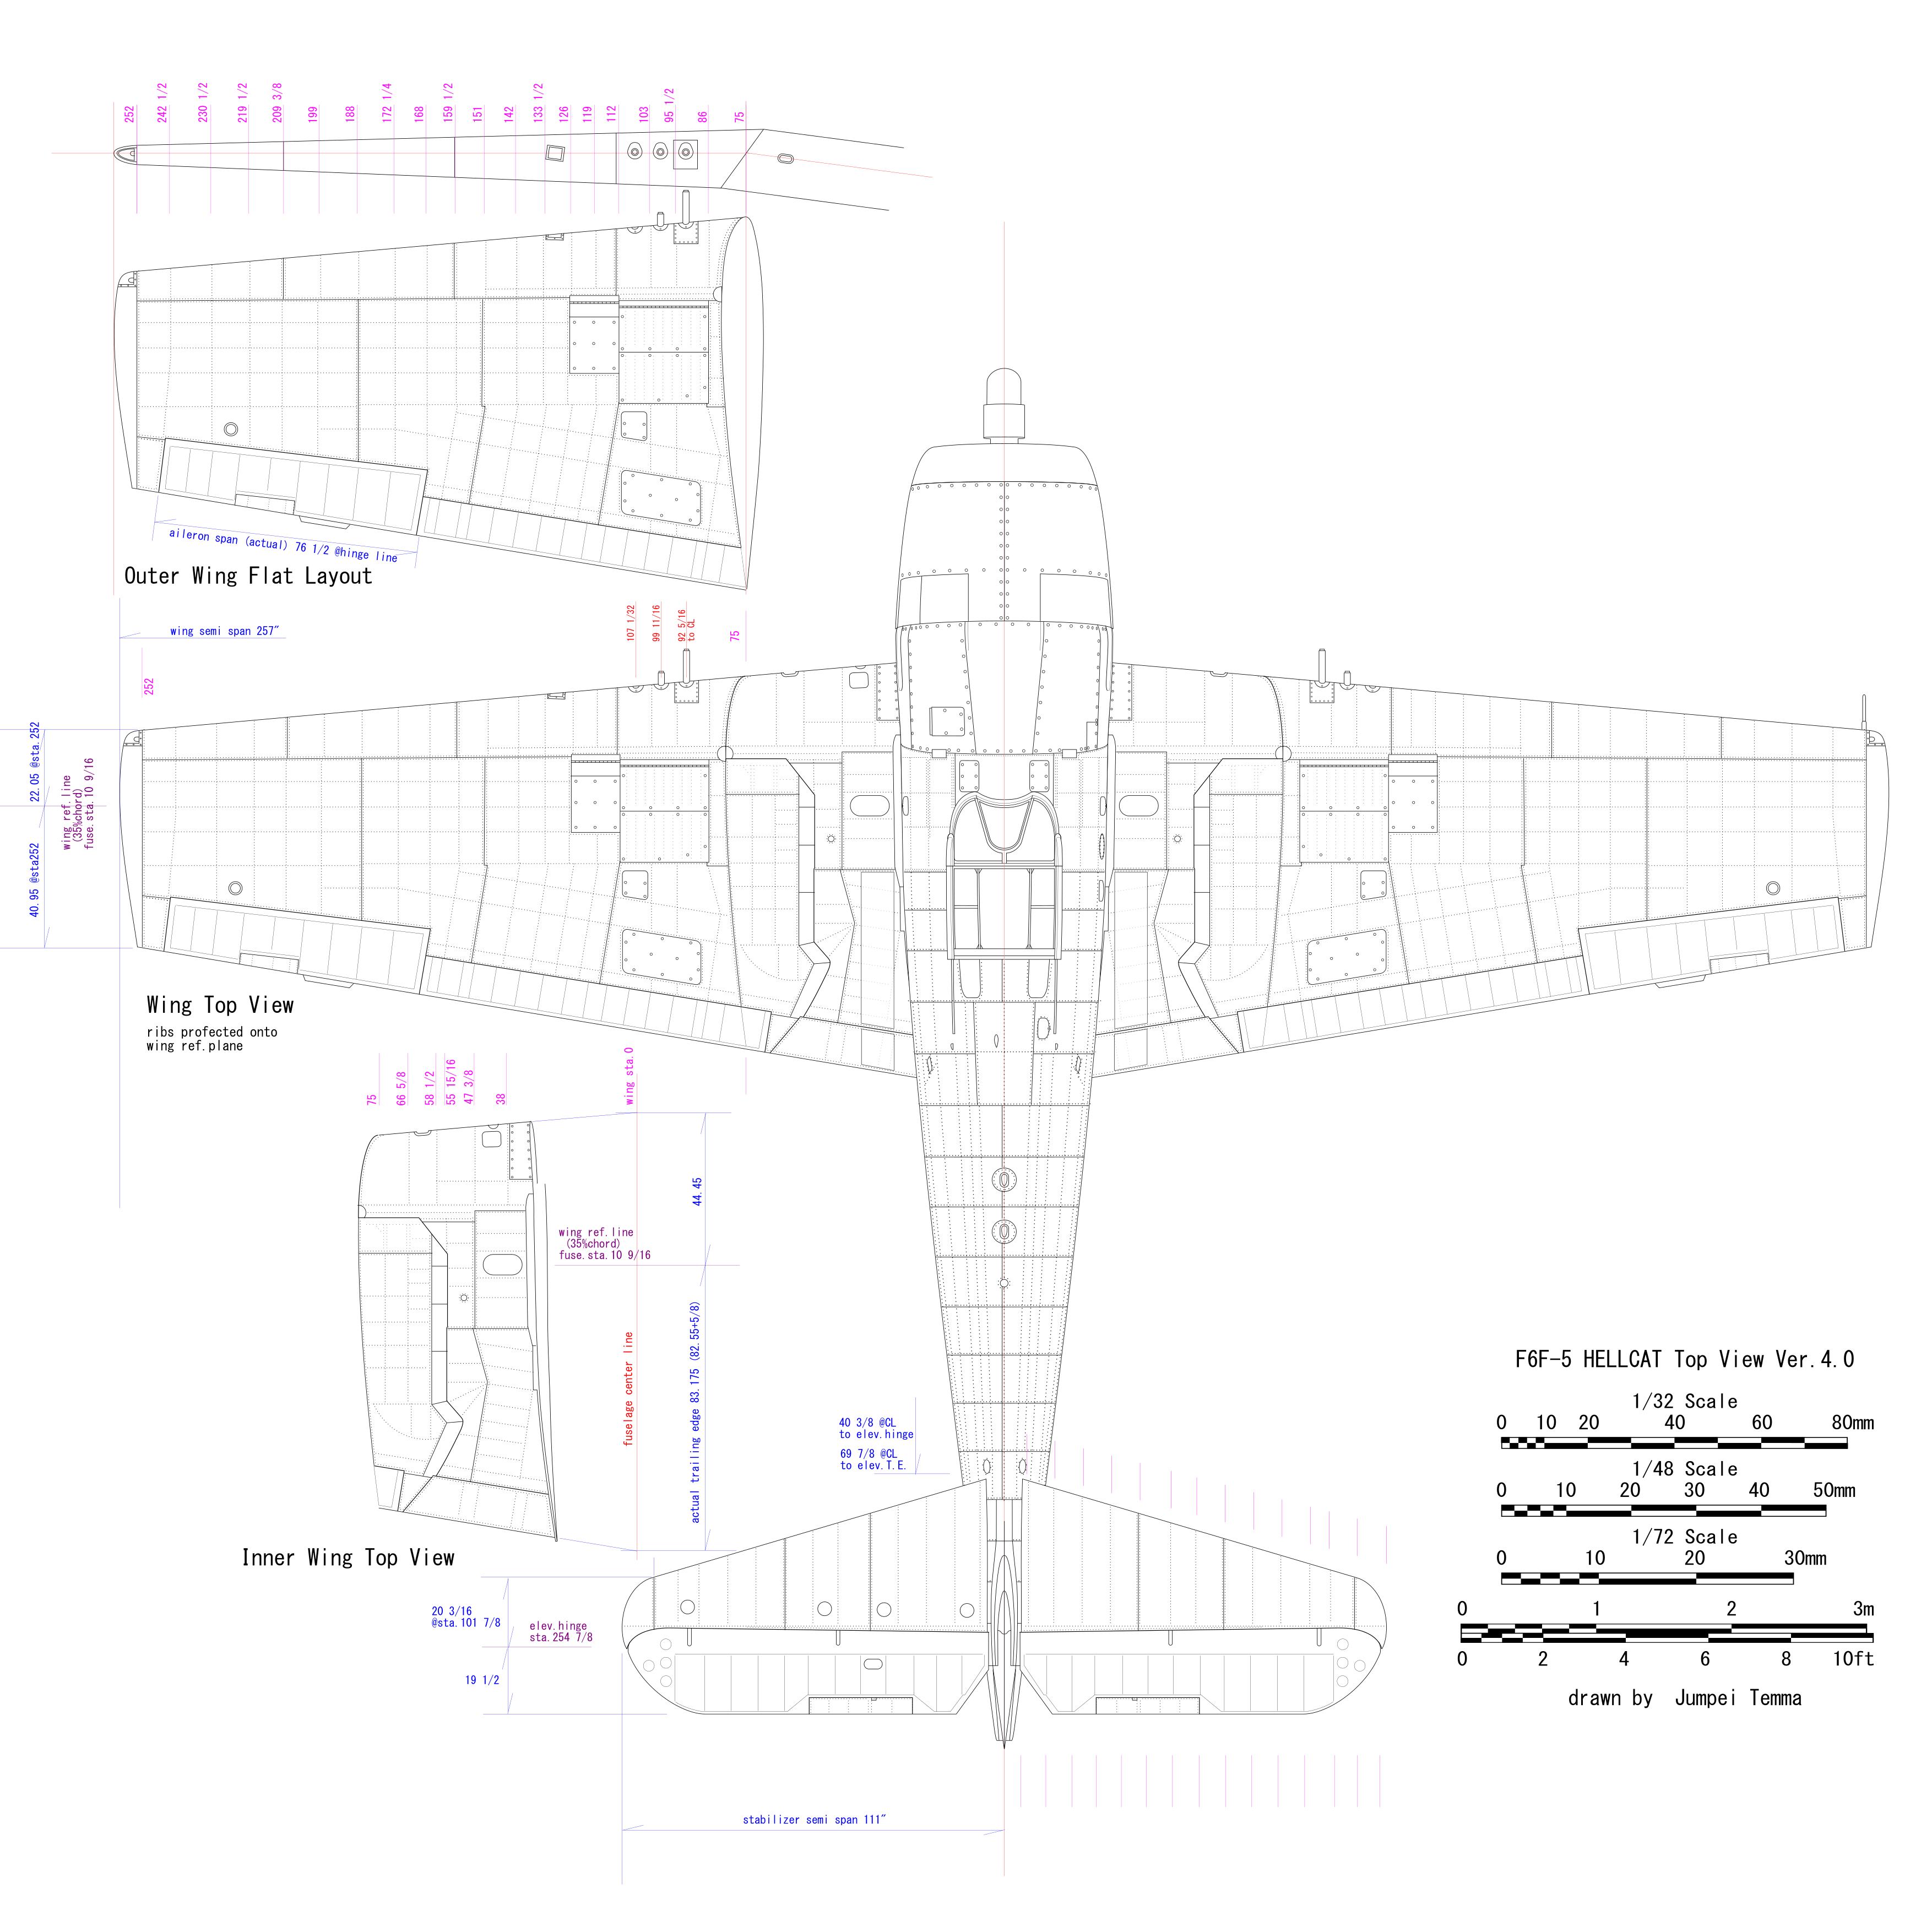
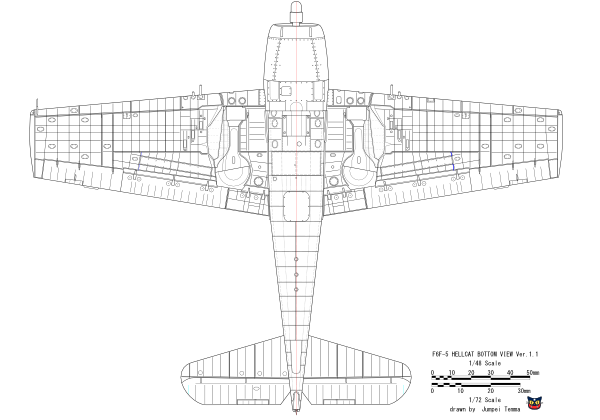
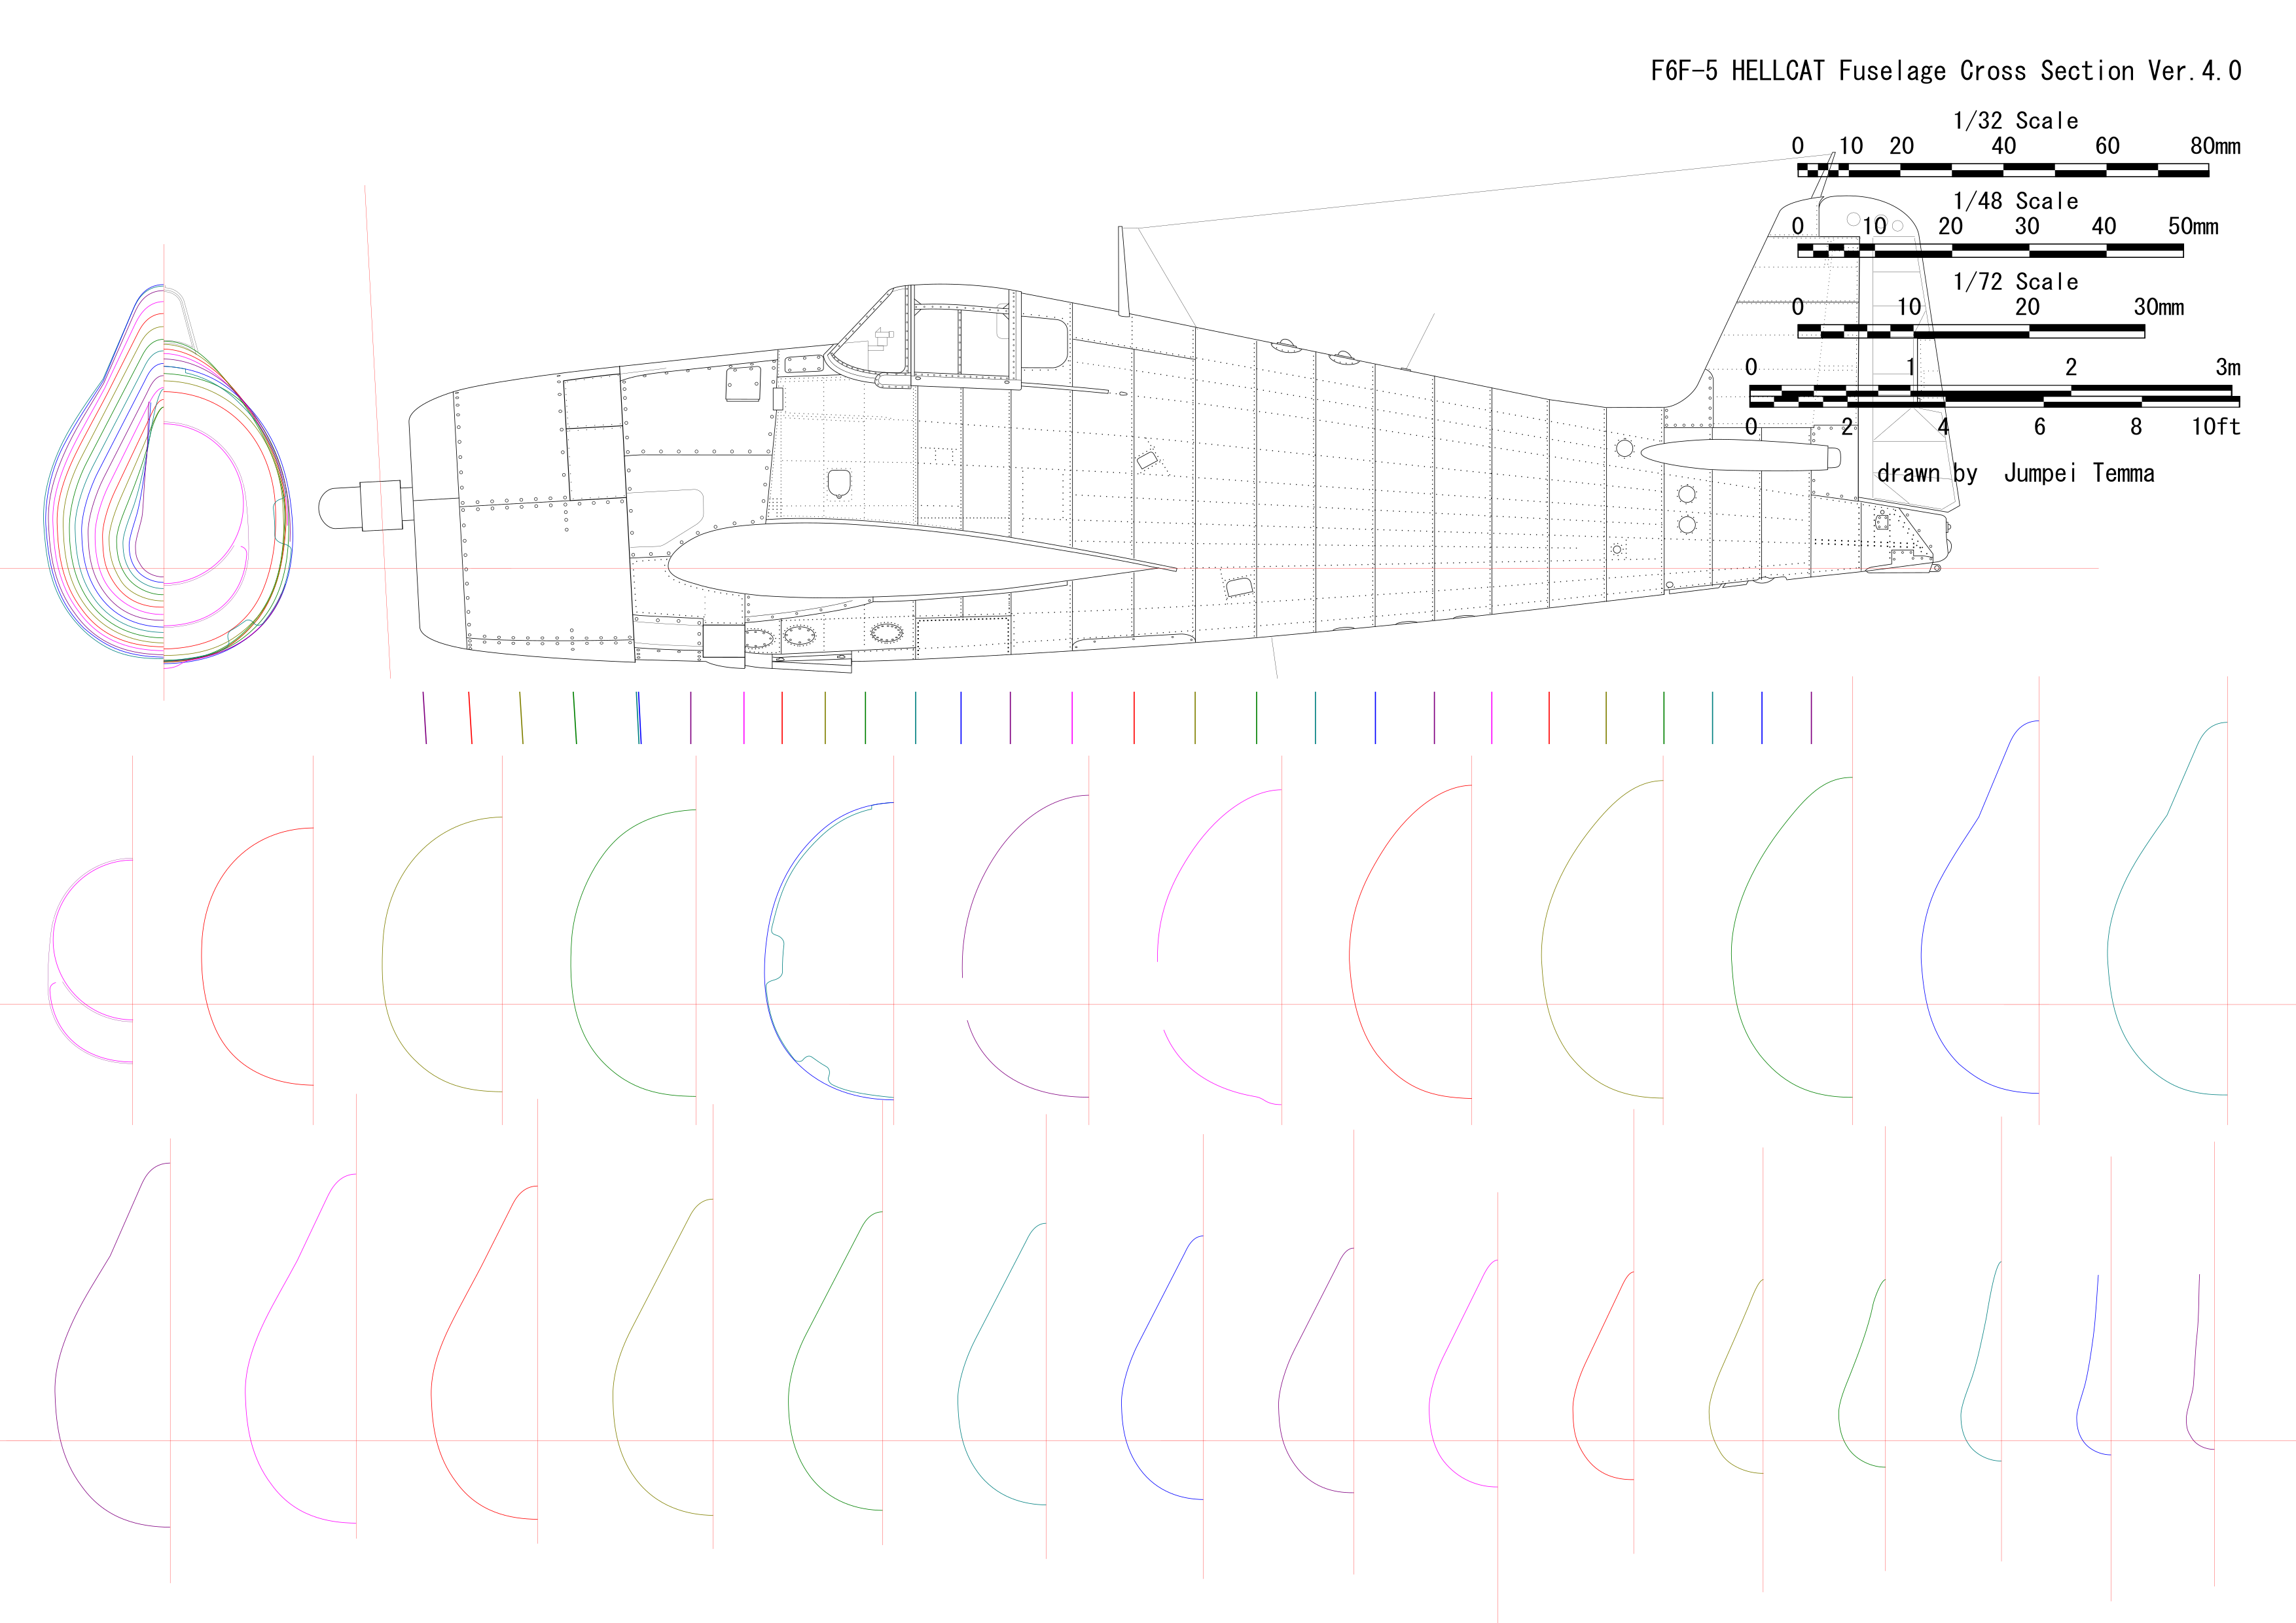
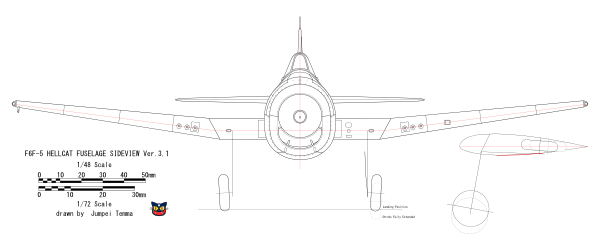
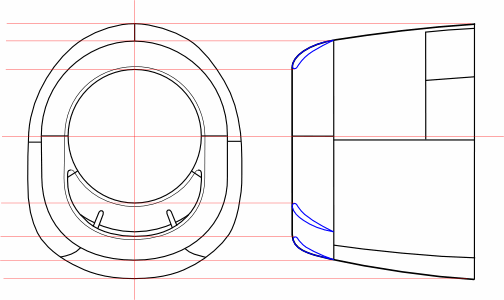
fuselage cross section (click here)
|
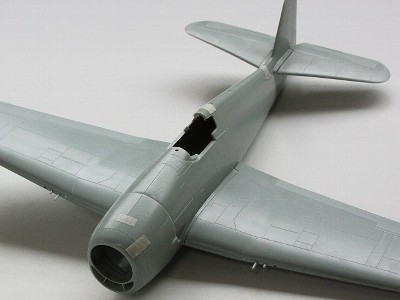
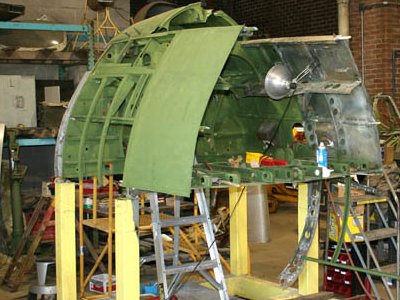
The fuselage |
|
|
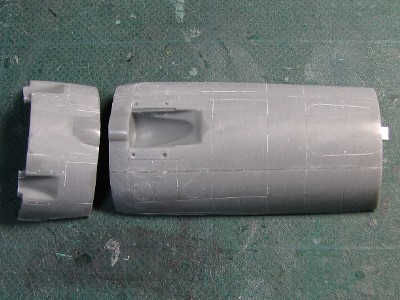
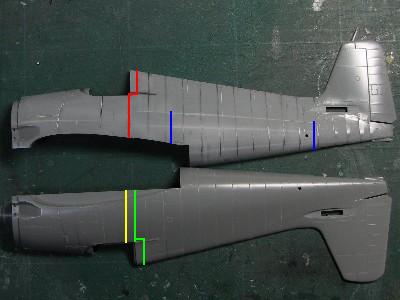 The upper one is after correction. The red line is glued line. The lower is kit part. |
 The left is kit original. The right is corrected. The flat area of rear fuselage is enlarged. |
 The inside is reinforced with Tamiya 0.5mm plaban (0.02" styrene sheet) using CA glue. |
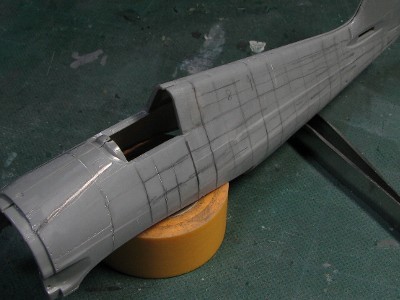 The upper forward fuselage is bent outside to sharpen the nose ridge. |
|
Basically, I use CA glue to join most of the main parts. I don't like plastic cement (e.g. Tamiya Cement) as it will latter sink. Plaban (Styrene sheet) for inside reinforcement is absolutely necessary; because bent parts tend to return how they once were over time. Plaban retains the shape I have altered. Then the fuselage surface was sanded with rough sand paper.
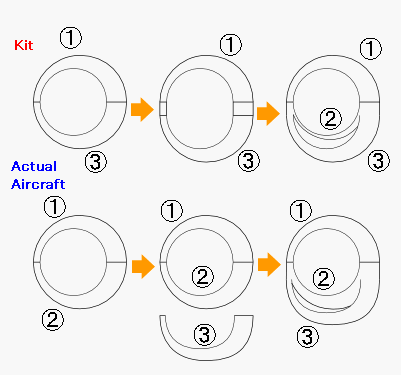
The shape of the upper cowl (1) and upper intake lip (2) are identical and they are absolutely round on actual A/C. But the upper lip (2) and lower lip (3) are different in shape. The lower lip (3) is slightly wide, low (see the following side view drawing) and not a true circle.
|
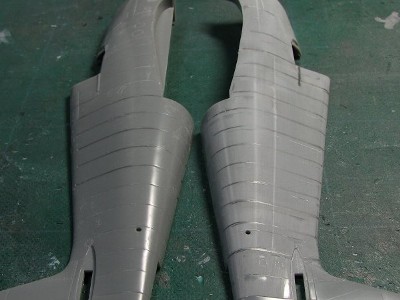
 The upper front cowl is cut out from kit cowling part (upper right). The upper lip of oil cooler and intercooler intake is cut from the other kit (lower right and left). |
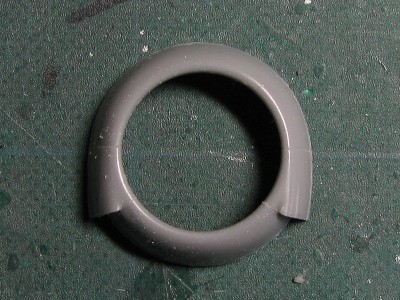 The upper front cowl and the upper intake lip are glued together. |
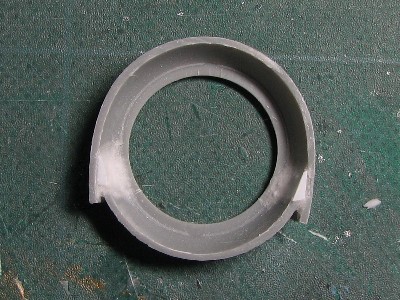 The inside is filled with putty. |
 The lower intake lip is widened. The backward cowling is enlarged with the shim (white plaban). The correct width of the cowling is 33.5mm (1.32") and the height is 39mm (1.54"). |
|
|
 The center section of the lower fuselage is widened using two kits. |
 Each parts are glued together. |
 The shim was inserted in lower fuselage. |
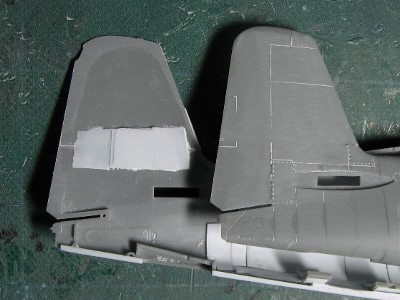 The tail fin is extended by 2mm (0.08). |
|
|
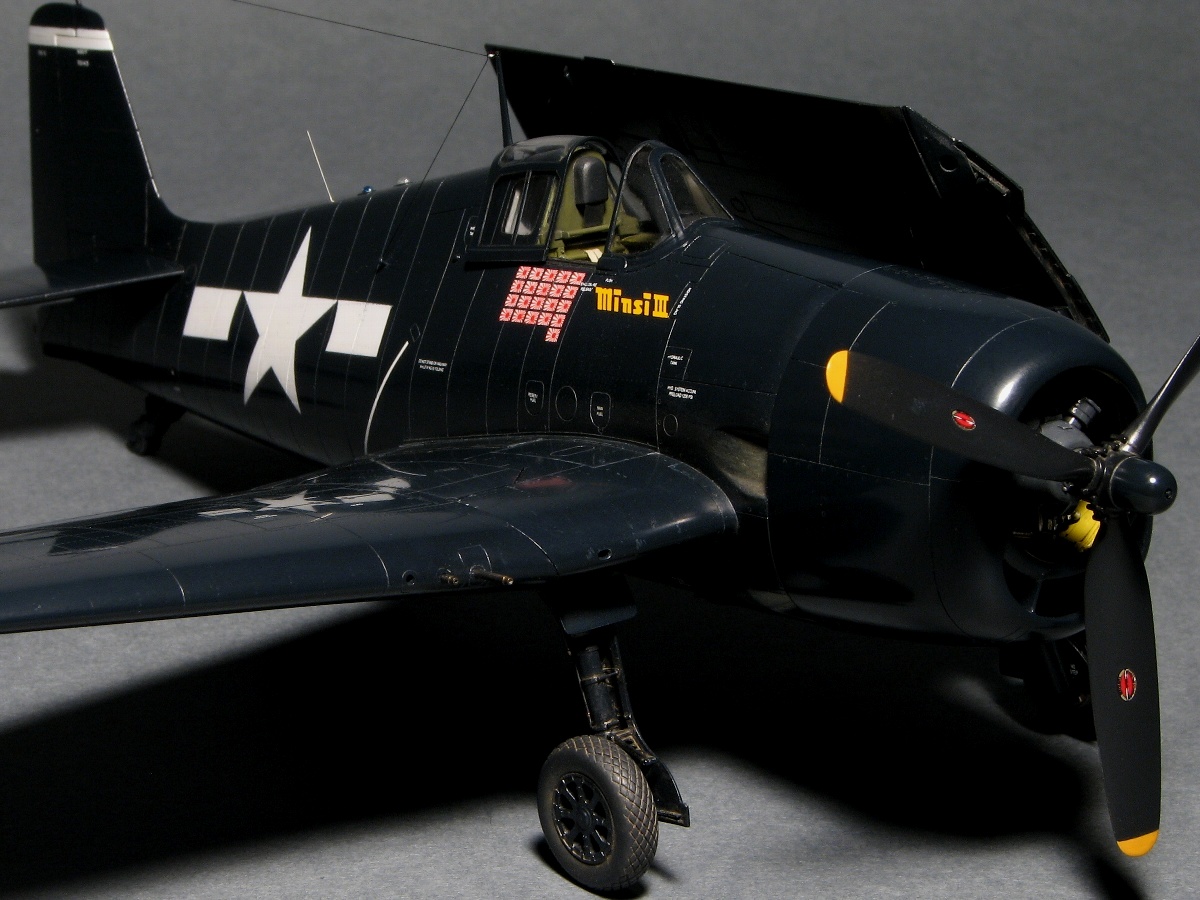
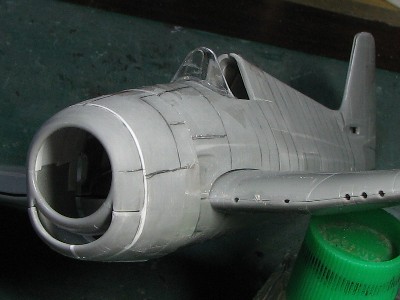 This is the correct shape of Hellcat!! See the square jaw and brutal cat grin. |
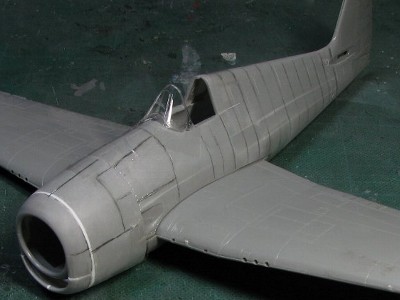 The length of the cowling is enlarged by 1mm as well. So the cubic volume is considerably increased. The wind shield is Eduard. |
|
Hasegawa -3. |
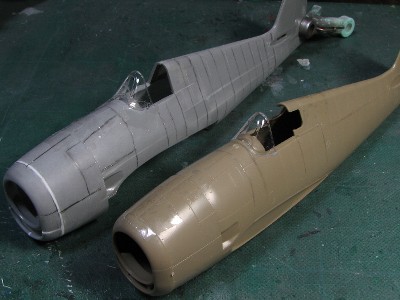 The left is corrected fuselage and the right is Eduard original. Eduard's cowling is too much square and the cross section shape is incorrect. |
 The cowling side curve was adjusted with CA glue and plastic powder. |
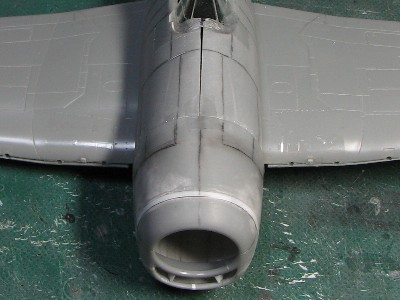 See the widened cowling end. |
|
|
To Be Continued