
North American P-51A Mustang
Accurate Miniatures 1/48 part-2
|
|
|
|
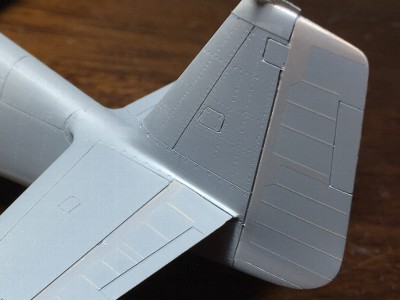
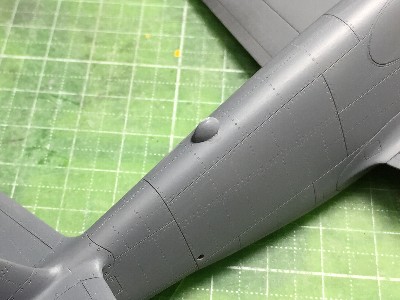
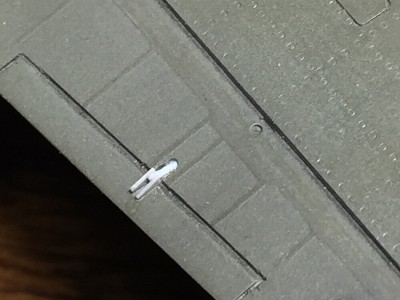
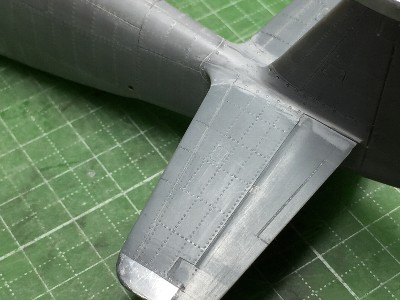 Rivets were engraved with a #1 beading tool. |
|
|
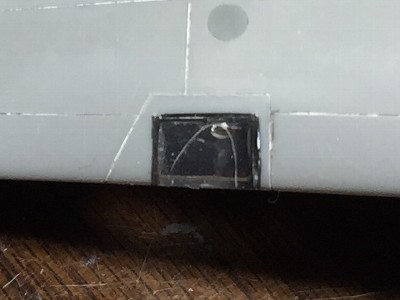
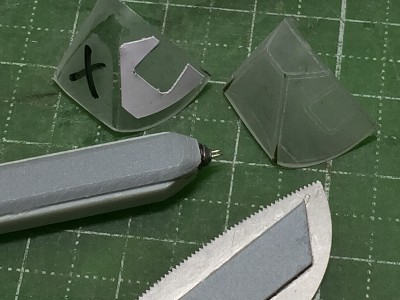 The template of the side small window was cut with a cutting machine. Then the frame was engraved with handmade double needles. Other straight frames were engraved with a photo-etch saw. |
 The surface was polished with rubbing compound. |
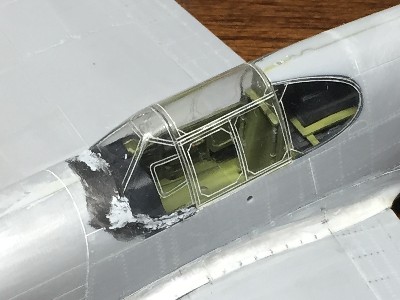
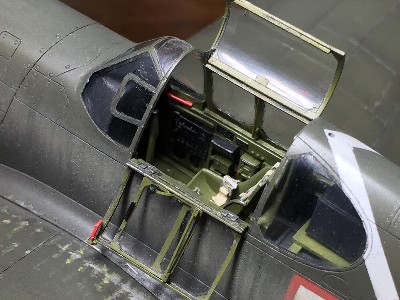
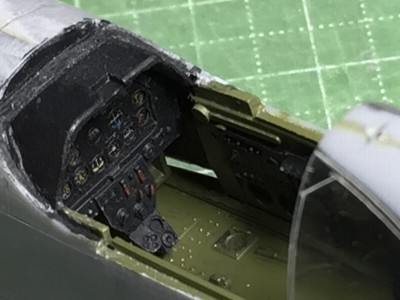 The instrument panel of Aires resin and glare shield were glued. |
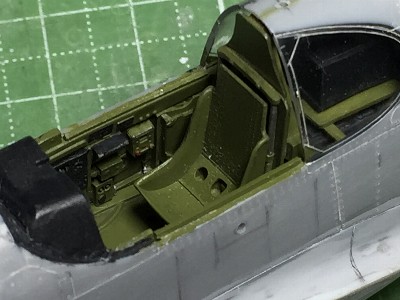 The seat and bullet proof plate were from Aires as well. |
|
|
 The cockpit floor was glued. |
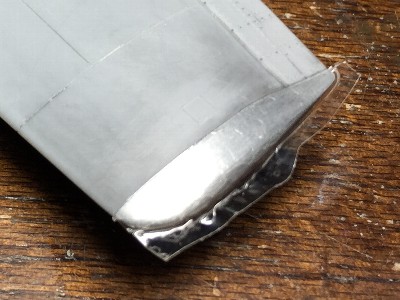
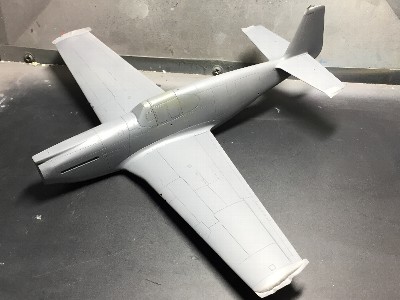
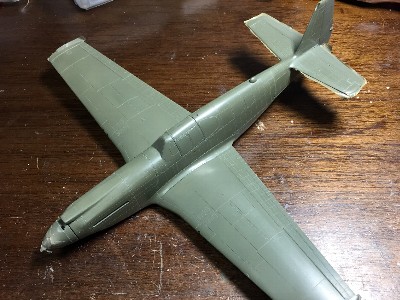
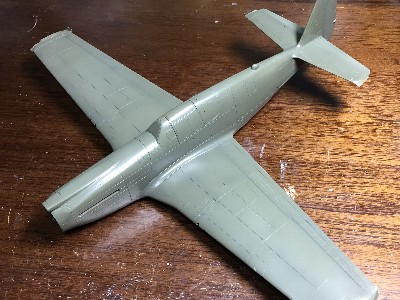
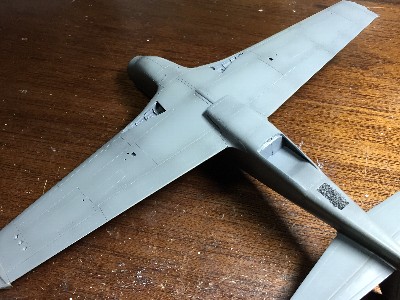
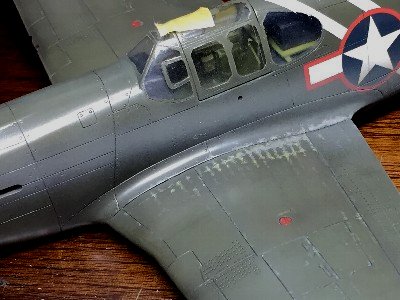
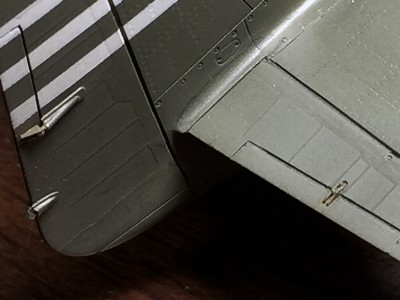
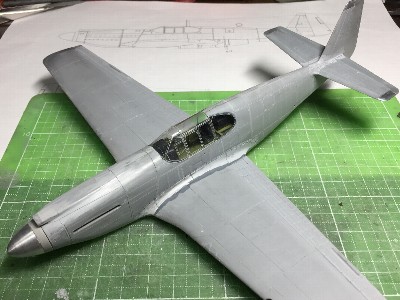 The wing was glued on the fuselage. The gap on the wing filet was filled with CA glue and plastic powder. |
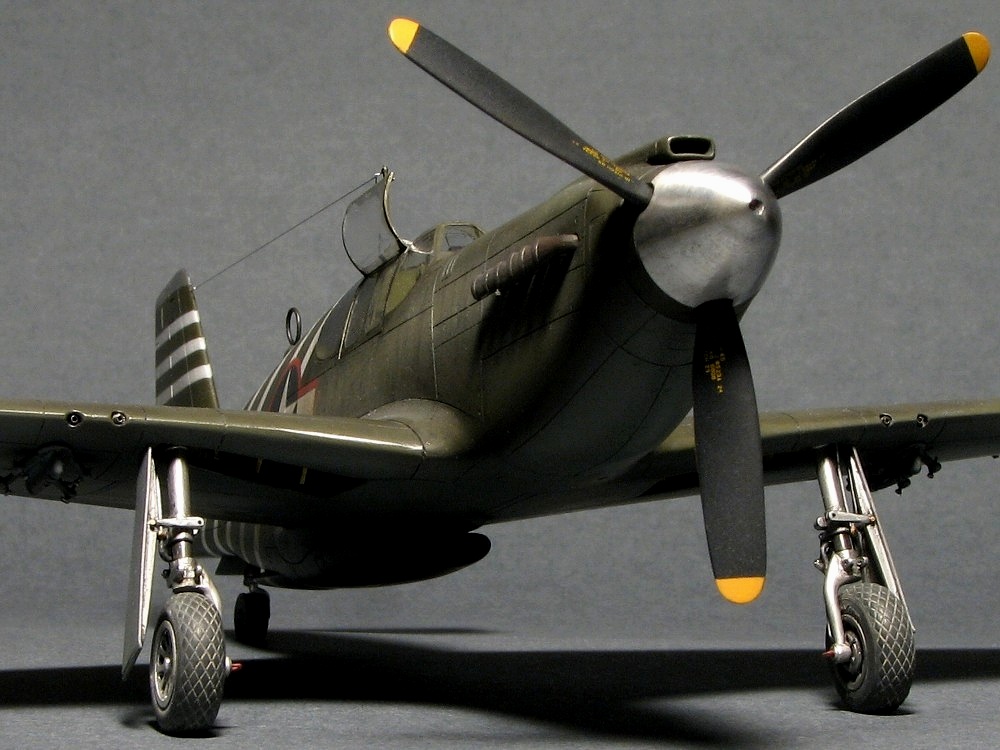
 The side view silhouette was checked again. I was very much satisfied with the straight line from the lower cowl to the lower wing. |
 The radiator duct was glued and riveted. The kit duct part was too thin to rivet. So the lower side was replaced with 1mm(.04") thick plastic sheet. |
|
Å@
|
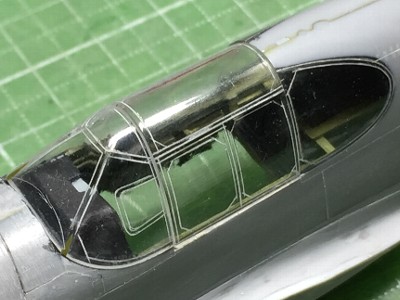
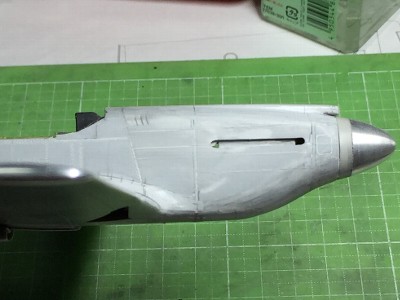
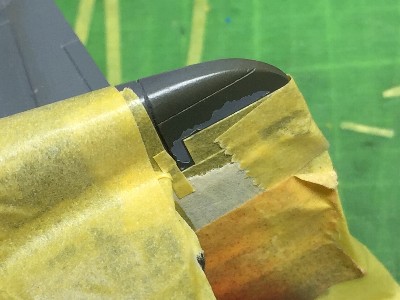
 The wind screen was glued on the fuselage. The large gap was filled with CA glue and plastic powder. Then the remaining small gap was filled with Tamiya putty (gray). |
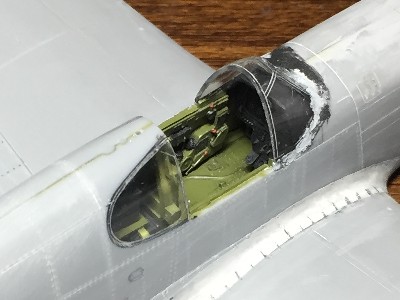 The position of the wind screen was guided with the next canopy. The center canopy part was not glued yet. |
 The landing light was made of heat formed plastic sheet and aluminum sheet. |
 The window was engraved and polished. |
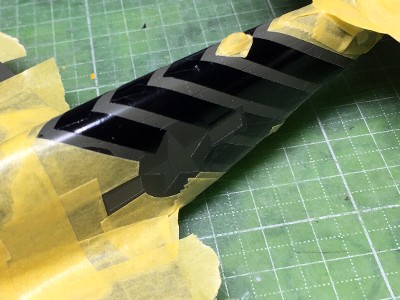
 The aluminum portion was masked with Scotch tape. |
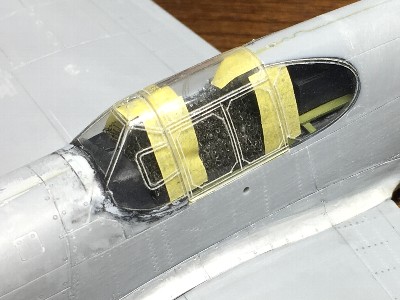 The canopy window was masked with Scotch tape as well. But it too clear to be seen. The center canopy was not glued on the fuselage. So the gap was covered with masking tape and urethane foam. |
 Interior green was sprayed on the canopy, then thin surfacer was sprayed. |
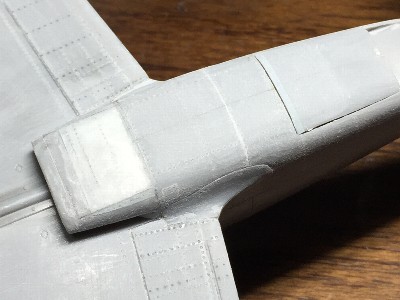
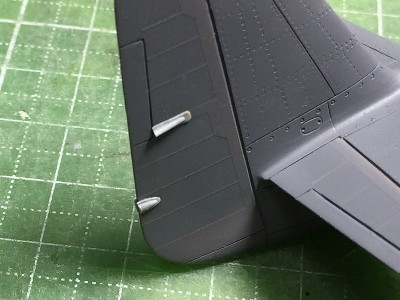
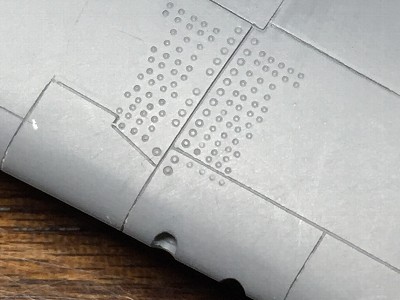 Only these rivets were engraved on the wing. #3(.02") and #1(.01") beading tool were used. |
 The rib tape was depicted with custom-made dry decals. |
 Surfacer was sprayed again. |
|
|
 Olive Drab was a mixture of Mr.Color #12 Olive Drab with 40%, #330 Dark Green with 40% and #13 Neutral Gray with 20%. |
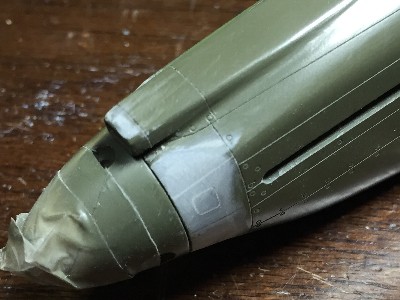 I had overlooked the gap between the spinner and cowl. The gap portion was sanded and painted with surfacer. The outline shape of this portion is S curved. |
 The cowl was touched-up. Shadow gradation was applied. |
 The lower side was painted with #13 Neutral Gray. |
 Oops! I forgot the tab rod and tail light. |
 The 1st ACG Mustang equipped the loop antenna. |
|
|
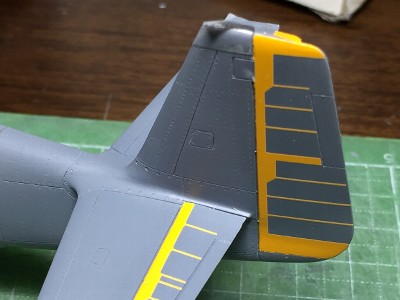
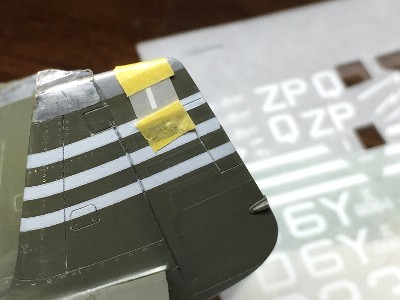
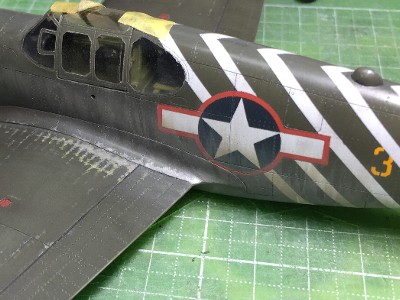
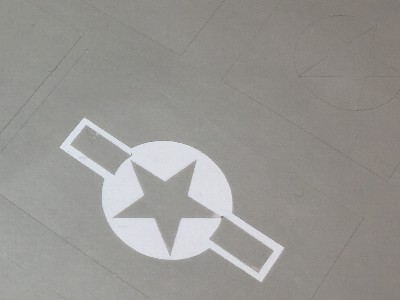 Template was cut with cutting machine. Oramask 810 is translucent gray. |
 White stripes were painted as well. |
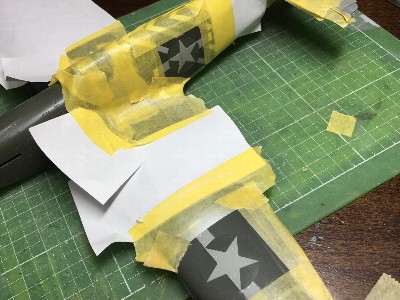 White was painted. And Oramask template sheet was pasted for next Blue. |
 Blue was painted. Template was pasted for next Red. Oramask is almost invisible. |
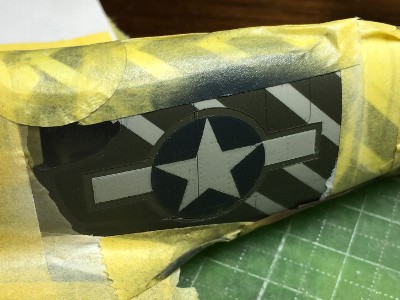
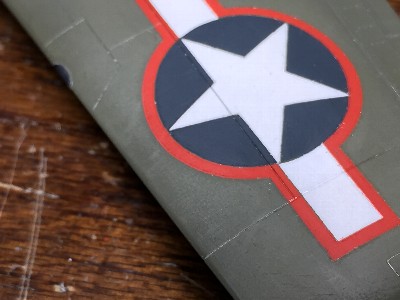 Insignia was finished. Semi Flat Crear was sprayed and the surface was polished with Mr. Laplos #6000. |
 Oh my god! Some of dry decal was removed with masking tape. |
 Three stripes were painted and the aircraft no "1" was dry decal. |
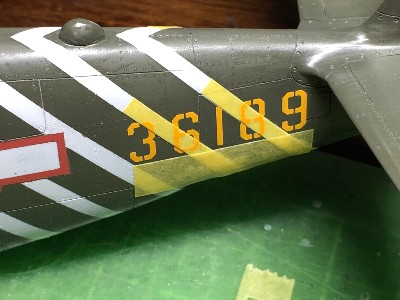 Serial no was dry decals as well. It was transferred on masking tape. After applying dry decals, Semi Flat Crear was sprayed. |
|
|
 Mr. #8 Silver had been painted under the layer of Olive Drab. OD layer was scratched with a metal stick. Zink. Yellow was painted with a fine brush. |
 Faded shades were airbrushed. |
 Exhaust soot dust was depicted. At first, Tamiya Color XF1 Flat Black and XF10 Flat Brown were sprayed. Next, Tamiya XF57 Buff was over sprayed. |
 Then, Tamiya color was partially wiped by a brush with Tamiya thinner. The brush was moved up and down. |
|
|
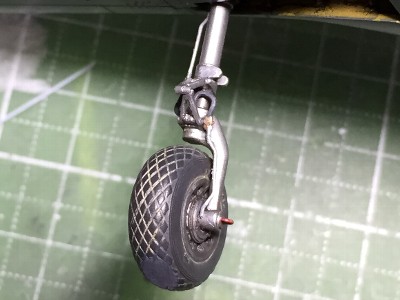
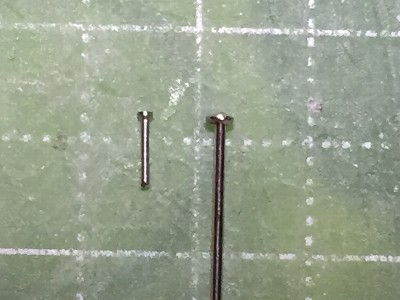
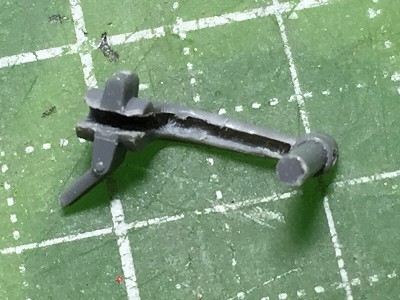 The gear was reinforced with a brass rod. The center of the gear leg was drilled. |
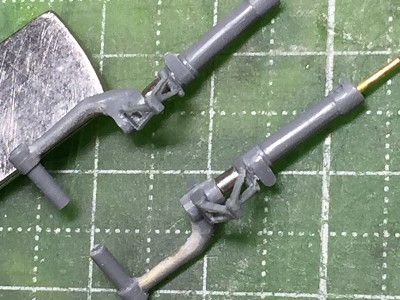 A 0.7mm brass rod was bent and inserted and glued. |
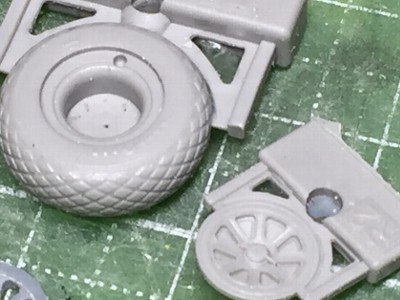 The tire was Eduard Brassin. But its wheel is incorrect. P-51's wheel is ten spokes. |
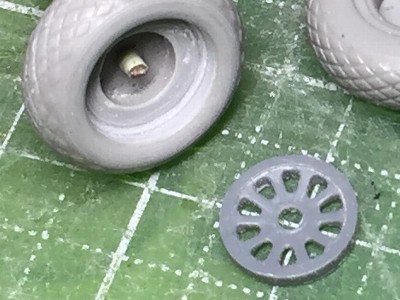 The wheel was Tamiya kit part. The inside surface of the wheel was sanded. |
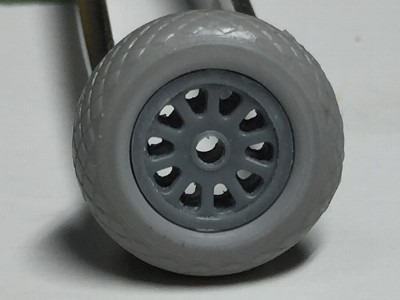 Small holes were drilled on the resin wheel so as to see through. |
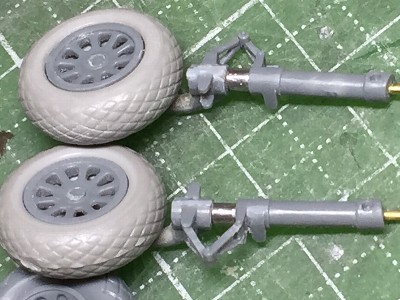 The oleo strut was soldered brass pipe. |
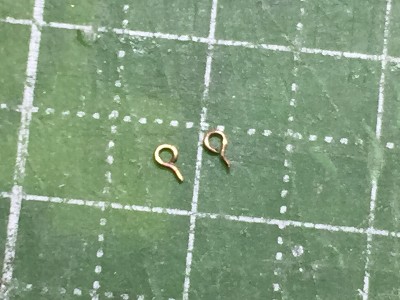 The towing ring was annealed 0.2mm(.008") brass rod. |
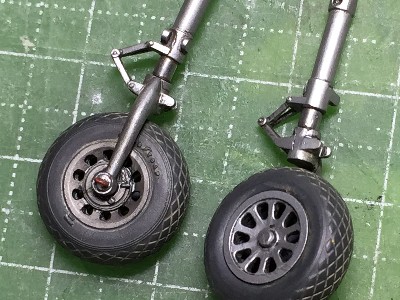 The landing gear was painted. Tamiya Weathering Master (Black, Rust, sand) diluted with soapy water was used for weathering wash. |
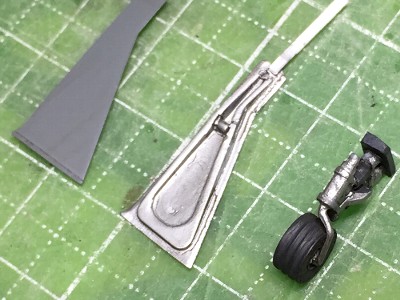 The gear cover and tail gear were from Tamiya P-51. The gear fork was brass rod. |
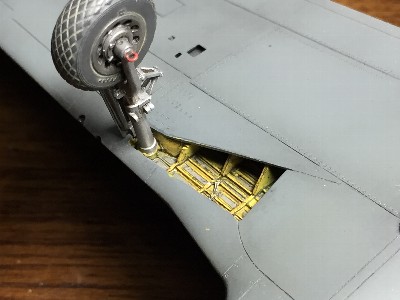 Coloration of the P-51A gear well was the same as P-51B. The gear well was mostly painted Zinc Chromate Yellow. Only the ceiling was painted silver lacquer. These colors are confirmed by an original color photo of P-51A. |
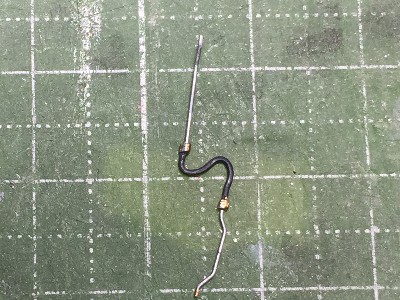 The brake line was added with extended sprue and lead line. |
 |
|
Some references describe that the gear well of early Alison Mustang was painted silver. Early Alison Mustangs were painted by RAF standard - the cockpit was RAF interior green and other interior was silver.
|
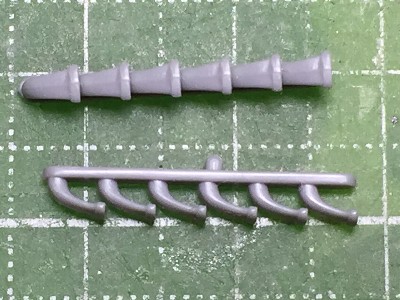 The upper view of the kit exhaust is not accurate. Engine exhaust holes are not so small. |
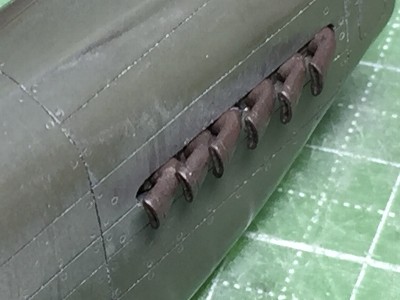 The exhaust stacks were replaced with Hasegawa P-40. The shape of Hasegawa exhaust parts was modified a little. |
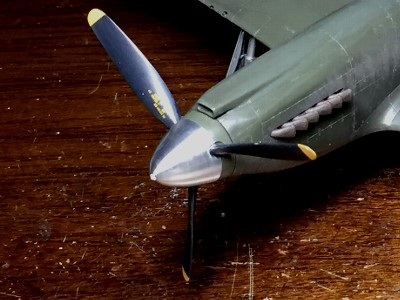
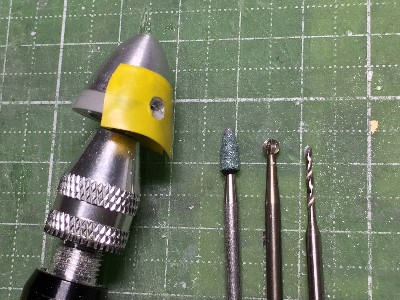 The spinner hole for propeller blades was drilled with hand router. |
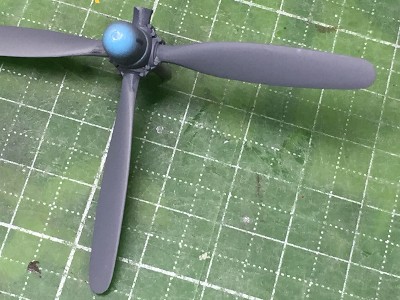 The kit propeller is not accurate. So Hasegawa F4U-5 propeller was used. |
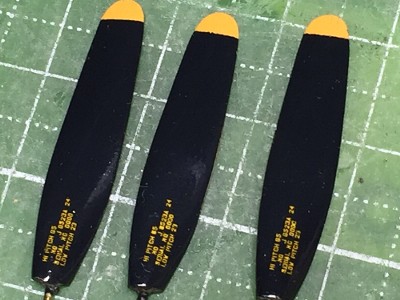 Propeller blades were painted and decals were applied. |
 |
 The brace pin of bomb rack wsd made of an insect pin. The pin was lathed with a hand router. |
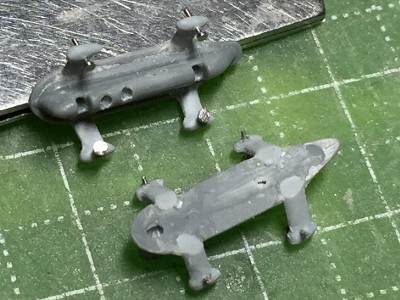 Four arms were made of 1mm(.04") plastic sheet and were glued on the kit bomb rack. |
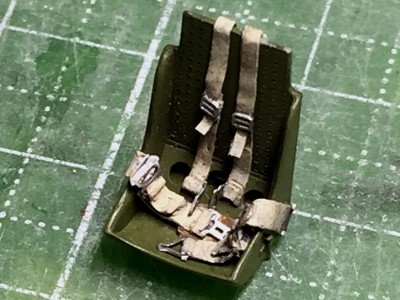
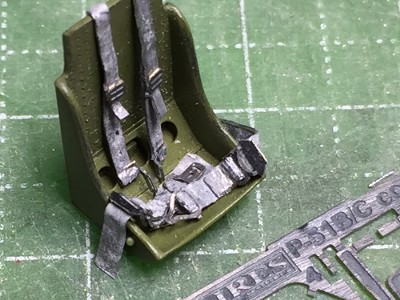 The seat was from Aires resin parts set for P-51B. The seat harness was made of lead sheet. Photo etched buckles were form Aires set. |
 |
 The N-3 gun sight was from Aires set as well. This resin part is oversize, but I had to compromise. The reflector were 0.2mm(.008") clear plastic sheet. It was glued with metal primer. |
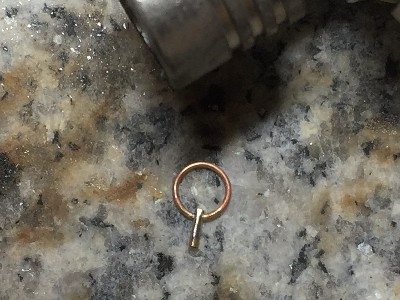 The loop antenna was made of 0.5mm(.02") brass rod and 0.7mm(.03") brass pipe. They were soldered with this torch. |
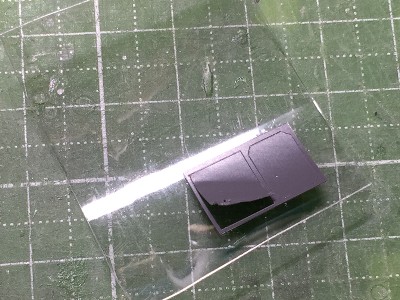 The port cockpit access door was made of PET bottle and gray cutting sheet. |
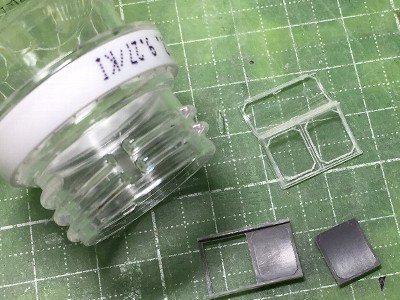 The starboard and upper windows were from Tamiya P-51B. The clear parts were thinned with sand paper, engraved and polished. |
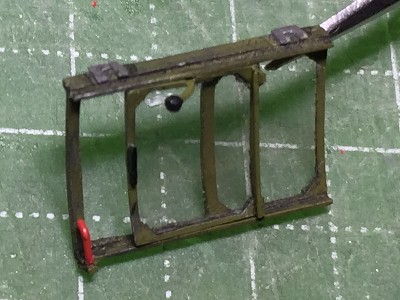 Details were added with plastic sheet and extended sprue. The ball of the knob was CA glue and plastic powder. |
 These windows were glued with wood glue (polyvinyl acetate emulsion adhesive). |
 Oops! I forgot the elevator tab rods. |
 Tab rods were painted with a fine brush and weathering wash was done. |
|
|
|
|
 |
 |
 |
|
|
|
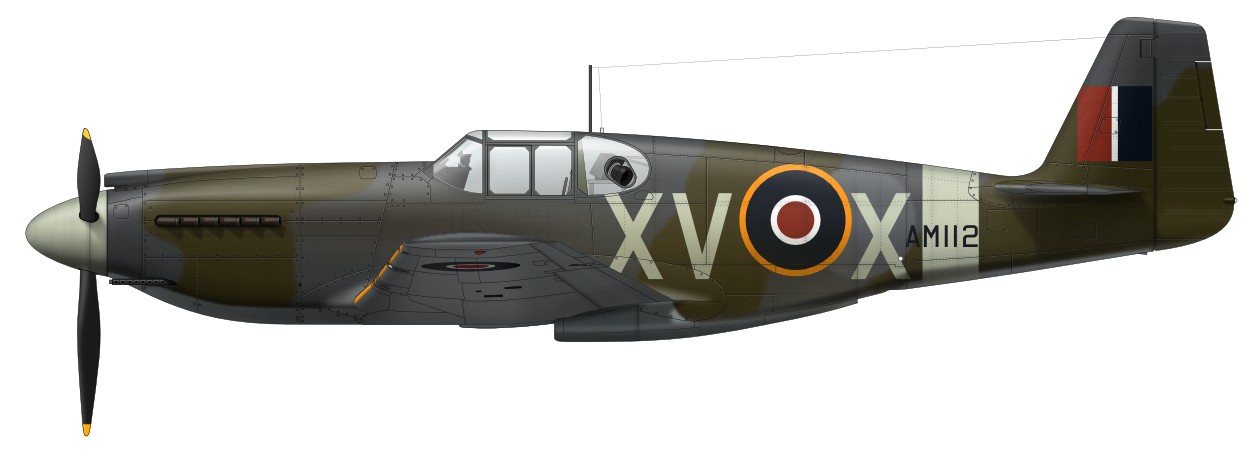
The second one is F-6A (P-51 PR type) of the 154th Observation Squadron, April 1943, North Africa. The original photo is starboard side. So port side markings are supposition. Details of the camera are a supposition as well. |
|
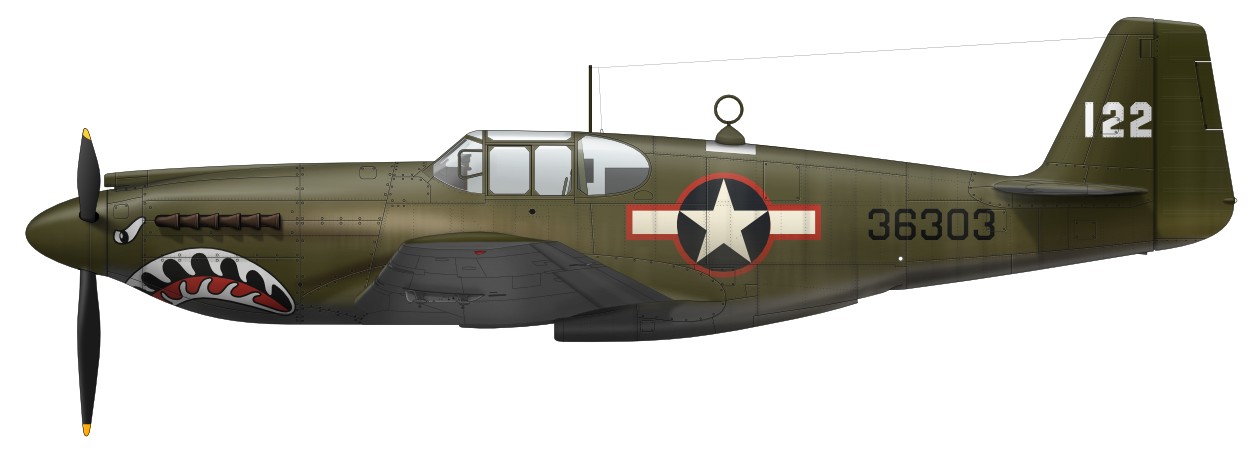
The third one is A-36A Apache flown by Maj. John Crowder of the 524th FBS, 1943, North Africa. Insignias are painted on both sides of upper and lower wing. |
|
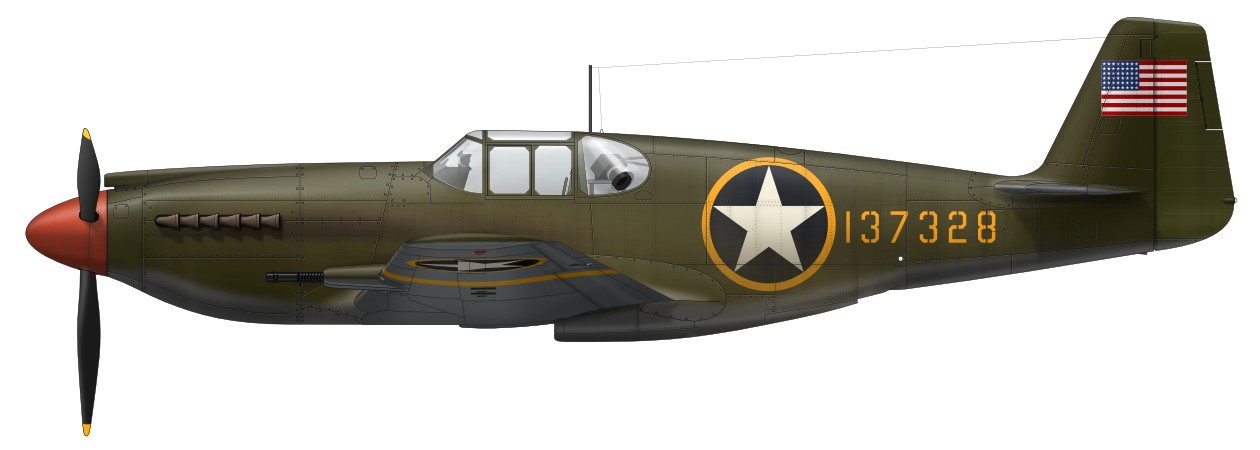
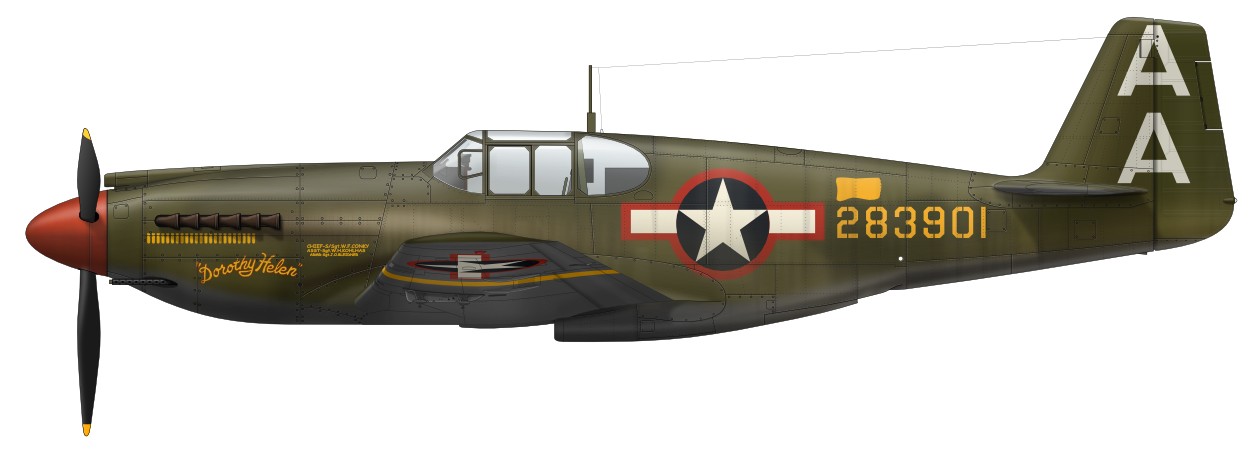
Next is P-51A flown by Capt. John Stewart of the 76th FS the 23rd FG, late 1943, Guilin. The position of the loop antenna is different from the 1st ACG's Mustang. |
|
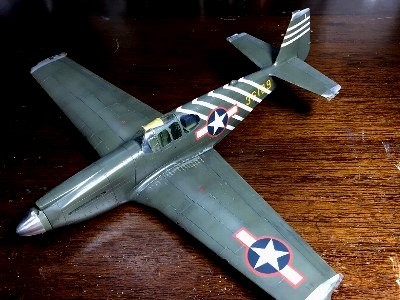
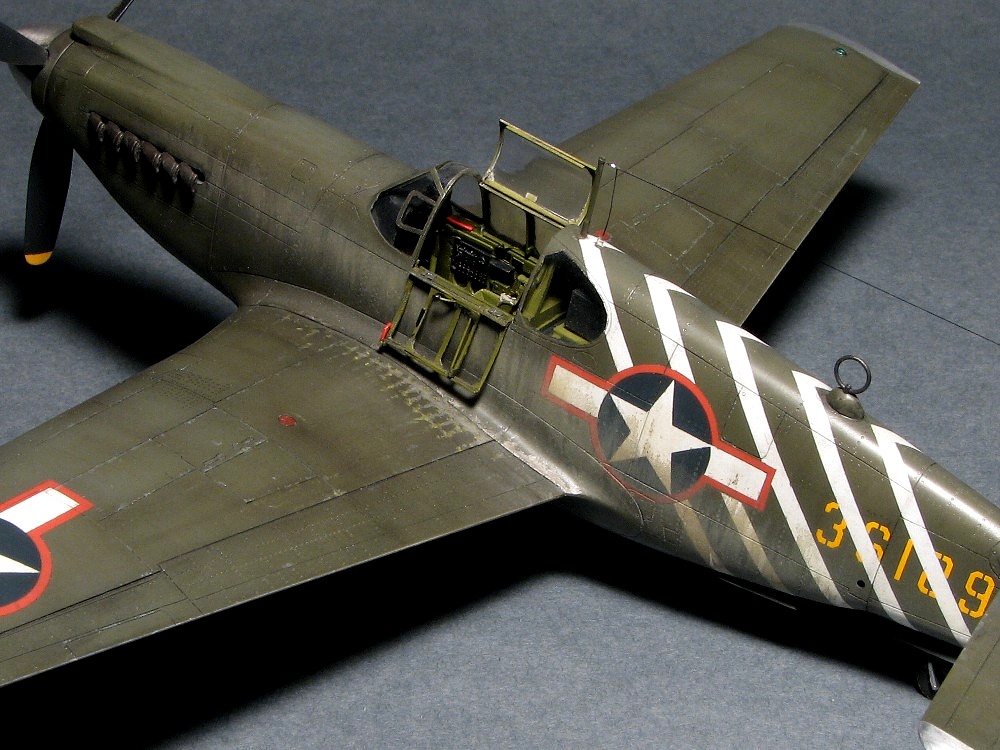
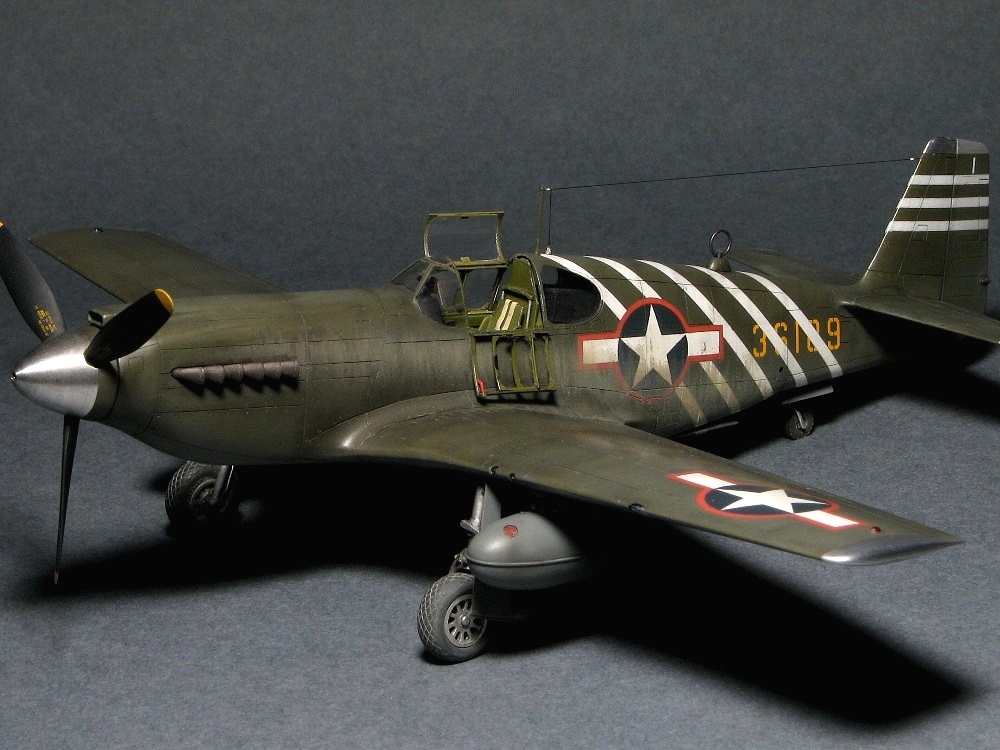
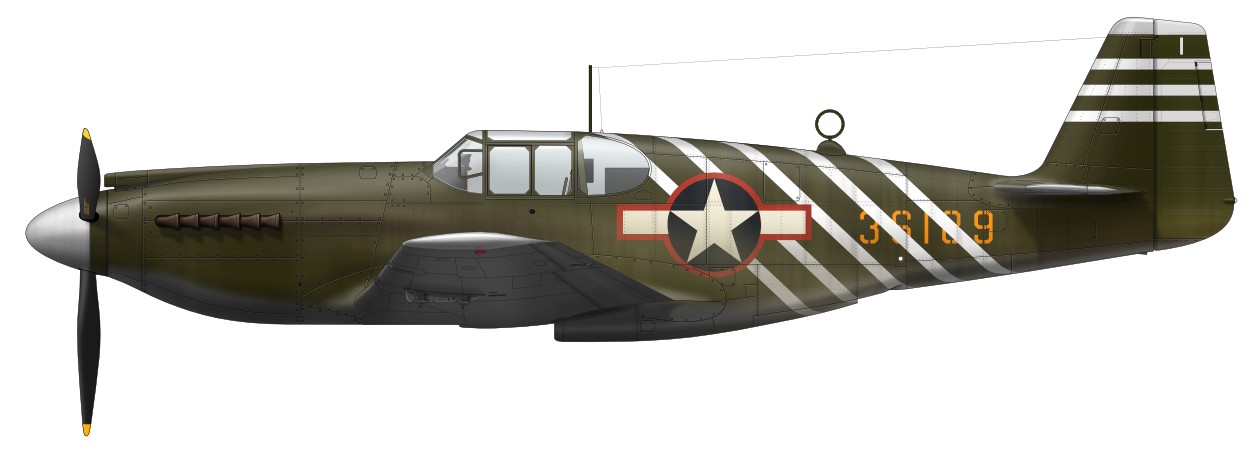
The last one is the same as my model. P-51A 43-6189 flown by Lt.Col. Philip G. Cochran, CO of the 1st Air Commando Group, early 1944, East India. The red border of the insignia was applied in a short period of the summer 1943. But I guess Cochran's aircraft still remained the red border for a substantial period of time as CO special markings. |
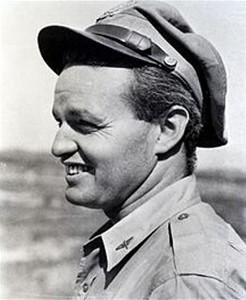
Lt.Col. Philip G. Cochran quoted from Wikipedia
|
|